Contribute
Register

Killer Mac Pro 2019

Status
Not open for further replies.
Joined
Mar 17, 2019
Messages
102
Motherboard
Gigabyte Z390 M Gaming
CPU
i9-9900K
Graphics
Vega Frontier Edition
Mac
  1. Mac Pro
Hi Everyone,

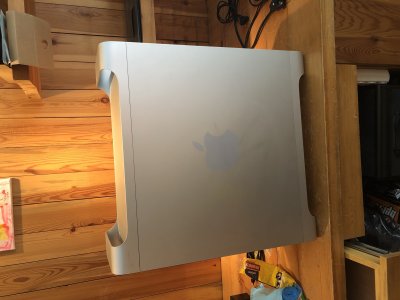
Since reading this forum, I was thinking to mod my 11 year old 2007 Mac Pro to give it a new life a new purpose :) I have read quite a lot, and I decided what to do so I take on the challenge.

My Specs:

Specs:
CPU: Intel i9-9900K
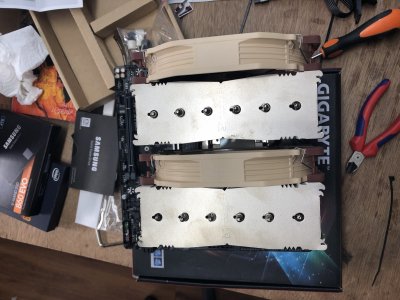
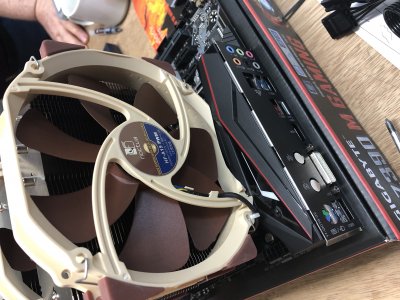
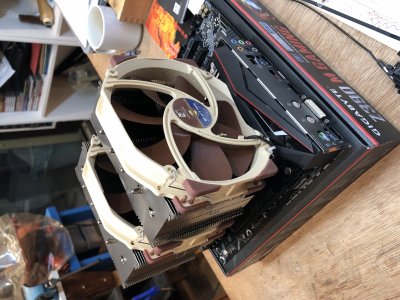
CPU Cooler: Noctua NH-D15
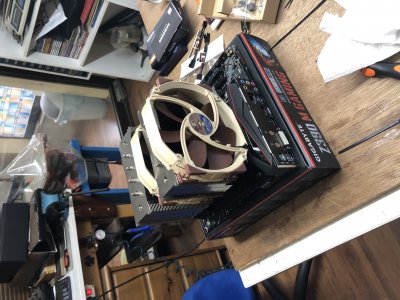
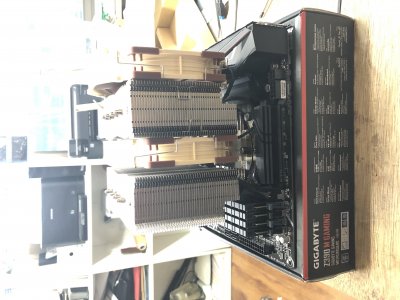
MB: Gigabyte Z390 M Gaming
Memory: HyperX Predator 64GB (4 x 16GB)
PSU: Seasonic Prime 750 Titanium SSR-750TR 750W 80+ Titanium
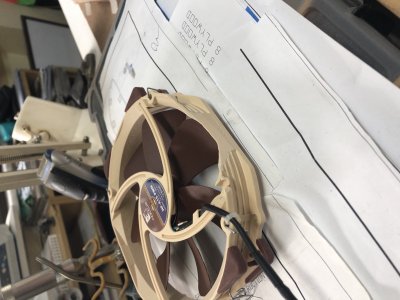
Fan: 3 Noctua NF-F12 PWM
SSD: 2 of Samsung 860 EVO 4TB 2.5 Inch SATA III Internal SSD
M.2 Disk: Samsung 970 EVO 1TB
GPU: AMD Radeon Vega Frontier Edition Air
Disk Adapter: 4 of NewerTech AdaptaDrive 2.5" to 3.5" Drive Converter Bracket
BT/ Wifi Card: Padarsey BCM94360CS2 WiFi Bluetooth Airport Wireless Card


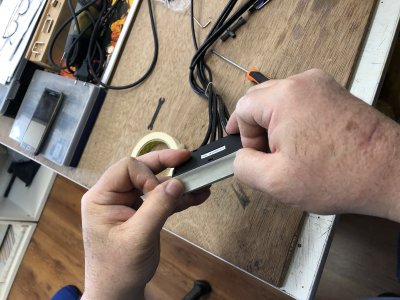
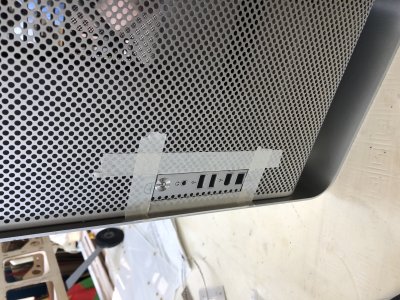
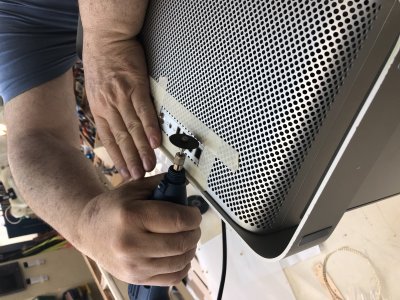
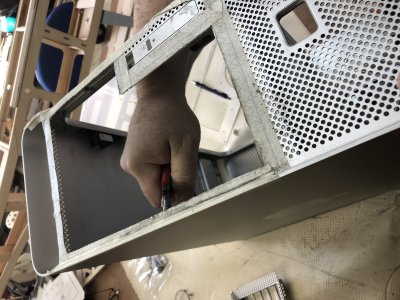
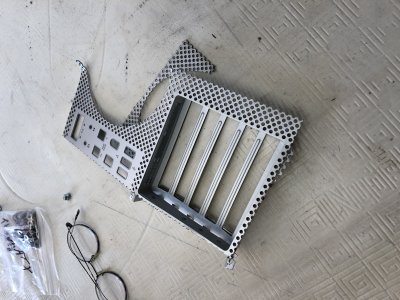
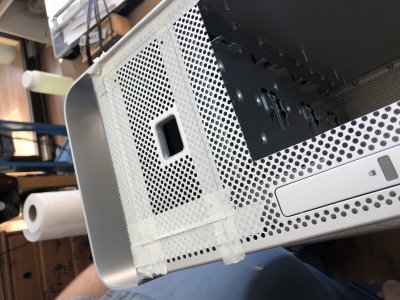
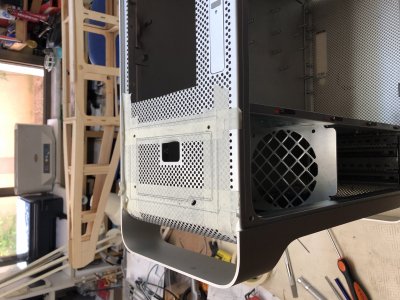
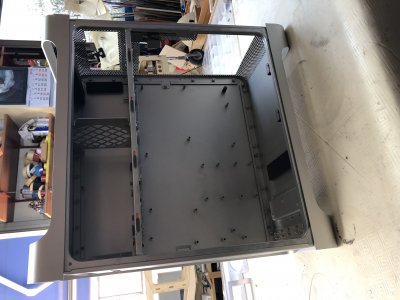
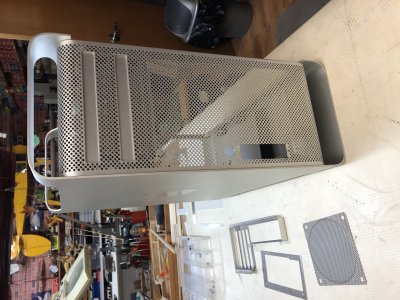
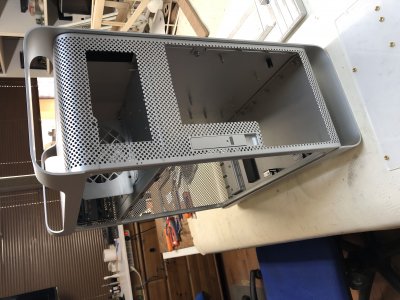
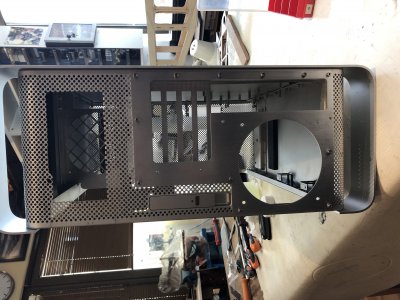
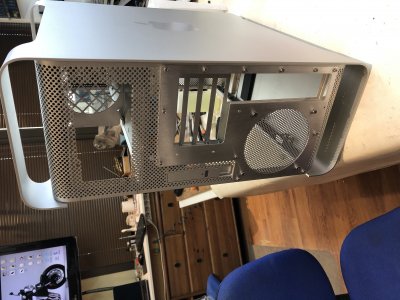
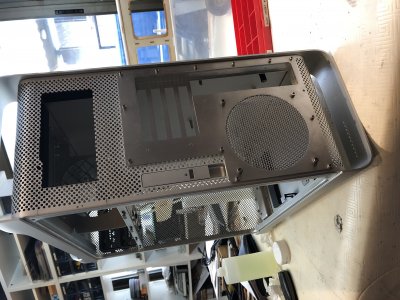
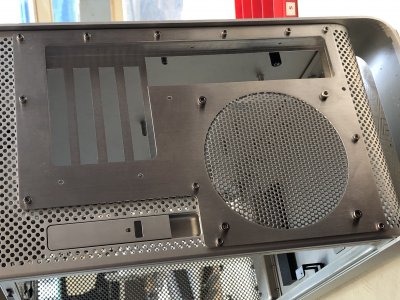
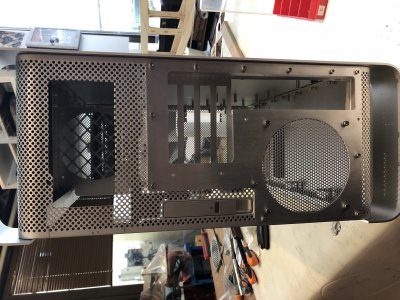
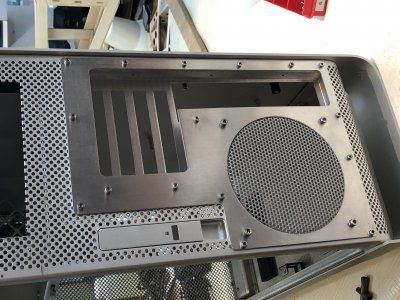
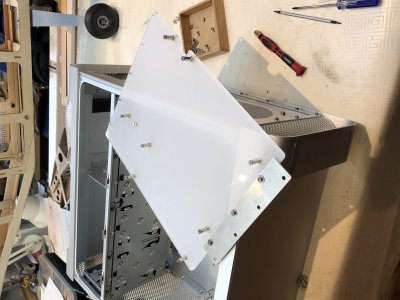
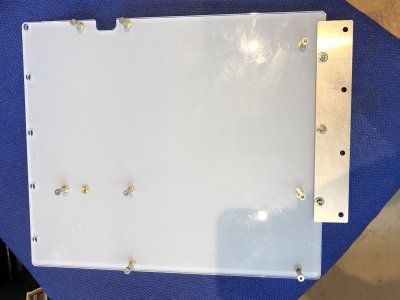
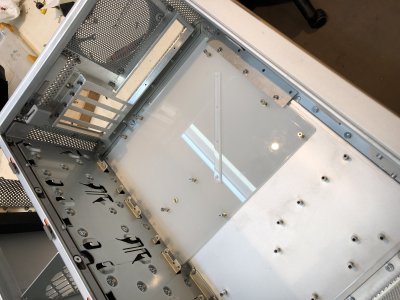
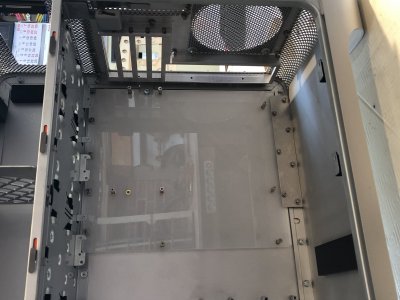
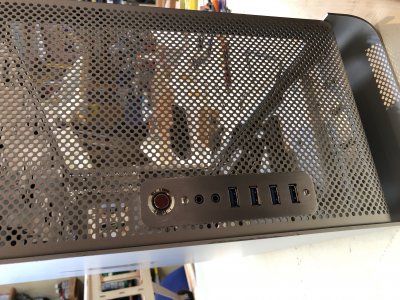
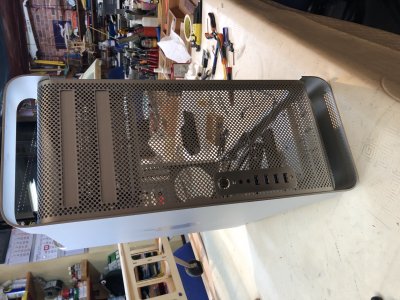
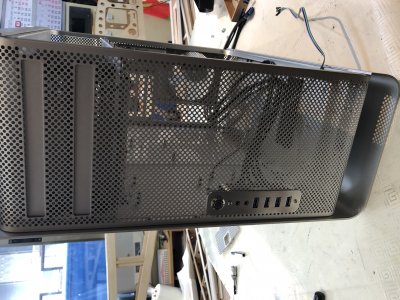
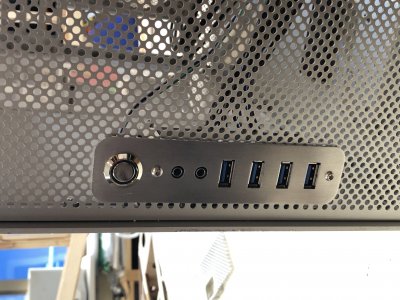
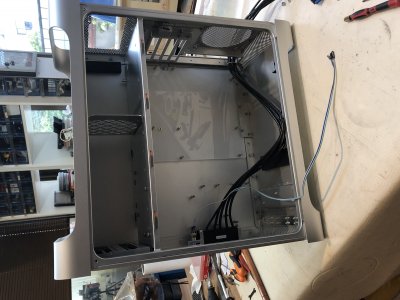
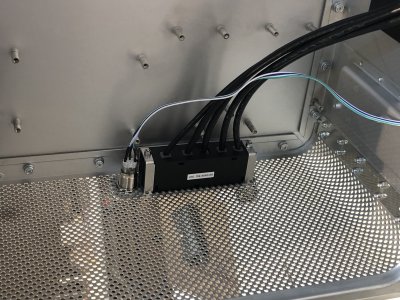
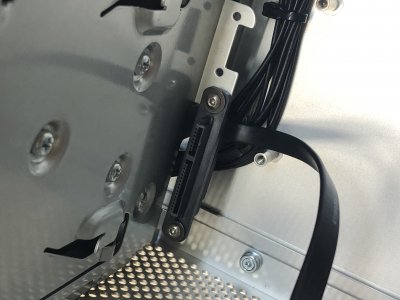
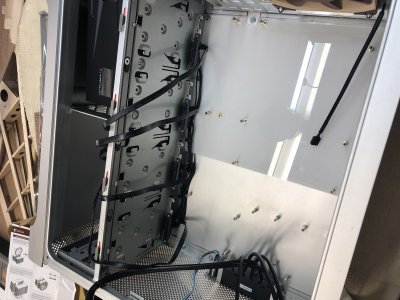
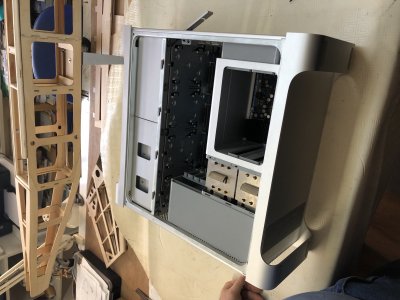
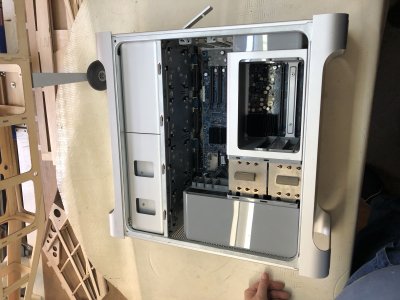
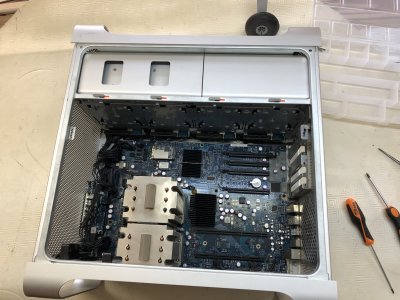
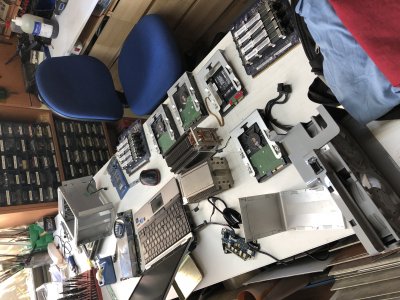
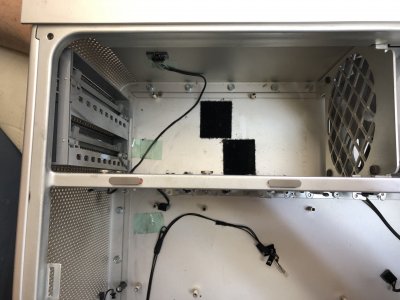
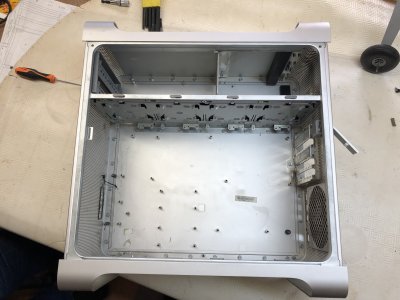
First I disassembled all the components in Mac Pro, it was quite straight forward but still took me 1 hour to do all that, also I took some help from ifixit at some points where I had a hard time, trying to find out a stubborn screw which locks the front fan assembly, interestingly it was just at the side of the case, here are some photos, from disassembly.
 

Attachments

  • yqWyUGYXRXSytkUPpgdauw.jpg
    yqWyUGYXRXSytkUPpgdauw.jpg
    2 MB · Views: 568
  • zJkDfriET4yMk9RuHAzbsg.jpg
    zJkDfriET4yMk9RuHAzbsg.jpg
    2 MB · Views: 588
  • +%lvWUR7QDOt1WJ5MRAqeg.jpg
    +%lvWUR7QDOt1WJ5MRAqeg.jpg
    2.3 MB · Views: 625
  • 3iFZB9YHTMSCL5O6yVokFg.jpg
    3iFZB9YHTMSCL5O6yVokFg.jpg
    2.4 MB · Views: 600
  • YmjM%QHyTHe%UeGWVOpeTQ.jpg
    YmjM%QHyTHe%UeGWVOpeTQ.jpg
    1.8 MB · Views: 619
  • MNO8K4+5RYSkXOfJ6rdOYA.jpg
    MNO8K4+5RYSkXOfJ6rdOYA.jpg
    1.8 MB · Views: 712
  • jrrjm%KCQPyox1yHmIvlGg.jpg
    jrrjm%KCQPyox1yHmIvlGg.jpg
    2.2 MB · Views: 694
  • gwpUDXFFSg2Cyzr4+gGE9g.jpg
    gwpUDXFFSg2Cyzr4+gGE9g.jpg
    2.6 MB · Views: 678
  • coE2cLXWSQOuLxzFZA%mlQ.jpg
    coE2cLXWSQOuLxzFZA%mlQ.jpg
    1.9 MB · Views: 624
  • hczLFqpZQKydi4zy4Uk%wg.jpg
    hczLFqpZQKydi4zy4Uk%wg.jpg
    1.6 MB · Views: 617
  • %VfWpmaRQAu04RnGUpi5cQ.jpg
    %VfWpmaRQAu04RnGUpi5cQ.jpg
    2.2 MB · Views: 636
  • 1kpJQvPDRuOGjTa49cB0VQ.jpg
    1kpJQvPDRuOGjTa49cB0VQ.jpg
    1.8 MB · Views: 616
  • tddE0W3CSU2YkfN2PksZ2Q.jpg
    tddE0W3CSU2YkfN2PksZ2Q.jpg
    1.6 MB · Views: 577
Out with the old, in with the new. Congratulations on taking on this challenging project. We'll be watching how it goes.
 
After finishing the disassembly, It was time to cut, drill and torture my beloved Mac Pro case, which had a hard time doing it at first but it was for a greater good, so I kept on checking my laserhive mATX converter kit parts, for fitment, all I can say is it is a very well made kit, apart from some parts where it aligns with the case and creates another layer of aluminum which than lead to alignment problems when I installed my GPU, but managed to fix it.
 

Attachments

  • Gekd7ClTQem9n8LVdD1M1w.jpg
    Gekd7ClTQem9n8LVdD1M1w.jpg
    2.8 MB · Views: 478
  • bAExjf39StyPvqqzDOnjvA.jpg
    bAExjf39StyPvqqzDOnjvA.jpg
    2.1 MB · Views: 510
  • WudgupnLTcqlFJlJ1fQwtA.jpg
    WudgupnLTcqlFJlJ1fQwtA.jpg
    2.4 MB · Views: 484
  • S9PDXE3SQU2wF4BiZvNu4Q.jpg
    S9PDXE3SQU2wF4BiZvNu4Q.jpg
    1.9 MB · Views: 521
  • QNYzGk%5QciWb5jNawuxdQ.jpg
    QNYzGk%5QciWb5jNawuxdQ.jpg
    2.2 MB · Views: 498
  • wwYLAI5FQiaibBlQrtdrjA.jpg
    wwYLAI5FQiaibBlQrtdrjA.jpg
    2.1 MB · Views: 500
  • SFcm4nc9TZ+YlexgjwWFJw.jpg
    SFcm4nc9TZ+YlexgjwWFJw.jpg
    2.3 MB · Views: 502
  • g9edbn%7SRCUzCaQXQnj5A.jpg
    g9edbn%7SRCUzCaQXQnj5A.jpg
    2 MB · Views: 466
  • Gsol+EBVRY+wAzhhL7a0wg.jpg
    Gsol+EBVRY+wAzhhL7a0wg.jpg
    2.3 MB · Views: 442
  • AUaQ94vJR56%jbc6l3YOCw.jpg
    AUaQ94vJR56%jbc6l3YOCw.jpg
    1.6 MB · Views: 519
  • %EGdJSABSGeYRz2JDj3NDQ.jpg
    %EGdJSABSGeYRz2JDj3NDQ.jpg
    2.2 MB · Views: 485
  • cdoLSI6sRMmSFmWaobvMoA.jpg
    cdoLSI6sRMmSFmWaobvMoA.jpg
    2.5 MB · Views: 493
  • j9oiqePxQUigL5qzbTmixg.jpg
    j9oiqePxQUigL5qzbTmixg.jpg
    2.3 MB · Views: 528
Once all the parts were cut out the front panel, the psu and the I/O it was time to install them in their appropriate places. Up to this point everything went quite smoothly, the only part that I did not like is cutting the aluminum of the cheese grater :) I must say that, Apple used a very sturdy and strong aluminum even with all the holes, it was quite challenging to cut it out.
 

Attachments

  • QNDRcapLR1qkKta0mde9zg.jpg
    QNDRcapLR1qkKta0mde9zg.jpg
    2.1 MB · Views: 405
  • RwlMUKTVTOCliJJnoLNDLQ.jpg
    RwlMUKTVTOCliJJnoLNDLQ.jpg
    2 MB · Views: 387
  • K5Wme9MDS%K3O9KLZi7r3A.jpg
    K5Wme9MDS%K3O9KLZi7r3A.jpg
    2.1 MB · Views: 384
  • r7l9eVG5QK+hEPdE%rB%Fw.jpg
    r7l9eVG5QK+hEPdE%rB%Fw.jpg
    2.3 MB · Views: 407
  • 6zJXPK0JRb2PjavLXEtK+A.jpg
    6zJXPK0JRb2PjavLXEtK+A.jpg
    1.8 MB · Views: 388
  • 2UHb8tQiQqqO%m++zs6xJg.jpg
    2UHb8tQiQqqO%m++zs6xJg.jpg
    2.4 MB · Views: 406
  • XhWQ0HWTQUm1NQovOdusPA.jpg
    XhWQ0HWTQUm1NQovOdusPA.jpg
    1.9 MB · Views: 364
After installing the mATX I/O, I moved inside there I took out all the motherboard standoffs with a soft hammer, it was very easy to do that, quite enjoyed myself, and I installed the motherboard tray which I purchased from Laserhive, it comes with the mATX kit, it is a 5mm plexy motherboard tray, installing it is very straightforward, the only thing that you have to be careful is once you align the tray and put all the screw don't go and screw each of them, it is better to slowly work your way out, and screw each gradually, so this way it will be fitted perfectly.
 

Attachments

  • wE8nQ4fpTQawik1J%T6zaA.jpg
    wE8nQ4fpTQawik1J%T6zaA.jpg
    1.4 MB · Views: 386
  • iikNtNunReiAb9m2jK0bow.jpg
    iikNtNunReiAb9m2jK0bow.jpg
    1.6 MB · Views: 356
  • hly9miRGQoGFtYWei+h4lA.jpg
    hly9miRGQoGFtYWei+h4lA.jpg
    1.6 MB · Views: 335
  • P02S9WiRQGGAOjxpR9u38A.jpg
    P02S9WiRQGGAOjxpR9u38A.jpg
    2 MB · Views: 328
  • 6E9RDRnTSzSNiqc%w0SpsQ.jpg
    6E9RDRnTSzSNiqc%w0SpsQ.jpg
    1.7 MB · Views: 367
  • Q%+8P86QQVuPbn7hdCJXHw.jpg
    Q%+8P86QQVuPbn7hdCJXHw.jpg
    1.7 MB · Views: 371
Then I moved to the front panel, in order to fit the front panel, I had to shave off a little bit from the plastic holder in order for the panel to be flush with the rest of the case otherwise I did not like the unnecessary gap that it creates, but apart from that it was quite easy, please be carful with the power button hole, and enlarge it very slowly if you are after a tight fit.
 

Attachments

  • AK4OZbc%Q22OKkJVbBKi8A.jpg
    AK4OZbc%Q22OKkJVbBKi8A.jpg
    2.4 MB · Views: 321
  • eaWkXnpDQYKigmZUFlT+vQ.jpg
    eaWkXnpDQYKigmZUFlT+vQ.jpg
    2.4 MB · Views: 276
  • wtAwsRVZS7eqoov+f7n3nQ.jpg
    wtAwsRVZS7eqoov+f7n3nQ.jpg
    2.3 MB · Views: 355
  • iSM1MazsRK2vuwWdXcxLaA.jpg
    iSM1MazsRK2vuwWdXcxLaA.jpg
    1.7 MB · Views: 288
  • EPs85rf8QgGJeLRpu6ygLA.jpg
    EPs85rf8QgGJeLRpu6ygLA.jpg
    1.8 MB · Views: 391
  • QwUE6CpATKWNcmlQBKLEMQ.jpg
    QwUE6CpATKWNcmlQBKLEMQ.jpg
    2 MB · Views: 333
Once all the chassis mods have finished, it was time to introduce the new components of this new Killer Mac Pro 2019 :)
I installed the motherboard, and it was perfectly ok.
 

Attachments

  • SVTdGQ2xRiiOtUtaUJVBlg.jpg
    SVTdGQ2xRiiOtUtaUJVBlg.jpg
    2.3 MB · Views: 427
After reading this forum for quite some time, I have find out that people preferred to use Corsair hot swap connector.
If you are going to use this connector, please install it with the original screws why ?
Because it later created a strange problem which, I had spent hours to find out, Let me briefly explain it, once I finished the build and powered it online for the first time, it only showed on of my SSD drivers, and it drove me crazy, the reason is because I used normal screws and the have a small head, once I slide in the SSD with the adapter it connected but then push slightly forward because the head of the screw was a little bit higher which touched the adapter at the back, but the original screw heads are all flat for a reason :) After I changed all the screws with the original ones, everything was working ok.
 

Attachments

  • G9d6bxfvQq+tLtiGB5uy5g.jpg
    G9d6bxfvQq+tLtiGB5uy5g.jpg
    1.3 MB · Views: 405
  • RzmNj2M8RmKjFmpxvon0lQ.jpg
    RzmNj2M8RmKjFmpxvon0lQ.jpg
    1.9 MB · Views: 406
After I finished with the hot swap connectors I moved on to the motherboard installed the i9 9900 K processor and then installed the Noctua NH-D15, once I finished it, I realized that, one of the fans at the front is slightly higher compared to the one at the back, so this led me think that I could have clearance problems not with the cooler itself but with that front cpu fan, anyway, I installed everything inside for a trial fitment, and realized that yes indeed the case door is locking but but touching inside and pushing it which it should not, anyway take out all the parts, take out my X-acto knife and start shaving the fan from the bottom part with a correct angle, to the point where it cleared the door, and I can tell that, this was indeed the case I lowered the fan 5mm which was more than ok. This was quite nice, purchasing a cpu cooler and gave it a shave to make it even more complex :) But duty calls it was necessary
 

Attachments

  • fbGKqlCDQMqMG9TOi116gA.jpg
    fbGKqlCDQMqMG9TOi116gA.jpg
    2.3 MB · Views: 375
  • wvGGeUbmRVKEYm5y5QHTSw.jpg
    wvGGeUbmRVKEYm5y5QHTSw.jpg
    2.6 MB · Views: 375
  • gGmTgklXTViv9p8op2SjaQ.jpg
    gGmTgklXTViv9p8op2SjaQ.jpg
    1.8 MB · Views: 388
  • nDWm6QXtTuKlxgktAHfj6A.jpg
    nDWm6QXtTuKlxgktAHfj6A.jpg
    2.3 MB · Views: 362
  • 2Xa0i2GcRqK4JMiGwMWucQ.jpg
    2Xa0i2GcRqK4JMiGwMWucQ.jpg
    1.6 MB · Views: 368
  • 81cCzAmkQGyWx3aLUkmmMA.jpg
    81cCzAmkQGyWx3aLUkmmMA.jpg
    2.1 MB · Views: 363
  • e819wsg8Qvm2R5NmlxYlMg.jpg
    e819wsg8Qvm2R5NmlxYlMg.jpg
    2 MB · Views: 341
  • feI6nc8rT0KopSF%avOq5Q.jpg
    feI6nc8rT0KopSF%avOq5Q.jpg
    2.2 MB · Views: 384
  • 19LMAujHQSGMQcIv6zl7SQ.jpg
    19LMAujHQSGMQcIv6zl7SQ.jpg
    2 MB · Views: 378
  • 3m6AdGEjSEKTCoNrQJ2j+Q.jpg
    3m6AdGEjSEKTCoNrQJ2j+Q.jpg
    2.2 MB · Views: 350
I really liked the stock look, so from day 1 I wanted to use all its original parts as much as I could, I used the front fan assembly, I changed the fans with the noctua NF-F12 PWM used a t cable to power it with the SYSTEM 1 header.
used the L shaped part where the GPU originally sits, I also used the top DVD holder and PSU holder, in order to install the original PSU Cover after I installed the seasonic PSU, I cut a piece of wood and shaved it to the point where it flushed with the DVD Holder, then I covered it with a Tesa duct tape and then I used double sided tape to fix it.
 
Status
Not open for further replies.
Back
Top