Contribute
Register

Jaap's G5 Mod

Status
Not open for further replies.
I think you'll still be fine because the only place for the air to go will be out the back due to positive pressure.

Yeah, i had the same idea. I flipped 'em already :)
 
Time for another update. I ordered a Lian Li EX36-B HDD rack with fan. I'll have plenty of room for my drives (at the moment i have 2, and one SSD).

The fan will cool the HDD's, but will also take care of air-intake.

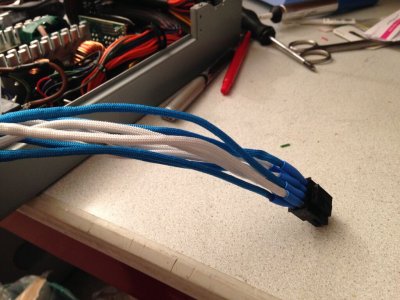
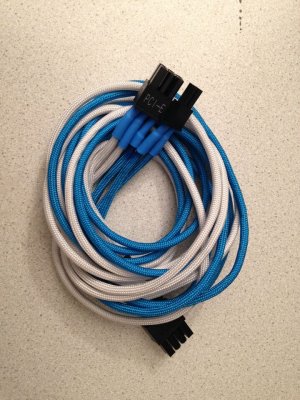
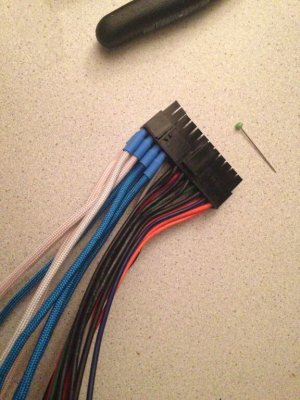
While waiting for that to arrive, i started sleeving the cables from the PSU. The cable for the CPU had to be shortened too, because normally the connector sits on top of the motherboard, but in my case it will be on the bottom.

I'm DIY-sleeving with conrad's heat-shrink and some 550 paracord from Ebay. At first, it's a little tricky to get the heatshrink even, but i'm happy with how it looks.

9RvLTu9w_clJ8R4_UjojfZXEdnWk-f22ymtJ8NUQc1o.jpg LKl9uzGbb4akrY-NqqMbvwICnVl6mtFypAB4OIeeul4.jpg tQUConMeWp2W4XNS8cVQp5qGpUnDOIxGSfY7vApl4c0.jpg

Of course the 24-pin cable needs to be finished, but i'm waiting on some additional paracord from China.
 
I just started some (first time) sleeving, using TELEIOS sleeve from MainFrame Customs. I too found it difficult to get the heatshrink to all lineup in the beginning. First cable I sleeved was one of the 8-pin power connectors for the GPU. Fun process...

I like your color choices:thumbup:
 
I just started some (first time) sleeving, using TELEIOS sleeve from MainFrame Customs. I too found it difficult to get the heatshrink to all lineup in the beginning. First cable I sleeved was one of the 8-pin power connectors for the GPU. Fun process...

I like your color choices:thumbup:

That's looking like great stuff. I tried it with my sleeving, but it won't melt. And also, i'm almost done so i'm gonna stick with sleeving with heatshrink.

Maybe i'll use it for my second mod, i also have a G4 waiting for me to do something with it :eek:
 
Last edited:
A few days ago my package with the Lian Li drive cage finally arrived.

Foto 10-10-15 16 36 59.jpg

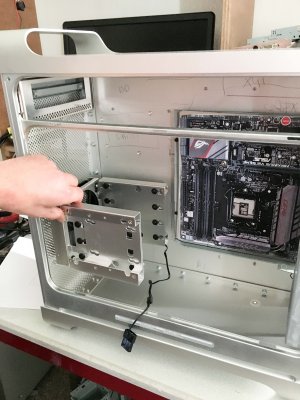
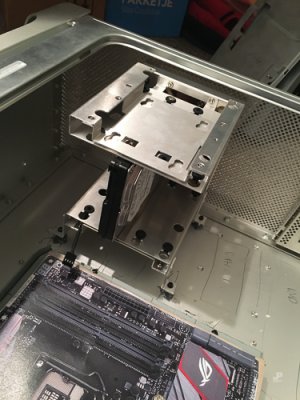
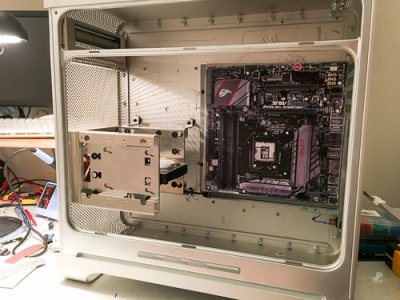
A quick try, and it fits nice in front of the motherboard. It will also pull fresh air in the case.

R-Foto 10-10-15 19 15 02-klein.jpg

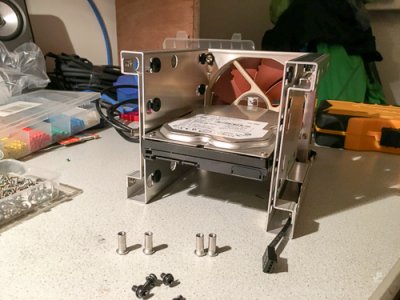
First job: replacing the fan it came with. I'm using noctua's in the case, so also here. Nice touch, with the cable on the side of the motherboard, the logo is straight up. No-one will ever see it, but it make's me happy ;)

R-Foto 10-10-15 19 28 46-klein.jpg R-Foto 10-10-15 19 39 30-klein.jpg

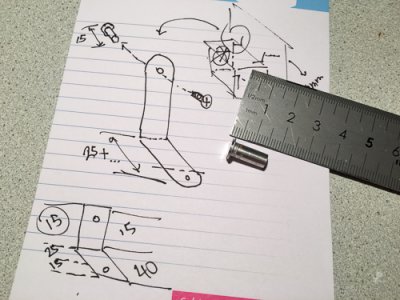
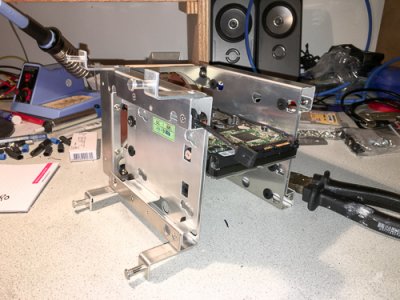
I mounted an old drive to give it some rigidity while installing it. I'm using some of the old motherboard stands to glue it to the back of the case. They won't give me enough clearance for the on-off switch and usb on the front of the case, so i'll construct some custom metal stands.

R-Foto 12-10-15 12 13 10-klein.jpg R-Foto 12-10-15 12 13 58-klein.jpg R-Foto 12-10-15 12 16 07-klein.jpg R-Foto 12-10-15 12 18 34-klein.jpg R-Foto 12-10-15 12 18 52-klein.jpg

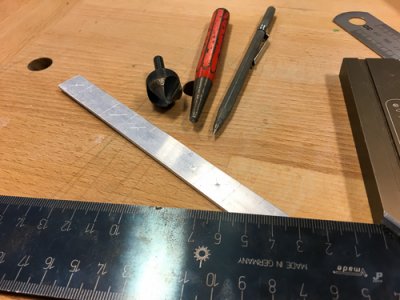
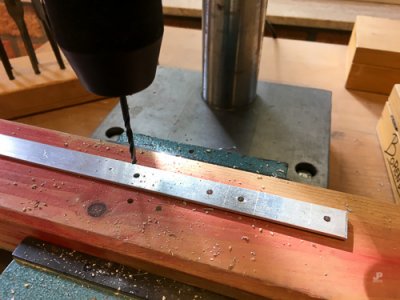
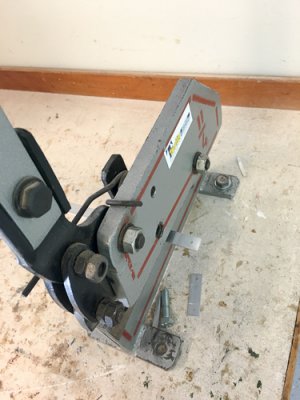
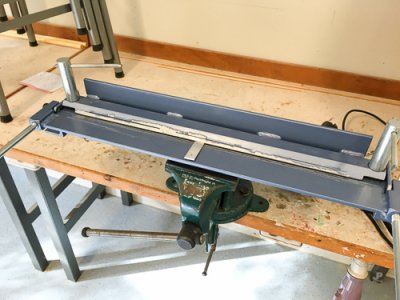
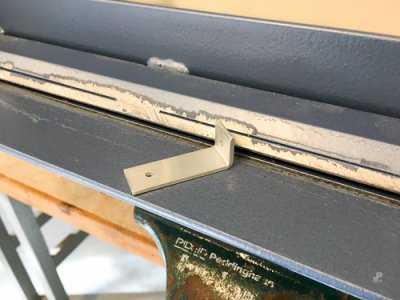
Measuring, drawing, drilling holes, cutting the pieces and the last step, bending.

R-Foto 12-10-15 19 24 20-klein.jpg R-Foto 12-10-15 19 24 38-klein.jpg

This time also i used my trusty hand-riveter to secure the stands to the bracket.

R-Foto 12-10-15 21 49 25-klein.jpg R-Foto 12-10-15 21 49 03-klein.jpg

I glued the stands for the motherboard-bracket with clear epoxy, but it came loose. So this time i used "Bison Kombi" epoxy-glue. It's a nice metal-color. The package promises it can withstand several kilo's of force and vibration, so it should hold.

R-Foto 13-10-15 20 47 42-klein.jpg

I holds nice for now. It's looking great, also from the front looking in the case. Finally something is getting back in :D.

R-Foto 13-10-15 20 46 53-klein.jpg

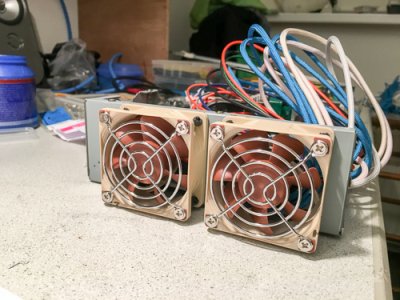
The last thing i did was mounting two fan-grills to the intake-fans of the PSU. I know it's not necessary, but it's not disturbing the airflow or creating noise, and i like how it looks, so they are staying on.

Next up is mounting an internal (usb 3) cardreader. I'd like to mount it without cutting in the front of top, but also with easy access. Currently i'm thinking of using the cd door, since i won't be mounting an optical drive. Maybe opening the door with an solenoid. Someone have experience with that?

Till next time,
Jaap
 
Last edited:
Little (phone) update.

Foto 15-10-15 22 46 07.jpg

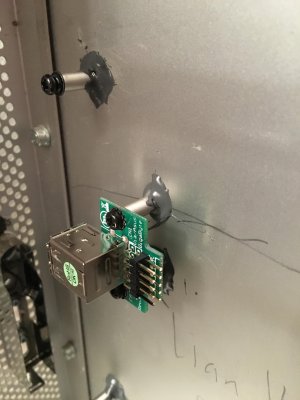
I installed a usb pin-header for a usb-bluetooth-dongle in front of the case. It's now in the back of the case, but i'd like it in front. Just hoping the aluminium won't act like a Faraday-cage blocking the signal. Again I used motherboard stands from the second G5 and metal-epoxy.

Foto 14-10-15 18 55 10.jpg

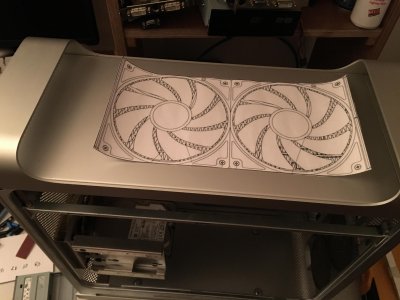
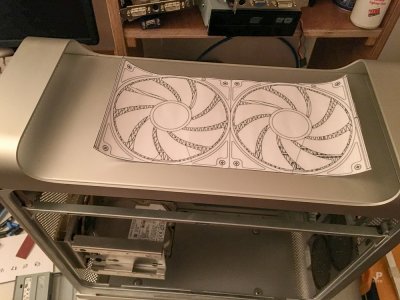
Also i'm thinking about cooling. I'd like to fit a 280mm radiator from a AIO-set on top, so i'm now figuring out if it fits.
 
Last edited:
Hello guys,

I've done a few things and i'd like to share my thoughts. First of all, i'm not going to mount the internal card reader. At this point, i don't think i can't get it right, and i don't want to regret it later.
If i want to place it, i need to cut the front or the top, both of which i'm not sure i can get nice without sanding and treating the entire outer case which i don't want to do.
I'm planning on getting a motherboard with enough USB 3 ports, so i'll get myself an external card reader.

R-Foto 14-10-15 18 55 10-M.jpg

As i shared earlier, i want to mount a radiator to the top of the case. Since i won't place an optical drive i don't need to reinstall the top tray, so i'll have plenty of room. At the moment i think i will choose the NZXT Kraken X61.

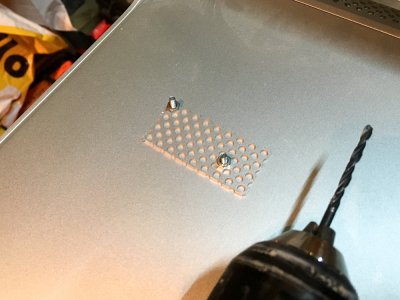
A few days ago I started trying my method of creating holes in the same pattern as the front and back of the case. I cut a little piece of mesh from my donor-G5-case. I drilled two holes while holding the mesh by hand. After that, i used two machine-screws to secure it to the case and drill some more holes.

R-Foto 20-10-15 21 00 07-M.jpg R-Foto 20-10-15 21 10 18-M.jpg toolbank_hllcb124.jpg

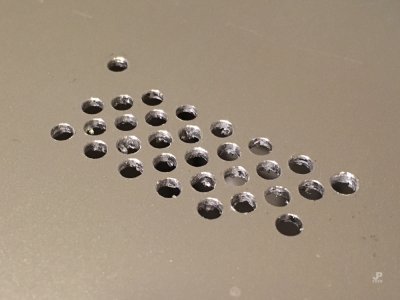
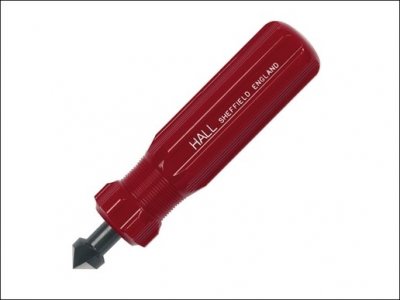
After drilling it was time to look at the result. It took a second time around with the drill to clean all the holes from the inside. I used a deburring tool to remove the sharp edges from the holes. It’s still not as smooth as original, there is a little rim which you can feel with your fingertips, but not see. Also, you can see in the close-up that the insides of the holes are shiny, because of the drilling. I’m guessing Apple uses a punch-tool to create the holes, or that the matte finish is created by the coating orso. This is only visible from close-by with light at the right angle.

R-Foto 20-10-15 21 13 34-M.jpg R-Foto 20-10-15 21 23 30-M.jpg

Because I like how it looks and because I have no alternatives, this is the way I’ll create the mesh on top of my G5.

I also cut grommet-holes in the bottom tray and reused an existing hole for an half grommet.

That's it, see you later.
 
Hi again, time to show you my progress.

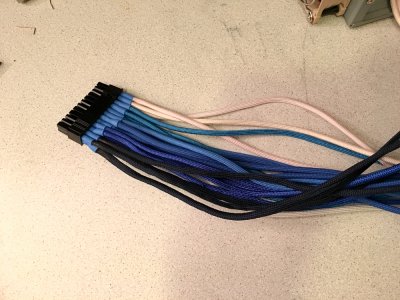
First, my cheap-chinese-paracord finally got delivered and i finished the ATX-power cable. Now all the psu-cables are sleeved. I'm doubting whether i should use cable-combs, but i'll decide when everything is in the case.
R-Foto 27-10-15 21 27 53-M.jpg

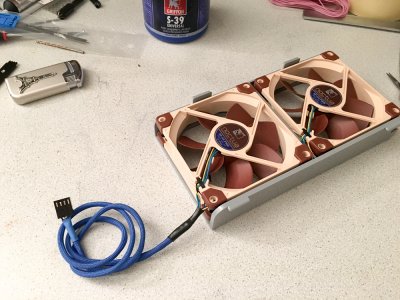
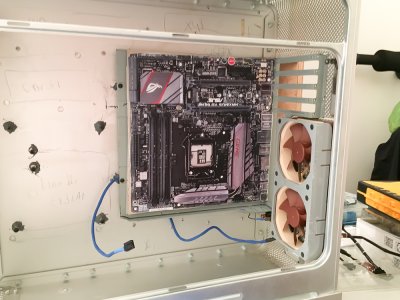
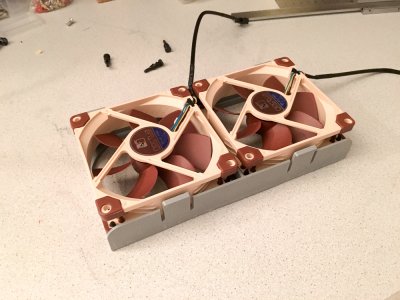
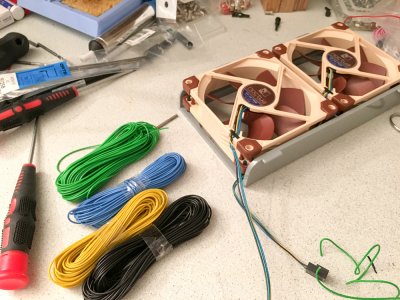
Next, i got the new fans for the rear exhaust. In line with the rest of the case, i'm using 92x25 Noctua PWM fans. They fit nicely in the bracket. I cut the original cables and soldered and sleeved a new cable with a single connector. Since the fans are PWM i won't use the provided LNA, i'll just lower the speed with the motherboard settings if its to loud.
Because i have not chosen a motherboard i made the cable long enough to go to the back and also top of the motherboard, behind the tray.
R-Foto 30-10-15 20 16 02-M.jpg R-Foto 30-10-15 20 39 58-M.jpg R-Foto 30-10-15 21 14 58-M.jpg R-Foto 30-10-15 21 16 38-M.jpg

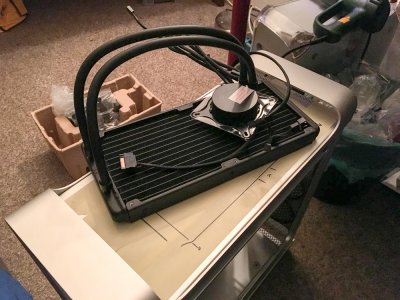
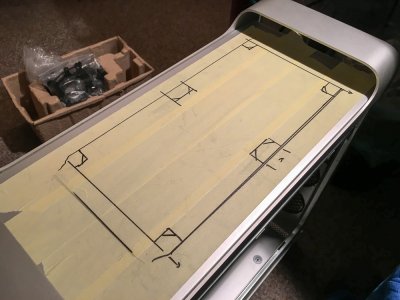
Also, the Kraken X61 is sitting here ready to be built in... I taped of the top of the case and drew the outline of the radiator. Next is creating the 4 corner holes to mount the radiator to the top of the case. I'm not gonna use the provided black screws, because they don't look good on the outside. Also, i want the screws to be countersunk.
I spent almost a complete evening trying to find out how that crazy UNC system works. Countersunk aluminium colored screws aren't easy to find in Europe. Finally i found a store in Amsterdam where i could order them on-line. They are a bit too long, but then i'll use some washers or cut them.
R-Foto 29-10-15 21 15 10-M.jpg R-Foto 29-10-15 21 18 01-M.jpg

And then begins the task of drilling A LOT of holes. In my last post i said i would drill the 3 mm holes, but i found out that drilling a 2 mm hole first, followed by a 3 mm hole leaves a nicer rim, without a burr.
Luckily, i wont have to draw or measure all the holes, because i can use the front of my second G5 as template. This will speed up the process.
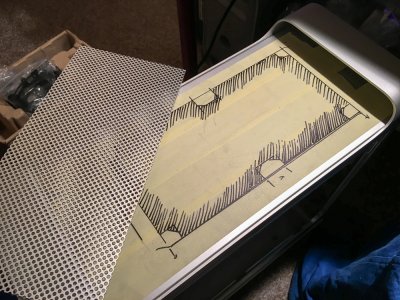
R-Foto 29-10-15 21 20 51-M.jpg

So, quick guesstimate: 280 mm long with a hole every 6 mm is 46 holes, 140 mm wide with a hole every 6 mm is 23 holes. 23 x 46 = 1.058, times 2 for drilling 2 mm first and then 3 mm:

I'm looking at drilling some 2.100 holes... Wish me luck :crazy::crazy:
 
Status
Not open for further replies.
Back
Top