Contribute
Register

Jaap's G5 Mod

Status
Not open for further replies.
Joined
Aug 9, 2015
Messages
51
Motherboard
Asus Maximus VIII Gene
CPU
Intel i7 6700K
Graphics
MSI Geforce GTX 960
Mac
  1. 0
Classic Mac
  1. 128K
  2. Power Mac
Mobile Phone
  1. iOS
It's done! Look here.


So, i'll be sharing my G5 mod. I'm going to keep it as clean and original as possible. As such, it won't be really special, but since you all have been inspiring and a source of information, i'll keep you posted on my progress.

I'm not going very fast, i really don't want to mess it up, so just taking my time.

It all started with a lucky find on Marktplaats.nl (digital marketplace).

222222.JPG
I bought two G5's and a G4 for a mere €50.
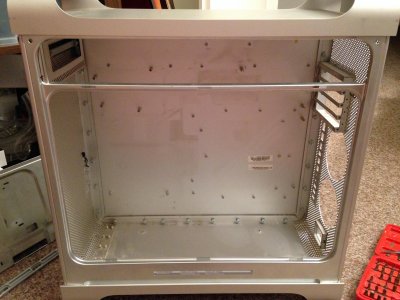
Foto 07-09-15 22 42 51.jpg
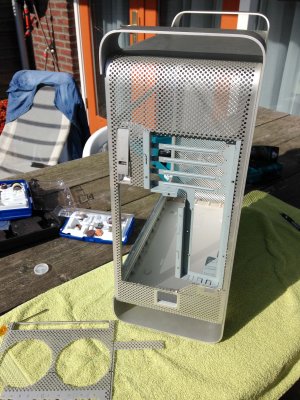
With a little help from this forum, it took me just under an hour to clean it out.
I chose to go for a mATX motherboard. With just 4 pci-slots, it will look the most like an original G5. I haven't bought one yet.
 
Last edited:
While thinking about placement of parts i started (as many) with the PSU.

Foto 14-09-15 20 28 50.jpg

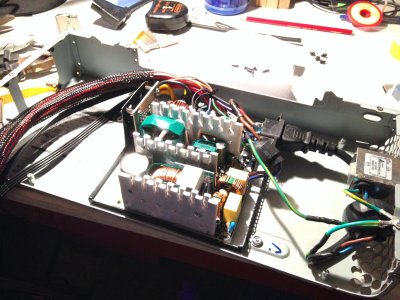
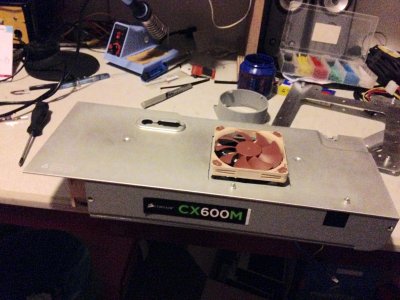
I fitted a CX600M in the original PSU. I soldered a new cable on the original plug, so i can keep using the original G5 cable.

Foto 19-09-15 20 35 26.jpgFoto 19-09-15 20 57 03.jpg
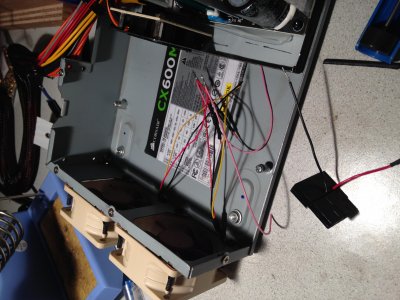
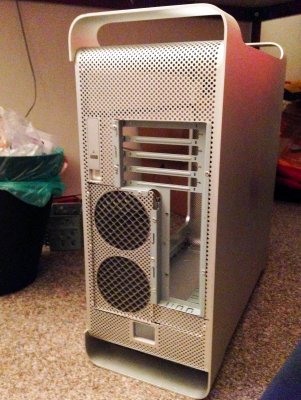
I replaced the noisy fans on the front with silent Noctua's. I soldered new wires on the fans. With a microswitch its possible to switch to a circuit with and without the resistors from the provided LNA.

Foto 19-09-15 12 48 40.jpgFoto 19-09-15 13 35 13.jpgFoto 19-09-15 20 57 49.jpg

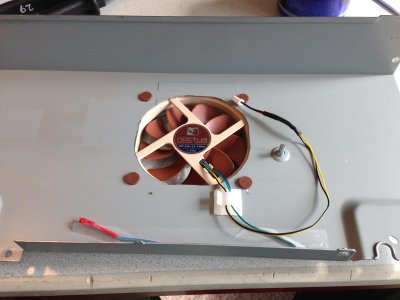
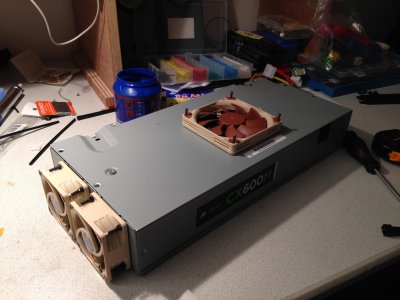
Just to be sure it won't overheat i mounted a low profile Noctua 92x14mm fan on top. Sadly, it means i had to cut a hole in the top of the PSU.

Foto 20-09-15 20 07 09.jpg
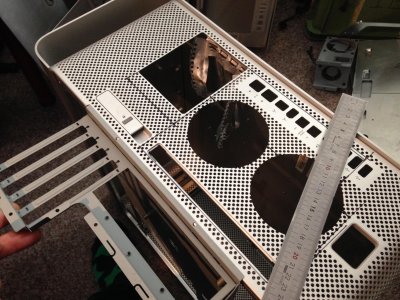
And a square hole in the "floor" of the case.
 
Foto 12-09-15 12 51 58.jpg

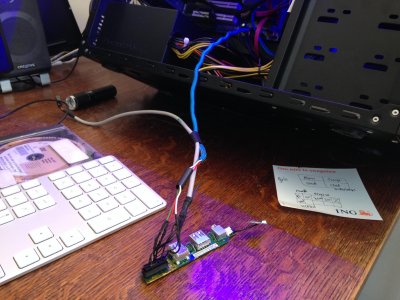
Front panel on/off, led and USB have been soldered and sleeved. On the picture testing it with my current PC.
 
I noticed your small PSU fans are blowing forward out the front of the case. Unless you're thinking about reversing the airflow of the entire case this is probably a bad idea because the system will be sucking in the warm air off the PSU through the front.
 
I noticed your small PSU fans are blowing forward out the front of the case. Unless you're thinking about reversing the airflow of the entire case this is probably a bad idea because the system will be sucking in the warm air off the PSU through the front.

Thanks for your reply. I hadn't thougt about this. I'm thinking (hoping) this won't be a problem, i don't think the PSU will get that hot. Also, if i reverse the fans i need to reverse the top fan also, which will result in blowing hot air to the mobo...
 
To be honest I can't see the point of the top PSU fan. The original Apple design works fine. In my G5 conversion I installed the internals from an ATX PSU and ran the original fans at 7v, the throughput of air from front to back is tremendous and more than adequate to cool the PSU.

I find it useful to use an incense stick as a smoke source to check airflow through the case. This is especially good on the Apple G5 and Mac Pro cases because of the mesh front and rear panels.
 
To be honest I can't see the point of the top PSU fan. The original Apple design works fine. ...

I know, but the components of the original Apple PSU are less densely packed, also, it's designed for airflow to be horizontal. The components of my Corsiar are much more dense packed, also there will be more wires blocking/disturbing the airflow. And the design calls for a vertical cooling airflow.

Great tip of the incense sticks, hadn't thought of checking it that way.
 
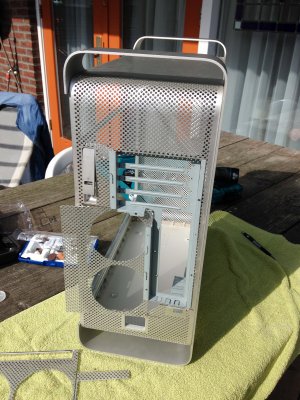
After finishing the PSU (housing, cables need to be shortened and sleeved.) it's time to get on with the mobo-tray.

I salvaged an mobo+i/o bracket from an old PC. First, measuring it all.

Foto 27-09-15 12 30 29.jpg

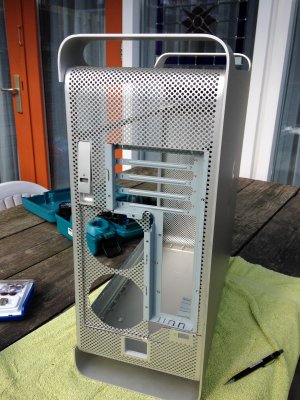
Time to cut it. I used a dremel. A little costly on the cutting discs (i think i used 8 orso), but i didn't want to use a jigsaw because i was afraid the saw would stress and bend the material.

Foto 27-09-15 13 40 38.jpg

And it fits. I don't know if i mentioned it, but a have a second case for parts. I cut the rear-exhaust-bracket-part of it to complete the rear.

Foto 27-09-15 13 42 41.jpg Foto 27-09-15 13 50 06.jpg

Next step: fitting the motherboardtray on the inside and after that on the backside. Then, fix the fan-part and the little triangle on to bottom.

Thanks for reading and your comments.
 
Last edited:
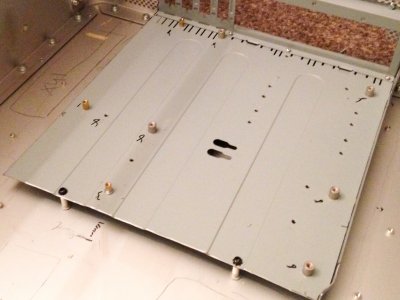
Today i finished mounting the motherboard tray.

Foto 30-09-15 20 03 16.jpg

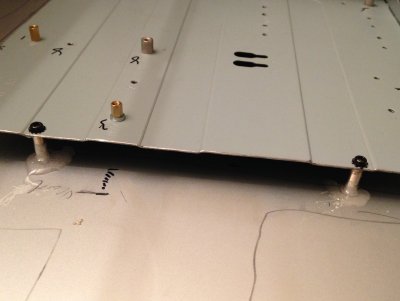
First i put the missing motherboard stands to fit my soon-to-be picked mATX-motherboard. I had trouble finding stands which all use the same screws, so i had to use a shorter one which i made a little higher with a few rings.

Also i mounted the back of the motherboard tray on two of the original stands which i had to remove. Not surprising, they were the exact height i needed.

Foto 30-09-15 20 54 42.jpg

Next, i put together all the parts for the back. I put it all together with blind rivets. It came out surprisingly sturdy.

Foto 30-09-15 21 05 05.jpg

The last step was glue-ing (is that a word?) the motherboard-tray-mounts to the back of the case with epoxy.
 
Thanks for your reply. I hadn't thougt about this. I'm thinking (hoping) this won't be a problem, i don't think the PSU will get that hot. Also, if i reverse the fans i need to reverse the top fan also, which will result in blowing hot air to the mobo...

I think you'll still be fine because the only place for the air to go will be out the back due to positive pressure.
 
Last edited:
Status
Not open for further replies.
Back
Top