Contribute
Register

Intel Nuc 2.0 (Broadwell)

Status
Not open for further replies.
...
[*]Only toleda's SSDT-1: same as above (maybe doesn't work by itself?)

Yes... no IGPU PM without plugin-type=1 injection (and GFX0->IGPU rename).

[*]ssdtPRGen.sh SSDT with toleda's SSDT-1: CPU 1.3-2.1 GHz, GPU 300-900 MHz (or maybe 350-900, it's hard to tell because it fluctuates a lot)

For CPU LFM multiplier, check output of AppleIntelInfo.kext.
 
FWIW, I just tried the Dell DW-1560 wireless under El Capitan with a NUC5i3MYHE, and it works. I used RehabMan's kexts for both wireless and bluetooth, and the handoff/hotspot enabler Clover patch from toleda's PCIe half-mini guide. I've updated my guide accordingly.
 
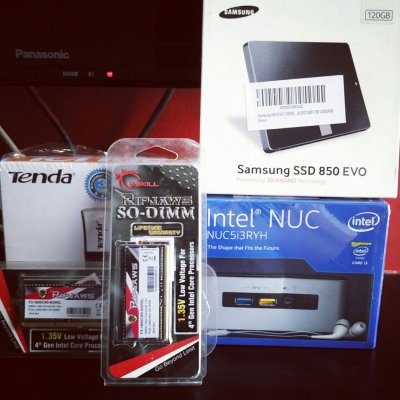
just got a NUC5i3RYH -

how much ram is everyone using on their i3 models? recommendations?
already ordered a single 8gb, wondering if more is worth it.
now the wait till all parts come :mrgreen:
 
Depends on what you want to do with it.

I'm running a number of Minecraft servers on a 5i3, and they each want a decent chunk of RAM, so I have 16 GB. Similarly if you were going to run VMs or something, more RAM might be needed.

For more general usage, I've been fine with 8 GB.

However, you may get better results with two RAM chips in dual-channel mode instead of a single chip.
 
thanks alot, got the 16GB and followed the guide to have a fully working hack mini. :mrgreen:
very happy with the system so far, some more testing left to see how it performs.


IMG_2015-09-24 16:53:54.jpg
 
How I upgraded to a higher capacity SSD in the NUC without starting over from scratch

Hey everyone, just wanted to give a quick update. I replaced the old-and-lying-around Kingston 128GB 3.0GB/sec 2.5" SATA SSD that I used to complete my original install with a more permanent Samsung 850 EVO M.2 256GB SSD. After looking around this site and others for the path of least resistance, and a bit of trial and error...here's how i did it:


  1. With both drives physically installed, booted into the old drive's OS.
  2. Using the Apple Disk Utility, initialized the new M.2 Drive, creating a partition with the recommended setting from this guide (GPT, Journaled, etc.). Shut down.
  3. On reboot, chose the Recovery partition on the 2.5" drive from the Clover boot menu.
  4. Using the Apple Disk Utility, ran a "Restore" from the old OS partition to the new one (~60GB copied in like 10 mins). Rebooted.
  5. On reboot, notable things:
    1. The BIOS did not yet recognize the new SSD in the Boot menu - that when I knew I needed to add a UEFI Partition with Clover.
    2. There were 2 new options in the clover boot menu - duplicates of my original Boot partition and the recovery partition.
  6. Booted into the old OS once again.
  7. Figured out which of my identically named OS partitions was on the new M.2 drive, and then renamed it in the finder.
  8. Installed Clover on the M.2 SSD using the default options. (this was originally a mistake; I missed the "customize" button the first time around, but I think that this through step 12 might have actually been simpler in hindsight).
  9. Used Clover Configurator to mount the Old EFI partition.
  10. Copied the entire EFI folder from the old 2.5 SATA EFI partition to the new M.2 EFI partition.
  11. Used Clover Configurator to rename the "Default boot volume" to the new name of the OS partition on the M.2 SSD (using the name defined in step 7 above).
  12. Reinstalled Clover on the M.2 SSD, ensuring that all of the options from the original guide were preserved (they were, by default). Shut down.
  13. On Reboot, checked BIOS to make sure that the M.2 was a boot option post-Clover, which it was. Re-ordered the boot drives to make M.2 first. Upon boot, confirmed that the boot drive was in fact the new OS partition in the MacOS. Shut down.
  14. Physically removed the old 2.5" SATA drive from the NUC.
  15. Rebooted to verify no more dependencies on the old 2.5" SATA drive. Confirmed! Noticeably faster boot time than the 2.5 SATA disk (YMMV).

Noteworthy hurdle that I cleared: During this process, I did get to a point where I had the old drive disconnected, and it appeared the machine would boot - but it kept getting hung at the end of the "boot thermometer". That's when I determined that I needed change the name of the Default Boot Volume to match the renamed drive (step 11) in the config.plist. Just in case anyone runs into that.

I am sure there's a quicker way to clone the UEFI partition along with the boot and recovery HD partitions, but I'm unaware. If not, then I hope this guide will be helpful to others that want to simply replace their boot drives!

Ammulder, thanks again for coming up with a method that includes a recovery partition for operations like this. Just because it's a Hackintosh doesn't mean we should be without basic utilities! Bravo.
 
Just checking in to update on my success.

Been running El Capitan for a couple of weeks now and it's perfect. I use a bluetooth usb adapter for my speakers, mouse and keyboard. I use LAN for internet. I've been installing the official updates without any problem.

On Yosemite I had this weird issue where the graphics would sometimes spazz out and the screen would start flickering and pretty much become unusable without a reboot. But since doing this El Capitan upgrade, I've had no issues at all!

The "heaviest" task I do on it is editing 1080 50fps video in Final Cut Pro. It handles it a lot better than you'd expect and can export pretty fast.

Very happy with this little beast :)
 
Interesting - the Intel Downloads Centre is now listing the i3 and i5 Skylake NUCs:


  • NUC6i3SYK
  • NUC6i5SYK
  • NUC6i3SYH
  • NUC6i5SYH

I guess we'll see these released soon.
 
Status
Not open for further replies.
Back
Top