Contribute
Register

I made a clone of working Sierra install - it's acting very strange . . .

Status
Not open for further replies.
Joined
Jul 23, 2013
Messages
120
Motherboard
GA-Z170X-UD5 TH
CPU
i7 6700K
Graphics
NVidia GTX 980Ti
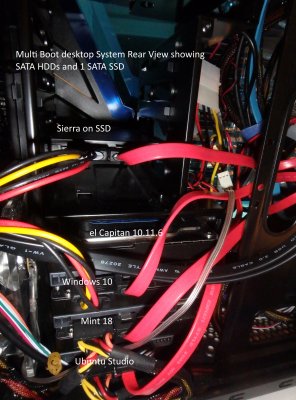
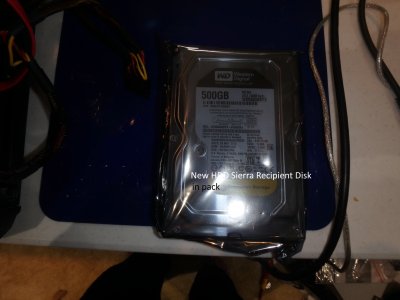
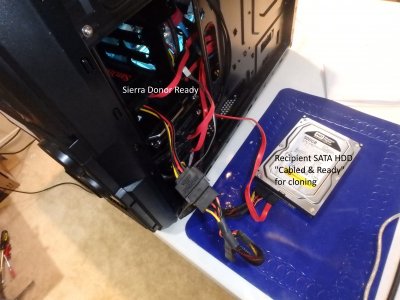
I have a good working SSD install of Sierra with all periferals working including usb 3.1, ethernet, sound etc. I still have an issue with multiple BIOS entries that regardless of which thread I read and re-read I can't get a solution to stick so I made a clone of that good install to try different remedies and not break the good SSD install.

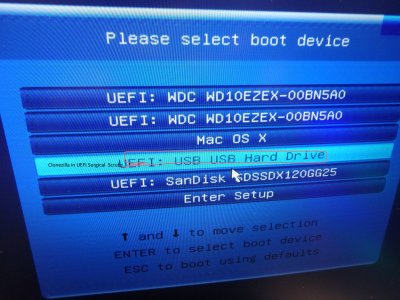
Made the clone with CCC and had it make a new recovery partition which I then copied the EFI folder from good install into it. So far so good. When I re-boot to the clone (without the good SSD plugged in of course) , when it gets to the bootloader screen and I hit return to start it - it hangs halfway through the progress bar under Apple logo then gives the probit icon. If I then restart and at the same bootloader screen press the spacebar, scroll through the boot args listed (none of which are checked) all the way down to the Return and hit Return, then Return again to start the boot - it boots up.

I don't have this issue with the original SSD Sierra install, just the clone I made of it.
Does this behavior ring any bells for a solution??

Also, I'm totally open for anybody's multiple BIOS entries solution - seems like the myriad threads about it work for Windows dual boot and Asus motherboards. I'm using this:

Gigabyte Z170X-UD5 TH
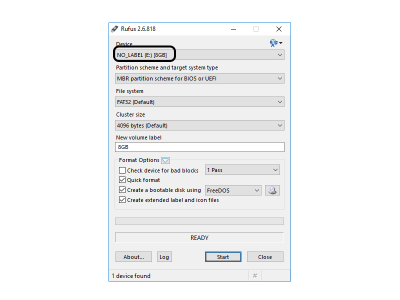
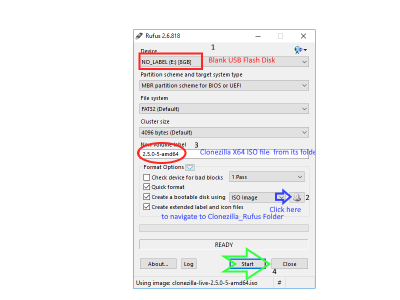
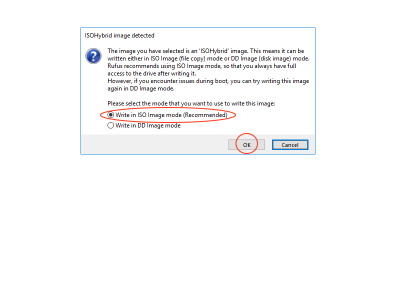
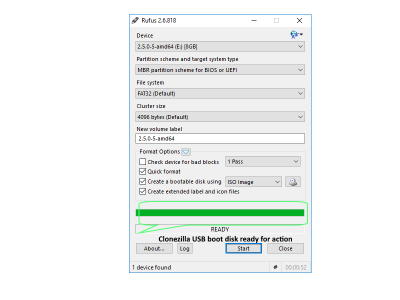
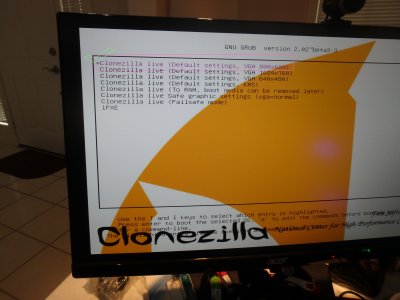
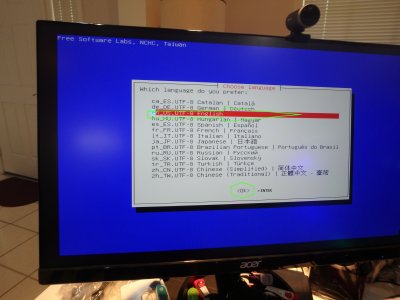
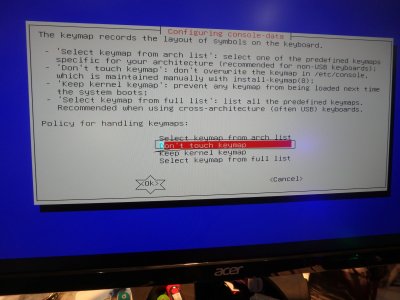
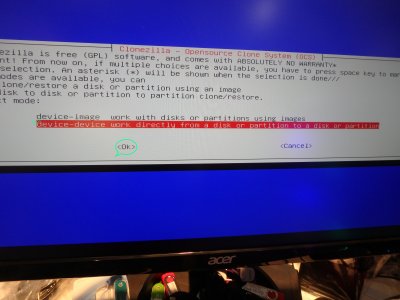
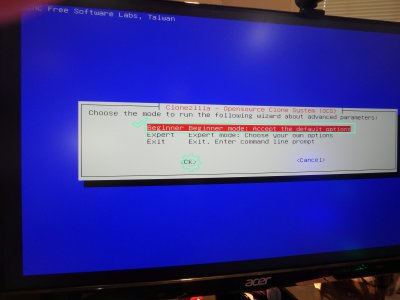
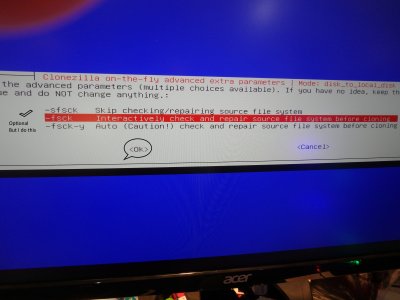
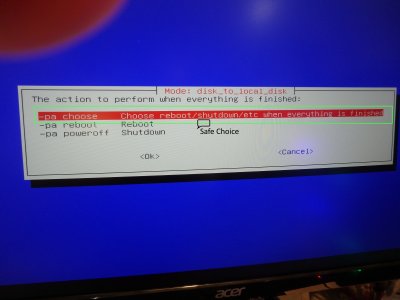
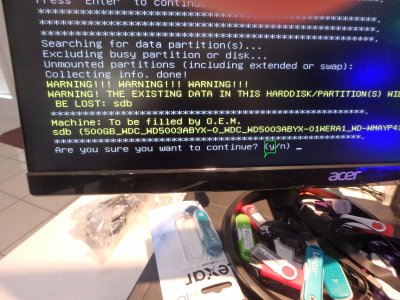
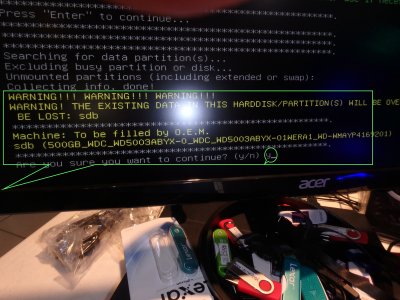
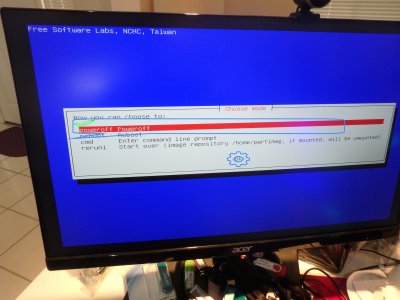
 
I have used the Linux Freeware "Clonezilla" to create an EXACT clone of my Sierra SSD to a cheaper 500GB SATA HDD that will boot exactly like the original SSD once I connect it to the same cables (Power/SATA) of the SSD and Power the PC and boot. It will load through its Clover all my other separate HDDs with Windows 10, Mint 18, el capitan the way the first Boot Sierra SSD used to do.
I make a "Disk to Disk clone". I have not done a "Partition to partition clone" but I don't doubt Clonezilla's ability to make an exact clone of OS X -Mac OS /Window /Linux Systems faithfully either way.

The GUI interface of Clonezilla is very easy even for me :). So, anyone can easily follow the very descriptive prompts to accomplish the task. The whole job is relatively fast.

I have CCC and Super Duper I had purchased a couple of years ago when Clonezilla was not this good. But now I use only Clonezilla and it is a Freeware!
If you are interested to try: go to the link below:
  • Get the latest 64 bit version of Clonezilla ISO file to your "Windows" system where you can easily create a Clonezilla USB Installer using the software "Rufus" downloaded simultaneously to the same folder
  • Using "Rufus" (latest downloaded) create your USB Clonezilla installer. [Save downloaded Clonezilla and Rufus in same folder to make life easier]
  • Connect a 4-8GB USB Flash disk to the USB port.
  • Launch Rufus from Rufus_Clonezilla Folder in Windows
  • The USB installer will be loaded by Rufus to its interface toward the top
  • Navigate to the Rufus_Clonezilla Folder to select the "Clonezilla ISO" file
  • Click "Start" to Create the Clonezilla disk in Rufus
  • The images uploaded to this thread will show the steps more clearly and will indicate when the disk is ready.
  • This Clonezilla disk will boot in all Oses (Windows /Hackintiosh/Linux) and clone all 3 types of disks as it is tolerant and friendly with all 3. I use Windows to create it because "Rufus" a Windows based software is a very Friendly and easy tool to make Clonezilla USB .
  • Shut down and Power off the PC and disconnect the cables of all other disks except the Sierra SSD or HDD.
  • This is to reduce clutter and confusion with too many disks while trying to choose the "Source" and "Recipient" disks for the cloning steps ahead.
  • Using the Power and SATA cables of another disconnected drive, connect a blank HDD [or if you can afford SSD ]
  • If you don't mind sacrificing data contained from formatting during cloning , you can use a used disk if that is all you have.
  • Leave the recipient disk outside the computer case on a rubber Mouse pad or Pad made of non-conducting material [for electrical safety] and avoid unnecessary effort to place it inside the case for a disk that is going to be disconnected for safe keeping.
  • Boot the PC with the prepared Clonezilla Bootable USB drive as first boot device in the BIOS.
  • Wait for the monitor to show "Clonezilla" screen.
  • The rest is too easy to list here: only thing to remember and to go slow and deliberate is the correct choice of the "Disk to Disk cloning" and "Source Disk" and "recipient disk" selection. This is made easier by disconnecting other disk in the earlier step .
  • All other choices up to start of cloning are usually the DEFAULT ones.
  • Once the cloning is Completed > choose the option to "SHUT DOWN"
  • Disconnect the Source Sierra SSD while testing the Cloned Disk.
  • Now you can just leave the disk there outside and test if it will boot to Sierra desktop by starting from Power On >Boot> Login>Desktop.
  • Once you are satisfied that the Clone is just an EXACT DUPLICATE in all respects, shut down, Power Off, and disconnect the clone for safe keeping and reconnect the original.
  • If you now reboot status quo ante will be reestablished
https://distrowatch.com/?newsid=09645
I have cloned all my disks to start fast without any downtime after a disk failure
Hope this helps.
I have edited this a few times to add text for clarity and upload images. I will add more images to a follow up post to show the actual Cloning steps.

I want to dedicate this post for Tonymac Forum for all the great help I got by reading the excellent Guides, great answers from the Moderators and dedicated contributors and the countless people who post great questions.
 
Last edited:
Thanks for the suggestion. A couple of questions. The only version of Clonezilla I see is for Ubuntu and AMD processors. No where that I can see on their download page is the word "Windows" mentioned. I got an ISO but it doesn't make any sense to me like a normal Windows program installer would.

Can you help with that? The rest of your instructions seem very straightforward.

I've been able to make clones using CCC and then using Clover installer to make the EFI partition and then copying the source drive's EFI folder into that. The only issue I'm having with that process is the one I've outlined above. Can/does Clonezilla clone the main partition and the EFI partition also?

I've got a working Windows separate computer to do the Clonezilla thumb drive, just need a download link to get something Windows understands. As you can see, I've absolutely no Linux/Ubuntu experience whatsoever.
 
Last edited:
  • From the link given you will reach Distrowatch Clonezilla Distribution page.
  • Download that to your WINDOWS 10 System [where you also download the USB Installer Creator "Rufus"]
  • Save live-2.5.0-5-amd64.iso (192MB, pkglist) to same folder as "Rufus" was saved (this is for easy navigation in the next steps)
  • Connect a 4 or 8GB FD to USB port.
  • Just Click Rufus to open
  • Your FD will be already in its interface
  • From the bottom Navigate and select the live-2.5.0-5-amd64.iso (192MB, pkglist) from previous Folder
  • Start creating the disk.
  • When you boot with this disk as first boot it will open Clonezilla screen
I will try to post some images but I need time to create it .
 
Glad you are making progress.:)
For the benefit of all reading this thread, here are the pictures I promised about Clonezilla USB creation . I'ill try to add step-by-step cloning pictures and edit this page later.
 

Attachments

  • ClonezillaUSB 1.png
    ClonezillaUSB 1.png
    17.9 KB · Views: 233
  • ClonezillaUSB 2.png
    ClonezillaUSB 2.png
    31.6 KB · Views: 561
  • ClonezillaUSB 3.png
    ClonezillaUSB 3.png
    21.1 KB · Views: 253
  • ClonezillaUSB4.png
    ClonezillaUSB4.png
    6.5 KB · Views: 236
  • ClonezillaUSB5.png
    ClonezillaUSB5.png
    19.8 KB · Views: 268
  • ClonezillaUSB6.png
    ClonezillaUSB6.png
    22.3 KB · Views: 215
Sorry!
I could not quite understand what you actually saw on the screen.

I was also cloning a 120GB SSD running Sierra to a new 500GB SATA HDD which just finished. I started almost 45 minutes after my last post downloading the two software and then starting the cloning . I just now completed cloning and Powered Off the PC. I have finished editing the photos I took of the procedure and posting now.

You need a disk equal to or larger than the Source disk to clone. It DOES NOT need to be SSD any SATA HDD, even used disk that can lose any data in it is, OK. I just had a brand new WD 500GB for this test cloning of my running Sierra 10.12.1 .
 

Attachments

  • clonezilla disk cloning -1.jpg
    clonezilla disk cloning -1.jpg
    3.6 MB · Views: 272
  • clonezilla disk cloning -2.jpg
    clonezilla disk cloning -2.jpg
    2.6 MB · Views: 271
  • clonezilla disk cloning -3.jpg
    clonezilla disk cloning -3.jpg
    4.3 MB · Views: 251
  • clonezilla disk cloning -4.jpg
    clonezilla disk cloning -4.jpg
    3.5 MB · Views: 237
  • clonezilla disk cloning -5.jpg
    clonezilla disk cloning -5.jpg
    4 MB · Views: 236
  • clonezilla disk cloning -6.jpg
    clonezilla disk cloning -6.jpg
    5.2 MB · Views: 307
  • clonezilla disk cloning -7.jpg
    clonezilla disk cloning -7.jpg
    3 MB · Views: 296
  • clonezilla disk cloning -8.jpg
    clonezilla disk cloning -8.jpg
    2.7 MB · Views: 275
  • clonezilla disk cloning -9.jpg
    clonezilla disk cloning -9.jpg
    3 MB · Views: 275
  • clonezilla disk cloning -10.jpg
    clonezilla disk cloning -10.jpg
    3.4 MB · Views: 236
  • clonezilla disk cloning -11.jpg
    clonezilla disk cloning -11.jpg
    3.5 MB · Views: 287
  • clonezilla disk cloning -12.jpg
    clonezilla disk cloning -12.jpg
    3.3 MB · Views: 222
  • clonezilla disk cloning -13.jpg
    clonezilla disk cloning -13.jpg
    3.1 MB · Views: 235
  • clonezilla disk cloning -14.jpg
    clonezilla disk cloning -14.jpg
    3.6 MB · Views: 228
  • clonezilla disk cloning -15.jpg
    clonezilla disk cloning -15.jpg
    4.7 MB · Views: 294
  • clonezilla disk cloning -16.jpg
    clonezilla disk cloning -16.jpg
    3.4 MB · Views: 328
  • clonezilla disk cloning -17.jpg
    clonezilla disk cloning -17.jpg
    3.4 MB · Views: 339
  • clonezilla disk cloning -18.jpg
    clonezilla disk cloning -18.jpg
    3.4 MB · Views: 266
  • clonezilla disk cloning -19.jpg
    clonezilla disk cloning -19.jpg
    3.4 MB · Views: 269
  • clonezilla disk cloning -20.jpg
    clonezilla disk cloning -20.jpg
    3.7 MB · Views: 231
  • clonezilla disk cloning -21.jpg
    clonezilla disk cloning -21.jpg
    3 MB · Views: 546
  • clonezilla disk cloning -22.jpg
    clonezilla disk cloning -22.jpg
    3.2 MB · Views: 316
  • clonezilla disk cloning -23.jpg
    clonezilla disk cloning -23.jpg
    3.1 MB · Views: 336
  • clonezilla disk cloning -24.jpg
    clonezilla disk cloning -24.jpg
    3.1 MB · Views: 213
Status
Not open for further replies.
Back
Top