- Joined
- Aug 15, 2016
- Messages
- 121
- Motherboard
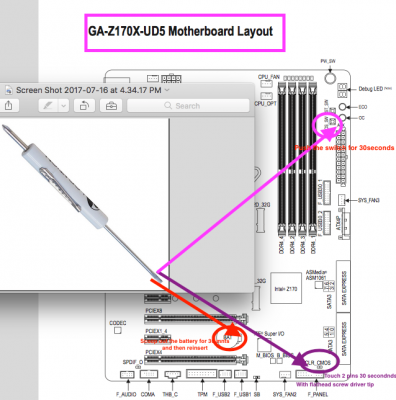
- GA-Z170X-UD5
- CPU
- i5-6500
- Graphics
- Vega 56
- Mobile Phone
I followed the steps on making a USB installer for High Sierra, but I keep getting I keep getting a no symbol / prohibited symbol when trying to install it.
I boot off the USB drive and I select Boot from Install macOS High Sierra. Then I see the Apple logo and the progress bar then I get no symbol / prohibited symbol.
What I am doing wrong?
Attached is a copy of EFI folder from my USB drive.

I boot off the USB drive and I select Boot from Install macOS High Sierra. Then I see the Apple logo and the progress bar then I get no symbol / prohibited symbol.
What I am doing wrong?
Attached is a copy of EFI folder from my USB drive.