Contribute
Register

How to build your own iMac Pro [Successful Build/Extended Guide]

Status
Not open for further replies.
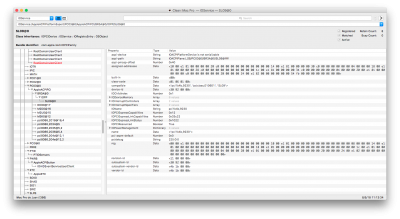
I tried to install High Sierra on a standard SSD (SanDisk SSD plus 120 GB) waiting for cloning it to my NVMe Samsung 960 Pro disk, as suggested by @rugula. I followed exactly the guide, but at point D.4) 7.) the booting process definitively stops (after several intermediate interruptions): here is a picture. Please, could anyone help me? Thank you!

What exact adapter cable is being used? That may make a difference, because of the USB -> SATA translation circuitry within the adapter cable.
Another option: simply clone the "partition prepared" (but: otherwise empty) 2.5" SSD to the NVMe SSD.
Use the adapter cable (USB-C -> SATA) only in preparation of the external 2.5" SSD's partitions (using the macOS Disk Utility) for macOS.
Then install both SSDs onto the internal ports of the X299 motherboard, and clone the empty 2.5" SSD to the NVMe SSD.
And then install macOS (via the USB thumb drive method) with only the NVMe SSD installed on the M.2 motherboard slot.
The internal port being more macOS friendly (compared with using a USB adapter cable) during actual macOS installation.
Also note: for a dual-boot Windows/macOS system, you'd want to only have a single target drive connected during either O.S. installation. Afterwards, use the F-key boot menu for the alternate drive boot selection.
 
Last edited:
#Update#

If you're using an NVIDIA GTX 1080ti; do NOT enable Gsync or else you will cause crashes on boot up if used in conjunction with thunderbolt.
 
What exact adapter cable is being used? That may make a difference, because of the USB -> SATA translation circuitry within the adapter cable.
Another option: simply clone the "partition prepared" (but: otherwise empty) 2.5" SSD to the NVMe SSD.
Use the adapter cable (USB-C -> SATA) only in preparation of the external 2.5" SSD's partitions (using the macOS Disk Utility) for macOS.
Then install both SSDs onto the internal ports of the X299 motherboard, and clone the empty 2.5" SSD to the NVMe SSD.
And then install macOS (via the USB thumb drive method) with only the NVMe SSD installed on the M.2 motherboard slot.
The internal port being more macOS friendly (compared with using a USB adapter cable) during actual macOS installation.
Also note: for a dual-boot Windows/macOS system, you'd want to only have a single target drive connected during either O.S. installation. Afterwards, use the F-key boot menu for the alternate drive boot selection.
I did so:


1) prepared on my MacBook Pro the USB flash drive following the point D3.) of the guide;

2) formatted the 2.5” SSD using the macOS Disk Utility and copied on the EFI partition the same - with Clover Configurator modified - EFI folder I have on the USB flash drive;

3) connected the 2.5” SSD to an internal SATA port;

4) inserted the USB flash drive into an USB socket on the case;

5) tried to install High Sierra, without success.


Note 1: The USB socket I used is connected via an internal USB hub to the Asus Prime X299 Deluxe MB USB78 connector.


Note 2: To the M.2_1 socket is connected a Samsung 960 Pro 1TB NVMe SSD with a previous Windows 10 installation.
 
Just tested the Logic X performance with Test Hyperthreading Bug.logicx under 10.13.4 SU

No issues at all and everything as expected!

Cheers,

KGP

Thanks @kgp was this on the latest version of Logic X 10.4.1?

I noticed the Intel power gadget shows a very staggered power and utilisation graph. and the hyperthreading bars refuse to drop down from 100 % after hitting stop even though the playhead and meters are not showing anything.

Is this familiar behaviour in anyway?
 
Last edited:
4) inserted the USB flash drive into an USB socket on the case;
5) tried to install High Sierra, without success.
Note 1: The USB socket I used is connected via an internal USB hub to the Asus Prime X299 Deluxe MB USB78 connector.
Note 2: To the M.2_1 socket is connected a Samsung 960 Pro 1TB NVMe SSD with a previous Windows 10 installation.

I think you may have missed the step of re-formatting the NVMe SSD, before attempting macOS installation on that drive.
I would not recommend trying to keep the Windows installation on that same drive.
So: between steps 4 & 5, re-format the NVMe SSD while the X299 system is booted from the USB thumb drive, using Disk Utility. Or else: clone the (pre-formatted, but otherwise empty) 2.5" SSD to the NVMe SSD. There are 3rd-party disk cloning tools, if Disk Utility is unable.

Edit: I forgot to mention another easier method: there exist USB-C thumb drives, such as:
https://www.amazon.com/dp/B01GFCL6TU/?tag=tonymacx86com-20
Should allow creating a macOS installation medium on your MacBook, and then using that as a bootable USB-C thumb drive for installing macOS onto your X299 NVMe SSD. That's assuming: the X299 board includes a USB-C port.
 
Last edited:
I received my Asus Prime X299-Deluxe. I bought a used one from a retailer at a really great price so couldn't pass it up. There are 2 SATA cables missing, a missing thermometer cable (2 out 3 are present), and a missing Mini-DP to DP cable which I have some laying around but don't really need anyway, but otherwise everything else appears to be there. Oddly there is an "ASUS HYPER M.2 X4 MINI" PCIE card. It's not listed in any of the parts lists I can find for the motherboard. It's a PCIE X4 card with an M.2 slot on it for accommodating 2230, 2242, 2260, 2280, and 22110 cards. Are these supposed to come with the motherboard? The specs only list the 2 M.2 slots that are on the motherboard and not this additional one via PCIE card.

Still awaiting more parts to be able to put this computer together...
 
Thanks @kgp was this on the latest version of Logic X 10.4.1?

I noticed the Intel power gadget shows a very staggered power and utilisation graph. and the hyperthreading bars refuse to drop down from 100 % after hitting stop even though the playhead and meters are not showing anything.

Is this familiar behaviour in anyway?

No, I used version 10.3.3.. and no, the behaviour you observe is not usual, if everything is set as required and as outlined in my guide.
 
Thanks a lot for this guide and perfect imacPro.
I would like to implement a PCI Card Marvell 88se9230 in PCIe 4, can you help me?

el9x0bp


wziVHvb
 

Attachments

  • Captura de pantalla 2018-05-10 21.56.22.png
    Captura de pantalla 2018-05-10 21.56.22.png
    256.6 KB · Views: 86
I received my Asus Prime X299-Deluxe. I bought a used one from a retailer at a really great price so couldn't pass it up. There are 2 SATA cables missing, a missing thermometer cable (2 out 3 are present), and a missing Mini-DP to DP cable which I have some laying around but don't really need anyway, but otherwise everything else appears to be there. Oddly there is an "ASUS HYPER M.2 X4 MINI" PCIE card. It's not listed in any of the parts lists I can find for the motherboard. It's a PCIE X4 card with an M.2 slot on it for accommodating 2230, 2242, 2260, 2280, and 22110 cards. Are these supposed to come with the motherboard? The specs only list the 2 M.2 slots that are on the motherboard and not this additional one via PCIE card.

Still awaiting more parts to be able to put this computer together...

As far I know, the ASUS HYPER M.2 X4 MINI PCIE card usually is not part of the box..
 
No, I used version 10.3.3.. and no, the behavior you observe is not usual, if everything is set as required and as outlined in my guide.


I am going to recheck your guide again. I don't think I've changed anything in the bios. for a long time. it used to work properly before for sure! but I can't remember if it did after the new 1301 unpatched unlocked bios and logic 10.4 or before 10.13.4 updates. it was perfect the first time I just built my system which was definitely 10.13.3 on 1202 bios if I'm not mistaken.

my geekbench scores are fine as is general system stability, ill check of the MSR 0xE2 registers are unlocked or changed etc.

Thanks again mate.
 
  • Like
Reactions: kgp
Status
Not open for further replies.
Back
Top