
- Joined
- May 27, 2010
- Messages
- 2,364
- Motherboard
- Dell Optiplex 9030 All in One
- CPU
- i5-4690K
- Graphics
- HD 4600
- Mac
- Classic Mac
- Mobile Phone

This is my Haswell NUC mod inside my Mac Mini case.
The mod was great fun to do, as I had to re-think things several times on exactly what, where, how.
The result though is a stunning little box inspired by the original Mac Mini, but brought up to date.
The conversion process can be followed in my build thread, where you can read all the details.
Key Features:
Cooling
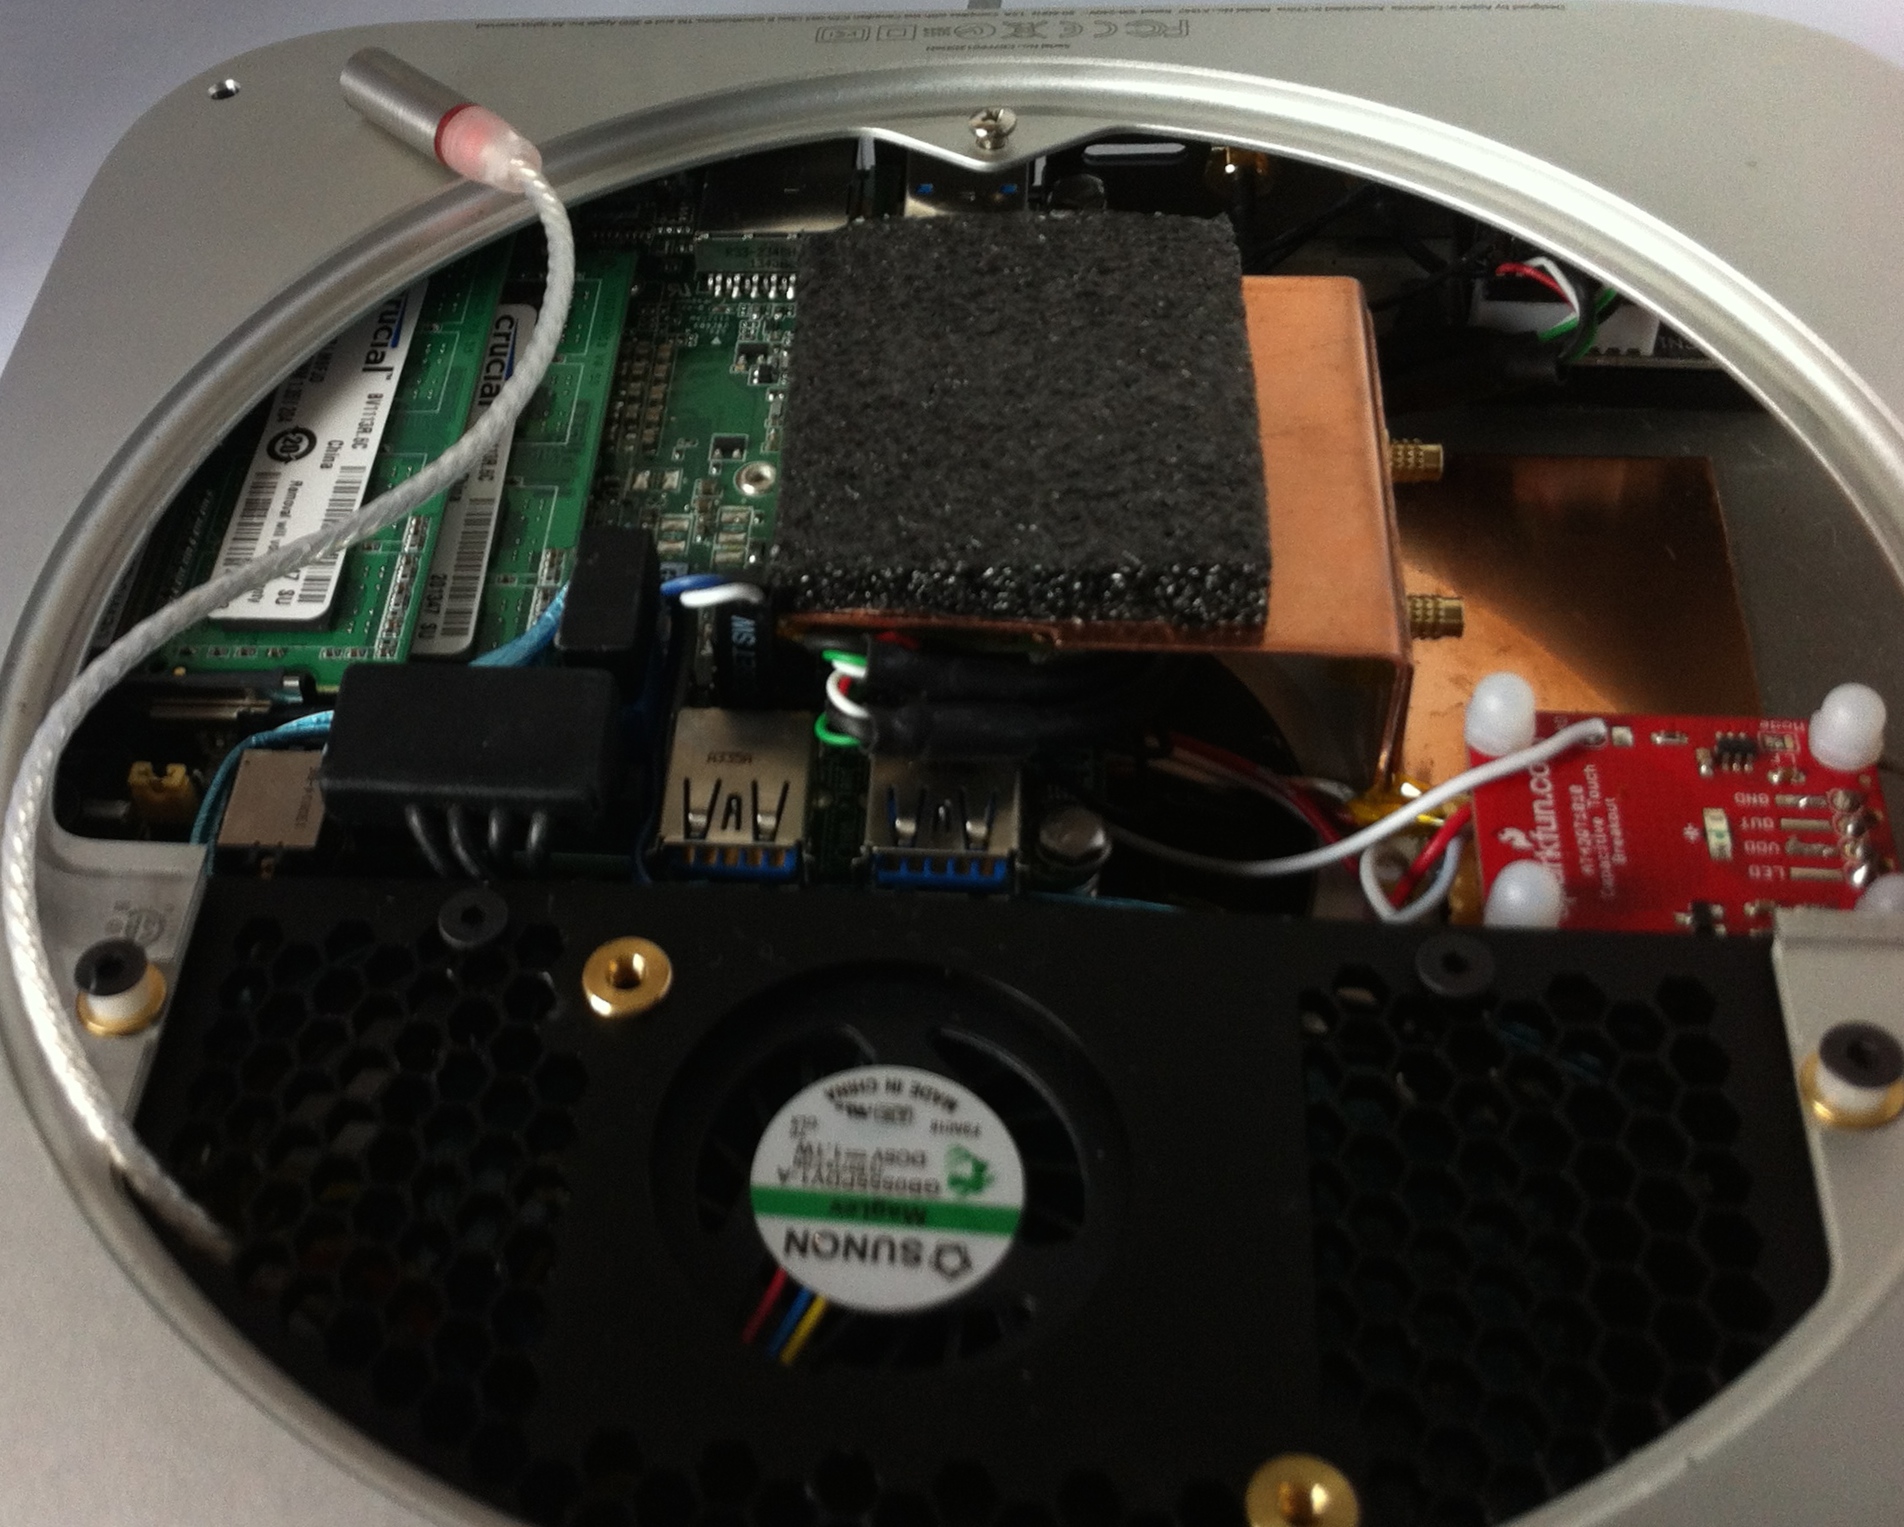
Generally passive cooled conversion: I designed and made my own heat plates to thermally connect the CPU and the mSATA card to the aluminium Mac Mini case. The heat spreader for the CPU involved re-using the base of the stock NUC heatsink and then chopping up some 3mm aluminium from an old G5 to make my own heat spreader/roof tray - here is a jpg of the footprint of the heat spreader plate (pdf is attached for you to make your own!):
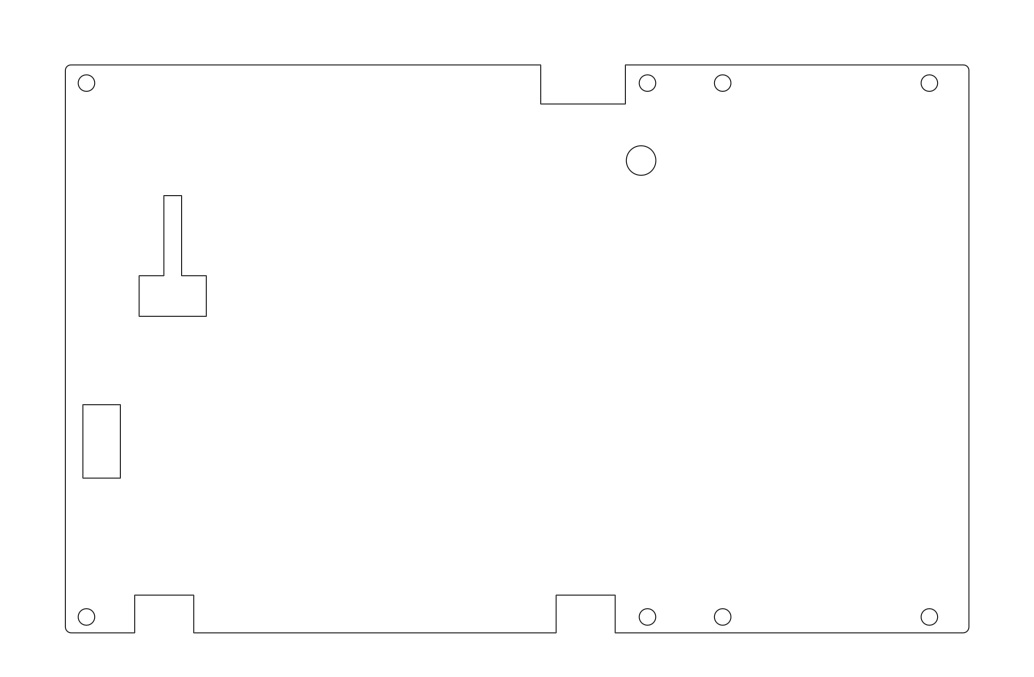
The final version in the case is based on the drawing, but I cut it down to be inside the NUC mobo footprint and then used Arctic silver 2 part thermal adhesive to bond it to the Mac Mini roof.
The mobo is sprung connected to the roof tray and the springs progressively tightened down in each corner for a level, firm thermal connection that exhibits minimal bending of the NUC mobo (!).
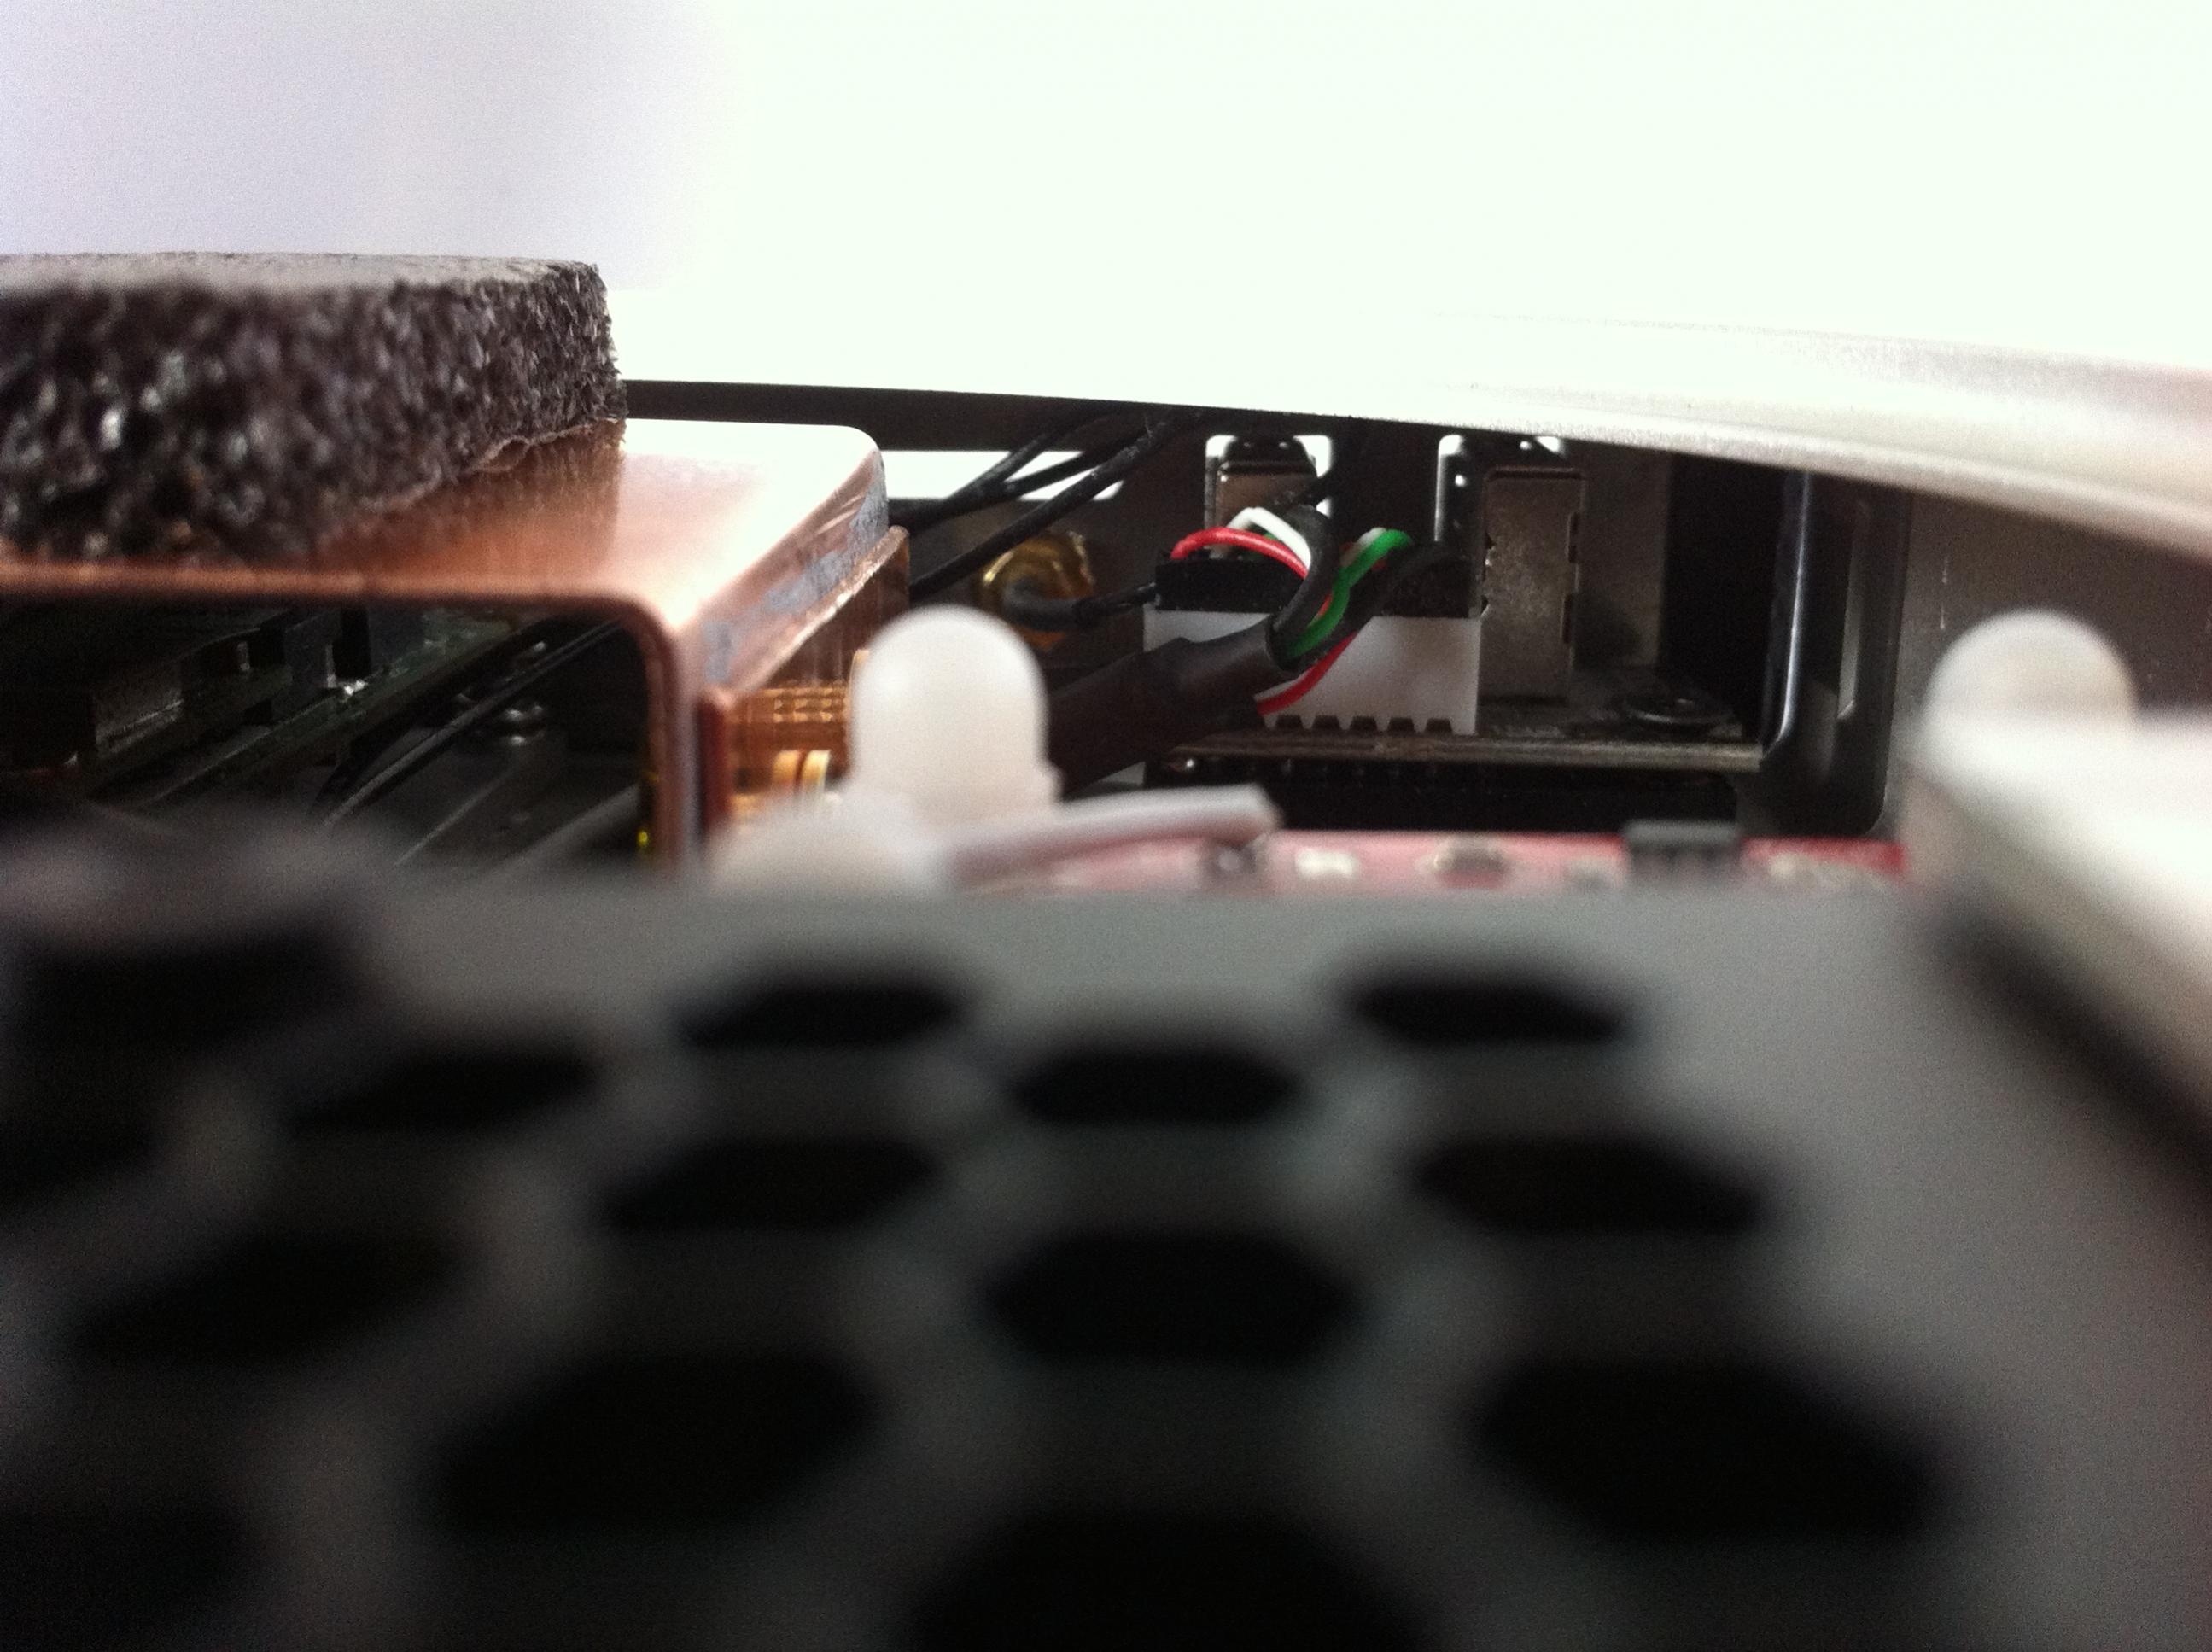
The mSATA drive is thermally connected to the case by a zig zag of two pieces of bent 0.5mm copper sheet:

As the mSATA has memory chips and controller chip at different heights I used different thickness contact shims under the "zig". The Zag is epoxied (AS 2 part again) to the roof and at the joint area matching holes and slots allow the parts to be positioned optimally - while the lump of foam is there to ensure that when the spin off base cover is attached some gentle pressure is always applied to the mSATA so that the good thermal connection should remain solid over time.
A final cooling element is re-use of the NUC fan. Reason? In extended use the mechanical hard drive can get a little warm - so the fan sits on top of it and as the fan spins, cool air from the base vent is pulled in and it works a treat to take a few degrees off of the HD temp. Duty cycle for the fan can be manually set in the UEFI bios so that it all stays lovely and silent.
Touch control
Partly for the "cool" factor, but also to keep down clutter on the rear panel, I went for a capacitive touch switch underneath the apple logo.
[video=youtube_share;nNUuxtCTpds]http://youtu.be/nNUuxtCTpds[/video]
SparkFun capacitive board with a simple wire antenna made from copper tape, works hand in hand with an IC type reed relay to provide a momentary switch.

Fusion Drive
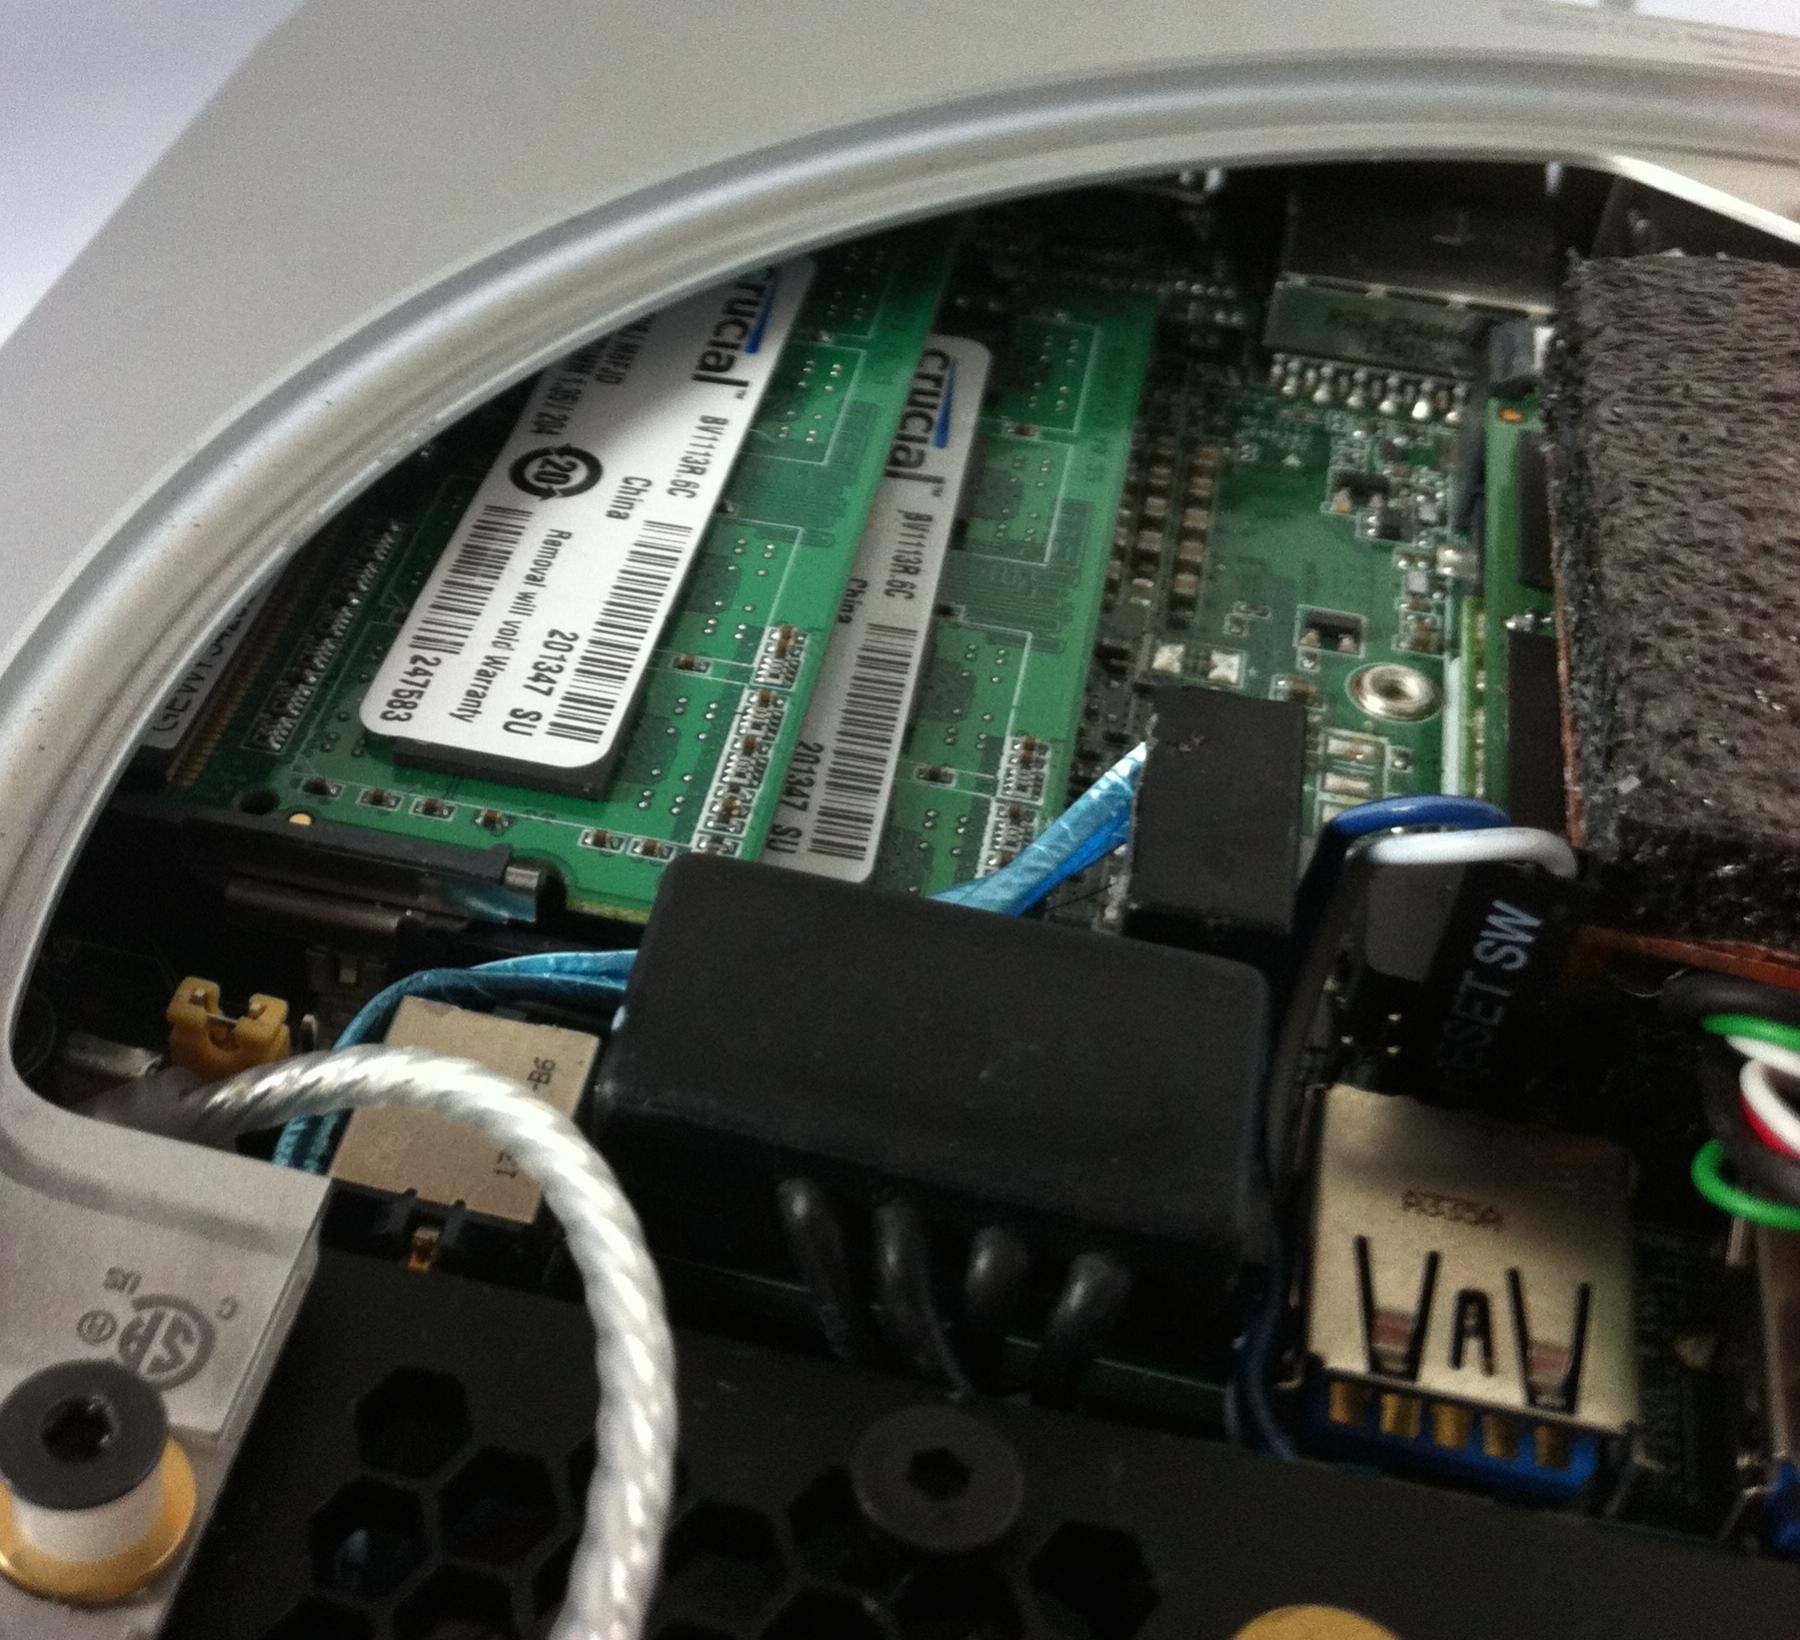
The great thing about the more recent Haswell NUCs is that as well as having an mSATA slot they also have a regular SATA connection - just begging to be "fused".
The laptop SATA of 1TB and a 120GB Crucial mSATA makes a relatively low cost way of having a high capacity yet fast machine.
The mechanical drive is under my little NUCgrill plate (pdf file attached if you want to have one made):
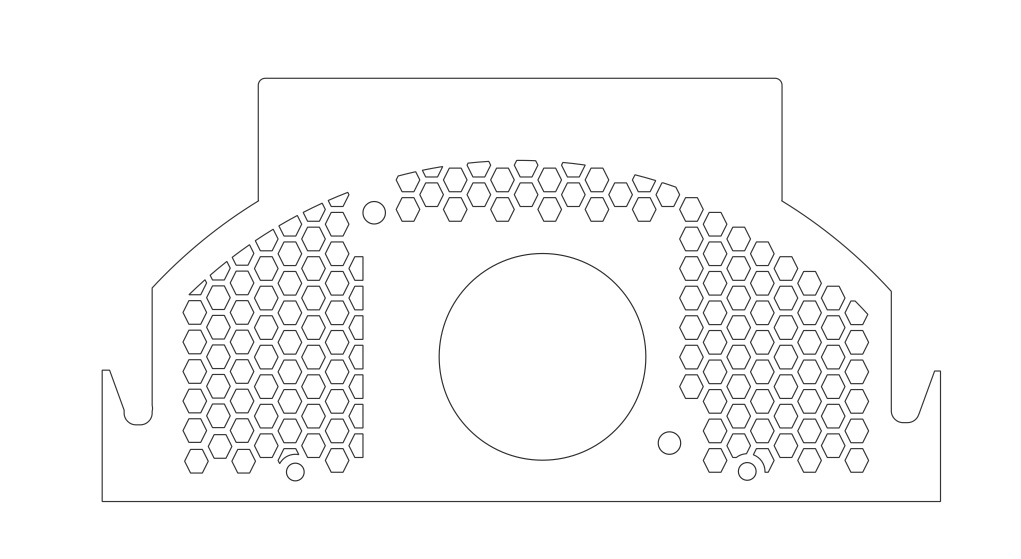
The, plate as well as having mounts for the fan, has a couple of 3mm holes through which screws attach to standoffs, and the standoffs attach into the mounting holes on the underside of the laptop drive. The little slots on the side locate the plate positively against some threaded mounts I made for the spinoff case cover mounts.
This plate has multi functions - fan mount, HD mount, ventilated design and also as a stowing place for the combined analog audio output:

The reason for this solution was: (a) I use HDMI/DP with digital audio 99% of the time so I don't really need the analog output/input; (b) rear panel space is precious! BUT I really want to keep the option for headset use, so this provides a handy way to simply uncoil the extension and lead it through a slot in the base cover periphery when needed. Deployed or stowed in 30 seconds and, when not in use, nobody would know it was there. [My worries about interference from the analog audio 3mm plug being always "on" were unfounded and in fact this does not seem to cause any issues.... ].
Extra USB ports
My final solution was to, instead of cutting up USB 3.0 cables and try to mount to the rear, to use the USB 2.0 part from a bit fenix front panel together with custom made 2mm pitch header extensions from a UK company called PC Parts and cables. For the incredibly cheap price of £9 inclusive postage I got two 15cm header to header cables that give a neat conversion.
This was chosen over USB 3.0 because the USB 3 connections have 9 conductors and are really difficult to route inside a tight case. So in total I have 2 USB 3.0 and 2 USB 2.0 rear panel connections.
Custom Rear Panel
I really do not like just having an open back to the case, so having found a chinese supplier of a rear bracket for the case that was tailored for a mini ITX board:
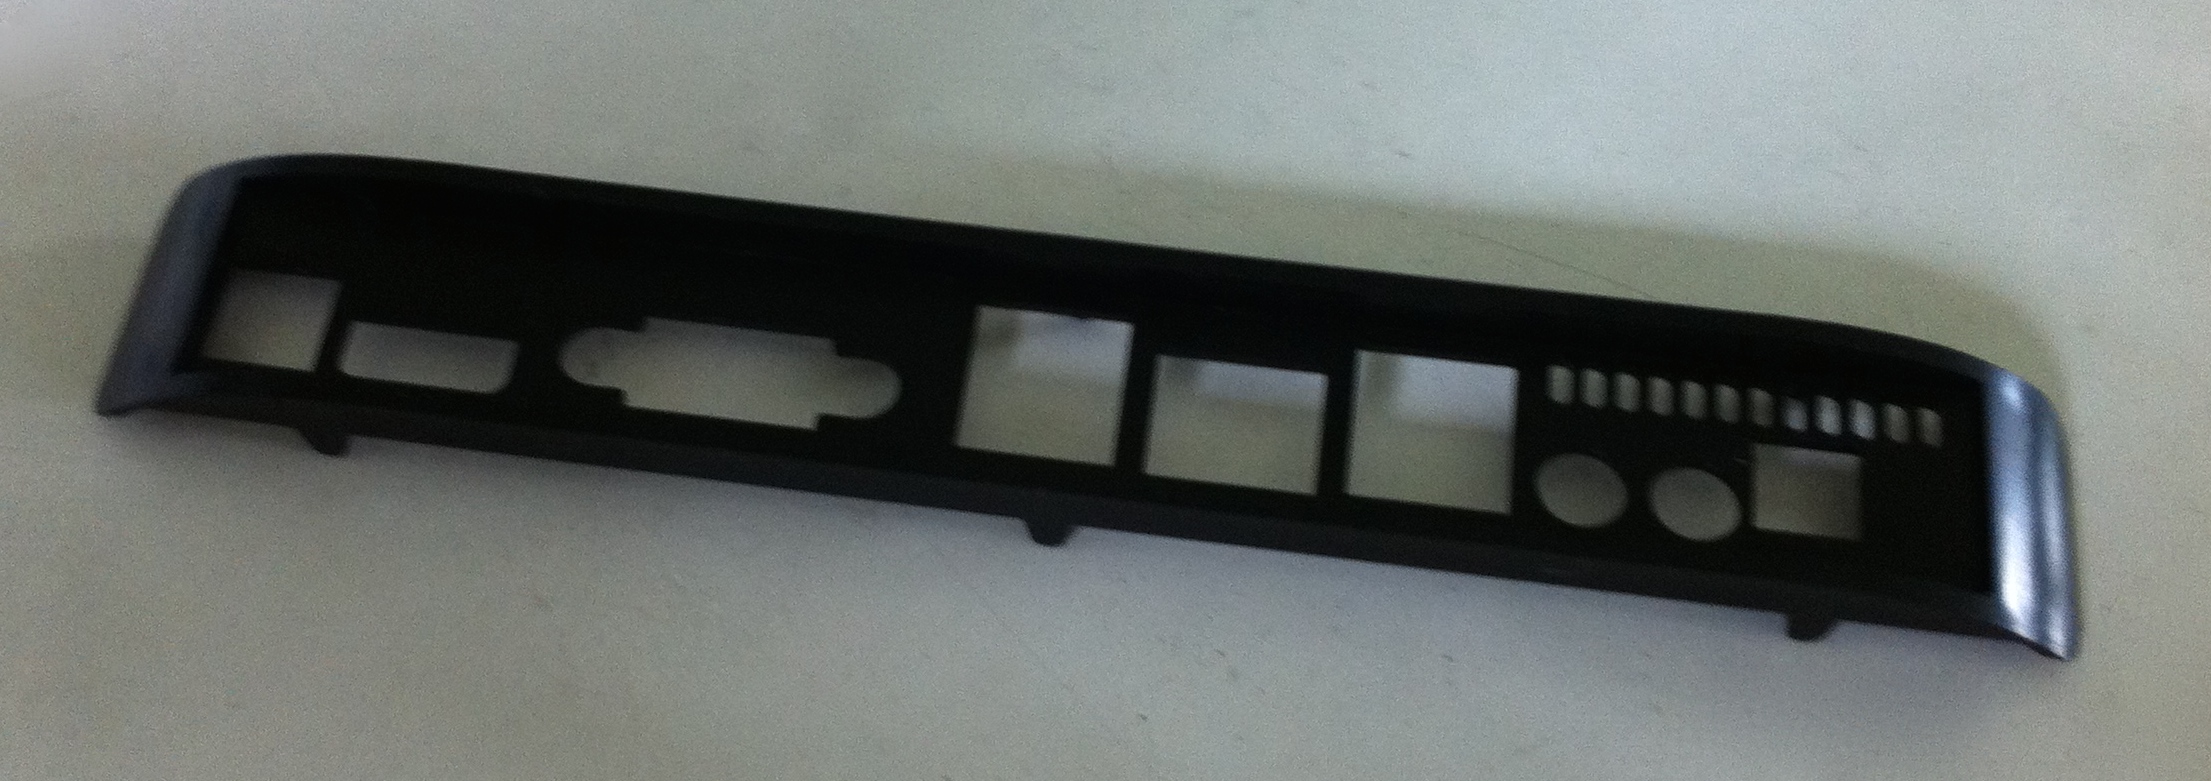
I cut out the parts I did not want to leave a bare frame and then had a plate made up to this design:
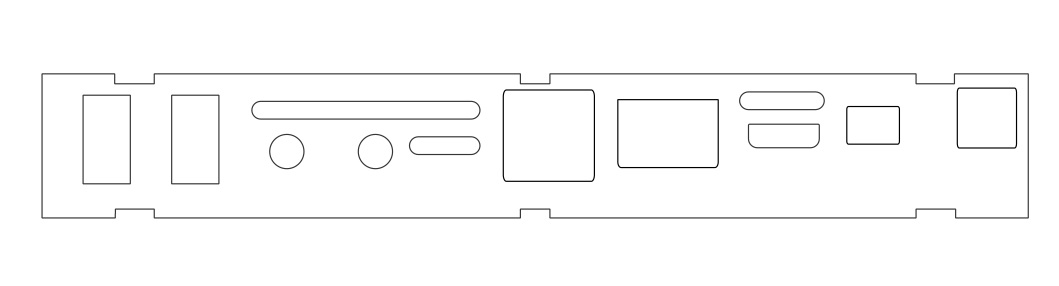
and epoxied it into the chinese part:


Then to smarten it some more I sprayed it black and cut a piece from grey craft foam to this design:
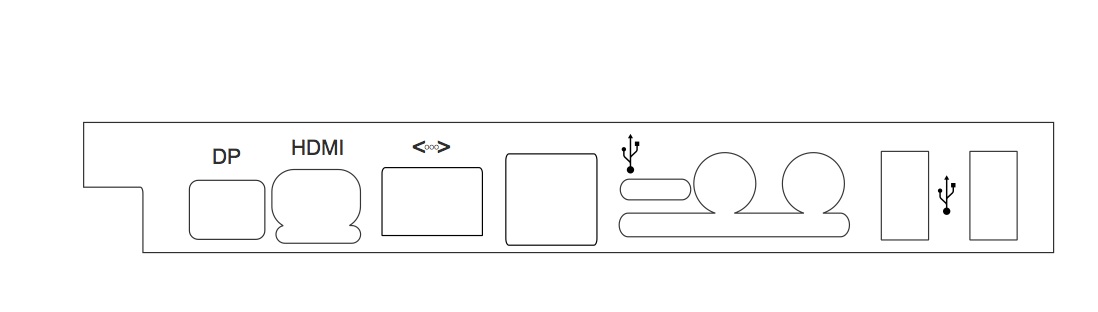
and glued it to my new plate:
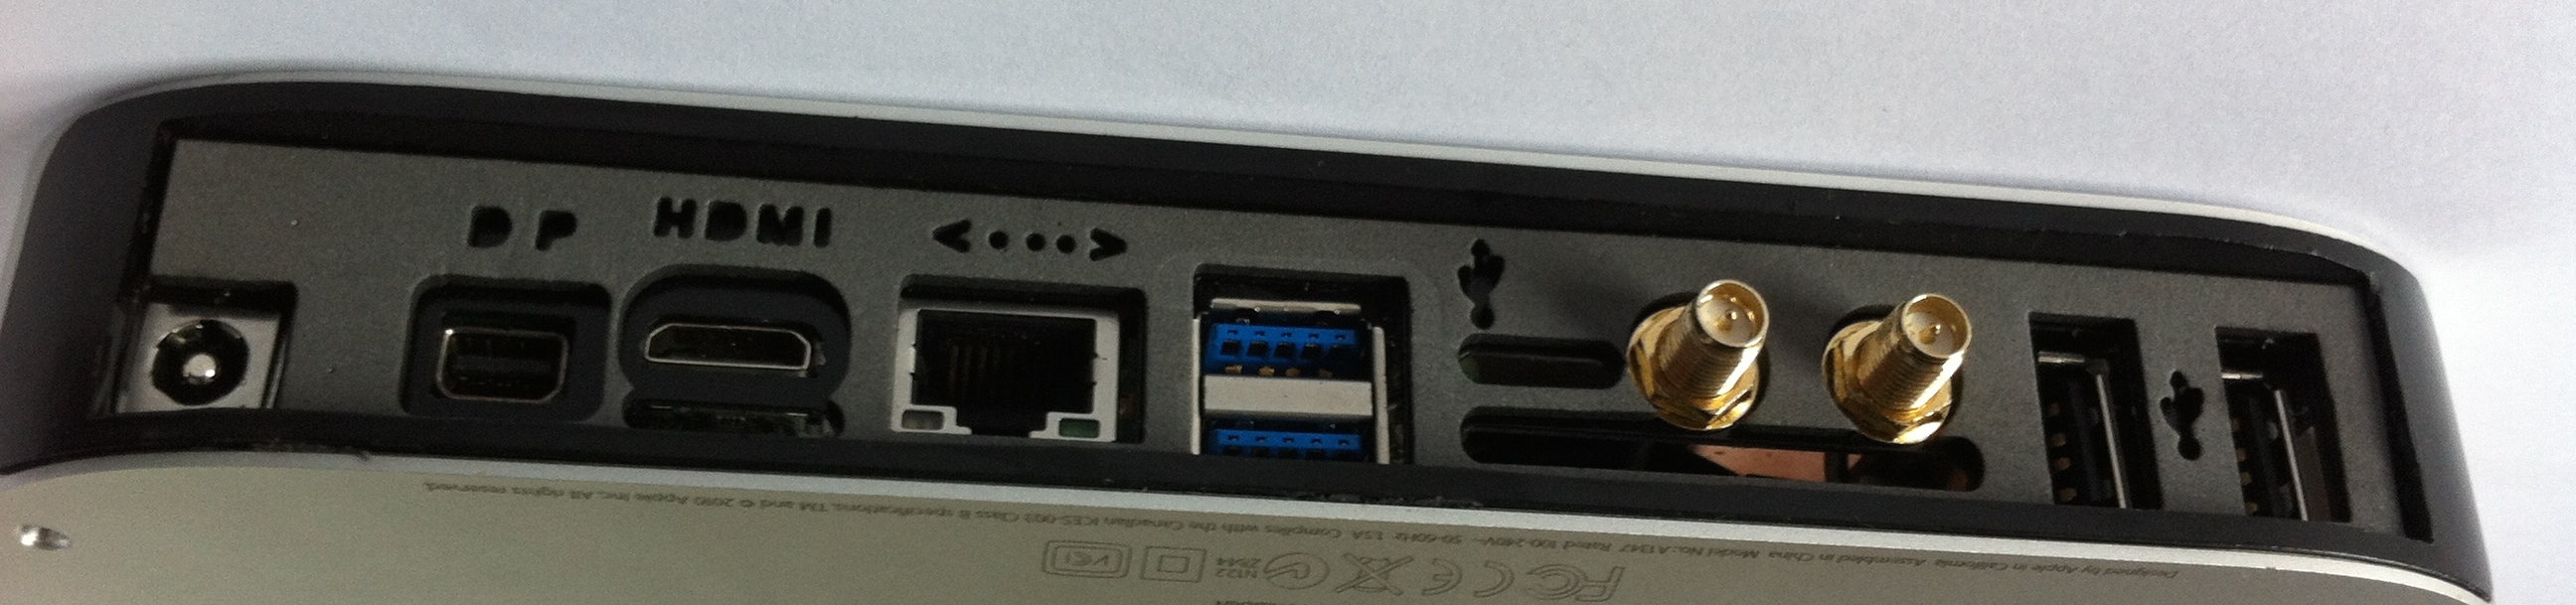
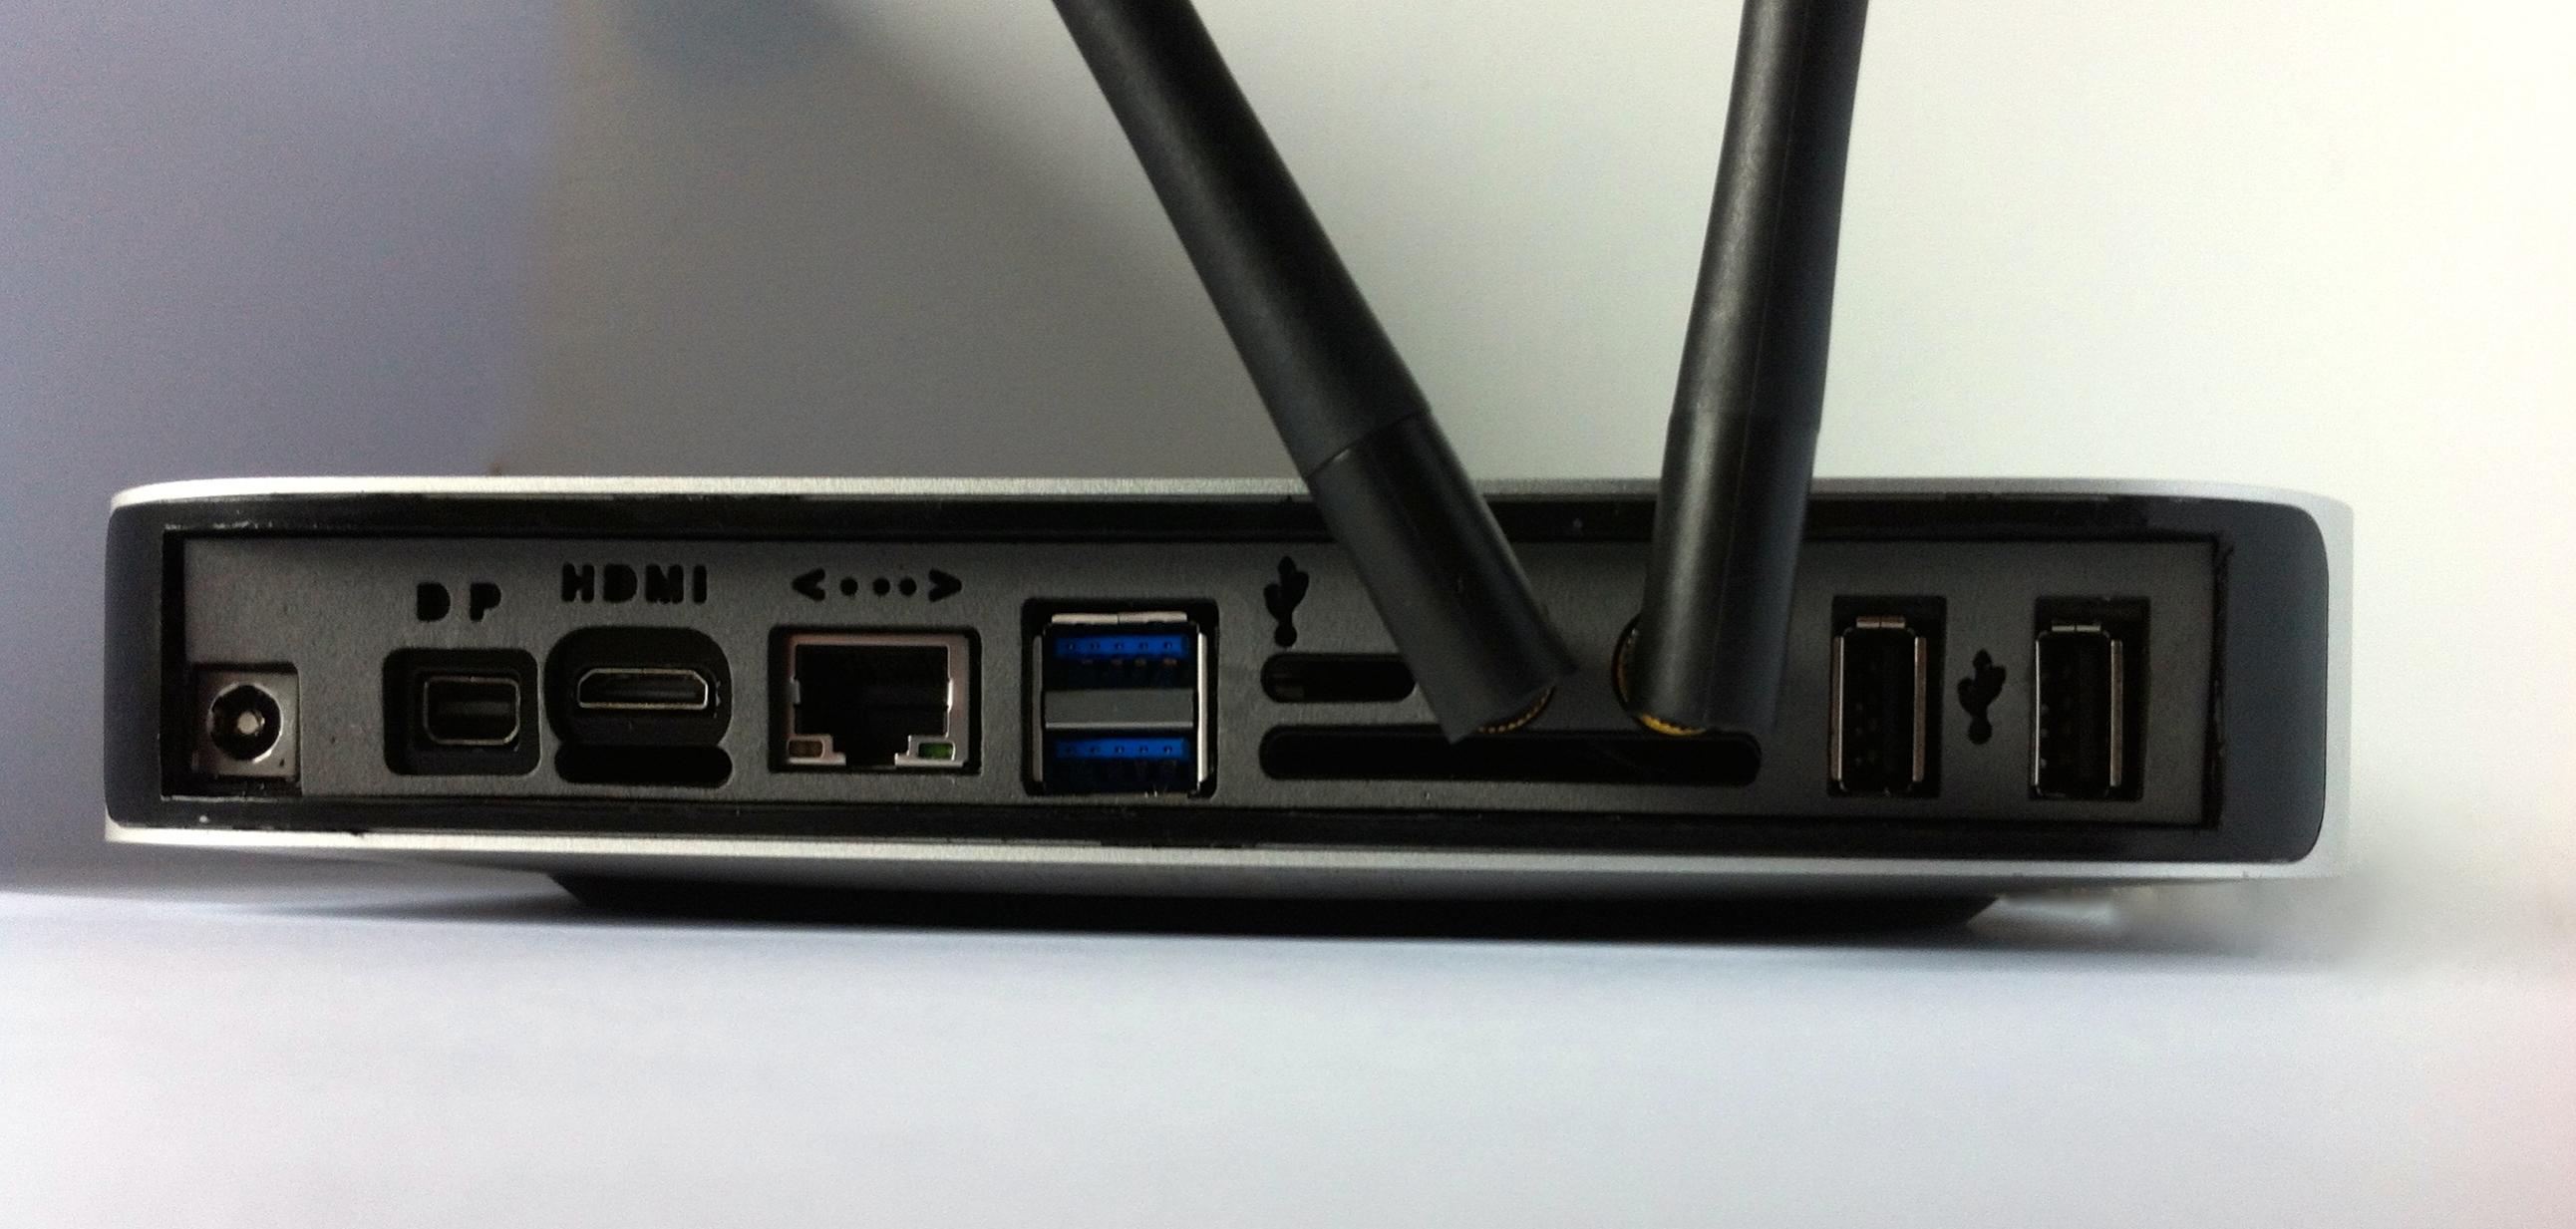
Again, files for cutting these parts are in the attached folder.
Conclusions
I am very pleased with the way this turned out. To me, it looks great inside and out and is a fitting update to the Mac Mini ethos. Performance is surprisingly good and it does not over heat even when confronted with intensive task such as video conversion. Developing this mod made me think hard about a case i had never before considered and gave me (yet again) a new respect for Apple Engineers - I hope they see this mod and hurry up with their own Haswell (or Broadwell) Mini!!
Attachments
Last edited by a moderator:
")