- Joined
- Jun 9, 2013
- Messages
- 10,289
- Motherboard
- ASUS ROG STRIX Z390-F GAMING
- CPU
- i5 8500
- Graphics
- RTX 570
- Mac
- Mobile Phone
So heres a guide on MacOS Sierra 10.12.1 up and running on Z97N-WIFI, H97N-WIFI With Nvidia Graphics. This guide will work with 10.9, 10.10. Although I run Mavericks on a second partition.
Guide to install 10.11.6 with Intel HD 4600.
https://www.tonymacx86.com/threads/...tel-hd4600-using-clover-uefi-hotpatch.203416/
Guide to install 10.11.6 With Nvidia Graphics.
https://www.tonymacx86.com/threads/...a-graphics-using-clover-uefi-hotpatch.206282/
My configuration on my H97N-WIFI Build.
This Guide will also work on Z97N-WIFI Also other Z97/H87 boards will work with this guide.
Things you will need.
16GB USB Flash Drive
macOS Sierra 10.12 downloaded from Mac App Store.
A Mac or a working Hackintosh to download macOS 10.12.1 from Mac App Store and to create installation Pen Drive.
Set of SSDTs. Credits to Rehabman for his help with SSDT-USB & SSDT-HACK.
New set of Config.plists. installer_nvidia_graphics & post_install_nvidia_graphics are for native cards that don't require Nvidia Web Drivers. installer_nvidia_graphics_nvdia_disable=1 & post_install_nvidia_graphics_nvidiaweb are for cards that requires Nvidia Web Drivers.
Bios Settings
You can use factory defaults. But due to my SSDT-UIAC I recommend to have XHCI set to enabled not Auto. VT-d can be left to enabled only if you have dart=0 in config.plist. If you decide to disable VT-d then no need to worry about having dart=0 in config.plist. Recommend not using Beta BIOS. Stay at BIOS F8. Set Boot settings to UEFI Only. Enable XMP Profile 1.
Creating USB
I used createmediainstall using Terminal and install Clover Manually.
Erase USB Boot stick as OS X Extended (Journaled), GUID Partition Map. Naming the Drive as USB. Open. Terminal and copy and paste.
Wait till files are done copying. Now we can move onto install Clover to the Pen drive. At the time of this guide Clover version was 3882.
Open up Clover. Continue, Continue again, Change install location to you're USB drive. Now click on Customise, Now we need to install correct settings for Clover.
To Clone my fork you will need to download developer tools and install using Terminal.
Now to Clone my fork using Terminal.
Location of files from my fork will be downloaded to ~(You're Name).
Settings for Clover.
Install For UEFI Booting only.
Install Clover in the ESP.
Theme (select one as you prefer I choose bootcamp)
Drivers64UEFI, OsxAptioFixDrv. (Don't use OsxAptioFixDrv2 it causes problems)
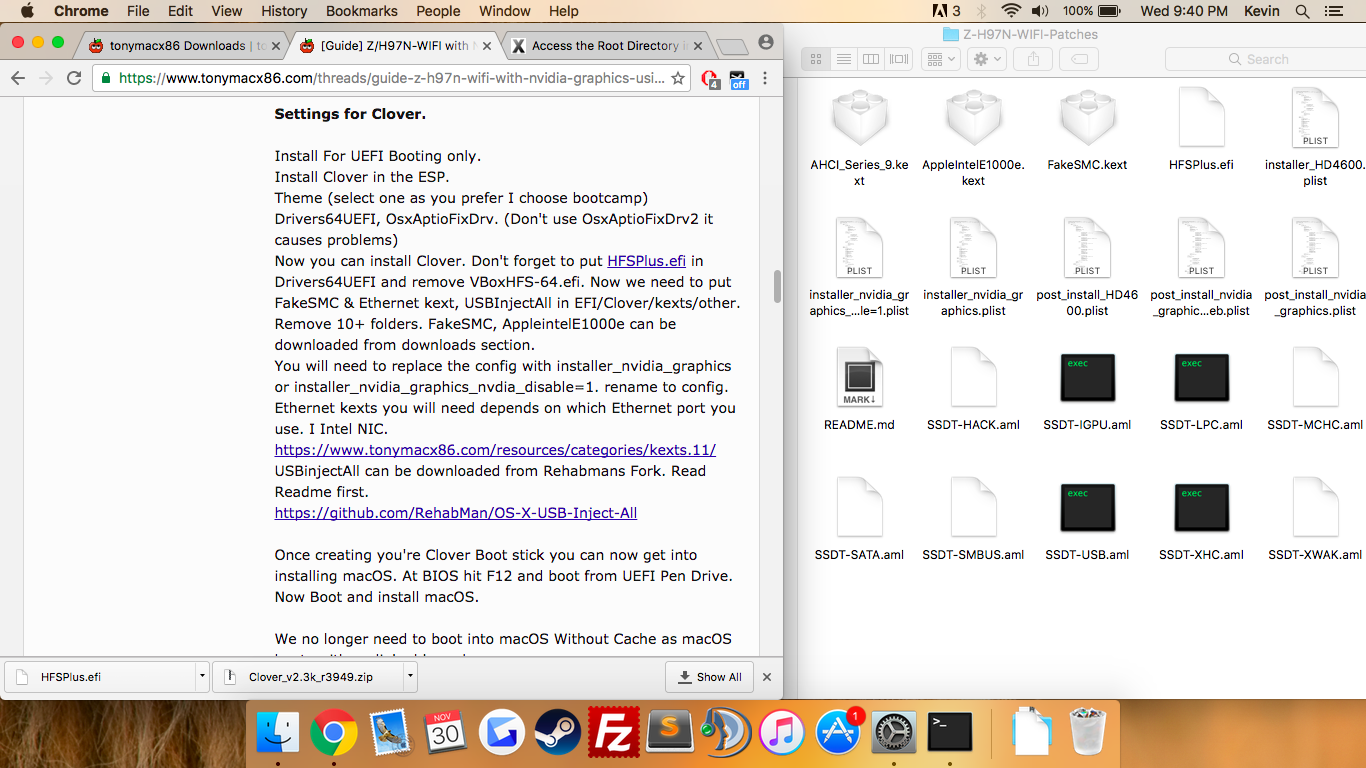
Now you can install Clover. Don't forget to put HFSPlus.efi in Drivers64UEFI and remove VBoxHFS-64.efi. Now we need to put FakeSMC & Ethernet kext, USBInjectAll in EFI/Clover/kexts/other. Remove 10+ folders. FakeSMC, IntelMausiEthernet.kext can be downloaded from downloads section.
You will need to replace the config with installer_nvidia_graphics or installer_nvidia_graphics_nvdia_disable=1. rename to config.
Ethernet kexts you will need depends on which Ethernet port you use. I use IntelMausiEthernet.kext which is on my Github.
USBinjectAll can be downloaded from Rehabmans Fork. Read Readme first.
https://github.com/RehabMan/OS-X-USB-Inject-All
Once creating you're Clover Boot stick you can now get into installing macOS. At BIOS hit F12 and boot from UEFI Pen Drive. Now Boot and install macOS.
We no longer need to boot into macOS Without Cache as macOS boots with prelinked kernel anyway.
Post Installation
At Post Installation you will need to install Clover to you're boot drive. Its pretty much the same as the Pen drive installation. Except you need to put in place the correct config & SSDTs.
Install For UEFI Booting only.
Install Clover in the ESP.
Theme (select one as you prefer I choose bootcamp)
Drivers64UEFI, OsxAptioFixDrv. (Don't use OsxAptioFixDrv2 it causes problems)
You can choose EmuVaribles if it makes you feel nervous but I didnt. Now you can install Clover. Don't forget to put HFSPlus.efi in Drivers64UEFI and remove VBoxHFS-64.efi. Now we need to install FakeSMC, IntelMausiEthernet.kext and USBinjectall in Library/Extensions. Kexts can be downloaded from downloads section.
You will need to replace the config with post_install_nvidia_graphics or post_install_nvidia_graphics_nvidiaweb rename to config.plist. Only need too install Nvidia Web Drivers if you're Nvidia Graphics Card requires Nvidia Web Drivers.
Ethernet kexts you will need depends on which Ethernet port you use. I use IntelMausiEthernet.kext which is on my Github.
download USBinjectall from Rehabmans fork. Read readme.
https://github.com/RehabMan/OS-X-USB-Inject-All
Now we need to put in place a few SSDTs. SSDTs we need are,
These set of SSDTs go in EFI/Clover/ACPI/patched.
Remove config.plist and replace it with the one called post_install_nvidia_graphics or post_install_nvidia_graphics_nvidiaweb and rename to config.plist.
Now we can reboot and boot into macOS without the Pen Drive.
For Native Powermanagement you will need to generate a SSDT using Piker Alpha's ssdtPRGen.sh.Guide can be found here. https://www.tonymacx86.com/threads/quick-guide-to-generate-a-ssdt-for-cpu-power-management.177456/
For Audio. There are two options here. You can use Toledas Clover Audio Injection but I choose to use RehabMans CodecCommander SSDT & CodecCommander.kext. RehabMans CodecCommander can be found on his Fork. But you can Clone his fork. Look at guide to clone his DH67BL fork. Guide https://www.tonymacx86.com/threads/guide-intel-dh67xx-with-hd3000-using-clover-uefi-hotpatch.190228/
As Hibernation isn't supported on a Hackintosh (You will need to disable suspend to disk or S4 sleep) You will need to disable it in Terminal.
After updates you may notice that Audio has stopped working. This can be fixed in Terminal.
Note.
Trim is enabled by the configs in my fork. No need to use sudo trimforce in Terminal. I prefer to use Clovers Fly on patching for Trim.
What works.
Native Power Management.
Full Graphics Acceleration with GTX760.
Sleep/Including Audio after sleep state.
3 Monitors using Nvidia GTX760.
Ethernet Intel & Atheros. But i choose to use Intel NIC.
iMessage and FaceTime. Although i didn't follow the iMessage guide.
USB 3 with full speed.
Beats 1 works but iTunes movies doesn't play due to DRM Protection can be fixed by using Shiki. https://github.com/vit9696/Shiki/releases
Link for iMessage fix https://www.tonymacx86.com/threads/how-to-fix-imessage.110471/
Link to Github for Config and Set of SSDTs & Configs.. https://github.com/VoiletDragon/Z-H97N-WIFI-Patches
Guide to install 10.11.6 with Intel HD 4600.
https://www.tonymacx86.com/threads/...tel-hd4600-using-clover-uefi-hotpatch.203416/
Guide to install 10.11.6 With Nvidia Graphics.
https://www.tonymacx86.com/threads/...a-graphics-using-clover-uefi-hotpatch.206282/
My configuration on my H97N-WIFI Build.
- GA-H97N-WIFI.
- Core i7 4790.
- Nvidia Gigabyte GTX 760 3 monitors.
- Corsair RM 650.
- Corsair Vengeance LP 16GB.
- Bitfenix Prodigy Case.
- Apple BCM94602CS in Mini PCI-E Adaptor.
- Apple Magic Mouse 2, Apple Keyboard 2.
- 3x ASUS VE248H.
This Guide will also work on Z97N-WIFI Also other Z97/H87 boards will work with this guide.
Things you will need.
16GB USB Flash Drive
macOS Sierra 10.12 downloaded from Mac App Store.
A Mac or a working Hackintosh to download macOS 10.12.1 from Mac App Store and to create installation Pen Drive.
Set of SSDTs. Credits to Rehabman for his help with SSDT-USB & SSDT-HACK.
New set of Config.plists. installer_nvidia_graphics & post_install_nvidia_graphics are for native cards that don't require Nvidia Web Drivers. installer_nvidia_graphics_nvdia_disable=1 & post_install_nvidia_graphics_nvidiaweb are for cards that requires Nvidia Web Drivers.
Bios Settings
You can use factory defaults. But due to my SSDT-UIAC I recommend to have XHCI set to enabled not Auto. VT-d can be left to enabled only if you have dart=0 in config.plist. If you decide to disable VT-d then no need to worry about having dart=0 in config.plist. Recommend not using Beta BIOS. Stay at BIOS F8. Set Boot settings to UEFI Only. Enable XMP Profile 1.
Creating USB
I used createmediainstall using Terminal and install Clover Manually.
Erase USB Boot stick as OS X Extended (Journaled), GUID Partition Map. Naming the Drive as USB. Open. Terminal and copy and paste.
Code:
sudo /Applications/Install\ macOS\ Sierra.app/Contents/Resources/createinstallmedia --volume /Volumes/USB --applicationpath /Applications/Install\ macOS\ Sierra.appWait till files are done copying. Now we can move onto install Clover to the Pen drive. At the time of this guide Clover version was 3882.
Open up Clover. Continue, Continue again, Change install location to you're USB drive. Now click on Customise, Now we need to install correct settings for Clover.
To Clone my fork you will need to download developer tools and install using Terminal.
Code:
gitNow to Clone my fork using Terminal.
Code:
mkdir~/Z-H97N-WIFI-Patches
cd~/Z-H97N-WIFI-Patches
git clone https://github.com/VoiletDragon/Z-H97N-WIFI-Patches.git
Location of files from my fork will be downloaded to ~(You're Name).
Settings for Clover.
Install For UEFI Booting only.
Install Clover in the ESP.
Theme (select one as you prefer I choose bootcamp)
Drivers64UEFI, OsxAptioFixDrv. (Don't use OsxAptioFixDrv2 it causes problems)
Now you can install Clover. Don't forget to put HFSPlus.efi in Drivers64UEFI and remove VBoxHFS-64.efi. Now we need to put FakeSMC & Ethernet kext, USBInjectAll in EFI/Clover/kexts/other. Remove 10+ folders. FakeSMC, IntelMausiEthernet.kext can be downloaded from downloads section.
You will need to replace the config with installer_nvidia_graphics or installer_nvidia_graphics_nvdia_disable=1. rename to config.
Ethernet kexts you will need depends on which Ethernet port you use. I use IntelMausiEthernet.kext which is on my Github.
USBinjectAll can be downloaded from Rehabmans Fork. Read Readme first.
https://github.com/RehabMan/OS-X-USB-Inject-All
Once creating you're Clover Boot stick you can now get into installing macOS. At BIOS hit F12 and boot from UEFI Pen Drive. Now Boot and install macOS.
We no longer need to boot into macOS Without Cache as macOS boots with prelinked kernel anyway.
Post Installation
At Post Installation you will need to install Clover to you're boot drive. Its pretty much the same as the Pen drive installation. Except you need to put in place the correct config & SSDTs.
Install For UEFI Booting only.
Install Clover in the ESP.
Theme (select one as you prefer I choose bootcamp)
Drivers64UEFI, OsxAptioFixDrv. (Don't use OsxAptioFixDrv2 it causes problems)
You can choose EmuVaribles if it makes you feel nervous but I didnt. Now you can install Clover. Don't forget to put HFSPlus.efi in Drivers64UEFI and remove VBoxHFS-64.efi. Now we need to install FakeSMC, IntelMausiEthernet.kext and USBinjectall in Library/Extensions. Kexts can be downloaded from downloads section.
You will need to replace the config with post_install_nvidia_graphics or post_install_nvidia_graphics_nvidiaweb rename to config.plist. Only need too install Nvidia Web Drivers if you're Nvidia Graphics Card requires Nvidia Web Drivers.
Ethernet kexts you will need depends on which Ethernet port you use. I use IntelMausiEthernet.kext which is on my Github.
download USBinjectall from Rehabmans fork. Read readme.
https://github.com/RehabMan/OS-X-USB-Inject-All
Now we need to put in place a few SSDTs. SSDTs we need are,
Code:
SSDT-GFX0These set of SSDTs go in EFI/Clover/ACPI/patched.
Remove config.plist and replace it with the one called post_install_nvidia_graphics or post_install_nvidia_graphics_nvidiaweb and rename to config.plist.
Now we can reboot and boot into macOS without the Pen Drive.
For Native Powermanagement you will need to generate a SSDT using Piker Alpha's ssdtPRGen.sh.Guide can be found here. https://www.tonymacx86.com/threads/quick-guide-to-generate-a-ssdt-for-cpu-power-management.177456/
For Audio. There are two options here. You can use Toledas Clover Audio Injection but I choose to use RehabMans CodecCommander SSDT & CodecCommander.kext. RehabMans CodecCommander can be found on his Fork. But you can Clone his fork. Look at guide to clone his DH67BL fork. Guide https://www.tonymacx86.com/threads/guide-intel-dh67xx-with-hd3000-using-clover-uefi-hotpatch.190228/
As Hibernation isn't supported on a Hackintosh (You will need to disable suspend to disk or S4 sleep) You will need to disable it in Terminal.
Code:
sudo pmset -a hibernatemode 0
sudo rm /var/vm/sleepimage
sudo mkdir /var/vm/sleepimage
After updates you may notice that Audio has stopped working. This can be fixed in Terminal.
Code:
sudo touch /System/Library/Extensions && sudo kextcache -u /Note.
Trim is enabled by the configs in my fork. No need to use sudo trimforce in Terminal. I prefer to use Clovers Fly on patching for Trim.
What works.
Native Power Management.
Full Graphics Acceleration with GTX760.
Sleep/Including Audio after sleep state.
3 Monitors using Nvidia GTX760.
Ethernet Intel & Atheros. But i choose to use Intel NIC.
iMessage and FaceTime. Although i didn't follow the iMessage guide.
USB 3 with full speed.
Beats 1 works but iTunes movies doesn't play due to DRM Protection can be fixed by using Shiki. https://github.com/vit9696/Shiki/releases
Link for iMessage fix https://www.tonymacx86.com/threads/how-to-fix-imessage.110471/
Link to Github for Config and Set of SSDTs & Configs.. https://github.com/VoiletDragon/Z-H97N-WIFI-Patches
Last edited: