- Joined
- Jul 7, 2010
- Messages
- 15
- Motherboard
- Gigabyte z68xp-d3 UEFI
- CPU
- Intel i5-2500k
- Graphics
- AMD 6850
- Mac
- Mobile Phone
Samsung NP880Z5E-X01XX
Yosemite Install Guide.
version 0.2 by Vairn
Introduction
This laptop really was a pain to get OSX installed onto, after what seemed like months of work, I finally got a config which works for me. I have the Australian Model of this laptop, NP880Z5E-X01AU so, this is the only model which I can test on.
What follows is the ONLY way I have made a successful booting USB, so please follow this to the LETTER, otherwise your milage may vary.
Note, if you want to dual boot with windows, you will have to run a command under windows which modifies your bios’s inbuilt UEFI bootloader, just so that it loads clover, and not the Microsoft boot loader. This isn’t needed for the USB installer, or if you will install OSX to an external HDD, or just osx without window. Only needed if you want to dual boot.
This Laptop only has one HDD bay, so you can’t just install it onto another HDD to bypass this.
You could use a USB to boot into clover though, if you are scared of modifying your bios.
Bios Settings:
I have the latest firmware installed, and make sure you turn off secure boot, and set it to UEFI and CSM, and disable fast boot.
TODO: Add Screenshots of my bios settings.
Creating USB Stick
I used Rehabman’s Clover USB Install guide.
http://www.tonymacx86.com/yosemite-...de-booting-os-x-installer-laptops-clover.html
To make a UEFI GPT Disk, I recommend Reading this, I will just list the steps taken to create the USB here. (You need access to a Mac to do this.)
Insert an 8gb or more USB stick into one of your USB Ports.
open up terminal (Applications/Utilities/Terminal)
You now want to know which device is your USB, todo this please type
You will see output similar to the following.
You can see mine here is disk1 since that is my usb, disk0 is my SSD, which you can see has windows, and OSX installed.
You now want to repartition the usb, to be a 1 partition GPT volume, type the following into terminal:
Install Clover, I used verson v2.3k_r3270, here is how Rehabman says to install clover for UEFI.
Ok, now I want you to download the following archive,
https://drive.google.com/file/d/0B1KKq2IXSUYIN0RmY25MaDVCdUk/view
It has all the kext’s needed, and 2 working configs, one for the Installer, and one for Booting OSX.
Just Copy the contents of the archive to your EFI partition.
Easiest way to mount your usb’s EFI Partition, is to do it via the terminal.
if you look at the diskutil output I posted earlier, you shall see that the usb is disk1, and there is an EFI partition on it in slot 1.
So to mount this as a folder, type the following into your terminal window.
Now you can easily copy the files from the zip over.
I will go into how and where I got the files from later, and the patches in the config.plist.")
Now rename config-USB.plist to config.plist, config-OSX.plist is used one OSX is installed!
Cool, now we have installed clover, time to install OSX’s Installer. YOU have to use the BaseBinaries Method, the createinstallmedia way results in a non-working installer, (no idea why, just believe me)
Paraphrasing Rehabman again: BaseBinaries clone method
Booting USB
Turn on your laptop, press f10 at the samsung logo bios screen, and choose UEFI <your USB Name Here> Clover should boot, and choose the osx install by default.
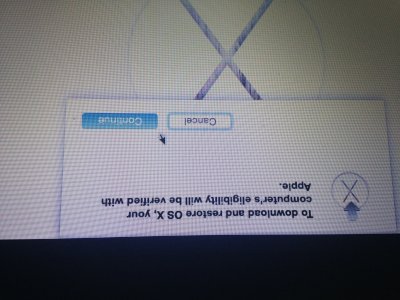
This may take some time to load up. The installer will appear, and you will see some graphics issues, the apple logo will be skewed. about 30% through loading.
There is meant to be a patch for this, but it has never bothered me, since it is only on the loading screen.
POST INSTALL
Still to come
Original Discussion Thread
http://www.tonymacx86.com/mountain-...amsung-ativ-book-8-installation-progress.html
*NOTE* Nicely formated Google Docs version available here.
https://docs.google.com/document/d/...eC49Lw94OPoN6W5zA/edit#heading=h.zgw3b2u2zyec
Yosemite Install Guide.
version 0.2 by Vairn
Introduction
This laptop really was a pain to get OSX installed onto, after what seemed like months of work, I finally got a config which works for me. I have the Australian Model of this laptop, NP880Z5E-X01AU so, this is the only model which I can test on.
What follows is the ONLY way I have made a successful booting USB, so please follow this to the LETTER, otherwise your milage may vary.
Note, if you want to dual boot with windows, you will have to run a command under windows which modifies your bios’s inbuilt UEFI bootloader, just so that it loads clover, and not the Microsoft boot loader. This isn’t needed for the USB installer, or if you will install OSX to an external HDD, or just osx without window. Only needed if you want to dual boot.
This Laptop only has one HDD bay, so you can’t just install it onto another HDD to bypass this.
You could use a USB to boot into clover though, if you are scared of modifying your bios.
Bios Settings:
I have the latest firmware installed, and make sure you turn off secure boot, and set it to UEFI and CSM, and disable fast boot.
TODO: Add Screenshots of my bios settings.
Creating USB Stick
I used Rehabman’s Clover USB Install guide.
http://www.tonymacx86.com/yosemite-...de-booting-os-x-installer-laptops-clover.html
To make a UEFI GPT Disk, I recommend Reading this, I will just list the steps taken to create the USB here. (You need access to a Mac to do this.)
Insert an 8gb or more USB stick into one of your USB Ports.
open up terminal (Applications/Utilities/Terminal)
You now want to know which device is your USB, todo this please type
Code:
diskutil list
Code:
Adams-MacBook-Air:extract Vairn$ diskutil list
/dev/disk0
   #:                       TYPE NAME                    SIZE       IDENTIFIER
   0:      GUID_partition_scheme                        *500.1 GB   disk0
   1: DE94BBA4-06D1-4D40-A16A-BFD50179D6AC               471.9 MB   disk0s1
   2:                        EFI NO NAME                 104.9 MB   disk0s2
   3:         Microsoft Reserved                         16.8 MB    disk0s3
   4:       Microsoft Basic Data                         140.0 GB   disk0s4
   5:                  Apple_HFS OSX                     137.4 GB   disk0s5
   6:       Microsoft Basic Data Data                    222.1 GB   disk0s6
/dev/disk1
   #:                       TYPE NAME                    SIZE       IDENTIFIER
   0:      GUID_partition_scheme                        *31.0 GB    disk1
   1:                        EFI EFI                     209.7 MB   disk1s1
   2:                  Apple_HFS install_osx             30.6 GB    disk1s2
You now want to repartition the usb, to be a 1 partition GPT volume, type the following into terminal:
Code:
diskutil partitionDisk /dev/disk1 1 GPT HFS+J "install_osx" R
Code:
For Clover UEFI, run the Clover Installer package:
- if using GPT, select the target of the install to "install_osx" using "Change Install Location"
- select "Customize" (the default is a legacy install -- we need to change it)
- check "Install for UEFI booting only", "Install Clover in the ESP" will automatically select
- check "Bluemac" from Themes (the config.plist files I provide use this theme)
- check "OsxAptioFixDrv-64" from Drivers64UEFI.https://drive.google.com/file/d/0B1KKq2IXSUYIN0RmY25MaDVCdUk/view
It has all the kext’s needed, and 2 working configs, one for the Installer, and one for Booting OSX.
Just Copy the contents of the archive to your EFI partition.
Easiest way to mount your usb’s EFI Partition, is to do it via the terminal.
if you look at the diskutil output I posted earlier, you shall see that the usb is disk1, and there is an EFI partition on it in slot 1.
So to mount this as a folder, type the following into your terminal window.
Code:
# temporary directory
mkdir /Volumes/EFI
#mount folder
sudo mount -t msdos /dev/disk1s1 /Volumes/EFII will go into how and where I got the files from later, and the patches in the config.plist.
Now rename config-USB.plist to config.plist, config-OSX.plist is used one OSX is installed!
Cool, now we have installed clover, time to install OSX’s Installer. YOU have to use the BaseBinaries Method, the createinstallmedia way results in a non-working installer, (no idea why, just believe me)
Paraphrasing Rehabman again: BaseBinaries clone method
Code:
# temporary directory
mkdir /tmp/install_esd

# mount InstallESD.dmg in installer package
hdiutil attach "/Applications/Install OS X Yosemite.app/Contents/SharedSupport/InstallESD.dmg" -readonly -mountpoint /tmp/install_esd -nobrowse

# restore it to target
sudo asr restore -source /tmp/install_esd/BaseSystem.dmg  -target /Volumes/install_osx -erase -format HFS+ -noprompt

# rename the target to be less unwieldy
diskutil rename "OS X Base System" install_osx

# remove Packages symlink
rm /Volumes/install_osx/System/Installation/Packages

# copy Packages as folder
cp -a /tmp/install_esd/Packages /Volumes/install_osx/System/Installation

# copy BaseSystem.dmg
cp -a /tmp/install_esd/BaseSystem.dmg /tmp/install_esd/BaseSystem.chunklist /Volumes/install_osx

# unmount InstallESD.dmg
hdiutil detach /tmp/install_esd

# remove temporary directory
rmdir /tmp/install_esd

You are now ready to eject your USB device.
Booting USB
Turn on your laptop, press f10 at the samsung logo bios screen, and choose UEFI <your USB Name Here> Clover should boot, and choose the osx install by default.
This may take some time to load up. The installer will appear, and you will see some graphics issues, the apple logo will be skewed. about 30% through loading.
There is meant to be a patch for this, but it has never bothered me, since it is only on the loading screen.
POST INSTALL
Still to come
Original Discussion Thread
http://www.tonymacx86.com/mountain-...amsung-ativ-book-8-installation-progress.html
*NOTE* Nicely formated Google Docs version available here.
https://docs.google.com/document/d/...eC49Lw94OPoN6W5zA/edit#heading=h.zgw3b2u2zyec
Attachments
Last edited: