
- Joined
- Oct 13, 2011
- Messages
- 12
- Motherboard
- OSX 10.7.4 Lion
- CPU
- Intel i7 950 3.07GHz
- Graphics
- GTX 460 SE
- Mac
- Classic Mac
- Mobile Phone
NEW! Fresh Install From Snow Leopard and Upgrade to Lion all works with audio and sleep fully functional in GA-X58A-UD3R with GTX460 [GUIDE]
Success, after more than two weeks trying....
And here is How I obtained Lion 10.7.3 working with audio and sleep fully functionals.
I am quite new or noob in this, I only have a hackintosh for a year now, so I decided to do a guide for noobs like me where I hope everything is crystal clear.
This is my first guide So please be patient plz. Do not hesitate to ask as this is a forum, I will try my best to help but if i can not help you someone else will!!! So don't be shy and ASK!!!
And now after this warm up Lets go with the Guide!!
COLORS CODE
- RED: it means is a link and that you can download it clicking in this text
- PURPLE: it means that the link where you can download this file is normally below
- BLUE: it means that this text is a title or something important
INDEX
Snow Leopard
1- STEP0: Links, Components, FIles, Drivers and Lists
2- STEP1: Computer Setup
3- STEP2: BIOS Setup
4- STEP3: iBoot
5- STEP4: Snow Leopard Installation
6- STEP5: Snow Leopard Update Combo
7- STEP6: Multibeast Installation
8- STEP7: Multibeast Ethernet
9- STEP8: Instal Nvidia GTX460 Drivers
10- STEP9: Memory Speed
Lion
11- STEP10: Purchase OS X Lion and first installation
12- STEP11: Prepare the Installer Partition
13- STEP12: xMove Installation
14- STEP13: Install OS X Lion
15- Step14: Sleep Fix
16- STEP15: Enabling Sound
NOTE: If you already have Snow Leopard installed skip the first nine steps and go straight away to the Lion installation part step 10
SNOW LEOPARD INSTALLATION
STEP0
Links, Components, FIles, Drivers and Lists
Fisrt the Components I used:
-MoBo: Gigabyte GA-X58A-UD3R rev2.0 Bios ver.FE
http://www.newegg.com/Product/Product.aspx?Item=N82E16813128423

-CPU: Intel Core i7 950 Costa rica @ 4.05GHz OC
http://www.newegg.com/Product/Product.aspx?Item=N82E16819115211
[amazon-uk]http://www.amazon.co.uk/Intel-i7-950-Quad-Core-Processor-Socket/dp/B002A6G3V2/ref=sr_1_1?ie=UTF8&qid=1335759522&sr=8-1[/amazon-uk]

-CPU Heatsink: Antec Kuler 620
http://www.newegg.com/Product/Product.aspx?Item=N82E16835209049&Tpk=Antec%20Kuler%20620
[amazon-uk]http://www.amazon.co.uk/Antec-Kuhler-H2O-620-Cooling/dp/B004LWYE4Q/ref=sr_1_sc_1?s=computers&ie=UTF8&qid=1335759701&sr=1-1-spell[/amazon-uk]
OFFER IN AMAZON-UK, NOW IS ONLY £47!! I BOUGHT IT FOR £75 7 MONTS AGO.

-Graphics: EVGA NVIDIA GeForce GTX460 SE 1GB DDR5 2xDVI 1xMini-HDMI
http://www.newegg.com/Product/Product.aspx?Item=N82E16814130749

-Audio: M-Audio Audiophile USB External Sound Card (optional)
http://www.newegg.com/Product/Product.aspx?Item=N82E16829121005

-HDD1: OCZ Agility 3 SSD 60GB
http://www.newegg.com/Product/Product.aspx?Item=N82E16820227725
[amazon-uk]http://www.amazon.co.uk/gp/offer-listing/B004Z0S6RU/ref=sr_1_1_olp?s=computers&ie=UTF8&qid=1335760902&sr=1-1&condition=new[/amazon-uk]

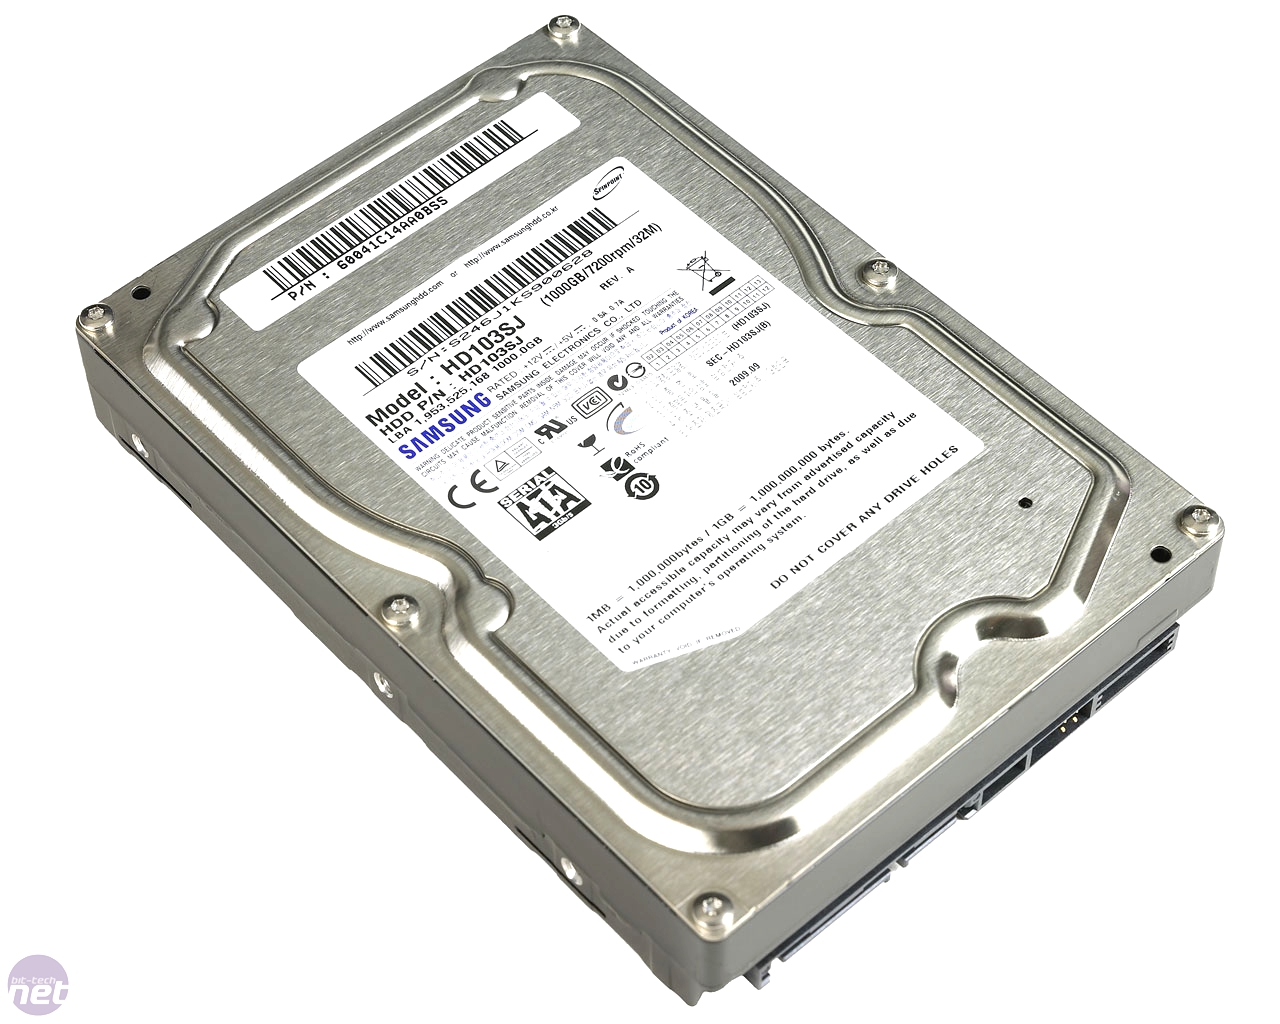
-HDD2: Samsung HD103SJ 7200rpm 1TB
http://www.newegg.com/Product/Product.aspx?Item=N82E16822152185
[amazon-uk]http://www.amazon.co.uk/Samsung-HD103SJ-internal-SATAII-7200RPM/dp/B002MQC0P8/ref=sr_1_1?s=computers&ie=UTF8&qid=1335761052&sr=1-1[/amazon-uk]
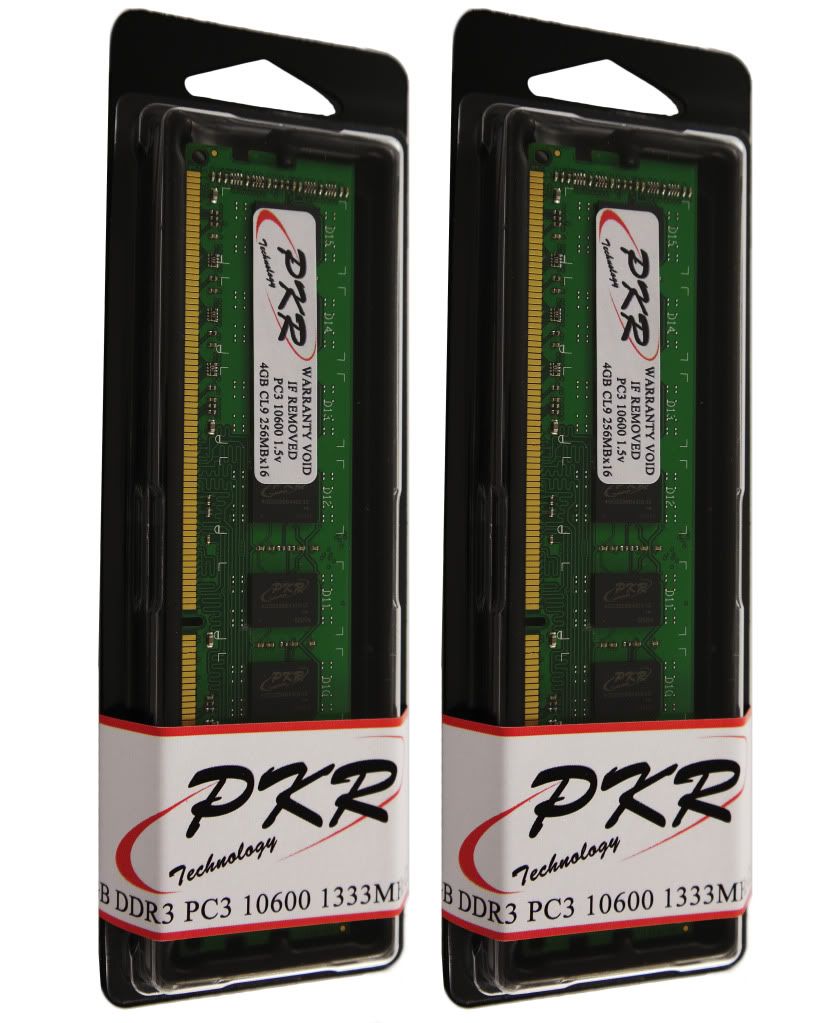
-Ram: PKR 16GB DDR3 1333MHz
EBAY PKR SHOP
PKR memory review in benchtec.co.uk . New brand computer components from UK
-Optical Drive1: Samsung BD-Drive DVDWBD SH-B123L
[amazon-uk]http://www.amazon.co.uk/Samsung-SH-B123L-Blu-Ray-Reader-Lightscribe/dp/B0044683HI/ref=sr_1_1?s=computers&ie=UTF8&qid=1335762412&sr=1-1[/amazon-uk]

-Optical Drive2: LiteOn ATAPI iHAS124
[amazon-uk]http://www.amazon.co.uk/LiteOn-IHAS124-19C-Internal-Software-Included/dp/B0026N4U9Q/ref=sr_1_1?s=computers&ie=UTF8&qid=1335762671&sr=1-1[/amazon-uk]

-Conectivity: Generic Bluetooth 3.0 usb
http://www.newegg.com/Product/ProductList.aspx?Submit=ENE&Description=bluetooth%20usb&bop=And&SecondSearch=1&Order=PRICE&PageSize=20
[amazon-uk]http://www.amazon.co.uk/s/ref=nb_sb_noss_1?url=search-alias%3Dcomputers&field-keywords=bluetooth+usb&x=0&y=0[/amazon-uk]

-Power Suply: Antec True Power 650
[amazon-uk]http://www.amazon.co.uk/Antec-Truepower-650W-Power-Supply/dp/B001Z07VQK/ref=sr_1_1?s=computers&ie=UTF8&qid=1335763131&sr=1-1[/amazon-uk]

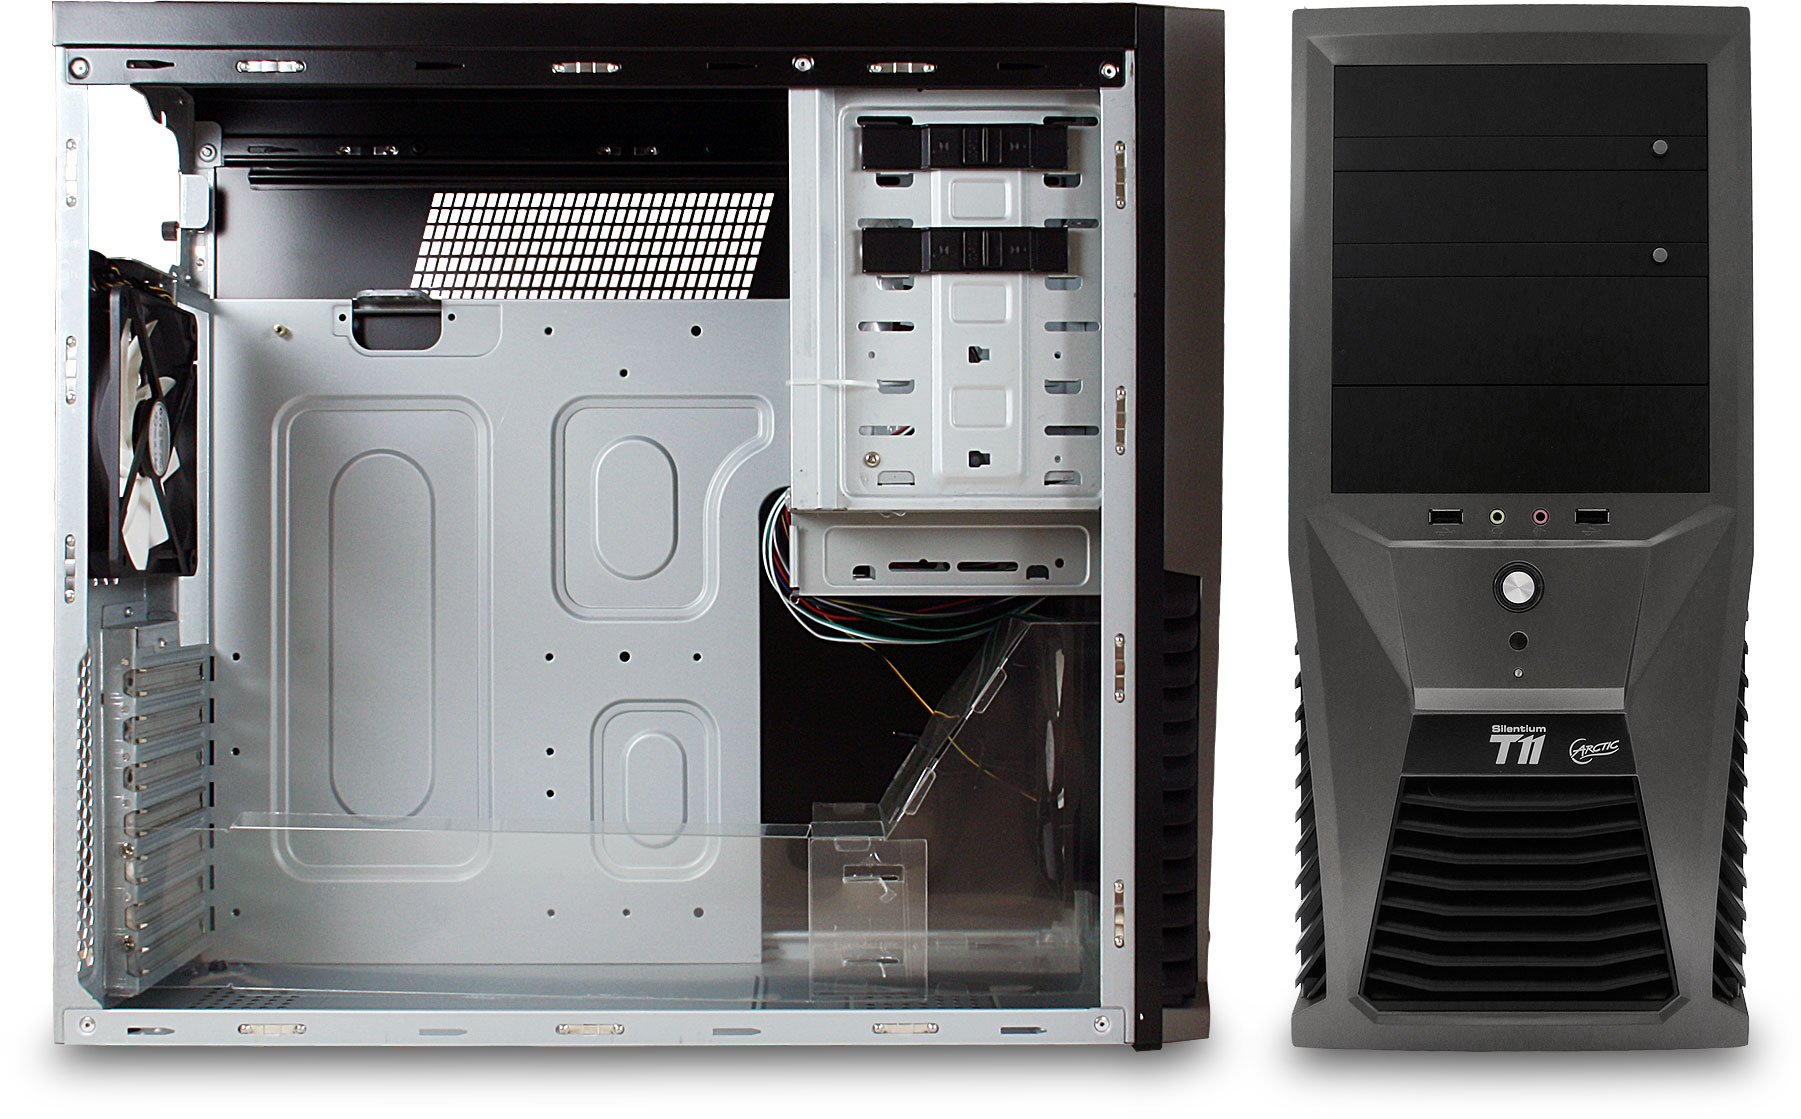
-Case: Artic Cooling Silentium T11
[amazon-uk]http://www.amazon.co.uk/gp/offer-listing/B003Y3M29M/ref=sr_1_sc_1_olp?s=computers&ie=UTF8&qid=1335763318&sr=1-1-spell&condition=new[/amazon-uk]
-Screen Monitor: BenQ EW2730V 27" VALED
[amazon-uk]http://www.amazon.co.uk/gp/offer-listing/B005HTAM1G/ref=sr_1_1_olp?s=computers&ie=UTF8&qid=1335763560&sr=1-1&condition=new[/amazon-uk]

OK this are my components but you don't need necessarily to have the same components , what you need to have like in my specs are the MotherBoard (MoBo) and the same Graphic Card as they are the only ones I have and tried with this configuration.
Files and Software you will need for your installations:
Snow Leopard:
- Buy Retail DVD Snow Leopard 10.6.3
- Download MacOSXUpdCombo10.6.8
- Download iBoot
- Retail_256.02.25f1v1-10.6.8
- cudadriver-4.0.19-macos-10.6.8
- CUDA-Z-0.6.133-SVN
- MultiBeast FOR SNOW LEOPARD
- User DSDT. Choose the option that better suit your system
- DSDT_Auto_Patcher.app
Lion:
- Buy Lion in Mac Appstore
- Download xMove
- 889Beta_Lion_AppleHDA
- SleepEnabler Kext
Note: This are the tutorials, forums and guides from where i obtained this results and all the answer I needed.
Check them if you have nay question or problem with your setups, they help me a lot and I am sure they will help you as well!!
Snow Leopard
-Guide GA-X58A-UD3R v2.0 FF - GTX 460 - Update 10.6.8 by JPA
-iBoot + MultiBeast: Install Mac OS X on any Intel-based PC by tonymacx86
Lion
-Lion Works in GA-X58A-UD3R v2.0 FF by JPA
-xMove + MultiBeast Guide by tonymacx86
-No sound in x58a-ud3r ver 2.0 Forum post
Links in purple can be download below
DSDT Auto-Patcher.app.zip
Lion Kexts.zip
STEP1
Computer Setup
- First you must make sure that all disks Disconnected except HD you are going to use for your MAC
- It's best to use an empty hard drive- you will have to partition and format the drive.
- Always back up any of your important data.
- 4GB RAM (2GB DIMMs in slots 1 and 3). If you have greater than 4gb of RAM, remove the extra RAM for a maximum of 4gb. You can put back any extra RAM in after the installation process
- Use only 1 graphics card in the 1st PCIe slot with 1 monitor plugged in.
- Remove any USB peripherals besides keyboard and mouse.
- Remove any PCI cards besides graphics- they may not be Mac compatible.
- If using a Gigabyte P55 board, use the blue Intel SATA ports- not the white Gigabyte SATA ports.
STEP2
BIOS Setup
- Boot your system and in the first screen with the Gigabyte Name you will see press del to access the BIOS
- boot Priority CD/DVD first
- PCH SATA CONTROL - change to ACHI
- ONBOARD SATA... all sata - change to ACHI
- HPET change to 64-bit mode
- ACPI SUSPEND - change to S3 STR
HERE you can find pictures and a guide on how to change your BIOS setup
STEP3
iBoot
- Burn in a CD iBoot
- Boot with iBoot
- Press F5 in Chamaleon when start with iBoot
- Insert your Mac OS X Snow Leopard Retail DVD and press F5 again
STEP4
Snow Leopard Installation
- When you get to the installation screen, open Utilities/Disk Utility. If you can't get to the installation screen, retry the process, but type -x at the screen above. This will enter Mac OS X Safe Mode, which will allow you to proceed.
- Format your hard drive to Mac OS Extended (Journaled).For the purposes of this guide, name it Snow Leopard. You can rename it later.
- Close Disk Utility and start installation and after about 20 min you are done with installation
- Reboot your system
STEP5
Snow Leopard Update Combo
- Eject Mac OS X Snow Leopard Retail DVD and insert again iBoot
- Start Mac OSX
- Video Welcome a Mac
- Complete all steps
- Download and Install MacOSXUpdCombo10.6.8
- DO NOT RESTART
STEP6
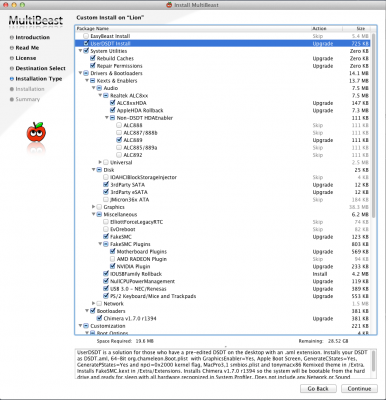
Multibeast
- Download your User DSDT from HERE or the link above, and put it in the same folder as Multibeast
- Open Multibeast and mark the next options
> UserDSDT
> System Utilities -> Rebuild Caches
> System Utilities -> Repair Permissions
> Drivers & Bootloaders -> Kexts & Enablers -> Audio -> Realtek ALC8XX -> ALC8XXHDA
> Drivers & Bootloaders -> Kexts & Enablers -> Audio -> Realtek ALC8XX -> AppleHDA Rollback
>Drivers & Bootloaders -> Kexts & Enablers -> Audio -> Realtek ALC8XX -> Non-DSDT HDAEnabler -> ALC889
> Drivers & Bootloaders -> Kexts & Enablers -> Disk -> JMicron36xeSATA and JMicron36xSATA
> Drivers & Bootloaders -> Kexts & Enablers -> Miscellaneous -> FakeSMC
> Drivers & Bootloaders -> Kexts & Enablers -> Miscellaneous -> FakeSMC Plugins -> Motherboard and Nvidia
> Drivers & Bootloaders -> Kexts & Enablers -> Miscellaneous -> IOPCIFamily
> Drivers & Bootloaders -> Kexts & Enablers -> Miscellaneous -> NullCPUPowermanagement
> Drivers & Bootloaders -> Kexts & Enablers -> Miscellaneous -> USB 3.0
> Drivers & Bootloaders -> Kexts & Enablers -> Miscellaneous -> PS/2 Keyboard Mice and Trackpad
> Drivers & Bootloaders -> Bootloaders -> Chimera v.x.x
> Customization -> Boot Options -> 32-bit Apple Boot Screen or 64 bits
> Customization -> Boot Options -> PCI Root ID fix
> Customization -> Boot Options -> Instant Menu
> Customization -> Boot Options -> Generate CPU states
> Customization -> System Definitions -> Mac Pro -> MacPro 3,1
> Customization -> Themes -> tonymacx86 Remixed
> OSx86 Software -> Kext Helper, Kext Utility
- Install and Finish
- Run Kext utility, you will find it your applications folder
- Reboot
Hackintosh*Multibeast options pt1 Screen Shot 2012-04-29 at 22.49.25.png
Hackintosh*Multibeast options pt2 Screen Shot 2012-04-29 at 22.50.02.png
STEP7
Multibeast Ethernet
- Open Multibeast
- install RealtekRTL81xx
> Customization -> Networks -> Lnx2Mac RealtekRTL81xx
- Open Kext Utility Repair Permissions
- Reboot
STEP8
Instal Nvidia GTX460 Drivers
- Install Retail_256.02.25f1v1-10.6.8
- cudadriver-4.0.19-macos-10.6.8
- Reboot
STEP9
Memory Speed
- Open smbios.plist in your HDD/Extra/
- Copy this line and paste it in smbios.plist . I you Copy and Paste the text, Make sure the text is in plain format and not rich format before add the line.
<key>SMmemspeed</key>
<string>xxxx</string>
- Introduce the digits that match your memory speed where the xxx are, i.e.. I introduced 1333 because my memory runs @1333MHz, if your is 1600 this is the value you should enter in to the string
AND Now you you will have an almost fully functional HACKINTOSH with SL 10.6.8
These are the results:
Working in 64 bits
- Boot OK
- Reboot OK
- Turn off OK
- Network OK
- Mouse OK
- Keyboard OK
- Video OK
- Firewire OK
- Bluetooth OK
- Drive DVD OK
- Drive Blu-ray OK
- Card Readers OK
- USB OK
- DVI x2 OK
- Full Resolution 1920x1080 OK
Working Software
- Final Cut Pro
- Adobe CS5 Master Collection
- Avid Media Composer
Not Works
- Wireless NOT TESTED
- HDMI cable video - Works and freeze in 10 min
- Sleep - The screen gets back but the Hard Drives and computer still working
- Audio* - with the previous version of multibeast I could enable audio with a VooDooHDA kext but in this latest version any plugin of the VooDooHDA series gave me Kernel Panic and I couldn't get sound coming out of the MoBo. But that wasn't a problem for me because from the beginning i have planned to use an external sound card I own (M-Audio Audiophile USB and it works great)
Click to check results and picture and compare with yours!!
EDIT:Not all your components will be the same as mine, probably it will give you different results depending on what processor, memory, HDD's you use. So why not try everything (Sound, Graphics, etc)before install Lion and post your results? it will be very helpful for other people!!
AND NOW LION INSTALLATION
STEP10
Purchase OS X Lion and first installation
- Boot into your existing Snow Leopard installation.
- Download the OS X Lion App directly from the Mac App Store, it will automatically open when it finish download.
- Click Continue.
- Select your Snow Leopard drive and press Install. This will not install the OS or affect this drive in any way. It will simply install the files necessary to do so later in the process.
- Click Restart to reboot.
STEP11
Prepare the Installer Partition
- Boot back into your existing Snow Leopard installation.
- Open /Applications/Utilities/Disk Utility
- Highlight your Snow Leopard drive in left column.
- Choose the Partition tab, and Click the + to Add a Partition.
- Name the secondary partition Installer with a size of 8 GB and click Apply.
- Click Partition.
- Close Disk Utility
STEP12
xMove
- Download xMove
- Double-Click xMove, and choose Installer as Destination.
WARNING: DO NOT choose existing Snow Leopard as the Destination.
- Click Install
- When done, you'll have a secondary partition on your drive containing the OS X Lion Installer!
TIPS:If xMove fails, you haven't installed the Lion App to your currently booted drive and it cannot find the necessary files. A quick way to remedy this is to manually mount the InstallESD.dmg and run xMove again.
STEP13
Install OS X Lion
- Reboot and at the Chimera boot screen, choose Installer
- It will boot directly to a Mac OS X Installer Screen complete with Disk Utility.
- Install OS X Lion over the existing Snow Leopard
- You should already have done proper post-installation steps on your existing Snow Leopard drive so you won't need to use Multibeast for Lion.
Step14
Sleep Fix
- Download The file below - Lion Kexts.zip
- Unzip the file, you will find two folders: Sleep Enabler and Sound Fix '12
- Open Sleep Enabler Folder
- Copy or Drag the file SleepEnabler.kext in to your Hdd/Extra/ /System/LIbrary/Extensions
- Authenticate
- Run KextUtility
- Reboot
Download Lion Kexts.zip
Lion Kexts.zip
STEP15
Enabling Sound
- Delete ALC8xxHDA.kext and AppleHDA.kext from /System/LIbrary/Extensions.
- Put the AppleHDA.kext from the Sound Fix '12 folder that you previously downloaded on to the desktop
- Run KextBeast
- Reboot
CONGRATULATIONSSS!!!!!

You have now a fully functional HACKINTOSH with Lion 10.7.3 installed
And this is what you have:
Working in 64 bits
- Boot OK
- Reboot OK
- Sleep OK
- Turn off OK
- Network OK
- Mouse OK
- Keyboard OK
- Video OK
- Firewire OK
- Bluetooth OK
- Drive DVD OK
- Drive Blu-ray OK
- Card Readers OK
- USB OK
- DVI x2 OK
- Full Resolution 1920x1080 OK
- HDMI cable video OK
- Sleep OK
- Audio OK
- Wireless NOT TESTED
Working Software
- Final Cut Pro
- Adobe CS5 Master Collection
- Avid Media Composer
I hope this guide Has been Helpful to you!!!!
Soon I will post benchmark test results
EDIT: I tried to delete NullPowerManagement kext like JPA advise in his post,before OverClocking the CPU but the computer started to gave me problems, I couldn't have it more than 1 sec on and then this
 I reboot with a Security SSD with the operative system (always good to have a backup drive) already installed, I accessed to my lion drive and placed back the NullPowerManagement kext, and everything worked fine again for me.
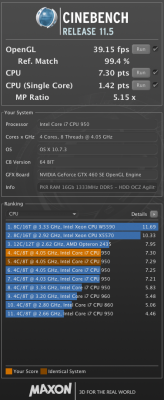
I Upgraded memory from 8 to 16Gb DDR3 1333MHz and results in test in cinebench OpenCl went up from 32fps to 39fps, CPU results did not went up that much but also improved.
Screen Shot 2012-04-28 at 21.27.29.png
Success, after more than two weeks trying....
And here is How I obtained Lion 10.7.3 working with audio and sleep fully functionals.
I am quite new or noob in this, I only have a hackintosh for a year now, so I decided to do a guide for noobs like me where I hope everything is crystal clear.
This is my first guide So please be patient plz. Do not hesitate to ask as this is a forum, I will try my best to help but if i can not help you someone else will!!!
So don't be shy and ASK!!!And now after this warm up Lets go with the Guide!!
COLORS CODE
- RED: it means is a link and that you can download it clicking in this text
- PURPLE: it means that the link where you can download this file is normally below
- BLUE: it means that this text is a title or something important
INDEX
Snow Leopard
1- STEP0: Links, Components, FIles, Drivers and Lists
2- STEP1: Computer Setup
3- STEP2: BIOS Setup
4- STEP3: iBoot
5- STEP4: Snow Leopard Installation
6- STEP5: Snow Leopard Update Combo
7- STEP6: Multibeast Installation
8- STEP7: Multibeast Ethernet
9- STEP8: Instal Nvidia GTX460 Drivers
10- STEP9: Memory Speed
Lion
11- STEP10: Purchase OS X Lion and first installation
12- STEP11: Prepare the Installer Partition
13- STEP12: xMove Installation
14- STEP13: Install OS X Lion
15- Step14: Sleep Fix
16- STEP15: Enabling Sound
NOTE: If you already have Snow Leopard installed skip the first nine steps and go straight away to the Lion installation part step 10
SNOW LEOPARD INSTALLATION
STEP0
Links, Components, FIles, Drivers and Lists
Fisrt the Components I used:
-MoBo: Gigabyte GA-X58A-UD3R rev2.0 Bios ver.FE
http://www.newegg.com/Product/Product.aspx?Item=N82E16813128423
-CPU: Intel Core i7 950 Costa rica @ 4.05GHz OC
http://www.newegg.com/Product/Product.aspx?Item=N82E16819115211
[amazon-uk]http://www.amazon.co.uk/Intel-i7-950-Quad-Core-Processor-Socket/dp/B002A6G3V2/ref=sr_1_1?ie=UTF8&qid=1335759522&sr=8-1[/amazon-uk]
-CPU Heatsink: Antec Kuler 620
http://www.newegg.com/Product/Product.aspx?Item=N82E16835209049&Tpk=Antec%20Kuler%20620
[amazon-uk]http://www.amazon.co.uk/Antec-Kuhler-H2O-620-Cooling/dp/B004LWYE4Q/ref=sr_1_sc_1?s=computers&ie=UTF8&qid=1335759701&sr=1-1-spell[/amazon-uk]
OFFER IN AMAZON-UK, NOW IS ONLY £47!! I BOUGHT IT FOR £75 7 MONTS AGO.
-Graphics: EVGA NVIDIA GeForce GTX460 SE 1GB DDR5 2xDVI 1xMini-HDMI
http://www.newegg.com/Product/Product.aspx?Item=N82E16814130749
-Audio: M-Audio Audiophile USB External Sound Card (optional)
http://www.newegg.com/Product/Product.aspx?Item=N82E16829121005
-HDD1: OCZ Agility 3 SSD 60GB
http://www.newegg.com/Product/Product.aspx?Item=N82E16820227725
[amazon-uk]http://www.amazon.co.uk/gp/offer-listing/B004Z0S6RU/ref=sr_1_1_olp?s=computers&ie=UTF8&qid=1335760902&sr=1-1&condition=new[/amazon-uk]
-HDD2: Samsung HD103SJ 7200rpm 1TB
http://www.newegg.com/Product/Product.aspx?Item=N82E16822152185
[amazon-uk]http://www.amazon.co.uk/Samsung-HD103SJ-internal-SATAII-7200RPM/dp/B002MQC0P8/ref=sr_1_1?s=computers&ie=UTF8&qid=1335761052&sr=1-1[/amazon-uk]
-Ram: PKR 16GB DDR3 1333MHz
EBAY PKR SHOP
PKR memory review in benchtec.co.uk . New brand computer components from UK
-Optical Drive1: Samsung BD-Drive DVDWBD SH-B123L
[amazon-uk]http://www.amazon.co.uk/Samsung-SH-B123L-Blu-Ray-Reader-Lightscribe/dp/B0044683HI/ref=sr_1_1?s=computers&ie=UTF8&qid=1335762412&sr=1-1[/amazon-uk]
-Optical Drive2: LiteOn ATAPI iHAS124
[amazon-uk]http://www.amazon.co.uk/LiteOn-IHAS124-19C-Internal-Software-Included/dp/B0026N4U9Q/ref=sr_1_1?s=computers&ie=UTF8&qid=1335762671&sr=1-1[/amazon-uk]
-Conectivity: Generic Bluetooth 3.0 usb
http://www.newegg.com/Product/ProductList.aspx?Submit=ENE&Description=bluetooth%20usb&bop=And&SecondSearch=1&Order=PRICE&PageSize=20
[amazon-uk]http://www.amazon.co.uk/s/ref=nb_sb_noss_1?url=search-alias%3Dcomputers&field-keywords=bluetooth+usb&x=0&y=0[/amazon-uk]
-Power Suply: Antec True Power 650
[amazon-uk]http://www.amazon.co.uk/Antec-Truepower-650W-Power-Supply/dp/B001Z07VQK/ref=sr_1_1?s=computers&ie=UTF8&qid=1335763131&sr=1-1[/amazon-uk]
-Case: Artic Cooling Silentium T11
[amazon-uk]http://www.amazon.co.uk/gp/offer-listing/B003Y3M29M/ref=sr_1_sc_1_olp?s=computers&ie=UTF8&qid=1335763318&sr=1-1-spell&condition=new[/amazon-uk]
-Screen Monitor: BenQ EW2730V 27" VALED
[amazon-uk]http://www.amazon.co.uk/gp/offer-listing/B005HTAM1G/ref=sr_1_1_olp?s=computers&ie=UTF8&qid=1335763560&sr=1-1&condition=new[/amazon-uk]
OK this are my components but you don't need necessarily to have the same components , what you need to have like in my specs are the MotherBoard (MoBo) and the same Graphic Card as they are the only ones I have and tried with this configuration.
Files and Software you will need for your installations:
Snow Leopard:
- Buy Retail DVD Snow Leopard 10.6.3
- Download MacOSXUpdCombo10.6.8
- Download iBoot
- Retail_256.02.25f1v1-10.6.8
- cudadriver-4.0.19-macos-10.6.8
- CUDA-Z-0.6.133-SVN
- MultiBeast FOR SNOW LEOPARD
- User DSDT. Choose the option that better suit your system
- DSDT_Auto_Patcher.app
Lion:
- Buy Lion in Mac Appstore
- Download xMove
- 889Beta_Lion_AppleHDA
- SleepEnabler Kext
Note: This are the tutorials, forums and guides from where i obtained this results and all the answer I needed.
Check them if you have nay question or problem with your setups, they help me a lot and I am sure they will help you as well!!
Snow Leopard
-Guide GA-X58A-UD3R v2.0 FF - GTX 460 - Update 10.6.8 by JPA
-iBoot + MultiBeast: Install Mac OS X on any Intel-based PC by tonymacx86
Lion
-Lion Works in GA-X58A-UD3R v2.0 FF by JPA
-xMove + MultiBeast Guide by tonymacx86
-No sound in x58a-ud3r ver 2.0 Forum post
Links in purple can be download below
DSDT Auto-Patcher.app.zip
Lion Kexts.zip
STEP1
Computer Setup
- First you must make sure that all disks Disconnected except HD you are going to use for your MAC
- It's best to use an empty hard drive- you will have to partition and format the drive.
- Always back up any of your important data.
- 4GB RAM (2GB DIMMs in slots 1 and 3). If you have greater than 4gb of RAM, remove the extra RAM for a maximum of 4gb. You can put back any extra RAM in after the installation process
- Use only 1 graphics card in the 1st PCIe slot with 1 monitor plugged in.
- Remove any USB peripherals besides keyboard and mouse.
- Remove any PCI cards besides graphics- they may not be Mac compatible.
- If using a Gigabyte P55 board, use the blue Intel SATA ports- not the white Gigabyte SATA ports.
STEP2
BIOS Setup
- Boot your system and in the first screen with the Gigabyte Name you will see press del to access the BIOS
- boot Priority CD/DVD first
- PCH SATA CONTROL - change to ACHI
- ONBOARD SATA... all sata - change to ACHI
- HPET change to 64-bit mode
- ACPI SUSPEND - change to S3 STR
HERE you can find pictures and a guide on how to change your BIOS setup
STEP3
iBoot
- Burn in a CD iBoot
- Boot with iBoot
- Press F5 in Chamaleon when start with iBoot
- Insert your Mac OS X Snow Leopard Retail DVD and press F5 again
STEP4
Snow Leopard Installation
- When you get to the installation screen, open Utilities/Disk Utility. If you can't get to the installation screen, retry the process, but type -x at the screen above. This will enter Mac OS X Safe Mode, which will allow you to proceed.
- Format your hard drive to Mac OS Extended (Journaled).For the purposes of this guide, name it Snow Leopard. You can rename it later.
- Close Disk Utility and start installation and after about 20 min you are done with installation
- Reboot your system
STEP5
Snow Leopard Update Combo
- Eject Mac OS X Snow Leopard Retail DVD and insert again iBoot
- Start Mac OSX
- Video Welcome a Mac
- Complete all steps
- Download and Install MacOSXUpdCombo10.6.8
- DO NOT RESTART
STEP6
Multibeast
- Download your User DSDT from HERE or the link above, and put it in the same folder as Multibeast
- Open Multibeast and mark the next options
> UserDSDT
> System Utilities -> Rebuild Caches
> System Utilities -> Repair Permissions
> Drivers & Bootloaders -> Kexts & Enablers -> Audio -> Realtek ALC8XX -> ALC8XXHDA
> Drivers & Bootloaders -> Kexts & Enablers -> Audio -> Realtek ALC8XX -> AppleHDA Rollback
>Drivers & Bootloaders -> Kexts & Enablers -> Audio -> Realtek ALC8XX -> Non-DSDT HDAEnabler -> ALC889
> Drivers & Bootloaders -> Kexts & Enablers -> Disk -> JMicron36xeSATA and JMicron36xSATA
> Drivers & Bootloaders -> Kexts & Enablers -> Miscellaneous -> FakeSMC
> Drivers & Bootloaders -> Kexts & Enablers -> Miscellaneous -> FakeSMC Plugins -> Motherboard and Nvidia
> Drivers & Bootloaders -> Kexts & Enablers -> Miscellaneous -> IOPCIFamily
> Drivers & Bootloaders -> Kexts & Enablers -> Miscellaneous -> NullCPUPowermanagement
> Drivers & Bootloaders -> Kexts & Enablers -> Miscellaneous -> USB 3.0
> Drivers & Bootloaders -> Kexts & Enablers -> Miscellaneous -> PS/2 Keyboard Mice and Trackpad
> Drivers & Bootloaders -> Bootloaders -> Chimera v.x.x
> Customization -> Boot Options -> 32-bit Apple Boot Screen or 64 bits
> Customization -> Boot Options -> PCI Root ID fix
> Customization -> Boot Options -> Instant Menu
> Customization -> Boot Options -> Generate CPU states
> Customization -> System Definitions -> Mac Pro -> MacPro 3,1
> Customization -> Themes -> tonymacx86 Remixed
> OSx86 Software -> Kext Helper, Kext Utility
- Install and Finish
- Run Kext utility, you will find it your applications folder
- Reboot
Hackintosh*Multibeast options pt1 Screen Shot 2012-04-29 at 22.49.25.png
Hackintosh*Multibeast options pt2 Screen Shot 2012-04-29 at 22.50.02.png
STEP7
Multibeast Ethernet
- Open Multibeast
- install RealtekRTL81xx
> Customization -> Networks -> Lnx2Mac RealtekRTL81xx
- Open Kext Utility Repair Permissions
- Reboot
STEP8
Instal Nvidia GTX460 Drivers
- Install Retail_256.02.25f1v1-10.6.8
- cudadriver-4.0.19-macos-10.6.8
- Reboot
STEP9
Memory Speed
- Open smbios.plist in your HDD/Extra/
- Copy this line and paste it in smbios.plist . I you Copy and Paste the text, Make sure the text is in plain format and not rich format before add the line.
<key>SMmemspeed</key>
<string>xxxx</string>
- Introduce the digits that match your memory speed where the xxx are, i.e.. I introduced 1333 because my memory runs @1333MHz, if your is 1600 this is the value you should enter in to the string
AND Now you you will have an almost fully functional HACKINTOSH with SL 10.6.8
These are the results:
Working in 64 bits
- Boot OK
- Reboot OK
- Turn off OK
- Network OK
- Mouse OK
- Keyboard OK
- Video OK
- Firewire OK
- Bluetooth OK
- Drive DVD OK
- Drive Blu-ray OK
- Card Readers OK
- USB OK
- DVI x2 OK
- Full Resolution 1920x1080 OK
Working Software
- Final Cut Pro
- Adobe CS5 Master Collection
- Avid Media Composer
Not Works
- Wireless NOT TESTED
- HDMI cable video - Works and freeze in 10 min
- Sleep - The screen gets back but the Hard Drives and computer still working
- Audio* - with the previous version of multibeast I could enable audio with a VooDooHDA kext but in this latest version any plugin of the VooDooHDA series gave me Kernel Panic and I couldn't get sound coming out of the MoBo. But that wasn't a problem for me because from the beginning i have planned to use an external sound card I own (M-Audio Audiophile USB and it works great)
Click to check results and picture and compare with yours!!
EDIT:Not all your components will be the same as mine, probably it will give you different results depending on what processor, memory, HDD's you use. So why not try everything (Sound, Graphics, etc)before install Lion and post your results? it will be very helpful for other people!!
AND NOW LION INSTALLATION
STEP10
Purchase OS X Lion and first installation
- Boot into your existing Snow Leopard installation.
- Download the OS X Lion App directly from the Mac App Store, it will automatically open when it finish download.
- Click Continue.
- Select your Snow Leopard drive and press Install. This will not install the OS or affect this drive in any way. It will simply install the files necessary to do so later in the process.
- Click Restart to reboot.
STEP11
Prepare the Installer Partition
- Boot back into your existing Snow Leopard installation.
- Open /Applications/Utilities/Disk Utility
- Highlight your Snow Leopard drive in left column.
- Choose the Partition tab, and Click the + to Add a Partition.
- Name the secondary partition Installer with a size of 8 GB and click Apply.
- Click Partition.
- Close Disk Utility
STEP12
xMove
- Download xMove
- Double-Click xMove, and choose Installer as Destination.
WARNING: DO NOT choose existing Snow Leopard as the Destination.
- Click Install
- When done, you'll have a secondary partition on your drive containing the OS X Lion Installer!
TIPS:If xMove fails, you haven't installed the Lion App to your currently booted drive and it cannot find the necessary files. A quick way to remedy this is to manually mount the InstallESD.dmg and run xMove again.
STEP13
Install OS X Lion
- Reboot and at the Chimera boot screen, choose Installer
- It will boot directly to a Mac OS X Installer Screen complete with Disk Utility.
- Install OS X Lion over the existing Snow Leopard
- You should already have done proper post-installation steps on your existing Snow Leopard drive so you won't need to use Multibeast for Lion.
Step14
Sleep Fix
- Download The file below - Lion Kexts.zip
- Unzip the file, you will find two folders: Sleep Enabler and Sound Fix '12
- Open Sleep Enabler Folder
- Copy or Drag the file SleepEnabler.kext in to your Hdd/Extra/ /System/LIbrary/Extensions
- Authenticate
- Run KextUtility
- Reboot
Download Lion Kexts.zip
Lion Kexts.zip
STEP15
Enabling Sound
- Delete ALC8xxHDA.kext and AppleHDA.kext from /System/LIbrary/Extensions.
- Put the AppleHDA.kext from the Sound Fix '12 folder that you previously downloaded on to the desktop
- Run KextBeast
- Reboot
CONGRATULATIONSSS!!!!!
You have now a fully functional HACKINTOSH with Lion 10.7.3 installed
And this is what you have:
Working in 64 bits
- Boot OK
- Reboot OK
- Sleep OK
- Turn off OK
- Network OK
- Mouse OK
- Keyboard OK
- Video OK
- Firewire OK
- Bluetooth OK
- Drive DVD OK
- Drive Blu-ray OK
- Card Readers OK
- USB OK
- DVI x2 OK
- Full Resolution 1920x1080 OK
- HDMI cable video OK
- Sleep OK
- Audio OK
- Wireless NOT TESTED
Working Software
- Final Cut Pro
- Adobe CS5 Master Collection
- Avid Media Composer
I hope this guide Has been Helpful to you!!!!
Soon I will post benchmark test results
EDIT: I tried to delete NullPowerManagement kext like JPA advise in his post,before OverClocking the CPU but the computer started to gave me problems, I couldn't have it more than 1 sec on and then this
I Upgraded memory from 8 to 16Gb DDR3 1333MHz and results in test in cinebench OpenCl went up from 32fps to 39fps, CPU results did not went up that much but also improved.
Screen Shot 2012-04-28 at 21.27.29.png
Attachments
-
DSDT Auto-Patcher.app.zip2.8 MB · Views: 196
-
Lion Kexts.zip2.3 MB · Views: 268
-
 Screen Shot 2012-04-28 at 21.27.29.png250.7 KB · Views: 972
 -
 Hackintosh Multibeast options pt1 Screen Shot 2012-04-29 at 22.49.25.png204 KB · Views: 1,009
 -
 Hackintosh Multibeast options pt2 Screen Shot 2012-04-29 at 22.50.02.png155.4 KB · Views: 1,001