
- Joined
- Feb 2, 2013
- Messages
- 325
- Motherboard
- HP Pavilion 14-ce0501na
- CPU
- i5-8250U
- Graphics
- UHD 620
- Mobile Phone

Hi all,
I've just finished my macOS install on my HP laptop and I thought I'd share config files, experience and a couple of tips - especially since these series of laptops do not seem to be as popular.
Specs:
Intel Core i5-8250U
8GB DDR4 @ 2666MHz. (Single channel)
14" IPS display 1920x1080px. @ 60Hz.
256GB m.2 SATA III SSD
What works:
QE/CI - Intel UHD 620
Screen Brightness
CPU PM and SpeedStep
Sleep/Wake
Battery
Audio
Camera
Keyboard
Touchpad
Ethernet
(Partial) FN Keys*
* Volume and music "fn+key" combinations works out of the box. Screen brightness fn+key combos need Karabiner.
What doesn't work:
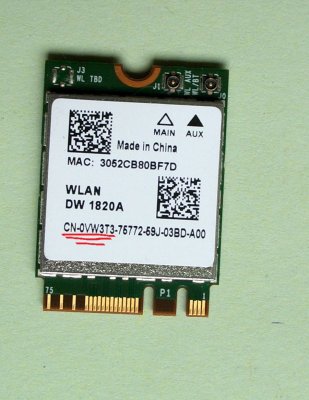
WiFi + BT**
** There's no escape from this one - you just have to buy a compatible card. Best case scenario - the DW1560 sporting a BCM94352z chip is recommended for best compatibility.
**After extensive research into DW-1820A, I can only say: It's not worth the hassle. Read more in Post #4
Not tested(yet):
Facetime/iMessage
Short review:
The CE0501NA is a very heavily budget-oriented machine. The keyboard is not backlit, a little too clunky in my opinion but with good typing feedback so speed-typists that don't actually need the backlight and the absolute thinnest product they can get - it's great! On top of that, it does include a 14" fullHD IPS display with more than decent colour for its money. Add to that the i5-8250U which is a true quad core CPU and the 8GB of RAM (single channel, sadly) and with the factory-equipped m.2 drive it's both lightweight and more than fast enough for your day-to-day tasks. Added bonus here is the fact that the BIOS does not operate under the whitelist initiative, so any wifi card will work on this (tested three different ones so far).
The unit I bought in particular turned out to be equipped with an M.2 SSD rather than an old-fashioned SATA drive. I noticed there was a connector for a SATA drive - and space for it next to the battery, so I got myself a Samsung EVO 850 - 250GBs for my macOS install, so I can dual-boot as well!
As many people have said online, the wifi is a no-workaround type of deal. You just have to bite the bullet and buy the DW1560 NGFF chip. I haven't bought one yet - once I do I will update this thread.
My machine costed £449 in Curry's new. Add to that £12 for the SATA cable and ~ £48 for the SSD - machine totalled at £510 without the wifi. Looks like £560 with it, which puts me at the reasonable half-price of a new MacBook Air. (and similar performance!)
Pre-requisites:
1. Access to a working Mac installation with access to the internet.
2. Suitable Flash-drive. Not every flash drive works for me for some reason. I've had limited success with Transcend drives.
3. A fairly basic understanding of how CLOVER works.
4. Some software such as:
* MaciASL
* iasl
* a plist editor (I use TextMate and Clover Configurator but you can use PlistEdit Pro or an equivalent)
* A few kexts (attached below)
Credits:
@RehabMan - for his tireless efforts and so much work done over the years! Thanks mate! Many of us wouldn't be able to do many things without you.
@erinviegas - for his Lenovo guide here on the forum that enabled my build! Thank you!
@dareposte - for his Lenovo guide here on the forum that supplemented my build. Thanks!
This forum for the rich repository that has been built over the years!
Install:
The installation process is what one might call a dirty install. Basically what I did was this:
1. Download Mojave from the App Store.
1a) I figured out the installer does not download the full 6.5 GBs, but merely a 29 megabyte installer.
1b) Spent some time googling how to download the full thing and set it up (FFS Apple!)
2. Create an installer media using UniBest
3. Download the files from @erinviegas 's guide and adapt:
* Change SMBIOS to MacBookAir7,1 - a.k.a. "MacBook Air (11-inch, Early 2015)"
* Adapt my RAM Modules according to what's installed in my machine - in my case 1 DIMM of 8GBs @ 2666MHz - this is VERY important!
* Delete all /EFI/CLOVER/ACPI/Patched files. These are not applicable as they are machine-specific.
* Delete every non-generic patch from config.plist - as that could mess with the install. (this is where you need to be fairly familiar with CLOVER configs, as I don't really remember all the patches and wasn't taking notes. Sorry!)
* Delete unnecessary kexts from /EFI/CLOVER/kexts/Other - there's a few we don't need - so I just left the basics and added battery, audio, sensors and Ethernet later on. (see attached EFI folder for reference)
* NOTE: I figured that since everything is patched on-the-fly with CLOVER, I could get away with a dirty install and clean up and patch things later. It is most definitely not an ideal situation, however, it worked for me and I don't even know what SSDT patching is, not to mention understanding it.
4. Install Mojave - From here I installed Mojave in a straight-forward way. Boot the installer, format my drive, install macOS and then reboot into the installed OS to set up like a new machine.
5. Iron out the little things
5a) PS/2 input (VoodooPS2Controller.kext)
This one is pretty straightforward - put the kext in /EFI/CLOVER/kexts/Other and reboot. Keyboard and touchpad work great! I wish I could disable the touchpad dynamically somehow, as I hate them in general - and I miss the functionality in Windows, where it would automatically disable my touchpad when a mouse is plugged into the USB.
5b) Audio (layout-id 28; AppleALC.kext)
This one Was tricky. I lost some time trying out different methods. It turned out I was just being stupid and didn't clean up my config.plist well enough and had left the wrong audio injection in, so I couldn't get my audio to work properly. Once I realised that and changed my layout-id to 28 it all worked with the AppleALC.kext method.
6. Battery - I simply followed this guide on Youtube and got it to work (Thanks Vicky Xce for the video!)
Credits to RehabMan for this! For the people that know how to patch DSDTs(unlike me!) - it is the "MaciASL - battery patch - RehabMan - Laptop Patch - [bat] HP Pavilion n012tx" - Apply, reboot, done!
Screen brightness worked out of the box with erinviegas' config.plist and you know the rule - if it ain't broke don't fix it - so I haven't touched anything in there. Having that said, I've no clue how to make it work from scratch
Some of the items above are incredibly brief - and once you complete them - or if you have ever completed them in the past, they should make a ton of sense! This is obviously a very dirty install and some may condemn it - I just thought I'd share my experience with building it - along with a working configuration.
STICKY FAT NOTE. IMPORTANT! PLEASE READ:
I've re-generated SMBIOS information from my config.plist - you will have to create and/or generate your own!!! THIS STEP IS IMPORTANT!
I may have forgotten something, so ask away and I'll try and respond when I have time.
Attachments
Last edited: