
- Joined
- Feb 19, 2016
- Messages
- 197
- Motherboard
- ASUS ZenBook UX430UA-DH74
- CPU
- i7-8550U
- Graphics
- Intel 620 1920x1080
Intel core i7 4790k - Devil's Canyon / Haswell
Gigabyte GA-Z97X Gaming 3 (Intel based graphics, Killer™ Ethernet E2200)
GeForce GTX 960 SuperClocked 4GB
Samsung 850 Evo 500GB
Corsair Vengeance 32GB RAM
CoolerMaster G650M 650W
Blackmagic Design Decklink mini monitor 4K SDI
Please also see other OSX version guides:
Z97x Gaming-3 I7-4790k GTX960 10.11 El Capitan - Guide
Z97x Gaming-3 I7-4790k GTX960 10.12 Sierra - Guide
Z97x Gaming-3 I7-4790k GTX960 10.13 High Sierra - (this thread)
PREFACE
I originally bought this hardware back in February 2016 and for several years ran OSX 10.11 El Capitan (See original Guide) for my DaVinci Resolve suite, and later on upgraded to Sierra 10.12 (See original Guide). This guide is for the steps to install High Sierra 10.13 on this hardware along with some tips for your install and setup. I love the 4790k Devil's Canyon processor, it has a lot of power despite now being 5 years old.The first thing to make note of is there are some differences you need to be aware of if going from a prior version to High Sierra. In High Sierra 10.13 you no longer use Nvidia boot flags nv_disable=1 (disable Nvidia graphic card) and nvda_drv=1 (enable Nvidia graphic card) or you will end up with black screen after boot up. The only nvidia flag that should be marked in your config.plist is Nvidiaweb which is located on the "system parameters" panel in Clover Configurator.
PRE-INSTALL
2. For UniBeast options I used UEFI boot mode and didn't check off any extra boxes under optional graphics configuration or other areas. The process of making your bootable USB can take anywhere from 20-40 minutes so be patient. The speed highly depends on your disk speed, computer speed, USB port speed, and USB stick speed.
3. My bios is version F6. I have no idea if newer version exists as I haven't checked yet. But I went through and made some changes in my bios as follows:
Load Optimized Defaults
Peripherals>xHCI Mode>Auto
Peripherals>xHCI Hand-off>ENABLED
Peripherals>EHCI Hand-off>ENABLED
BIOS Features>VT-d>DISABLED
BIOS Features>Boot Mode Selection>UEFI
Save and Exit
4. Important: Before you run the installer I recommend you pull your GTX960 card out and enable your Intel built in graphics in your BIOS for the installation process and next steps. This will save you from a lot of lost time and frustration with issues on the install and reboots, and final post-installation. You will need a DVI connector or VGA connector to use the Intel integrated graphics card.
In this guide I will tell you when to put the GTX 960 back in, it is virtually the last thing you will do. So PULL IT OUT !
5. Insert USB and use your motherboard menu F12 to select the USB with High Sierra install on it. If you do not see the USB then go into your BIOS setup and make sure you setup one of your boot slots to the USB. You can also perform a boot override in the BIOS if you like.
6. After High Sierra has finished its installation you should be booting into High Sierra no problem. Your Ethernet port might be working, but no sound or other drivers yet. That is covered in the POST INSTALLATION section.
7. Keep your GTX card out of the machine until instruction to put it back in. This will save you a tonne of grief and issues during the setup.
POST INSTALLATION - MultiBeast
Running the MultiBeast:
To finish your post setup, I used multi-beast 10.4.0 available for download here: https://www.tonymacx86.com/resources/multibeast-10-4-0-high-sierra.401/
Quick Start
Clover UEFI Boot Mode
Drivers / Audio
Check ALC1150 and AppleHDA
Drivers/Disk
skip this section
Drivers/Mac
Check all FAKE options and NMC if you have it.
Drivers/Network
Check Atheros E2200 Ethernet
Bootloaders
Select Clover UEFI Boot Mode
Customize/Graphics
do not select anything
Customize/SSDT
do not select anything
Customize/System Definitions
Select iMac 14.2
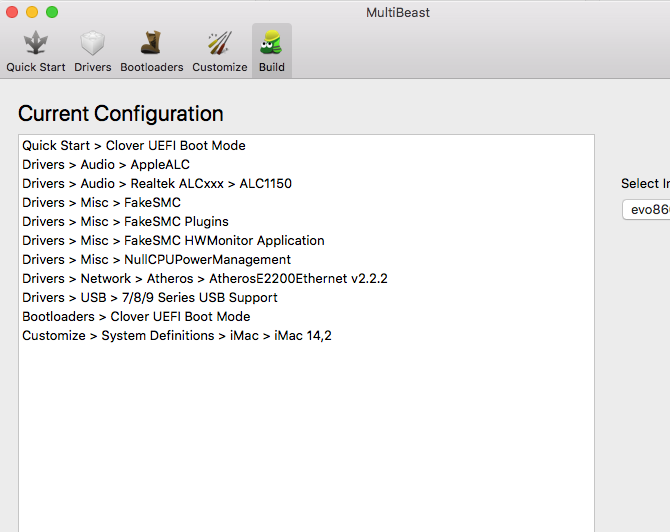
Now build the settings which will copy kexts and setup your config.plist file.
When this is finished, shut down the machine, pull out the USB and turn power on.
TIP: when you get the clover menu you want to select "boot from XXXX" where XXXX is the name of your internal hard drive where you installed High Sierra to.
High Sierra OSX should load. Congrats, you are booting off your internal hard drive. But, there is still lots of work to do.
POST INSTALLATION II
Preface
1. Your GTX 960 is still not installed in the computer yet. Do not put it in until step #7.
Setup Audio
2. Go to system preferences and change your audio settings to "built-in" if you are using the 1/8" headphone jack for your speakers.
Perform Apple security update
3. Do not skip this step: Check that your internet is working and if so run the Apple updater. DO NOT UPDATE everything at this point. Only update the security patch at the bottom of the list. You need to do this in order to install the Nvidia web drivers. If you do not update with this security patch, you will get version errors trying to install any version of Nvidia web drivers.
You will need to restart your machine to install the update. Once the update is completed and you are back on your OSX, go to next step.
Installing Nvidia web drivers
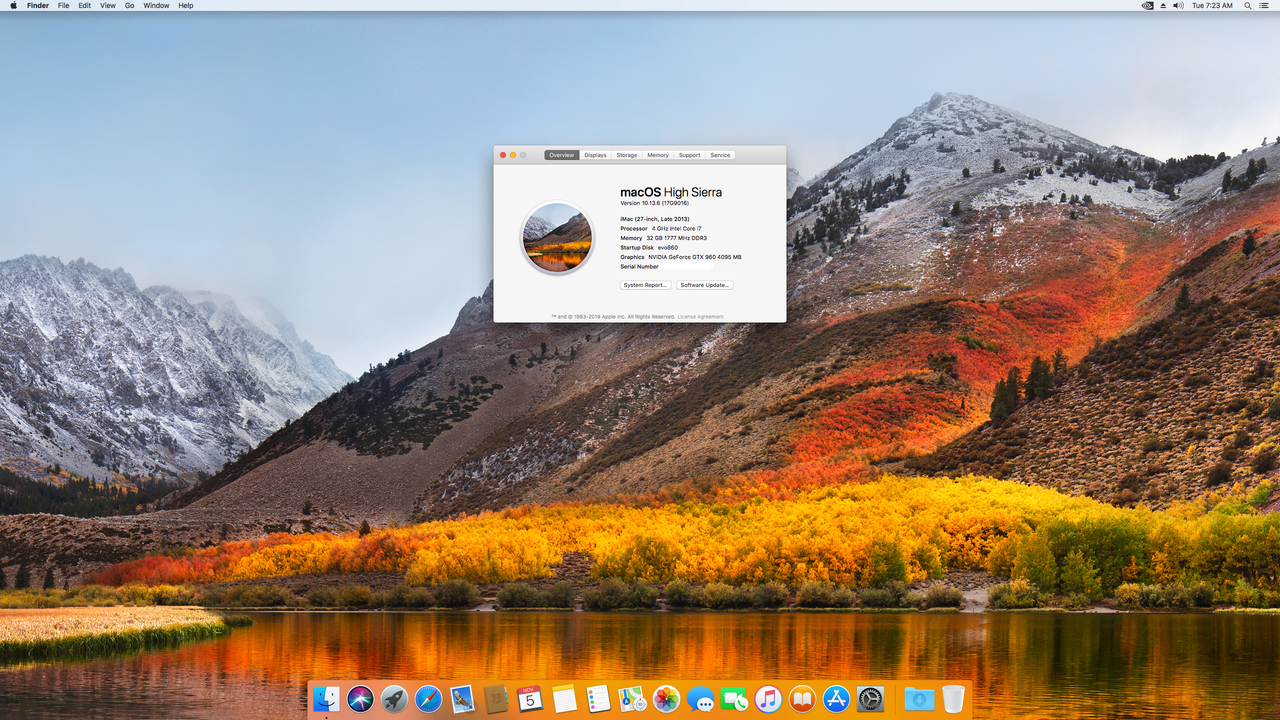
4. Find out the build of your High Sierra by going to about this mac. Clock on the word "Version 10.13" and the build will appear next to it. Now go to this page and download the correct version web driver for your OS build of High Sierra.
https://www.tonymacx86.com/nvidia-drivers/
Install this driver, restart the machine, do not put the card in yet.
Final steps before putting GTX 960 card back in
5. The GTX card is still not in the computer yet. You will need to download and run Clover Configurator. It can be downloaded from this website here https://www.tonymacx86.com/resources/clover-configurator.429/. Once downloaded, run it and mount your main boot partition, then open your config.plist file.
For the GTX 960 card to work with high sierra you need to remove all Nvidia boot arguments from the config.plist. If you are advanced, you can do this yourself by editing the config.plist with text editor. Otherwise use Clover Configurator which makes it super easy.
Remove Nvidia boot flags nv_disable=1 (disable Nvidia graphic card) and nvda_drv=1 (enable Nvidia graphic card).
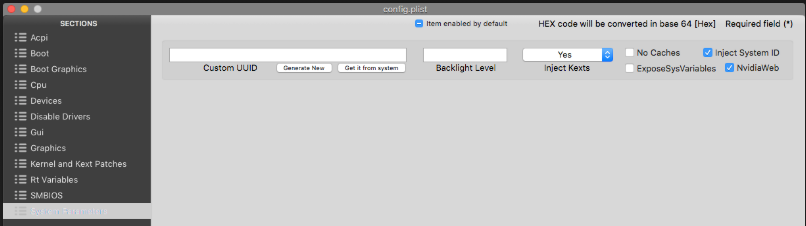
Add Nvidia Web option on the SYSTEM PARAMETERS window.
You also need to remove nvda_drv=1 from the NVRAM page, or otherwise your clover boot will keep using the argument which causes the screen to go black even if you removed the two arguments from the config.plist!
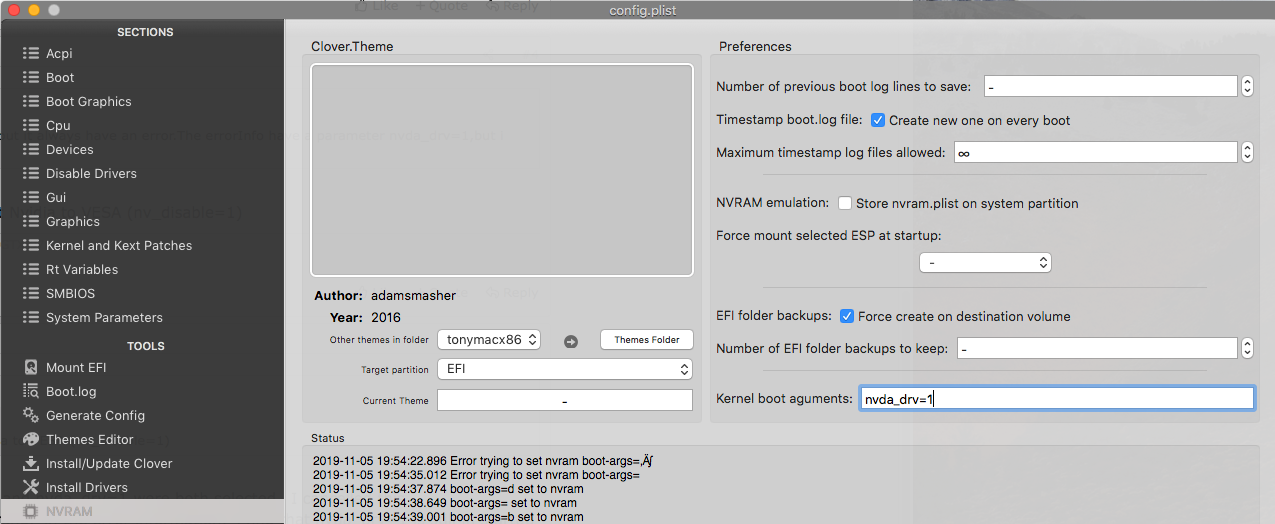
Once you've made these changes, close Clover Configurator. And open your config.plist again with Clover to make 100% absolutely sure the old nvidia arguments are removed, and only the new Nvidiaweb option is checked.
Once this is done shut down your computer.
Insert the GTX 960 card
6. Finally you can insert your GTX 960 card in the computer!
Boot up the machine and go into the BIOS. Disable the Intel integrated graphics. Reconnect your monitor cables and boot up the machine.
For some reason, your clover configurator will be applying the nv_disable=1 boot flag so when the Clover menu loads, you need to go to OPTIONS and edit the boot argument and remove nv_disable=1 from the argument. Go back to the Clover menu and boot your OSX on your hard drive.
Install CUDA driver
7. If everything went well, you should boot into your OSX without any issues using your GTX 960 and attached monitor.
The next step is to install the CUDA drivers. You can download the newest one here: https://www.nvidia.com/en-us/drivers/cuda/mac-driver-archive/
You don't need to restart.
OTHER
The USB ports are not working in USB 3.0 yet but I will update this page once I work on getting it working in the next few days.
Attachments
Last edited:
")