- Joined
- Oct 22, 2010
- Messages
- 323
- Motherboard
- z68a-d3-b3
- CPU
- i7-3770k
- Graphics
- GTX 650
OK, guys, this is a very easy to do guide from scratch you can do upgrade as well however I wanted to do a clean install. For a Direct upgrade Guide Tony has a fantastic Guide posted here https://www.tonymacx86.com/threads/update-directly-to-macos-catalina.284463/
Updates
[October-16-2019] Supplemental Update
[Guide] Dell Optiplex 7010
OK, guys, this is a very easy to do guide from scratch you can do upgrade as well however I wanted to do a clean install. For a Direct upgrade Guide Tony has a fantastic Guide posted here https://www.tonymacx86.com/threads/update-directly-to-macos-catalina.284463/ Updates [October-16-2019]...
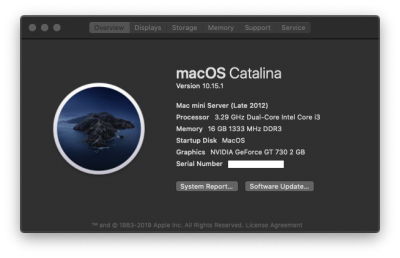
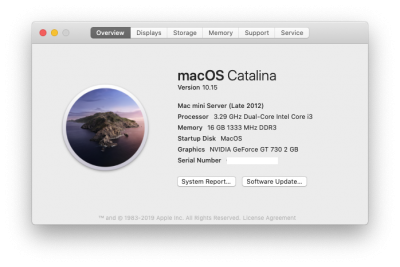
[March-24-2020] 10.15.4
https://www.tonymacx86.com/threads/guide-dell-optiplex-7010.284786/post-2089839
Steps
1- download Catalina from appstore https://apps.apple.com/us/app/macos-catalina/id1466841314
2- you need a 16gb usb stick as the file size is 8gb+
3-Create a usb installer (Make sure you name the usb stick Untitled)
Code:
sudo /Applications/Install\ macOS\ Catalina.app/Contents/Resources/createinstallmedia --volume /Volumes/Untitled4-once the usb stick is created then mount the EFI folder using clover configulator or any app that can mount the EFI partition
5-use supplied EFI from attachments and place inside the EFI folder of the installer
6-Boot computer using F12 Key, and format drive Make sure to delete everything form the drive and to use disk utility and make sure its GUID and partition type is Mac OS Extended (Journaled) once OS is installed it will convert to afps automatically (Makes sure to click view and show all devices and you will see the name of your drive i.e like mine says ADATA SX900 Media you wanna erase that or else you wont get the extended journaled option)
Step7- After install is complete and your able to use the OS. Use clover and mount the EFI partition of MacOS on installed drive and copy the EFI folder in there and now your MacOS will become bootable
Post install
Get rid of that annoying message of asking you to allow install for every app
Open Applications > Utilities > Terminal and enter the following command to allow apps downloaded from unidentified developers:
Paste following command in terminal
Code:
sudo spctl --master-disableAttachments
Last edited:
 I will add that