The recommended methods are in post #1.
This post contains alternatives that may still be useful in scenarios that post #1 methods may not be possible.
Fresh install scenario (or update), modifying minstallconfig.xml using PlistBuddy
Refer to this guide for an overview of the installation process from USB:
https://www.tonymacx86.com/threads/guide-booting-the-os-x-installer-on-laptops-with-clover.148093/
The process involves creating an installer USB with createinstallmedia, then booting that USB (via Clover on the same USB). You then run the installer, create an HFS+J partition suitable for macOS with Disk Utility, then point the installer to that partition.
Even though you create a new HFS+J partition, if the target is an SSD, the installer will still convert it to APFS.
To avoid that, after running the installer, and upon the first reboot where you would be normally directing Clover to boot the next stage of the installer by selecting "Boot macOS Install from ...", instead, boot the "install_osx" partition on USB again. When that is finished booting, choose Terminal from the Utilities menu.
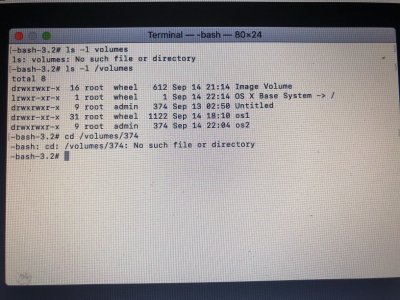
Now, in Terminal, navigate to your target volume:
Code:
# list /Volumes to remind yourself of the name you gave it
ls -l /Volumes
# then change your working directory to it (in my case, I used '1013')
cd /Volumes/1013
# now change to the "macOS Install Data" directory
cd "macOS Install Data"
# now fix the minstallconfig.xml with PlistBuddy
/usr/libexec/PlistBuddy -c "Set :ConvertToAPFS false" minstallconfig.xml
That's it! Now you're ready to quit Terminal, reboot, and continue the installation process by booting the "Boot macOS Install from ..." partition. When you're done, you'll have a fresh install on HFS+J instead of APFS.
Fresh install scenario (or update), modifying minstallconfig.xml using vi
Refer to this guide for an overview of the installation process from USB:
https://www.tonymacx86.com/threads/guide-booting-the-os-x-installer-on-laptops-with-clover.148093/
The process involves creating an installer USB with createinstallmedia, then booting that USB (via Clover on the same USB). You then run the installer, create an HFS+J partition suitable for macOS with Disk Utility, then point the installer to that partition.
Even though you create a new HFS+J partition, if the target is an SSD, the installer will still convert it to APFS.
To avoid that, after running the installer, and upon the first reboot where you would be normally directing Clover to boot the next stage of the installer by selecting "Boot macOS Install from ...", instead, boot the "install_osx" partition on USB again. When that is finished booting, choose Terminal from the Utilities menu.
Now, in Terminal, navigate to your target volume:
Code:
# list /Volumes to remind yourself of the name you gave it
ls -l /Volumes
# then change your working directory to it (in my case, I used '1013')
cd /Volumes/1013
# now change to the "macOS Install Data" directory
cd "macOS Install Data"
Now, still in Terminal, edit the minstallconfig.xml file with vi:
You will find code:
Code:
    <key>ConvertToAPFS</key>
    <true/>
Your goal is to change the true to false.
If you know how to use vi, this will not be a problem. Otherwise, follow the instructions below very carefully:
- arrow such that the cursor is at the 't' in 'true'
- press the Del key (forward delete) four times (this removes 'true')
- press i (this puts vi into insert mode)
- type 'false' (without the quotes)
- press Esc (this takes vi out of insert mode)
The result should look like:
Code:
    <key>ConvertToAPFS</key>
    <false/>
No other changes should be made.
If the file looks good:
- press ':wq' (without the quotes) and press enter (':wq' saves the file and exits vi)
If the file doesn't look right, don't save it:
- press ':q!' (without the quotes) and press enter
That's it! Now you're ready to quit Terminal, reboot, and continue the installation process by booting the "Boot macOS Install from ..." partition. When you're done, you'll have a fresh install on HFS+J instead of APFS.