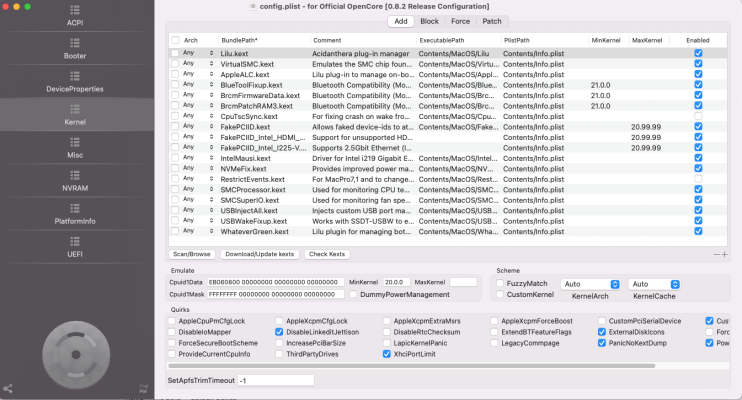
Let's uncheck all three of the kexts shown in screenshot, then reboot. It may also be a good idea to perform a CMOS Reset, then configure BIOS parameters again (per Post 1).
When configuring BIOS parameters, we should first select "Load Optimized Defaults" and then make changes on top of that.
To perform CMOS reset, shutdown system and flip power switch on PSU to OFF. Then short the two designated pins on motherboard with a flathead screwdriver. Now flip power switch on and boot the system.
View attachment 552753