Contribute
Register

Gigabyte Z390 M Gaming build with working NVRAM

pastrychef

Moderator
Joined
May 29, 2013
Messages
19,458
Motherboard
Mac Studio - Mac13,1
CPU
M1 Max
Graphics
32 Core
Mac
  1. MacBook
  2. Mac Pro
Classic Mac
  1. iBook
  2. Power Mac
  3. PowerBook
Mobile Phone
  1. iOS
Gigabyte Z390 M Gaming Build
Screen Shot 2020-02-19 at 2.14.42 PM.png

Components
Gigabyte Z390 M Gaming Motherboard
> Amazon, Newegg
Intel i9-9900K Processor > Amazon, Newegg
Noctua NH-D15S CPU Cooler > Amazon, Newegg
Oloy DDR4 3200MHz 4x16GB RAM > Amazon, Newegg
PowerColor Radeon VII > Amacon, Newegg
BCM94360CS2 on PCI-e Adaptor > Amazon, Newegg
Syba SD-PEX24055 10GbE PCI-e card > Amazon, Newegg
GC-Titan Ridge > Amazon, Newegg


Comments
I've had this motherboard for approximately 9 months now and did not do a build thread for it until now because I struggled so much with getting it to run at a level that met my personal standards for reliability and stability. It wasn't until the awesome guys at Acidanthera figured out how to get NVRAM working and Gigabyte finally releasing a reliable BIOS (F9g) that I am comfortable in recommending this motherboard.

I do have a GC-Titan Ridge Thunderbolt 3 PCI-e card and it worked fine with the only Thunderbolt device I own, an OWC 10GbE Thunderbolt 3 adaptor. However, I pulled the GC-Titan Ridge card and stuck in my Syba AQC107 10GBase-T card instead to clean up some cable mess in the case and to keep things a little neater on my desk. My EFI will include the SSDT to enable the GC-Titan Ridge. Although I never personally tested any other Thunderbolt devices, I have no reason to believe Thunderbolt devices that work on other hackintoshes won't work here.

I will be making lots of references and comparisons with another motherboard that I own, the Asus Z370-G Gaming (Wi-Fi AC) which I feel intimately familiar with.


The Build
Motherboard
I chose this motherboard primarily for the VRM. While I was able to overclock my i9-9900K fine on my old Z370 motherboard, I wanted to see what the 10+2 phase VRM of this motherboard can do and the option to go to 128GB RAM if/when I ever needed to is cool. On paper, it appeared to offer everything I would want in a motherboard. I always like the mATX form factor and have always felt that 3-4 PCI-e slots are enough for my needs.
  • The Good. My theories of better overclocking ability on this motherboard were confirmed. I am able to clock to 5GHz with considerably less voltage (1.290v, Turbo LLC) and can even run 5.1GHz reliably at somewhat reasonable voltages (1.320v, Turbo LLC). I booted in to 5.2GHz but didn't stay on it for long. I was afraid my cooling solution may not be sufficient for the amount of voltage I anticipate it would require to stay stable. Please note that my i9-9900K was delidded.
  • The Bad. This motherboard is quite finicky with RAM. When shopping for RAM, I highly suggest consulting the QVL and also looking around the forums to see which RAM work reliably for other Gigabyte Z390 users. My much cheaper Oloy DDR4 3200MHz RAM runs at 3600MHz more reliably on this motherboard than my far more expensive G.Skill DDR4 3400MHz RAM. Go figure...
  • The Ugly. The other negative about this motherboard is that Gigabyte decided to block the CNVi port from working with anything but Intel CNVi Wi-Fi/Bluetooth cards. So, if you want Wi-Fi/Bluetooth in macOS, you will have to go with a PCI-e solution. Also, SATA0 is disabled if an NVMe SSD is installed in the M2P connector.
CPU
I am using an i9-9900K but I've also had an i5-9400F on this motherboard. Both work as expected and have no issues with macOS. Really, any CPU compatible with the motherboard will work.

Heatsink & Fans
I'm using the same Noctua NH-D15S that I'd been using since my first hackintosh build from around 2016 and it continues to perform well. All the fans in this build are Noctuas except for the front case fan which is a Silverstone AP183 1800mm fan. The reason the front case fan is not a Noctua is because Noctua doesn't make 180mm fans...

Graphics Card
I went with a Radeon VII because I felt it was the best macOS compatible video card available. I also do a bit of gaming in Windows and from the benchmarks I saw it still beats the RX 5700 XT most of the time especially when gaming in higher resolutions.

Power Supply
I'm still using the same Seasonic X-850 from my first hackintosh build from 2016. This has been a great power supply. It's inaudible in use and has never skipped a beat.

Case
I'm using a Silverstone TJ-08E. I like the relatively small footprint and fantastic air flow. I also have a 3x3.5 to 2x5.25 hot swap cage occupying the two 5.25" drive bays in the case and a 2x2.5 to 3.5 hot swap cage in the bottom 3.5" bay. This allows me to swap out drives without the need to ever open the case or mess with cables.

Wi-Fi/Bluetooth
As I mentioned above, I use an Apple BCM94360CS2 on a PCI-e adaptor for 100% macOS compatibility.


Installation
Prerequisites

  • You must be on at least BIOS F9g F9l (that's a lower case L). I have found older BIOS versions to be too buggy. (Update: Attached below is BIOS F9k Beta. This version of BIOS added (1) the ability to unlock CFG and (2) disable Serial Port. I'm using it now and it has been solid. More info here. I highly recommend using F9k.). (Update 2: @Valensing has posted BIOS F9j which also restores CFG unlock and ability to disable Serial Port here. This reportedly does not have the black screen issue some experience with F9k.) If you get errors when flashing, you can try the fix from post #2769.
  • You need to have access to a working Mac or hackintosh.
  • A Catalina compatible discrete video card. While it is possible to use IGPU only, my EFI folders are not currently configured for this.
  • If you are using a macOS compatible Wi-Fi/Bluetooth card, the USB cable should be plugged in to the F_USB1 motherboard header and the PCI-e card should be installed in the PCIEX1_2 slot.
  • At least one USB flash drive. Personally, I like to stick to 16 or 32GB USB 3 flash drives due to an old FAT32 limit.

BIOS Settings
  • Advanced Mode > Settings > IO Ports > Initial Display Output > PCIe 1 Slot
  • Advanced Mode > Settings > IO Ports > Above 4G Decoding > Enabled
  • Advanced Mode > Settings > IO Ports > USB Configuration > XHCI Hand-off > Enabled
  • Advanced Mode > Boot > CSM Support > Disabled
  • (If using iMac19,1 system definition) Advanced Mode > Settings > IO Ports > DVMT Pre-Allocated > 64M
  • (If using iMac19,1 system definition) Advanced Mode > Settings > IO Ports > DVMT Total Gfx Mem > 256M
  • (If using iMac19,1 system definition) Advanced Mode > Settings > IO Ports > Aperture Size > 256MB
  • (Only available on Beta BIOS F9k, F9j, F9l) Settings > IO Ports > Super IO Configuration > Serial Port > Disabled
  • (Available on BIOS F9k, F9j, F9l) Boot > CFG Lock > Disabled
* Note: Contrary to popular belief, I've never had to disable VT-x or VT-d on any of my hacks.

For those who have GC-Titan Ridge Thunderbolt 3 PCI-e card:
  • Advanced Mode > Settings > Thunderbolt(TM) Configuration > Thunderbolt Boot Support > Boot Once
  • Advanced Mode > Settings > Thunderbolt(TM) Configuration > Security Level > No Security
  • Advanced Mode > Settings > Thunderbolt(TM) Configuration > Discrete Thunderbolt Configuration > GPIO3 Force Pwr > Enabled

Unlock MSR (aka unlock CFG) (NVRAM will not work with locked MSR)
Update to BIOS F9l. This will allow you to do the unlock right in BIOS.
1. Download and unZip the BIOS file.
2. Copy the BIOS file to a FAT32 formatted USB flash drive.
3. Use the Q-Flash feature in BIOS to update BIOS.
4. To be safe, do not update the Backup BIOS.
5. Re-do your BIOS settings after flashing.

Unlock MSR Using Grub Shell
1. Download the EFI Shell and unZip it.
2. Copy the EFI folder to the EFI partition of your USB flash drive. (EFI Agent can help with mounting of EFI partitions.)
3. Boot from the USB flash drive.
4. At the Grub prompt, enter:
Code:
setup_var_3 0x5C1 0x0
5. Reboot in to BIOS.
6. Save your BIOS settings profile to USB flash drive. If your BIOS ever resets itself, you won't have to manually unlock MSR again, just load your BIOS setting profile and MSR will be unlocked.
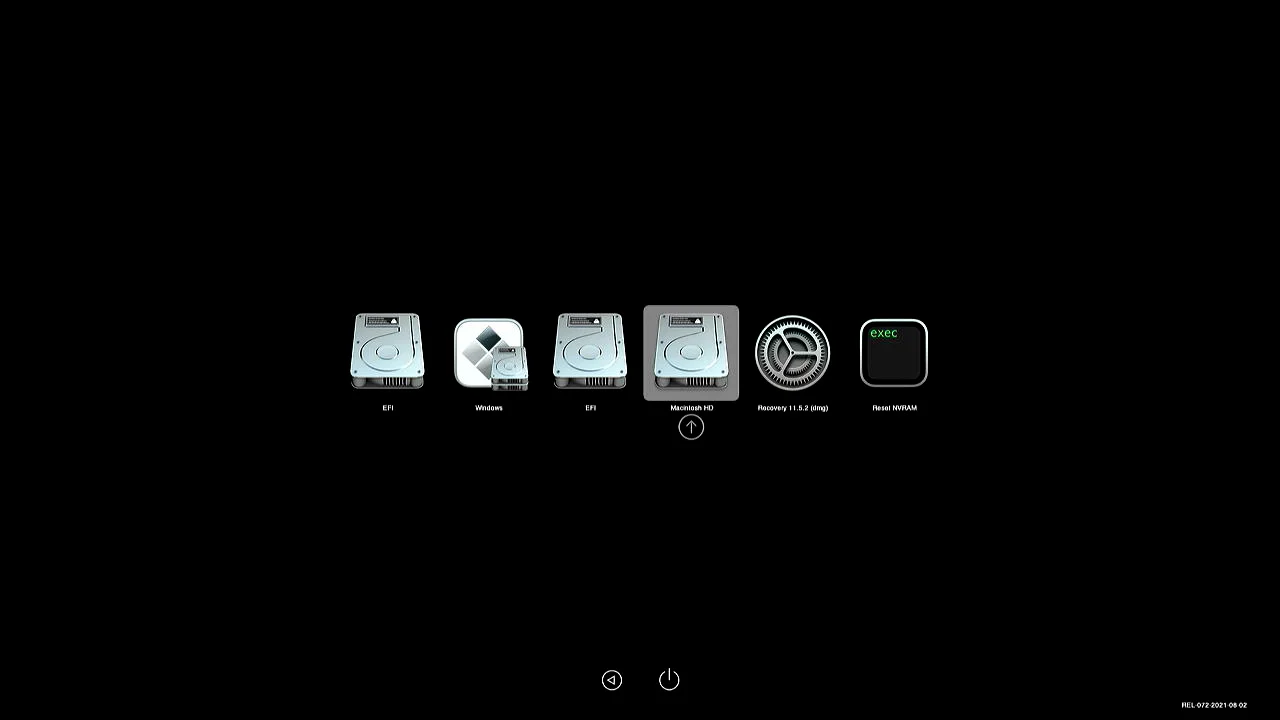
7. Done. (Please see last image of post #2 to see what success looks like.)
* Note/Warning: The MSR address is the same for every BIOS version for this motherboard, so far. This MSR address is only for this motherboard. If you are on another motherboard, you will need to find what your MSR address is.


Create Your USB Installer And Install macOS
On your working Mac or hackintosh, create your USB Catalina installer.
1. Download the full Catalina installer from the Mac App Store.
2. Plug in your USB flash drive.
3. Launch Disk Utility and initialize the USB flash drive as Mac OS Extended (Journaled)/GUID with the name Untitled.
4. Launch Terminal and enter:
Code:
sudo /Applications/Install\ macOS\ Catalina.app/Contents/Resources/createinstallmedia --volume /Volumes/Untitled -- /Applications/Install\ macOS\ Catalina.app
5. Choose and download either the Clover or OpenCore EFI then unZip it.
6. Copy the EFI Folder to the EFI partition of your USB flash drive. (EFI Agent can help with mounting of EFI partitions.)
7. Boot from the USB flash drive.
8. Install macOS.
9. Mount the EFI partition of your USB flash drive and the EFI partition of your main system drive.
10. Copy the EFI folder from the EFI partition of your USB flash drive to the EFI partition of your main system drive.
11. Done.
* Note: Users with AMD Navi cards (i.e. 5700 XT) may need to add "agdpmod=pikera" boot argument to config.plist.

EFI Configuration Notes
  • iMacPro1,1 system definition is used. (You can also switch to iMac19,1 if you like.)
  • All hackintosh kexts are installed in EFI and injected by bootloader.
  • SIP is Enabled.
  • All external USB ports Enabled.
  • F_USB30 motherboard header Enabled.
  • One port on F_USB1 motherboard header Enabled for Bluetooth.
  • USB 2 functionality Disabled on USB 3.1 gen 2 ports. (I hit the 15 port limit and this was the most logical compromise.)
  • IGPU can be enabled in BIOS so that Quick Sync is available for apps such as FCPX. Enabling IGPU in BIOS is optional. However, be warned, enabling IGPU may cause problems booting at times if you are using BIOS F9g. It is not a problem with BIOS F9k or newer. In my experience, switching back and forth between Clover and OpenCore can cause this to happen, so I suggest picking one bootloader and sticking with it. If/when this happens, clearing CMOS will fix it.
  • AMD Navi video card users will need to add the following Boot Arugment: agdpmod=pikera
  • As of OpenCore 0.5.8, OpenCanopy is enabled by default.
  • As of OpenCore 0.5.8, Boot Chime is configured but disabled by default.

Post Installation
1. Open your config.plist and populate the Serial, Board Serial, UUID, (and MAC address, if you are using OpenCore).
2. Go to System Preferences > Startup Disk and select your startup disk.
3. Done.


What Works/Doesn't Work
  • As far as I know, pretty much everything except (1) "Hey, Siri!" when system is sleeping and (2) Sidecar because I am using iMacPro1,1 system definition.
  • If you need Sidecar, change to iMac19,1 system definition. (This will break DRM support but there are workarounds. I have not tested the workarounds enough to give any support for this.)
  • Sleep/wake works, however, waking from sleep requires multiple mouse clicks/key presses. I have no idea why or how to fix this. If anyone knows, please let me know. Btw, pressing the power button wakes the system in one shot. (@pit512 figured out that "darkwake=0" boot argument fixes this. Thanks!) (@Humanate states "darkwake=10" has the added benefit of also being able to wake with Apple Watch along with just a single mouse click.)
  • The macOS USB 15 port limit is already addressed in my EFI folders. No addition work/fixes are necessary.
  • UtterDisbelief has confirmed that even booting in to El Capitan is possible with these EFI folders.
  • As stated above, my EFI folders are not configured for systems without a discrete video card. The reason is because the connectors need framebuffer patching to fix and those patches are not in my config.plists. I will post the connector patches in a separate post.
  • The PS/2 port works. I use an old school PS/2 mechanical keyboard, but system can not be waken from sleep by PS/2 keyboards/mice.
  • FileVault works. You may see some weird verbose text, just ignore it.
  • Booting Single User Mode, Safe Mode, Recovery all works. You may see some weird verbose text, just ignore it.
  • If you are seeing color banding on your display, @Bustycat has posted a fix.


Epilogue
It took a long time to get this board working reliably enough to satisfy my personal standards. I thought I'd given up for the final time back in December but was alerted to the fact that NVRAM was fixed in January and gave it one last go... After owning this motherboard for approx 9 months, it's finally running macOS well enough that I can recommend this motherboard for hackintoshing. The acidanthera team has all my thanks for getting NVRAM working!

I'm now using this as my primary system, replacing my beloved Asus Z370-G Gaming (Wi-Fi AC). In my opinion, the Z370-G is still a tiny bit better at running macOS because the M.2 slot for Wi-Fi/Bluetooth works with BCM94360CS2 but this is a very minor issue that I've traded for better overclocking and the option to upgrade to 128GB RAM if/when needed.
 

Attachments

  • EFI Clover r5103 Z390M.zip
    22.8 MB · Views: 1,751
  • EFI OpenCore 0.5.4 Z390M.zip
    19.4 MB · Views: 1,039
  • EFI Shell.zip
    3 MB · Views: 2,846
  • EFI OpenCore 0.5.5 Z390M.zip
    18.9 MB · Views: 867
  • EFI Clover r5104 Z390M.zip
    23.1 MB · Views: 856
  • EFI OpenCore 0.5.6 Z390M.zip
    18.6 MB · Views: 848
  • EFI Clover r5107 Z390M.zip
    23.2 MB · Views: 965
  • EFI OpenCore 0.5.7 Z390M.zip
    5.1 MB · Views: 723
  • EFI Clover r5114 Z390M.zip
    23.2 MB · Views: 754
  • EFI OpenCore 0.5.8 Z390M.zip
    6.7 MB · Views: 888
  • EFI Clover r5117 Z390M.zip
    23.2 MB · Views: 1,068
  • EFI OpenCore 0.5.9 Z390M.zip
    6.4 MB · Views: 956
  • Z390MGAMING.F9k.zip
    6.7 MB · Views: 793
  • EFI Clover r5120 Z390M v3.zip
    23 MB · Views: 568
  • EFI OpenCore 0.6.0 Z390M v2.zip
    6.4 MB · Views: 611
  • EFI Clover r5122 Z390M.zip
    23.1 MB · Views: 754
  • EFI OpenCore 0.6.1 Z390M.zip
    6.4 MB · Views: 616
  • EFI OpenCore 0.6.2 Z390M v2.zip
    6.5 MB · Views: 518
  • EFI OpenCore 0.6.3 Z390M v2.zip
    6.5 MB · Views: 627
  • EFI Clover r5126 Z390M v4.zip
    23.4 MB · Views: 444
  • EFI Clover r5127 Z390M.zip
    23.4 MB · Views: 605
  • EFI OpenCore 0.6.4 Z390M.zip
    6.5 MB · Views: 534
  • EFI OpenCore 0.6.5 Z390M.zip
    6.6 MB · Views: 453
  • EFI Clover r5128 Z390M.zip
    23.4 MB · Views: 372
  • EFI Clover r5129 Z390M.zip
    23.6 MB · Views: 352
  • EFI OpenCore 0.6.6 Z390M.zip
    62 MB · Views: 570
  • EFI Clover r5131 Z390M.zip
    23.5 MB · Views: 422
  • EFI OpenCore 0.6.7 Z390M.zip
    61.9 MB · Views: 465
  • EFI Clover r5132 Z390M.zip
    23.5 MB · Views: 295
  • EFI OpenCore 0.6.8 Z390M.zip
    62 MB · Views: 424
  • EFI Clover r5134 Z390M.zip
    23.6 MB · Views: 387
  • EFI OpenCore 0.6.9 Z390M.zip
    12.1 MB · Views: 513
  • EFI Clover r5136 Z390M.zip
    23.6 MB · Views: 308
  • EFI OpenCore 0.7.0 Z390M.zip
    12.3 MB · Views: 455
  • EFI Clover r5138 Z390M.zip
    23.6 MB · Views: 319
  • EFI OpenCore 0.7.1 Z390M.zip
    12.3 MB · Views: 351
  • EFI OpenCore 0.7.2 Z390M.zip
    12.4 MB · Views: 371
  • EFI Clover r5139 Z390M.zip
    23.7 MB · Views: 295
  • EFI OpenCore 0.7.3 Z390M.zip
    12.5 MB · Views: 358
  • EFI Clover r5140.1 Z390M.zip
    25 MB · Views: 211
  • EFI OpenCore 0.7.4 Z390M.zip
    13.8 MB · Views: 370
  • EFI Clover r5141 Z390M.zip
    25.1 MB · Views: 339
  • EFI OpenCore 0.7.5 Z390M.zip
    13.7 MB · Views: 405
  • EFI Clover r5142 Z390M.zip
    25.1 MB · Views: 225
  • EFI OpenCore 0.7.6 Z390M.zip
    13.8 MB · Views: 296
  • EFI OpenCore 0.7.7 Z390M.zip
    14.2 MB · Views: 209
  • EFI Clover r5144 Z390M.zip
    25.5 MB · Views: 164
  • EFI OpenCore 0.7.8 Z390M.zip
    14.2 MB · Views: 255
  • EFI Clover r5145 Z390M.zip
    25.5 MB · Views: 287
  • EFI OpenCore 0.7.9 Z390M.zip
    14.2 MB · Views: 327
  • EFI Clover r5146 Z390M.zip
    25.6 MB · Views: 378
  • EFI OpenCore 0.8.0 Z390M.zip
    14.3 MB · Views: 287
  • EFI OpenCore 0.8.1 Z390M.zip
    14.2 MB · Views: 216
  • EFI OpenCore 0.8.2 Z390M.zip
    14.3 MB · Views: 210
  • EFI OpenCore 0.8.3 Z390M.zip
    14.4 MB · Views: 192
  • EFI OpenCore 0.8.4 Z390M.zip
    14.6 MB · Views: 160
  • EFI OpenCore 0.8.5 Z390M.zip
    14.6 MB · Views: 162
  • EFI OpenCore 0.8.6 Z390M.zip
    14.6 MB · Views: 146
  • EFI OpenCore 0.8.7 Z390M.zip
    14.6 MB · Views: 123
  • EFI OpenCore 0.8.8 Z390M.zip
    14.4 MB · Views: 174
  • EFI OpenCore 0.8.9 Z390M.zip
    14.4 MB · Views: 172
  • EFI OpenCore 0.9.0 Z390M.zip
    14.6 MB · Views: 171
  • EFI OpenCore 0.9.1 Z390M.zip
    14.7 MB · Views: 165
  • EFI OpenCore 0.9.2 Z390M.zip
    14.5 MB · Views: 158
  • EFI OpenCore 0.9.3 Z390M.zip
    14.7 MB · Views: 231
Last edited:
How To Find Your MSR Lock/Unlock Address And Change The Setting

Tools Needed

  • UEFITool - Used to extract sections of the BIOS. (There are multiple tools available for download. Make sure you download the Mac version of UEFITool.)
  • Universal-IFR-Extractor - Used to convert the file extracted by UEFITool in to readable text.
  • EFI Shell
  • A copy of the BIOS version that you have installed on your motherboard. Get this from your motherboard manufacturer's website.

* Note: The following instructions are for my Gigabyte motherboard, but it should be extremely similar for any brand of motherboards. This is the same method used to find and change the DVMT Prealloc on laptops.

Part 1 - Extraction
1. Put UEFITool, Universal-IFR-Extractor, and your motherboard BIOS in to a folder on your desktop named "MSR".
2. unZip all the files in the MSR folder.
3. Rename your BIOS file with "bin" extension. For my motherboard, I renamed "Z390MG.F9g" to "Z390MG.bin".
4. Right-click UEFITool and select "Open" and confirm to open.
5. In UEFITool, goto File on the menu bar and select "Open Image File..." and select your BIOS file.
6. In UEFITool, goto File on the menu bar and select "Search..."
7. In the window that pops up, click on the "Text" tab and enter "CFG Lock" in the "Text" field.
Screen Shot 2020-02-02 at 8.42.40 AM.png
8. In the "Message" section on the bottom half of the UEFITool window, double-click on the PE32 Image where it found "CFG Lock".
Screen Shot 2020-02-02 at 9.11.19 AM.png
9. In the "Structure" section on the top left of the UEFITool window, right-click on the "PE32 Image section" and select "Extract As Is..." I named mine "setup.bin".
Screen Shot 2020-02-02 at 8.48.04 AM.png
10. Done.

Part 2 - Conversion
1. Right-click ifextract and select "Open" and confirm to open. A Terminal window should open.
2. Open a new Terminal window.
3. Drag ifextract from your MSR folder to the Terminal window.
4. Drag your "setup.bin" file to the same Terminal window.
5. Drag your "setup.bin" file to the same Terminal window again, but, this time, change the file extension from ".bin" to ".txt" and press Enter.
Screen Shot 2020-02-02 at 9.02.31 AM.png
6. Done.

Part 3 - Find Address
1. Open the "setup.txt" file in TextEdit.
2. Press Command+F to search for "CFG".
3. Now we can see that address is 0x5C1 and that it's currently set to 0x1.
1.png
4. We can also see that 0x1=Enabled and 0x0=Disabled.
2.png
5. With this info, we can just boot in to EFI Shell and make the changes as detailed in post #1.
6. Done.

Update:
This is what it looks like after you've successfully unlocked MSR.
IMG_0586.jpeg
 
Last edited:
FAQs, Hints, and Tips

Which graphics cards work OOB?

  • Vega 56/64 (Try to stick to cards with cards that adhere to reference video out layout.)
  • Radeon VII (All Radeon VIIs are the same. All are reference.)
  • RX 560-590 (Be careful with XFX and Visiontek brands. Check on forum for compatibility before purchasing. Also be careful with RX 560s, some manufacturers sell rebadged RX 550s and/or RX 480 which will not work.)
  • AMD RX 5000-series works on Catalina 10.15.2 and newer. "agdpmod=pikera" boot argument will probably be required in config.plist.
  • AMD RX 6800, 6800 XT, and 6900 XT support has been added to macOS as of macOS Big Sur 11.4. If you have a card with incompatible Device-IDs, please see here. CSM may need to be enabled in BIOS. "agdpmod=pikera" boot argument will probably be required in config.plist.
  • AMD RX 6600 and 6600 XT support has been officially add to macOS as of macOS Monterey 12.1. "agdpmod=pikera" boot argument is required in config.plist. Here's a post with some real world test results vs M1 Max.
*Note 1: It's always a good idea to try and stick with reference style port layouts. For example, if the port layout on a reference card has three DisplayPort and one HDMI and you find a card that has six HDMI, it's probably a good idea to avoid the card with six HDMI.
*Note 2: Although there are some Nvidia cards that are still supported as of Catalina, I advise you to stay away from them. They are a dead end and any support will end sooner rather than later.
*Note 3: There are older AMD cards that others have managed to get working, but I don't have any experience with them.
*Note 4: RX 6800, RX 6800 XT, and 6900 XT support has been added to macOS 11.4 public beta. Non-Reference cards may require firmware flashing or special files. Please see here and here for details. (RX 6700 XT cards are not working yet.)
*Note 5: RX 6600 and RX 6600 XT support has been added to macOS 12.0.2 public beta. Still no support for RX 6700 XT.
*Note 6: You can use Metal-Features-Inspector to make sure your graphic card is working correctly.

I use IGPU only (no dGPU). What's the correct ig-platform-id to use?
Everything up to and including macOS Catalina 10.15.4, use 3e9b0007. (Leaving blank may also work.)
Starting with macOS Catalina 10.15.5, use 3e9b0000. (Leaving blank may also work.)
*Those with dGPUs should not configure anything for ig-platform-id. Leave it blank.

Which CPUs can I use?
Any CPU that's compatible with the motherboard except Pentiums and Celerons. Just keep in mind that "F" series processors do not have IGPU, so avoid these if you need IGPU.

Do all NVMe SSDs work with macOS?
No. Some NVMe SSDs have had compatibility issues with macOS in the past. The Samsung 970 EVO Plus and Samsung PM981 were notable ones. Eventually, there was a firmware update for the Samsung 970 EVO Plus that fixed the kernel panics that the original firmware caused, but, as far as I know, there was never any such firmware update for the PM981.

Also, note that some SSDs have issues with Trim. Samsung SSDs and SSDs that use Phison controllers appear to be the ones affected. They will cause slow boot on Monterey. Please see here for more info.

Some Samsung SSDs have slow boot issue with Monterey. Please see buyer's guide for updated recommendations.

Which Wi-Fi/Bluetooth cards work?
Apple made BCM94360xxx-based cards work OOB and it's what I recommend. You will need a PCI-e adaptor for these cards because Gigabyte whitelists the CNVi port on the motherboard to only work with Intel CNVi cards.

Asus and ASRock motherboards can use M.2 A/E key adaptors for these cards and use the motherboard M.2 slot for Wi-Fi/Bluetooth.

M.2 M key slots (these slots are originally meant for use with NVMe SSDs) can also be used but, in my opinion, it's a waste of a PCI-e x4 slot.

BCM94352Z based cards such as the Dell DW1560 and Lenovo 04x6020 can also work, but these will require additional kexts for both Wi-Fi and Bluetooth.

BCM943602BAED based cards such as the Dell DW1830 can work. Wi-Fi should work OOB but additional kexts will be needed for Bluetooth.

Some people have gotten the Dell DW1820A to work. There are multiple versions of these cards, so be careful which you purchase. Please see this guide for valuable information. I do not have any first hand experience with these cards.

Some have gotten Atheros based cards to work, but the methods to get them working are extremely "hacky" and I advise you to stay away from them.

Recently, a new BCM94360NG card has emerged on to the market. These are M.2 A/E slot compatible and work OOB (assuming your motherboard doesn't have any whitelist.). *Update: These cards appear to have packet loss issues when used with Catalina or newer. Please see this thread for more info.

Lastly, Fenvi makes quite a few Wi-Fi/Bluetooth PCI-e cards that work OOB in macOS and is a very popular choice among hackintoshers.

Note: Monterey broke Bluetooth compatibility with non-Apple native cards. Some users have had luck using BlueToolFixup to re-enable Bluetooth. I was unable to get it to work with a DW1560.

Which 10GBase-T cards work OOB?
Syba SD-PEX24055 (I use one of these.)
Sonnet Presto Solo 10GBase-T Ethernet
Synology 10Gb Ethernet Adaptor E10G18-T1
Asus XG-C100C 10G Network Adaptor (Confirmed by jbarnette.)

*Note: As of Big Sur Public Beta, the Aquantia AQC107 based cards require a patch in config.plist to work.

Does WoL from shutdown work?
Please see this thread for info. I have not personally tested.
Update: WoL should be working with Mieze's IntelMausiEthernet as of version 2.5d3.

Can I add more USB ports via PCI-e USB cards?
Yes. If you want to add USB 3 ports, look for PCI-e cards using Fresco Logic FL1100 chipset.
If you want to add USB 3.1 gen 2 ports, look for cards using ASM1042 or ASM1124 chipsets.
These three chipsets are supported by macOS OOTB. You will not need to make any changes to your hackintosh configuration. The ports from these cards will not count towards the macOS 15 port limit.

Does Thunderbolt work?
I've gotten the Gigabyte GC-Titan Ridge Thunderbolt 3 card to work with this motherboard and an OWC 10GbE Ethernet adaptor. But that's the extent of my experience with Thunderbolt. I do not have any other Thunderbolt devices to test. That being said, I expect Thunderbolt to work as well as any other hackintosh on this motherboard.

If you want to take it to the next level and flash your Thunderbolt card with custom firmware to make it behave more like a real Mac, you can find links to all the info you need here. Also, @nottooshabby has posted some important info here for those who want to use an Apple Thunderbolt Display.

Update (10-04-21): SmackAttack has posted instructions on how to activate AppleVTD which should help Thunderbolt compatibility here. These changes will be added to my EFI folders going forward.

Should I use Clover or OpenCore?
I've tested both with this motherboard and have found both to work equally as well. As far as I can tell, neither is better and neither is worse. Clover is well established and has been used by many for quite a long time. OpenCore is technically still in "beta" and still going through quite a few changes with each new update. That being said, I still recommend Clover for beginners. As of October 2021, I feel that OpenCore is now easy enough to work with through config tools such as OpenCore Configurator that beginners should have no problems with it. With Monterey and higher, I definitely recommend OpenCore over Clover.

It's up to you which you want to use. You can easily switch between the two with no problems if you use the same Serial, Board Serial, and UUID for both. In the event that switching from Clover to OpenCore prevents booting, just clear CMOS and OpenCore will boot again.

What apps do you use to edit config.plist?
For Clover config.plists, I use Clover Configurator (Freeware).
For OpenCore config.plists, I use QtOpenCoreConfig (Freeware), OpenCore Configurator (Freeware), or PlistEdit Pro (Commercial $29.95).
Xcode (free from Mac AppStore) and ProperTree (Open Source and free) also work with both types of config.plists. (Text editors can also be used, but it's easier with the above apps.)

Should I use iMacPro1,1 or iMac19,1 system definition?
iMacPro1,1 will allow for full working DRM but Sidecar will not work.
iMac19,1 will allow for Sidecar to work but DRM may or may not work. Please see here for possible DRM workarounds. I have no experience with these workarounds and won't be of any help.
Personally, I've been on iMacPro1,1 for quite a long time and it has worked extremely well.

*Note: If you need to boot High Sierra or older, you may need to use iMac18,1 system definition.
**Note 2: Entering "defaults write com.apple.AppleGVA gvaForceAMDAVCDecode -boolean yes" in Terminal may get DRM working if you have IGPU enabled and are using iMac18,1 or iMac19,1 system definitions.

Should I enable IGPU?
If you are using iMac19,1 system definition, you MUST enable IGPU. Period. It's not an option.
If you are using iMacPro1,1 system definition, it's optional. I've read conflicting reports from FCPX users on whether it helps with performance. I don't use FCPX so you will have to test on your own to see which works best for you.
Here is an interesting post from one user. Also see this post.

Should I use DisplayPort or HDMI to connect my monitor?
In my experience, HDMI just doesn't work well with macOS. Sometimes lowering resolution and/or refresh rates can help when using HDMI as can higher quality cables. Oddly, the same cables can run perfectly when booted in to Windows so don't use that as a gauge.

DisplayPort works best with macOS but you still need a good quality cable. I've read of others who solved stability issues by replacing cables included with monitors with better quality ones.

This video does a good job of explaining differences in HDMI cable quality.

Should I install hackintosh kexts to /Library/Extensions/ and/or /System/Library/Extensions/?
No! Stop! Don't do this. /System/Library/Extensions/ is completely off limits now. While installing hackintosh kexts to /Library/Extensions/ can work, it does nothing for stability and offers zero benefits while adding to complexity and is a pain to maintain/update. Just don't do it. If you do, please don't ask for help from me.

Still not sure about how to install kexts? Here's a "guide".

Should I disable System Integrity Protection (aka SIP)?
I don't recommend it, especially if you are running Big Sur (or newer).
Please see here for a great explanation of changes in Big Sur that makes this impractical.

What preparations should I take before updating to a new version of macOS?
Usually, updating to the latest bootloader version and latest hackintosh kexts versions is enough. Hackintool is a fantastic tool that can help you stay up to date on these. It's always a good idea to check the forum for any special circumstances where more needs to be done before updating macOS.

*Note: When updating OpenCore, I highly recommend that you start with fresh config.plist!!!

Can I install Windows and/or Linux in addition to macOS?
Of course you can. This is standard PC hardware, after all. While it's possible to install other operating systems on the same boot drive as your macOS drive, I highly advise that you install the other operating systems on separate drives. The reason is that Windows updates has a tendency to screw up the Clover EFI and the Linux installers I've tried has a tendency to install Grub all over the place which, again, screws up the Clover EFI.

When installing Windows or Linux, just install as you would on any PC. To be safe, you can unplug your macOS drive or, at the very least, make backups before beginning your installation especially your Clover EFI. Again, the Linux installers I've tried tend to install the Grub bootloader all over the place and can screw up your Clover EFI.

Once installation is done, you can even boot your "Bootcamp" drive in macOS as a virtual machine using VMware Fusion (should be possible with Parallels too, but I've never tried).

How can I make a bootable backup?
Clone your main system drive the same way you would do it on a real Mac. Carbon Copy Cloner and SuperDuper! are popular apps that can do this.
When done:
1. Mount the EFI partition of your Source drive.
2. Mount the EFI partition of your Destination drive.
3. Drag and drop the EFI folder from the EFI partition of your Source Drive to the EFI partition of your Destination Drive.
4. Done.

If you have Time Machine setup, you can just to boot in to the Recovery partition and use Apple's built-in "Recover From Time Machine Backup". This is a completely free option.
1. Boot in to the macOS Recovery partition.
2. Launch Disk Utility and initialize your Destination drive to APFS/GUID.
3. Launch the Recover From Time Machine Backup option.
4. Follow on screen instructions.
5. When done, reboot, and drag and drop the EFI folder from the EFI partition of your original Source Drive to the EFI partition of your new Destination Drive.
6. Done.

How do I boot in Safe Mode or Single User Mode?
Clover:
Navigate to the drive that you want to boot from and press the space bar. You will be presented with Safe Mode and Single User Mode options.
OpenCore:
Single User Mode - At the OpenCore boot menu, navigate to the drive you want to boot from. Press Command+S (Windows Key+S if you are using a Windows keyboard) and press Enter.
Safe Mode - At the OpenCore boot menu, navigate to the drive you want to boot from. Hold the Shift key and press Enter.

What do all those kexts in the EFI folder do?
  • AppleALC - Gets the onboard audio working. This is a Lilu plugin.
  • IntelMausiEthernet - Gets the onboard NIC working.
  • Lilu - This kext is required to get many other kexts working.
  • SATA-200-series-unsupported - This will make your SATA ports appear as "Intel 11 Series Chipset" instead of "Generic" in System Information > SATA.
  • SMCProcessor - This is part of VirtualSMC. It helps provide CPU sensor info.
  • SMCSuperIO - This is part of VirtualSMC. It helps provide chipset sensor info.
  • USBInjectAll - This can be used to address a number of USB issues.
  • USBPorts.kext - USB port mapping to address the macOS 15 USB port limit.
  • VirtualSMC - This emulates the Apple SMC. It is essential to booting macOS on hackintoshes. This is a Lilu plugin.
  • VoodooInput - This works in conjunction with VoodooPS2Controller to get trackpad gestures.
  • VoodooPS2Controller - This enables the PS/2 port(s) on your motherboard.
  • WhateverGreen - This fixes a large number of GPU issues. This is a Lilu plugin.
In reality, you can do away with most of these kexts if you want to, albeit at the expense of some functionality. The only ones that are essential are (1) Lilu, (2) VirtualSMC, and (3) USB fix.
  • AppleALC can be deleted if you don't want audio to work. You can circumvent this by using USB audio.
  • If used with one of the video cards recommended above, WhateverGreen only enables all the video out ports and HDMI/DisplayPort audio. Your system will function perfectly fine without it if you are only using one monitor.
  • IntelMausiEthernet can be avoided if you use a natively supported NIC such as one of the 10GBase-T NICs recommended above.
  • SMCProcessor and SMCSuperIO can be deleted if you don't care to monitor sensors.
  • VoodooPS2Controller and VoodooInput can be deleted if you don't want your PS/2 port(s) to work in macOS.
  • SATA-200-series-unsupported can be deleted if you don't mind seeing "Generic" in System Information.
What do all those drivers in the EFI folder do?
  • ApfsDriverLoader - Allows the bootloader to read APFS file systems.
  • AppleGenericInput - One of the fixes to get FileVault working on hackintoshes.
  • AppleUISupport - One of the fixes to get FileVault working on hackintoshes.
  • AptioMemoryFix - Aptio/Memory fix to make Aptio BIOSes macOS compatible.
  • HFSPlus - Allows the boot loaders to read HFS+ file systems.
  • OcQuirks+FwRuntimeServices - Aptio/Memory fix to make Aptio BIOSes macOS compatible.
  • VirtualSmc - Hook for VirtualSMC.
*Note: Once you have found an Aptio fix that works with your motherboard, there should never be a need to change to a different one. Once it works, it will always work. The only thing that can possibly break it is an update to a radically different BIOS.

What actually gets NVRAM working on Z390?
  • Unlocked MSR (aka disabled CFG Lock). Asus, ASRock, and MSI motherboards should have MSR unlocked OOB. Only Gigabyte motherboards should need manual unlocking.
  • SSDT-PMC.aml - This is the SSDT from the acidanthera guys that does all the magic.
  • "slide=0" boot argument in config.plist.

If you are still trying to iron out Bluetooth problems and/or having reception problems, it's a good idea to enable "Mouse Keys" so that you can control the pointer using your keyboard. I alway enable this option in the event that my Magic Mouse runs out of batteries.

  1. Go to System Preferences > Accessibility > Pointer Control.
  2. Click on the "Alternative Control Methods" tab.
  3. Click on the "Option" button.
  4. Enable "Press the Option key five times to toggle Mouse Keys".
Screen Shot 2019-12-09 at 5.29.31 AM.pngScreen Shot 2019-12-09 at 5.31.57 AM.png

Now, if you ever have Bluetooth mouse issues, you can just spam the "Option" key five times and you will be able to control the pointer using your keyboard number pad. To turn off Mouse Keys, just spam the "Option" key five times again. Of course, this is only helpful if you are using a USB or PS/2 keyboard...

Screen Shot 2019-12-09 at 5.36.10 AM.png


* The same can be achieved in Windows. To toggle Mouse Keys in Windows, press Left Alt (Option key on a Mac keyboard) + Left Shift + Num Lock together.
Have you been bitten by the bug and have gotten addicted to hackintoshing and have multiple hacks? Do you keep a USB macOS installer with EFI folders for each of your hacks?

I like keeping USB installers with known working EFI folders around in the event that something goes horribly wrong with my boot drive so that I can boot and make repairs. The problem was that I had multiple USB installers all serving the same purpose. But there's a better alternative. Make a single USB installer with an EFI folder with all the kexts and ACPI patches needed to boot each of my systems. Here's how to do it...

1. Create a USB macOS installer as detailed in post #1.
2. Copy the entire EFI folder of your first hackintosh to the EFI partition of the USB macOS installer.
3. Delete everything in /EFI/CLOVER/ACPI/patched/.
4. Delete everything in /EFI/CLOVER/kexts/Other/.
5. Boot your hackintosh and, at the Clover boot menu, press F2.
6. Navigate to /EFI/CLOVER/misc/.
7. You will find a file named preboot.log. Open this file with TextEdit (any text editor will work but, for simplicity, I will just use TextEdit in these directions).
8. Search (Command+F) for "Running on:"
Screen Shot 2018-03-28 at 6.23.53 AM.png

9. Here, we will find the "product name" used by the manufacturer of the motherboard for this particular model. Sometimes "board name" is required. If product name doesn't work, try with board name.
Screen Shot 2018-03-28 at 6.51.16 AM.png

10. Copy (Command+C) this name without the parentheses.
11. Create a new folder on your desktop and paste the name.
Screen Shot 2018-03-28 at 6.32.35 AM.png

12. Navigate to /EFI/CLOVER/ and copy (Command+C) the (1) ACPI folder, (2) config.plist, and (3) kexts folder.
Screen Shot 2018-03-28 at 6.36.45 AM.png

13. Paste (Command+V) those 3 items to the folder you just created on your desktop.
Screen Shot 2018-03-28 at 6.40.40 AM.png

14. Repeat Steps 5-13 on all your hacks.
15. Copy these folders from each of your hacks to the /EFI/CLOVER/OEM/ folder on your USB installer.
Screen Shot 2018-03-28 at 7.15.21 AM.png


Congratulations. You now have a single USB macOS installer that can be used on all of your hacks.


*Note: This will only work if all your hacks use UEFI Clover and can boot from the same files in /EFI/CLOVER/drivers/UEFI/.

*Note 2: In the event that your hacks require different .efi drivers:
1. Copy all the required drivers from all your hacks to /EFI/CLOVER/drivers/UEFI/.
2. Navigate to the config.plists of each of your builds and go to config.plist > Disable Drivers to disable the drivers this particular build does not require.
If you use the built-in macOS support for L2TP or IKEv2 for VPN, you may have noticed that if the VPN connection is dropped, it doesn't auto reconnect. Here is a simple little Apple Script that will help it auto reconnect.

Note that if want to stop if from auto reconnecting, launch Activity Monitor and kill the process.

iPads can also be used:
1. Make sure your Magic Trackpad has a fresh set of batteries.
2. Turn off the Magic Trackpad by holding the power button until the green light is off.
3. Wait a few seconds.
4. Turn on the Magic Trackpad by holding the power button. Continue to hold power button. The green power light should start flashing. Keep holding the power button!! Do not release the power button!!
5. On your macOS system, go to System Preferences > Bluetooth.
6. You should see the Magic Trackpad. Click "Connect".
7. Once the Magic Trackpad has paired, you can release the power button.
1. Download and install the Gigabyte App Center in Windows.
2. Download and install the @BIOS app for the Gigabyte App Center.
3. Launch the @BIOS app and click on the Face Wizard tab.
4. Select your image. (I have tested .bmp and .jpg files. Try to keep image size small. 800x600 worked for me. 1920x1080 has also been reported to work.)
5. Click Next at the bottom of the window.
6. Click OK at the bottom of the window.
7. Done.

You can find some pre-made Mac themed images here and here.

1. Launch Hackintool.
2. Click on the PCI tab on the top portion of the window.
3. Click on the Export button on the bottom portion of the window.
PCI-1.png
4. Look for the pcidevices.plist file on your desktop and open it with Xcode or PlistEdit Pro.
5. Look for PciRoot(0x0)/Pci(0x1b,0x0) and delete AAPL,ig-platform-id and device-id. (*Note: I also deleted PCI devices that were not actual PCI-e cards. The deleting of ig-platform-id and device-id is only applicable for this build. If your build requires them, you should fill the appropriate values instead.)
PCI-2.png
6. Copy the Properties.
PCI-3.png
7. Open your config.plist with Xcode or PlistEdit Pro.
8. Delete Devices > Properties. (If you don't have it, you are fine.)
9. Paste Properties to Devices section.
PCI-4.png
10. Save.
* 11. Open your config.plist with Clover Configurator and look for "LPC/eSPI Controller". Then delete the entire device. If you don't have this, you are fine. (Note: I needed to do this because keeping it prevented sleep, your system may not need this deleted.)
PCI-6.png
12. Reboot.
13. Look in System Information > PCI.
PCI-5.png

*Note: You can now edit the strings to anything you like. For example, in the following image, you can see that AAPLslot-name is "[email protected]". You should be able to change it to, for example, "Slot-1". Or, you can change "Vega 10XLXT [Radeon RX Vega 56/64]" to "MSI RX Vega 56 Air Boost".
PCI-7.png
This week, I swapped out my Dell AT101 "Bigfoot" keyboard (Alps key switches) for a Logitech G413 keyboard (Romer-G key switches). Then I went down the rabbit hole in searching for methods to make the keyboard behave more Mac-like.

Goals:
  1. Make the "Alt" key behave as the Command key.
  2. Make the "Windows" key behave as the Option key.
  3. Make the "Menu" key (located on the right of the space bar between Fn and CTRL) behave as the Option key.
5799703_sd.jpg

Achieving #1 and #2 was easily done in System Preferences > Keyboard > Modifier Keys...

Screen Shot 2022-06-13 at 7.33.58 AM.png
I found a few different solutions to achieve #3, but it required having apps running 24/7 or kexts to be installed... I wanted something "cleaner". I finally came across a brilliant solution by rmbrad where we just have to create a simple plist and add it to ~/Library/LaunchAgents/.

Screen Shot 2022-06-13 at 7.37.33 AM.png

Source:https://apple.stackexchange.com/que...menu-button-on-windows-keyboards-used-in-os-x

In his example, he mapped the Menu key to behave as a Command key. To make it behave as the Option key, just use 0xE6 instead of 0XE7.
 
Last edited:
Those with different Z390 motherboards can try the attached EFI folder.

Asus Z390 motherboards should have MSR unlocked OOB.
Gigabyte Z390 motherboards will need to unlock MSR manually.
MSI Z390 motherboards appear to have MSR unlocked OOB.
I believe ASRock motherboards have MSR unlocked OOB...
I don't know if MSR is locked or unlocked from the factory on other motherboard brands.
If you need to unlock MSR, please see post #2 for instructions on how to find the correct address.

This EFI should work whether you have a discrete video card or if you are using IGPU only. The only instance where IGPU only becomes an issue is if your IGPU connectors need patching such as the Gigabyte Z390 M Gaming. If your connectors need patching, please see the following link:

Update:
Attached Clover config.plist for Gigabyte Z390 M Gaming users who are on IGPU only. I have only tested with one monitor. I do not know how or if this works for multi-monitor setups.

Update #2:
Those who have difficulty booting with this EFI can try deleting /EFI/CLOVER/kexts/Other/AptioMemoryFix.efi and replacing it with OcQuarks.efi+FwRuintimeServices.efi+OcQuirks.plist.

Update #3:
EFI Clover r5105 Z390.zip includes OcQuirks instead of AptioMemoryFix.

Update #4:
Gigabyte Z390 M Gaming users who are using IGPU only, please see post #1360.

Update #5:
For those of you who have an unsupported dGPU, you can try the EFI from post #2313.
 

Attachments

  • EFI Clover r5103 Z390.zip
    22.9 MB · Views: 720
  • Clover config.plist for Z390 M Gaming IGPU only.zip
    4.1 KB · Views: 857
  • OcQuirks+FwRuntimeServices.zip
    29.7 KB · Views: 465
  • EFI Clover r5107 Z390.zip
    23.2 MB · Views: 513
  • EFI Clover r5117 Z390.zip
    23.2 MB · Views: 587
Last edited:
Grats on getting the new build up and stable. Does this mean that you will no longer maintaining the other system or is it still going?

I still have it running with my i5-9400F and old Vega 56.
 
@pastrychef
In your expirience is it better to buy regular Gigabyte Z390M, or Z390M Gaming variant?
I plan to pair it with i5-9400, 16GB HyperX Fury, Samsung 500GB 860 EVO, and maybe my old nVidia GeForce GT 710 (which is in my current hackintosh), or leave it with iGPU until I buy better video card.

What's the deal with IGPU connectors patching, is this only on Z390M Gaming variant or what ?

It's time to retire my old but trusty hackintosh... :)
I need help setting up IGPU on Gigabyte Z390M ,i5-9600k,, gskill 16gb, amd RX 590
 
@pastrychef
In your expirience is it better to buy regular Gigabyte Z390M, or Z390M Gaming variant?
I plan to pair it with i5-9400, 16GB HyperX Fury, Samsung 500GB 860 EVO, and maybe my old nVidia GeForce GT 710 (which is in my current hackintosh), or leave it with iGPU until I buy better video card.

What's the deal with IGPU connectors patching, is this only on Z390M Gaming variant or what ?

It's time to retire my old but trusty hackintosh... :)


I never really looked in to the regular Z390 M much... It looks like it has very, very weak VRM. I guess it depends on cost... If it's significantly less expensive than the Z390 M Gaming and you are positive you won't be overclocking, it may do. On the other hand, if the difference in price is small, I'd just go with the Z390 M Gaming. Better VRM keeps things cooler.

The GT 710 is really old and really slow. The IGPU of your i5-9400 will run circles around it. The only reason I see to using the GT 710 would be to avoid dealing with the IGPU connector patching or if you need the HDMI out.

Some motherboards have connector mapping that doesn't play nice with macOS. I don't know how many or exactly which motherboards this affects but the Z390 M Gaming is certainly not alone. Please see the following link for more information:
 
I need help setting up IGPU on Gigabyte Z390M ,i5-9600k,, gskill 16gb, amd RX 590

As per forum rules, please update your profile to include your CPU, motherboard, and GPU.

Please try the EFI folder and config.plist in post #4 of this thread.

Remember, the EFI folders I provide in this thread assume that you have MSR unlocked on your motherboard.
 
Back
Top