Contribute
Register

Giacomoleopardo's Workstation Triplet

Status
Not open for further replies.
Well...well...well. After tinkering around for the last couple of hours I have finally cracked it!!!

Have my macOS Sierra USB stick booting all the way through to the installer. macOS Utilities are available. Partitioned the HDD and installing macOS Sierra on my ROG Rampage V Edition 10 with Bios 1502 and i7-6900K CPU.

Finally upgrading from El Capitan to macOS Sierra....miracles do happen :clap::)...no more :banghead:

What was the final trick(s) Ciaodiablo?
 
So after a few days of testing i can confirm that these two kext files "VoodooTSCSync.kext" (to enable CPUs with a higher number of cores) and "NullCPUPowerManagement.kext" are needed to boot the system successfully with an i7-6900K CPU. On my test build without these two in the EFI/CLOVER/kexts/10.12 folder the system will not boot period, it will PANIC and hang. A hard reboot is then needed. Put the kexts back and it boots fine.

Break down for a macOS Sierra 10.12.3 build with a i7-6900K & ASUS ROG Rampage V Edition 10 motherboard is the following:

  • Make sure motherboard bios is at 1502
  • use Giacomoleopardo's bios settings (as per this guide)
  • create a macOS Sierra USB installer (latest image 10.12.3 works just fine)
  • install latest Clover bootloader to USB (Clover_v2.3k_r3998)
  • make sure CPU type is 0x0a02
  • FakeCPUID can either be 0x0306A0 or 0x0306E0
  • have the following drivers in the drivers64UEFI directory :
    AppleImageCodec-64.efi
    AppleKeyAggregator-64.efi
    AppleUITheme-64.efi
    CsmVideoDxe-64.efi
    DataHubDxe-64.efi
    EmuVariableUefi-64.efi
    FirmwareVolume-64.efi
    FSInject-64.efi
    HFSPlus.efi
    OsxAptioFixDrv-64.efi
    OsxFatBinaryDrv-64.efi
    SMCHelper-64.efi
  • have the following kexts in the 10.12 directory :
    AHCIPortInjector.kext
    BrcmFirmwareRepo.kext
    BrcmPatchRAM2.kext
    FakeSMC_ACPISensors.kext
    FakeSMC_GPUSensors.kext
    FakeSMC_LPCSensors.kext
    FakeSMC.kext
    HDMIAudio.kext
    IntelMausiEthernet.kext
    IOAHCIBlockStorageInjector.kext
    NullCPUPowerManagement.kext
    realtekALC.kext
    USBInjectAll.kext
    VoodooTSCSync.kext
    X99_Injector USB 3.kext
    XHCI-x99-injector.kext
  • Boot arguments are : -v npci=0x2000 dart=0 nv_disable=1 kext-dev-mode=1
  • Boot from USB and use macOS Utilities to partition your HDD or SSD
  • Install macOS Sierra to your desired HDD or SSD
  • Once completed system will be rebooted, boot from USB but select boot from macOS HDD/SSD from Clover bootmenu
  • Complete configuration of your Mac Pro and once you are at Desktop, download and install Clover bootloader to the HDD or SSD
  • Download Clover configurator and install and mount HDD/SSD EFI partition
  • Copy config.plist, drivers64UEFI & kexts folder over from your USB to your macOS Startup disk EFI partition
  • For onboard audio make sure to have in your config.plist under Section Acpi\DSDT: add Rename AZAL to HDEF in Comment, 414C5A41 in Find* [Hex], 48444546 in Replace [Hex]. Mandatory for Realtek ALC Audio
  • config.plist under Devices section: set Audio on 1
  • download audio_cloverALC-120.command.zip and run from terminal
  • Download and install the lastest Nvidia Display Drivers (WebDriver-367.15.10.35f01) but don't restart
  • Download AGDPfix.app.zip and apply but do not restart
    • Copy IOPlatformPluginFamily.kext from S/L/E to desktop, then copy it to another location (for backup)
    • Delete IOPlatformPluginFamily.kext from S/L/E (password required)
    • Empty trash
    • Open from Desktop IOPlatformPluginFamily.kext/Contents/PlugIns/X86PlatformPlugin.kext/Contents and you'll find a lot of .plist files: frequency vectors instruction are stored in some of those files. Mac-F60DEB81FF30ACF6.plist (MacPro 6,1 board id) doesn't have. Mac-27ADBB7B4CEE8E61.plist (iMac 14,2 board id) does have!
    • Copy Mac-27ADBB7B4CEE8E61.plist on desktop, rename it Mac-F60DEB81FF30ACF6.plist, then copy the new named file back into IOPlatformPluginFamily.kext/Contents/PlugIns/X86PlatformPlugin.kext/Contents replacing the original MacPro 6,1 file which doesn't have frequency vectors.

  • install modified IOPlatformPluginFamily.kext to System/Library/Extentions using either KextBeast or Kext Wizard and now restart
  • change nv_disable=1 to nvda_drv=1 under options from the Clover bootmenu and boot (full acceleration graphics now available)
  • for GTX 980 Ti HDMI audio to work, download audio_cloverHDMI-120.command.zip and run from terminal and then restart
That's about it.

If you have any questions feel free to ask and if you need to, just incorporate giacomoleopardo's config.plist settings into the
Kudos to giacomoleopardo, cheesepizza, kgp, ptzulu, tonymacx86 and all other users & members here at tonymacx86.com

:clap::clap::clap::clap::clap::clap::clap::clap::clap::clap::clap::clap::clap::clap::clap::clap::clap::clap::clap::clap::clap::clap::clap::clap::clap::clap::clap::clap::clap::clap::clap::clap::clap::clap::clap::clap::clap::clap::clap::clap::clap::clap::clap::clap::clap::clap::clap::clap:
 
Last edited:
First of all, a huge thank you to Giacomoleopardo for such a great job! Kudos!

Mine is working fine, with the exception of the ASM USB 3.0 ports. (Just so no one gets confused - I am not talking or trying to enable/disable the ASMedia 3.1 ports, I am only discussing the three USB 3.0 ports in the rear of the motherboard).

At first, I went into the bios and disabled all of the USB 2.0 ports there. Seemed to have no effect in terms of enabling the three ASM ports. Then I enabled everything in the bios, and tried each port one by one, reviewing each enabled port with IORegistry. According to IORegistry, there should be a SSP6 port, but I sure can't find it. Plugging in USB drives/devices never work in the rear panel ASM ports. And actually, nothing has ever worked in those three ASM ports in the back panel.

In reviewing ReHab man's post, I thought I saw that his patch only applied to the Intel USB controllers. Would that mean that patch would not work on the three ASMedia USB 3.0 ports on the rear panel?

Bottom line, what would help me is if anyone has been able to get the three ASM ports in the back of the Asus X99-A II to work? Am I missing something?

The three I'm talking about are identified in the illustration attached...


Okay, with more troubleshooting I discovered part of the problem and a work-around. What happened was that I obtained an Asus Thunderbolt 3 card (this is the one with three ports: a USB 3.1 C port, a USB 3.1 Type A port, and a Thunderbolt 1/2 port), and installed it following the same process and slot that Giacomoleopardo described. It wasn't until I removed that card that the ASMedia 3.0 ports came back live. Now, it's also true that I have my Graphics Card (an Asus GTX 980 TI) in the first slot (PCIEX 16_1), not the slot that Giacomoleopardo had it in (PCIEX16_3), so I'll have to fully duplicate his layout, including where he installed his video card to see if that makes a difference. It may just be that this Asus Thunderbolt 3 card is not compatible with the X99-A II, or maybe it just isn't ready yet. Not sure which.


So, I like it when people follow up. Here's my follow-up on my research attempting to get the Asus Thunderbolt 3 card working with this setup. The card has three ports but apparently only one of them can be used at any given time. The focus of my attempt was to get Thunderbolt 3 to work via the USB C port (this works, for instance, on a Gigabyte UD5 TH motherboard, which has a USB C Thunderbolt interface - I have one and I've tested it and it works).

I duplicated Giacomoleopardo's layout exactly, including the placement of the graphics card and other cards on the motherboard slots, and all his bios settings, but I was unable to get the Asus Thunderbolt 3 card working. I did upgrade the firmware in Windows and added the drivers, but no luck.

Has anyone managed to get any Thunderbolt card (Thunderbolt 2 or 3) to work in this setup? I mean with this motherboard (Asus X99-A II) and a Broadwell-E CPU?
 
An update to my macOS Sierra build :

I have now managed to boot Sierra without the use of the NullCPUPowerManagement.kext, VoodooTSCSync.kext & AppleIntel CPUManagement.kext after tinkering around with scripts and Clover patches

But for some reason i can't use FakeCPUID = 0x040674 so still using 0x0306A0 or 0x0306E0. Without a FakeCPUID the system won't boot.

Also changed the Bios CPU Core Ratio setting from Auto to By Core Usage and CPU hits 3.7Ghz under Geekbench instead of the before 3.5Ghz max.

I have applied some xcpm patches as per Pike R. Alpha's Universum but Power Management still not working on my Broadwell-E CPU.

Has anyone had luck with getting XCPM working on the i7-6900K ??

Thanks
 
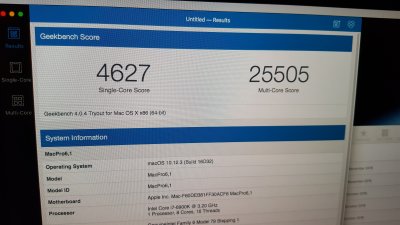
Ran Geekbench 4.0.4 64bit CPU benchmark and got the attached score.

Any good? Thoughts.....?
 

Attachments

  • tmp_10982-20170204_121137136332169.jpg
    tmp_10982-20170204_121137136332169.jpg
    6.7 MB · Views: 192
An update to my macOS Sierra build :

I have now managed to boot Sierra without the use of the NullCPUPowerManagement.kext, VoodooTSCSync.kext & AppleIntel CPUManagement.kext after tinkering around with scripts and Clover patches

But for some reason i can't use FakeCPUID = 0x040674 so still using 0x0306A0 or 0x0306E0. Without a FakeCPUID the system won't boot.

Also changed the Bios CPU Core Ratio setting from Auto to By Core Usage and CPU hits 3.7Ghz under Geekbench instead of the before 3.5Ghz max.

I have applied some xcpm patches as per Pike R. Alpha's Universum but Power Management still not working on my Broadwell-E CPU.

Has anyone had luck with getting XCPM working on the i7-6900K ??

Thanks


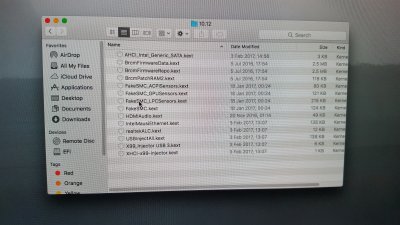
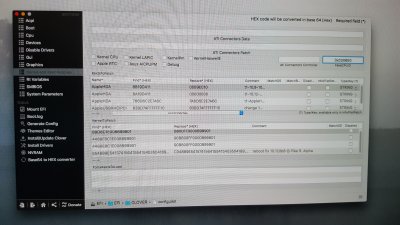
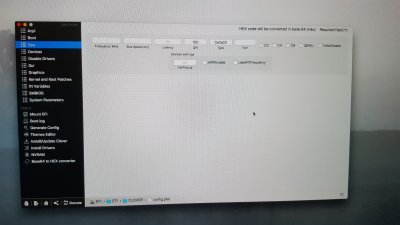
It would be great if you posted the current screenshots of your directories of clover, i.e., 10.12 kexts, and drivers64UEFI now that you're booting without NUllCPUPowerManagement.kext, VoodooTSCSync.ket and AppleCPUManagement.kext. Also, what does your config.plist look like now? Specifically, the ACPI, Kexts to Patch and Boot sections? I'm not asking for you to post the whole thing - just the screenshots of these sections.

Did you make the changes before or after you got the system booting from a hard disk? In other words, with your original post (#118), were you able to boot and install from your USB install disk and then from a hard disk (system disk)?

Thanks a million for posting!
 
Last edited:
Hi mm2margaret,

Yes i made the changes after the initial installation from USB to HDD i.e. that's why it's called tinkering around by trial & error to get things working :banghead:;)

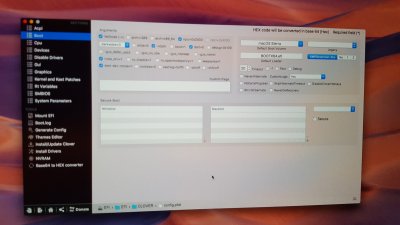
Screenshots of 10.12 kext & drivers64UEFI attached as well as Clover config.plist sections. All other sections are the standard settings like everyone else has.

I'm trying to get XCPM to work but it's a handful...doing alot of reading up on it at the moment and trying different settings, freqVectors, etc...
 

Attachments

  • tmp_11658-20170205_025654951911197.jpg
    tmp_11658-20170205_025654951911197.jpg
    8.1 MB · Views: 186
  • tmp_11658-20170205_025635-1533611022.jpg
    tmp_11658-20170205_025635-1533611022.jpg
    8.5 MB · Views: 196
  • tmp_11658-20170205_025609589922770.jpg
    tmp_11658-20170205_025609589922770.jpg
    6.9 MB · Views: 210
  • tmp_11658-20170205_0255151437654938.jpg
    tmp_11658-20170205_0255151437654938.jpg
    5.7 MB · Views: 199
  • tmp_11658-20170205_0254232039834128.jpg
    tmp_11658-20170205_0254232039834128.jpg
    3.9 MB · Views: 191
  • tmp_11658-20170205_025344-1471039157.jpg
    tmp_11658-20170205_025344-1471039157.jpg
    6.1 MB · Views: 173
Last edited:
Giacomoleopardo's Workstation Triplet
Intel® Core™ i7-6900K Processor - Asus X99-A II - EVGA GeForce GTX 980 Ti HYBRID GAMING
El Capitan 10.11.6 UEFI Clover step by step install method
...

First thank you very much for your very detailed guide. Like many here I have been on a quest to replace my aged edit station.​
and with a build Based on the Deluxe II model I finally have.

You thought out a lot of airflow details which I applaud . On thing that is missing is how you actually hooked up the pump and fans to your motherboard. I too have the H115i Cooler it has a pump power line and the fans plug into a cable from the pump. Asus recommends a different configuration. The pump into the pump header, and the fans into the cpu fan headers. Which did you use since you are overclocking so high.

Kevin
 
Status
Not open for further replies.
Back
Top