Contribute
Register

G4 Cube Inspired Self Build

Status
Not open for further replies.
Really nice! I love the look of copper coolers…
I bought some cheep copper memory coolers off eBay. See picture in last post. Not convinced they dissipate much heat, they seem to get quite hot, so may end up removing them.

When I have fairly thick material or blind holes such at in your standoffs, I use WD-40 as a lube. This helps cutting the threads and preventing the tap seizing. Also, you may need to tap the holes in stages, where you remove the tap and clear the hole of metal chips. I use compressed air and WD-40 for this.
I used 'used' four-stroke mower oil, which turned into a thick paste!!! On reflection I can see how a lighter lubricant would have been better. Thanks for the tip.
 
Do I see right - you are using a Cube power switch in this project? Good idea!

BTW: My new project started now. See sig.

MacTester
 
Do I see right - you are using a Cube power switch in this project? Good idea!

BTW: My new project started now. See sig.

MacTester
Yes you are right, however it wasn't my first design. I had ruled out conventional mechanical pushbuttons, as required too much depth, I needed something thin. Initially I was going to use a power switch from an iMac 24", these are black versions of the G5 (and all Mac laptops) switch mechanism.

It wasn't until after I had seen a real G4 cube, and the round wifi antenna ports, that I realised I replace part of the sides of my case with acrylic, and use the power switch, and bring my antennas inside.
 
Drilling and tapping those posts on center must've been tricky Kiwi. The touch sensor is a great idea. I've got two of them unused here from my 2 cube projects. Will keep them now in case I decide to take on a custom build like yours.

Watching this thread...


Ersterhernd
 
For my curren project, I wanted a special power button as well, simply because it looks better. I went for a MacBook replacement part. The connector was of course something special, so I simply cut it off and with some improvising I attached it to a regular 2pin cable. Easy job, and I like the button :)
 
Cooling FAN (Revisited)

If you read my earlier posts you know I initially choose a fan from a MacBook Pro 15" Unibody, today I replaced this with the 17" MBP fan (right hand side). Here is a comparison of the two fans.
IMG_1467.jpg

The main issue when connecting this, is that it is 5V fan, not the normal 12V. However this didn't really pose a problem in the end, as all signal (except for 5V) can be derived from the standard fan header. Here is the connection diagram for the fan.
Screenshot 31:03:13 9:56 PM.jpg
 
If you buy a normal fan, you usually get an adapter to slow it down to 5V.
Have thought of connecting this 5V fan to one of those adapters and then you could even get the +5V line form the fan header?

The Intel NUC has a very similar fan. If you get in troubel with the MBP fan, you could check out how Intel did that.
 
Top Plate

Had some time over the long weekend so did some work on the top plate. It needs to mount the HDD and CPU Fan.

The HDD will be screwed to two rails. I used flat head screws
IMG_1459.jpg


And those two rails glued to the top plate.
IMG_1470.jpg


Before I glued them on, I drilled for large holes, that the screw heads sit in. The picture (top right)
shows these holes with the rails glued in place. What you end up with a recessed hole that the screws sit in.
IMG_1475.jpg


In the above picture you can also see the three countersunk holes that hold the fan in place. Below is the fan in profile screwed to the plate.
IMG_1477.jpg
 
First Assembly

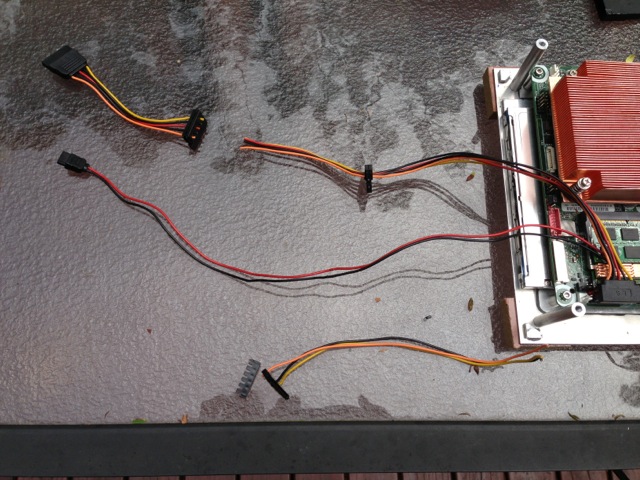
First job was to cut the internal power cables down to size, removing unnecessary connectors
IMG_1473.jpg


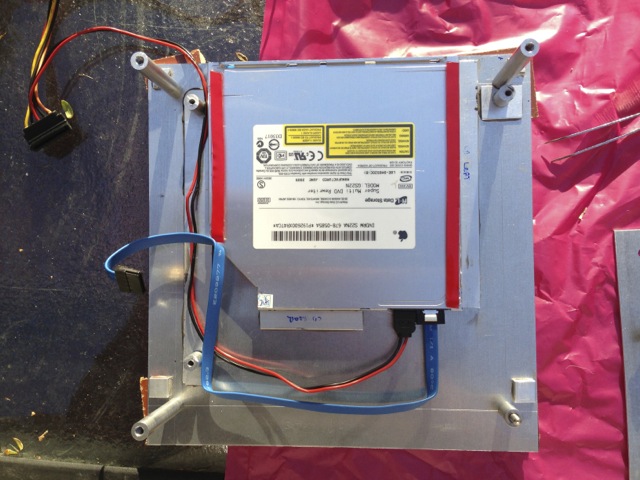
Next mount the DVD drive, and cabling for the drive.
IMG_1478.jpg


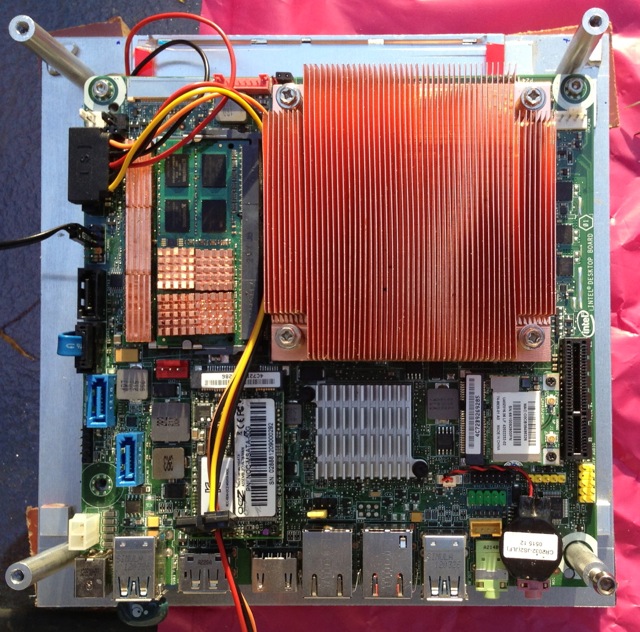
Then mount the motherboard on top of the drive, and connet the dvd drive.
IMG_1479.jpg


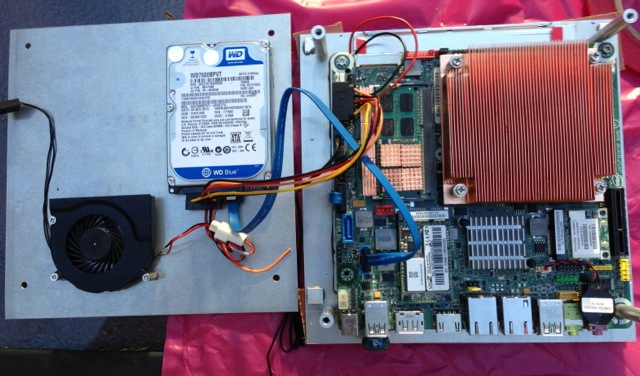
Then finally connect the HDD and fan to the MB
IMG_1481.jpg


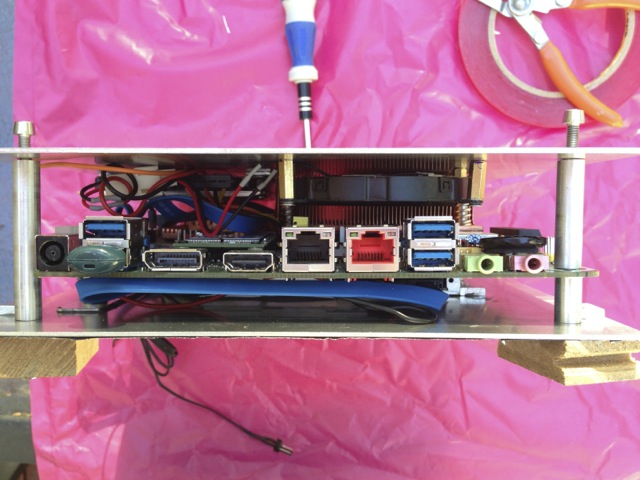
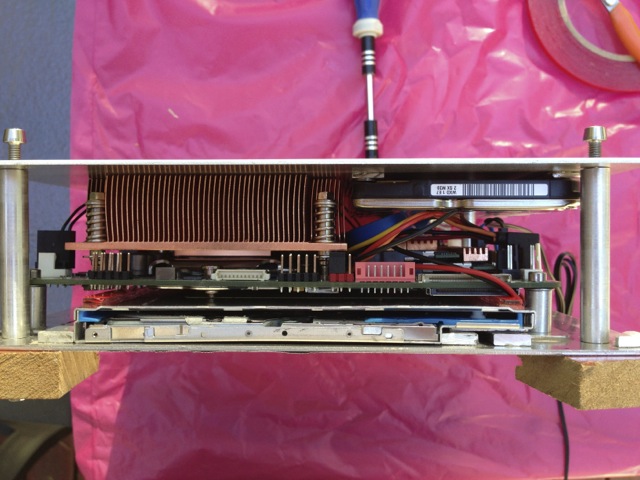
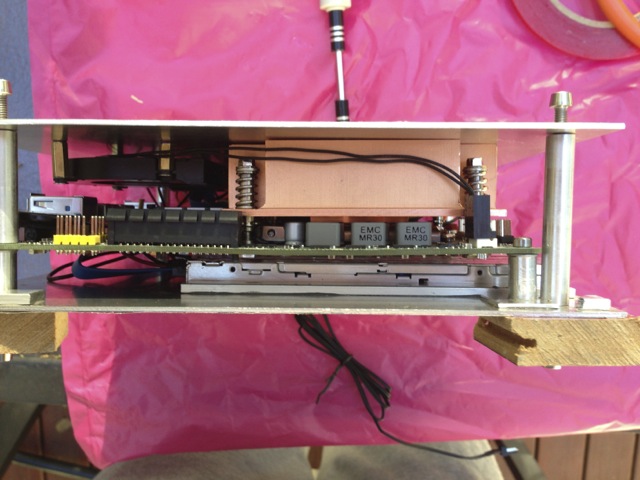
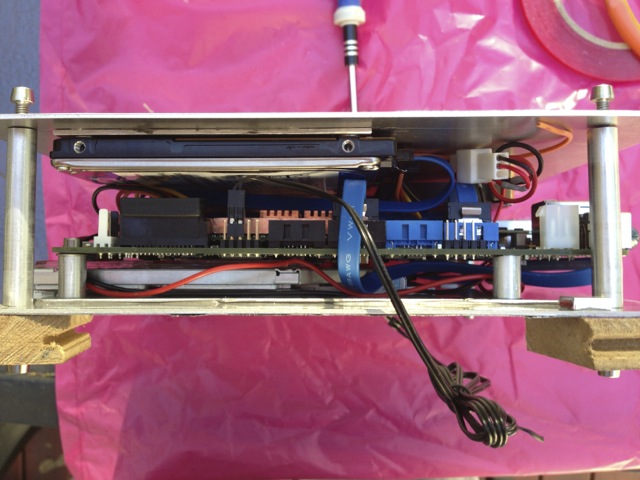
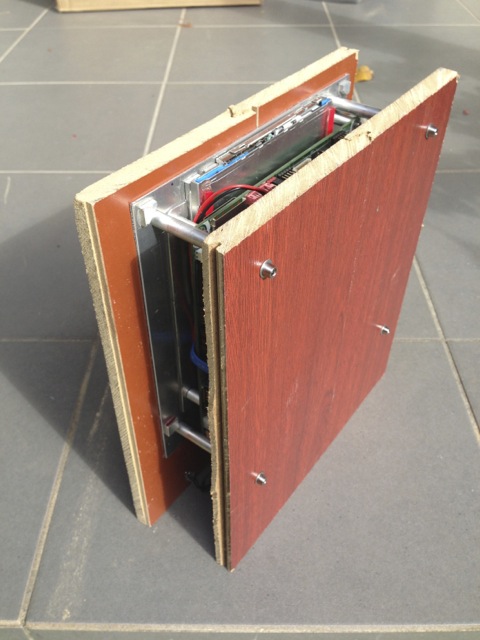
Thats it really, here are four pictures showing the assembled computer from the four sides

Bottom, showing IO Ports / Fan / Blue DVD sata cable
IMG_1482.jpg


Top. showing DVD, CPU heatsink, Hard drive
IMG_1484.jpg


Back Side. Heatsink, CPU Fan, DVD Drive
IMG_1483.jpg


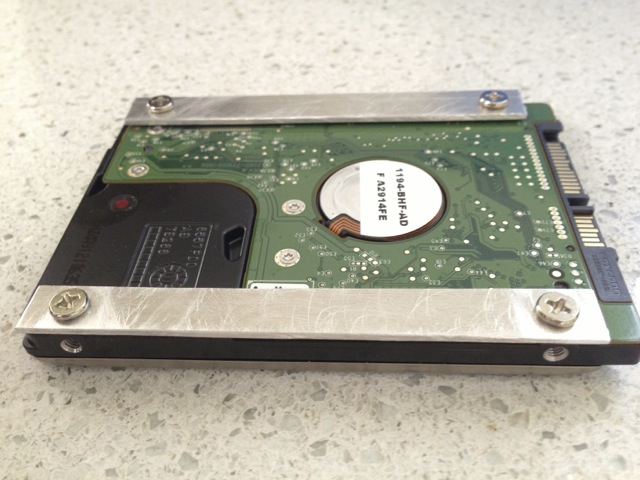
Front Side. HDD. SATA and Power cabling. The loose black cable is the temporary power stitch.
IMG_1485.jpg


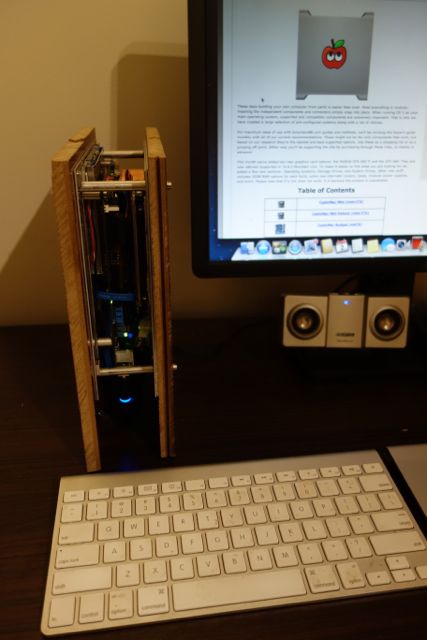
And what it looks like in it's Almost final form. The wood is 12mm flooring (replaced due to water damage)
IMG_1488.jpg


If you use your imagination, replace the wood for acrylic revealing brushed aluminium sides, a black mesh top with slot for dvd, black front panel with dark acrylic insets; then you should have a mental picture of the final result.

Apart from the work on the outer case, the only things that are left are the Power switch on the front, four additional USB ports mounted at the bottom, and internal wifi antennas.

I haven't planned for internal bluetooth (I think there would be room), I have chosen instead the IO Gear USB dongle, plugged in underneath is hidden from view.
 
Status
Not open for further replies.
Back
Top