Contribute
Register

First Powermac G5 (Late 2005) Project - Design According to Ive

Status
Not open for further replies.
Never through anything away, especially bits of metal, they are raw materials for future work.
This is a realization I came to last weekend when I was clearing out the garage, and came across the top of an old Shuttle SFF computer case. In the attached picture you can see see that there isn't much difference to the G5 panel. What a find :thumbup: Expect it to see it show up in future work, You can see I have already started.
 

Attachments

  • IMG_1165.jpg
    IMG_1165.jpg
    990.8 KB · Views: 425
Install the Motherboard

All the SATA Cables (except optical drive) are routed underneath the motherboard (with 90 degree turns) an emerge near the SATA MB ports. In the photo (taken from back of case) you can see the four cables from hot swap enclosure, and two from he apple drive bay, and the main power cable.
IMG_1117.jpg

The motherboard is screwed into position, and power and data cables connected, and cables adjusted pushed back under motherboard so they protrude very little.
IMG_1119.jpgIMG_1120.jpgIMG_1131.jpg
 
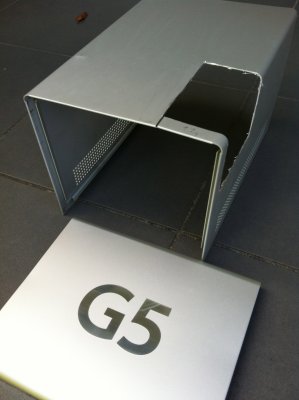
Mid Frame Conversion

The mid frame (my term) is the divider, primarily used to separate airflow between CPU and PCI compartments. In most mods (that I have read) this is disposed of. In my mod this is a crucial component, as many of the other components I am keeping mount to it.

First had to trim it to clear the motherboard components (mainly the memory slots). In doing this the main issue is highlighted. The rear of the frame looses all its support, as previously it was mounted (screwed) into the motherboard at the base of the frame. To secure the tray I first glued another sheet of aluminum to it so that's length went ALL the way to the back of the case.
IMG_1093.JPG

Originally I was thinking of wedging it between the PCI frame and the rear CPU fan bracket. This didn't work out because it made the frame slightly too low and upset installation of other components, so had to find another way.
IMG_1126.jpg

What i did was to trim the lower part of the mid frame at the rear, so that it didn't come in contact with the PCI frame at all, then it could sit up a fraction higher in the case.

To support it I fashioned an L bracket that screwed into the lowest most PCI slot, on top of any card installed. The L bracket faces down parallel to the mid frame, and extens out to provide a lip that the mid frame can rest on. The mid frame isn't actually screwed into anything at the back.
IMG_1092.jpgIMG_1176.jpgIMG_1179.jpg

I used an off cut of the optical drive bay to create the L bracket, as it had an L shape at the bottom were it was screwed to the outer case.

At the front the mid frame is primarily mounted to four apple standoffs under the optical drive bay (kept specifically) two of them screw directly to the mid frame. The other two screw into a plastic frame that acts as the PCI support for full length cards. This is attached to the mid frame, so acts as part of its support.

Because the mid frame was previously screwed to the standoffs with the motherboard sandwiched between, I created some spacers from some nylon I had lying around, to give some extra height, and give better alignment.
IMG_1127.jpg
 
Hello Kiwi,

I love your work and have to thank you a lot for proofing the fit of the Lian Li HARD DRIVE ENCLOSURE! I was struggeling with myself, because I was not sure if the length is "short" enough to fit in the case.

Did you drilled out the riveted parts for the door and the fan?

Edit:

Could you please measure the gap between the bottom HDD and the enclosure and the highest HDD and the enclosure.
Thanks for your comments, I took a gamble that the enclosure would fit when I bought it. Yes i remember there were some rivits that needed to be drilled out to remove front door and fan, I think it was mostly screws though.

As for the measurements will have to get back to you. Because the enclosure is fully installed, and a pain to remove, I will remove the drives, and measure from the mounting holes on a rail without a drive installed. Let me know if this is ok?
 
I just want to know if there is enough space for a screw head / nut.
At the top i was easily able to wedge two CD's in the gap. At the bottom it was similar but harder for me to judge. The bottom of a hard drive is not flat, but at its thickest (the side rail) again could get 2 CD's in there, adding a third made the drive lift up but that cold just be my mounting screws.

In summary you should be fine, but there isn't heaps of room, so best to go with screws/nuts that have a low profile, or just countersink the screws in.
 
Just a small update

Speaker Assembly


The speaker and PCI Fan assembly slots into the top front of the mid frame. The fan provides airflow to the PCI cards. I rerouted the speaker and fan cables to exit through a hole ( I drilled) on the rear of the speaker compartment. I think this just gave a cleaner appearance. I connected the speaker to the motherboard using an adapter cable to convert the PC 4 pin connector to the 2 pin connector of the apple speaker.

IMG_1051.jpgIMG_1053.jpgIMG_1055.jpgIMG_1064.jpgIMG_1196.jpg
 
Rear CPU Exhaust Fans

The design is to reuse the existing frame and mounting, but replace the fans. The existing fan mount (screwed to the G5 chassis), did not need to be modified. When it cut the Rear IO ports I was careful to trim so the bottom of the bracket aligns flush with the top of the IO port.

The fan enclosure required quite a bit of modification, first I had to cut out a chunk of it, to clear the motherboard IO sockets.
IMG_0987.jpg

The following photo shows the bracket temporarily mounted, you can see the MB ports clearly intruding into is space where the bracket was removed.
IMG_0990.jpg

Problem was the the bottom of the bracket now had no strength, so i glued a small piece of plastic (just cut from the bracket) to help provide more support to the bottom of it. The is the square piece of plastic mounted at the top between the two fans.
IMG_1084.jpgIMG_1083.jpg

I then installed new Fractal Design 92 mm fans into the bracket, using new rubber mounts into the existing holes. I cut the cables to the fans and spliced both fans into s single cable and used paracord to sheath the cable back to a three pin fan connector. When splicing a fan cable in this way, only a single yellow wire should be connected.
IMG_1087.jpgIMG_1086.jpg

The finished fan assembly installed in the case
IMG_1137.jpg
 
Status
Not open for further replies.
Back
Top