- Joined
- Jul 24, 2018
- Messages
- 184
- Motherboard
- GigaByte-Z370N-WIFI
- CPU
- i5-8400
- Graphics
- HD 630 / GTX 1060
- Mac
- Mobile Phone
b.kind’s small white box mini-ITX build:
Core i5-8400 - GA-Z370N-WIFI - i630 - Airport
Core i5-8400 - GA-Z370N-WIFI - i630 - Airport
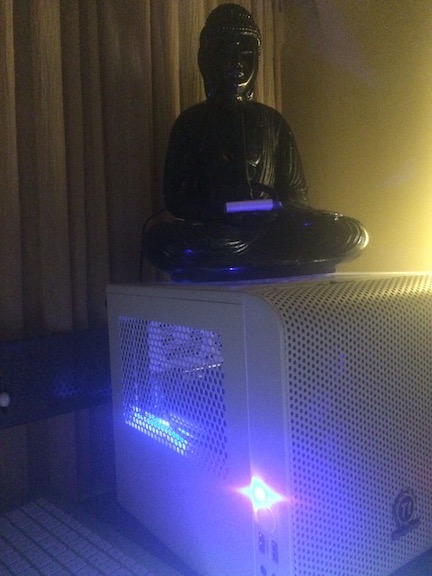
a small white box
Goal
Simple config, easy build, smooth install.
Using recommended modern components.
For home-office use. Replacing a dead 2011 macMini.
HD 630 integrated graphics. No external GPU.
Using stock intel cooler.
Using recommended modern components.
For home-office use. Replacing a dead 2011 macMini.
HD 630 integrated graphics. No external GPU.
Using stock intel cooler.
Components
GIGABYTE GA-Z270N-WIFI mini-ITX Motherboard - https://www.gigabyte.com/Motherboard/Z370N-WIFI-rev-10#kf
https://www.amazon.com/dp/B076VD4XV4/?tag=tonymacx86com-20
https://www.newegg.com/Product/Product.aspx?Item=N82E16813145046
Intel Core i5-8400 Processor - https://www.intel.com/content/www/us/en/products/processors/core/i5-processors/i5-8400.html
https://www.amazon.com/dp/B0759FGJ3Q/?tag=tonymacx86com-20
https://www.newegg.com/Product/Product.aspx?Item=N82E16819117824
Crucial Ballistix Sport LT (16GB) Memory - http://www.crucial.com/usa/en/bls2k8g4d240fsb
https://www.amazon.com/dp/B00UFF7Y4A/?tag=tonymacx86com-20
https://www.newegg.com/Product/Product.aspx?Item=N82E16820148985
Crucial MX500 2.5 Inch SATA SSD (1TB ) - http://www.crucial.com/usa/en/ct1000mx500ssd1
https://www.amazon.com/dp/B077SF8KMG/?tag=tonymacx86com-20
https://www.newegg.com/Product/Product.aspx?Item=N82E16820156174
Corsair RM550x Power Supply - https://www.corsair.com/us/en/Power/Plug-Type/RMx-Series/p/CP-9020177-NA
https://www.amazon.com/dp/B015YEICJ2/?tag=tonymacx86com-20
https://www.newegg.com/Product/Product.aspx?Item=N82E16817139124
Thermaltake Core V1 -https://www.thermaltake.com/Chassis/Cube_Case_/Core/C_00002701/Core_V1_Snow_Edition/Design.htm
https://www.amazon.com/dp/B015UDUAKG/?tag=tonymacx86com-20
https://www.newegg.com/Product/Product.aspx?Item=9SIA8EF5UY1178
CM94360CS2 Airport Wireless card
https://www.amazon.com/gp/product/B07BQ976CR/?tag=tonymacx86com-20
BCM94360CS2 to M.2 adapter for above
https://www.amazon.com/gp/product/B01KHRJVXW/?tag=tonymacx86com-20
Comments
Why Hackintosh?
Because the ifixit.com repair site gives recent MBPs a repairability rating of 1 out of 10.
Because Apple (the hardware company) no longer releases the best HW. Just the smallest.
Because of the Mac Mini HW update schedule. Because of the Apple Tax.
I talked myself out of building a hackintosh half a dozen times, but I kept reading.
The documentation, tools & support community are persuasive.
Wireless
The MB’s integrated intel wireless chip does not speak Apple wireless. Gnashing of teeth. Planned to swap the intel wireless chip with an Airport chip, so macOS wireless can run ‘native’. (Hoping that this added complexity in the build will make for a cleaner install later on.)
While waiting for the hardware to arrive:
I read the manuals for the MB, PSU & Case. Short reading.
Looked at build videos online.
Read the MultiBeast manual at: http://www.multibeast.com
Looked at other people’s Z370N builds. Same motherboard, many different builds, each with different config choices.
Looked at build videos online.
Read the MultiBeast manual at: http://www.multibeast.com
Looked at other people’s Z370N builds. Same motherboard, many different builds, each with different config choices.
https://www.tonymacx86.com/threads/...lent-ga-z370n-i5-8400-16gb-500gb-nvme.247619/
https://www.tonymacx86.com/threads/success-itx-gamer-ga-z370n-wifi-i5-8400-gtx-970.252483/
https://www.tonymacx86.com/threads/success-coffee-lake-i7-8700k-ga-z370n-wifi.240887/
https://www.tonymacx86.com/threads/success-gb-z370n-wifi-coffee-lake-i5-overclocked-gtx-1060.250342/
https://www.tonymacx86.com/threads/...70n-wifi-evga-1060-sc-6gb-high-sierra.254876/
https://www.tonymacx86.com/threads/tiptoe-macmini-z370n-wifi-i5-8400.248443/

The Build
The case is a Mini ITX Cube Case - 10.9” x 10.2” x 12.4”.
Swap out the integrated intel wireless card for an Airport card First. (see Wireless below)
PSU —> Case - fan facing down.
CPU —> MB
Cooler —> CPU / MB
RAM —> MB
MB —> Case
Drive —> Case
Swap out the integrated intel wireless card for an Airport card First. (see Wireless below)
PSU —> Case - fan facing down.
CPU —> MB
Cooler —> CPU / MB
RAM —> MB
MB —> Case
Drive —> Case
Connect the case cables to the system panel connector.
(Power and Reset buttons, Power and HD lights.
2 Front USB 3.0 headers. 2 Front audio headers.)
Power to MB & SSD. Data Cable from MB to SSD.
(Power and Reset buttons, Power and HD lights.
2 Front USB 3.0 headers. 2 Front audio headers.)
Power to MB & SSD. Data Cable from MB to SSD.
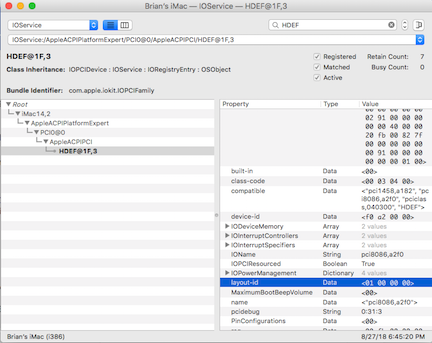
Wireless
Airport card —> M.2 adapter card
M.2 adapter card —> MB
See: [Guide] Installing an Airport card into a GA-Z370N-WIFI motherboard
https://www.tonymacx86.com/threads/...card-into-a-ga-z370n-wifi-motherboard.259300/
M.2 adapter card —> MB
See: [Guide] Installing an Airport card into a GA-Z370N-WIFI motherboard
https://www.tonymacx86.com/threads/...card-into-a-ga-z370n-wifi-motherboard.259300/
Nothing else about the build was remarkable. Went fast. The case was easy and fun to work with.
It does resemble something from these guys: https://www.cuisinart.com/shopping/appliances
The huge 200mm case fan has a 3-pin head. “All the fan headers on the MB have 4 pins.”
The 3-pin head fits nicely in the 4-pin header. It never shuts off, or makes noise.
Now is the time to attach the antenna. WIFI works without attaching the antenna. BT does not.
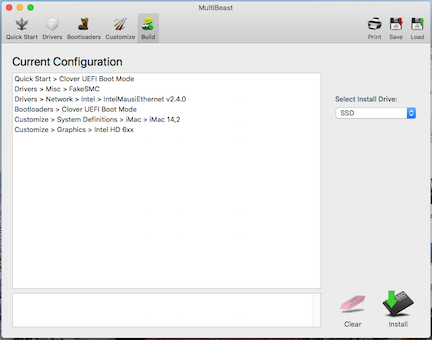
The Installation - UniBeast, Clover, macOS High Sierra, MultiBeast, a few drivers.
Jump down to message #4 of this thread, perform the instructions, and jump back here.
https://www.tonymacx86.com/threads/...n-wifi-i630-airport-card.258728/#post-1797792
Everything should be working except USB 3.0 and Audio.
https://www.tonymacx86.com/threads/...n-wifi-i630-airport-card.258728/#post-1797792
Everything should be working except USB 3.0 and Audio.
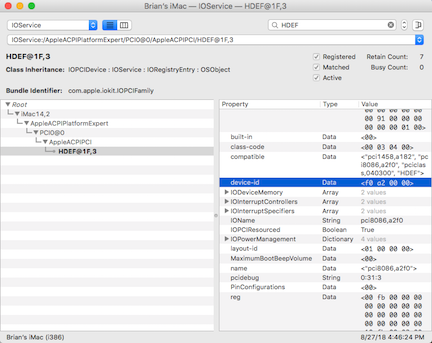
Fixing USB 3.0
Jump down to message #26 of this thread, perform the instructions, and jump back here.
https://www.tonymacx86.com/threads/...-i630-airport-card.258728/page-3#post-1824177
https://www.tonymacx86.com/threads/...-i630-airport-card.258728/page-3#post-1824177
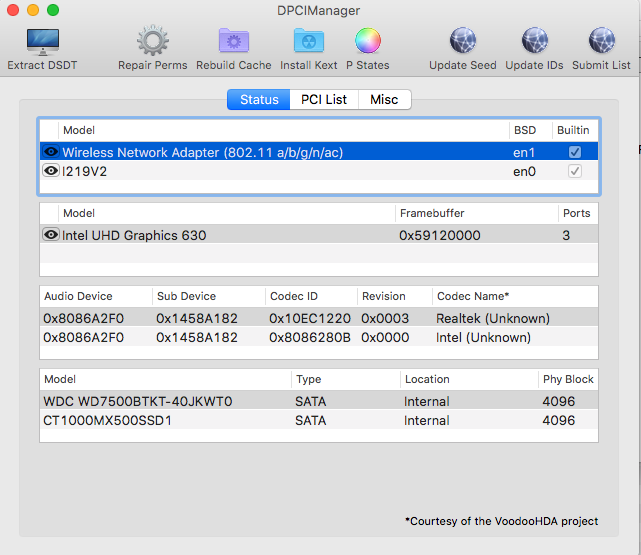
Fixing Audio
Jump down to message #29 of this thread, perform the instructions, and jump back here.
https://www.tonymacx86.com/threads/...-i630-airport-card.258728/page-3#post-1824975
https://www.tonymacx86.com/threads/...-i630-airport-card.258728/page-3#post-1824975
That's it, everything should be working.
First impressions
Zippy. Benchmarks aside, it just feels fast.
Quiet. Big slow case fan. Stock intel cooler. PSU fan doesn't need to run. (Probably drawing 120 watts.)
Cool. Not putting out much heat. (We live in the tropics, and our place gets warm.)
Quiet. Big slow case fan. Stock intel cooler. PSU fan doesn't need to run. (Probably drawing 120 watts.)
Cool. Not putting out much heat. (We live in the tropics, and our place gets warm.)
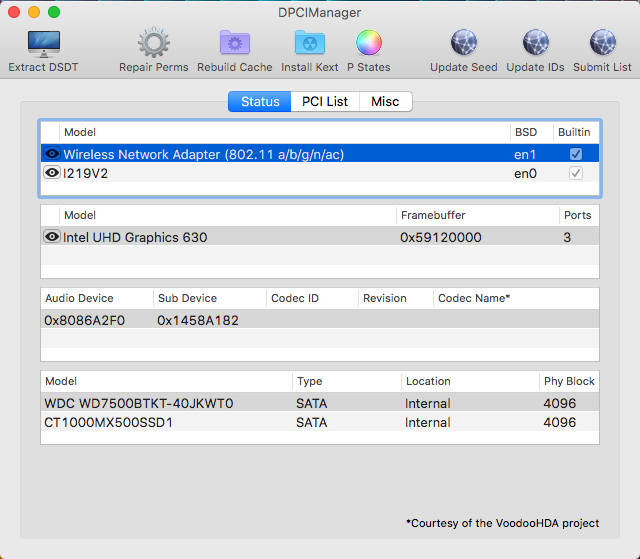
What works
Airport! WIFI and Bluetooth. (Remember to hook up the antennas.)
Gigabit Ethernet
HDMI video, with two monitors.
sleep / restart works great (Had a complete power failure in sleep mode. System came back up perfectly.).
Audio from the front and rear headphone jacks. (Sounds better in back.)
2 front USB 3.0 ports and 6 back USB 3.0 ports - all charge an iPhone, and transfer data at USB 3.0 speeds.
Time Machine, App Store, iCloud, Notes, iMessages can send and receive.
What does not work
Nothing I know of.
Known Issues
Installing flux caused the system to be unbootable. (Restored from backup.)
Installing MS Office 365 causes the system to be unstable. (Restored from backup.)
Somewhat amazed that all this stuff just works, as installed, with very little configuration on my part.Installing MS Office 365 causes the system to be unstable. (Restored from backup.)
This is a hell of an accomplishment. Hats off to the gurus who did this and documented it.
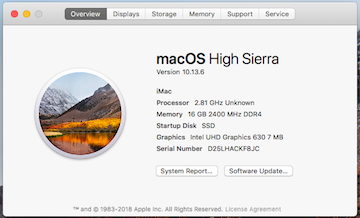
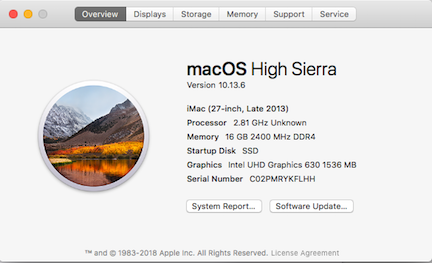
Summary
My lovely wife now has a new hackintosh to replace her dead, 2011 macMini.
A small white box.
All for a few weeks of careful reading.
For the money we have saved, we have made a contribution to tonymacx86.
A small white box.
All for a few weeks of careful reading.
For the money we have saved, we have made a contribution to tonymacx86.
======
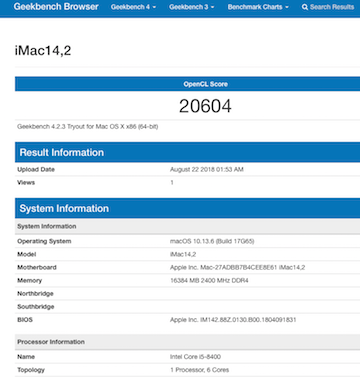
Benchmarks
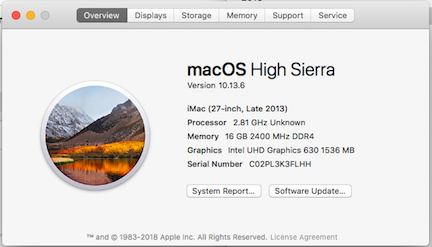
No fine tuning done at all. Other system definitions (18,2 or 18,3) may work better.
I would welcome any suggestions in the matter.

Attachments
Last edited: