Contribute
Register

Ersterhernd's G4 Cube Project

Status
Not open for further replies.
On another note; can you post a step by step on how to install Mountain Lion? I'm about to go through the same process with the same board/cpu/cooler and would like to save the "several hours" it took you.

Installation of 10.8.2 was done using the Unibeast installer USB. The BIOS was updated to a patched 0048 first. The only BIOS setting I checked was AHCI. Left all else at default.

1. Updated the bootloader on the USB stick to Chimera 2.0 just to be current. Plugged into an internal USB 2.0 header.
2. Used "Graphics Mode"="1680x1050x32" -v flags to get full res on the 20" Cinema and Verbose.
3. The machine loaded to the awful "Waiting for root device"
4. Tried it again using -x also. Booted to the full resolution "Select Your Language" screen.
5. Partitioned with DU.
6. Rebooted this time without -x. Go figure... it got all the way to the "Select Your Language".
7. Installation ended with the Successful green check mark.
8. Rebooted and Mtn Lion loaded perfectly.
9. Did the usual tweaks with Multibeast. FakeSMC, Network, SMBIOS.
10. Installed a Snow Leopard IO80211Family.kext to get the Dell 1397 Wifi going.

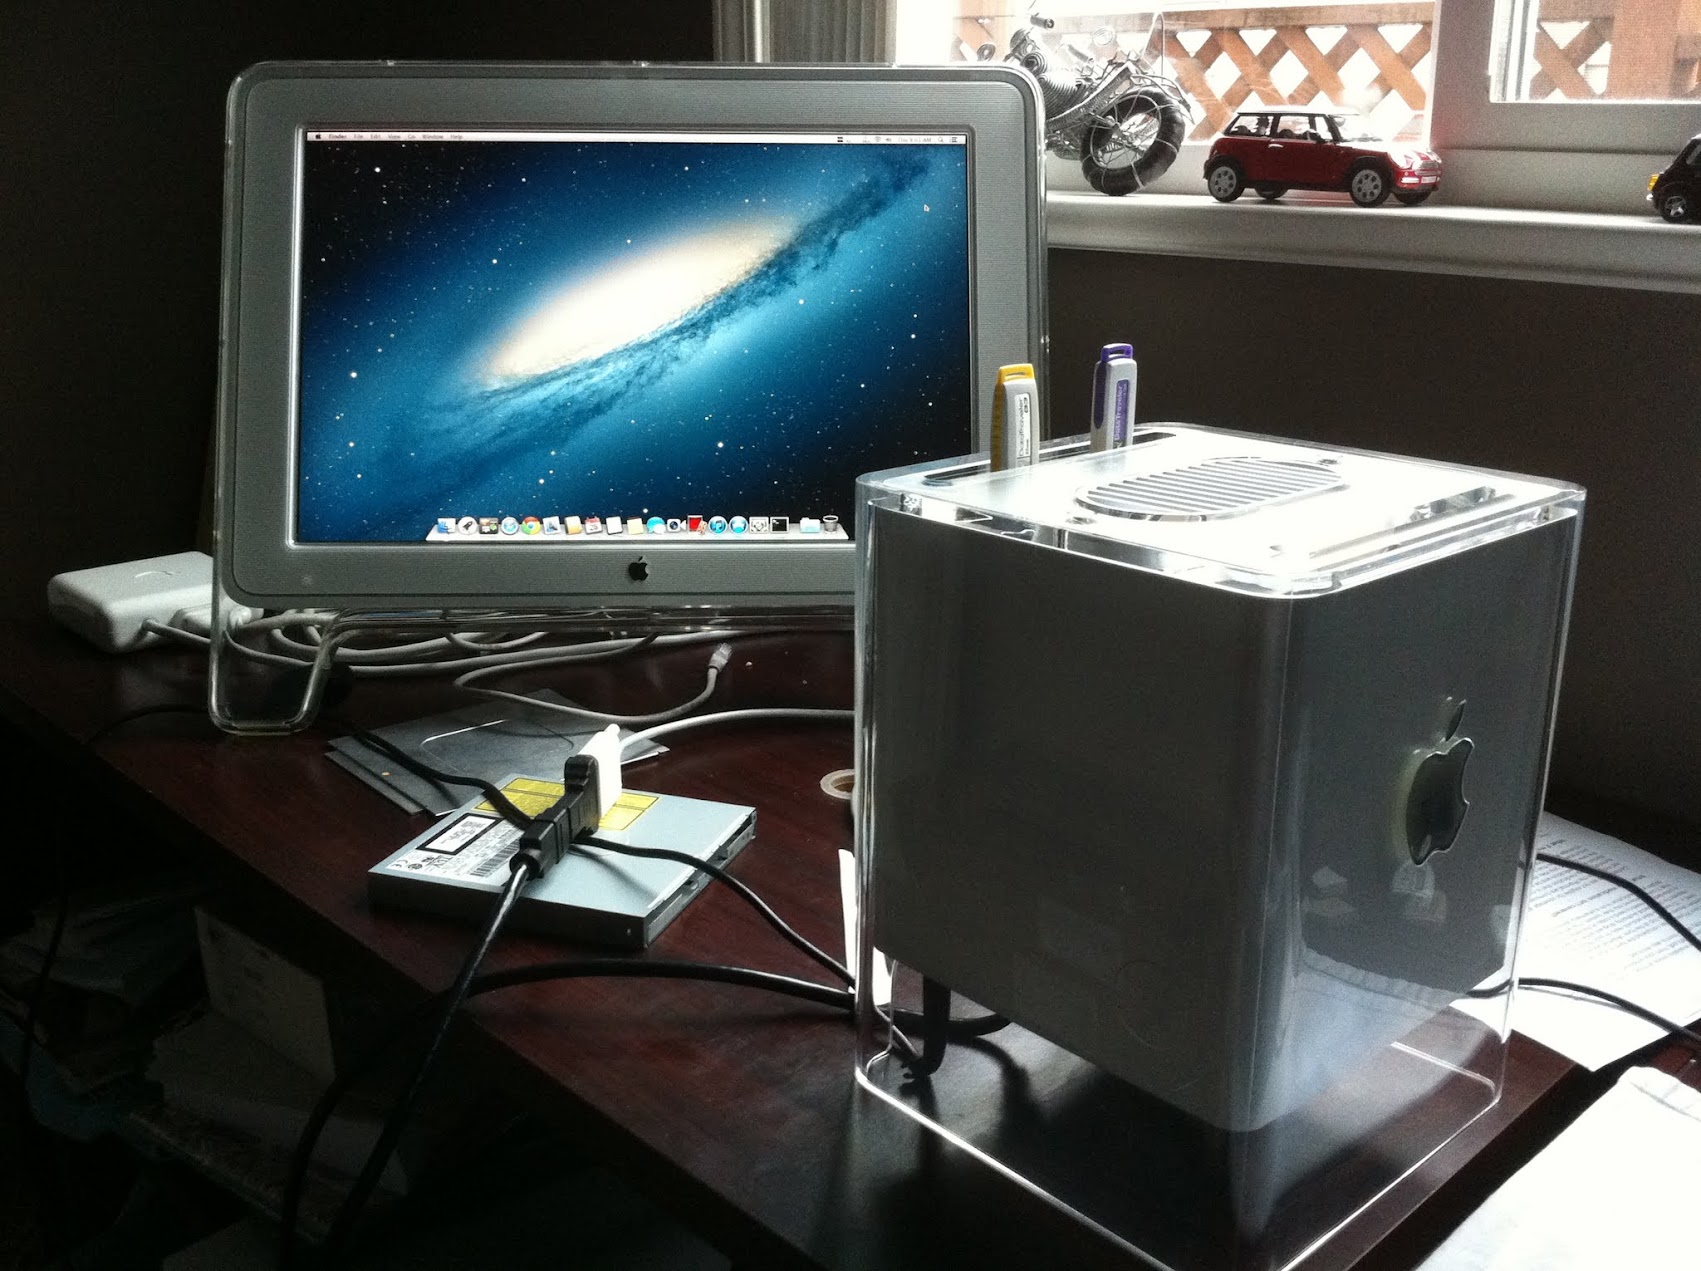
Here's where the problems began. The boot took well over a minute to get the desktop. About This Mac reported the graphics as "64 MB of Shared Memory" instead of HD 4000 like I expected. My Cinema display wasn't recognized either. Youtube vids were hopeless, screen tearing galore. Obviously no QE/CI acceleration.

What took "hours" (yes it did actually :oops:) was determining that a DSDT and SSDT were needed. Once those were in place (both patched versions) the boot was immensely faster and the graphic acceleration was 100%. I didn't expect to have to use a DSDT in this build, but it appears that I do.

I then used these three commands to build the kernel cache:

sudo su

sudo kextcache -system-prelinked-kernel -all-loaded

sudo kextcache -v 1 -a i386 -a x86_64 -m /System/Library/Caches/com.apple.kext.caches/Startup/Extensions.mkext -z /System/Library/Extensions/


I then set the "UseKernelCache" key in the boot.plist to "YES" and restarted.
The machine boots in only 11 seconds!

I'm not an expert on these installs by any means, I just keep trying until I hit success. I have no idea why the DSDT was required, perhaps someone in the know can fill me in.

Hope this helps.


Ersterhernd
 
Wow, attention to detail and the pictures are really great. Would like to know your progress on the Touch Sensor?

Hi Kiwi,

I've emailed Edisen and asked if they'd ship me one of their sensors. No reply yet as Germany is 10 hours ahead of us here. I know that I won't be able to use the G4 stock sensor, there just isn't room with the DQ77KB. I will do my darnedest to get the Edisen one. I don't care how much it costs to ship.

As shown in my photos, the installed Power/Reset buttons are a viable option to turn the Cube on. They both work as they should. If for whatever reason I can't get a sensor for this cube, reaching around the rear will have to do. I haven't yet figured out how to run the rear Power switch and the Sensor in Parallel, but I'm sure someone here will have an answer for that one.


Cheers!
 
The BIOS was updated to a patched 0048 first.


Thanks Ersterhernd, much appreciated!


Would it be possible for you to post the patched 0048 bios? I plan to follow your steps tomorrow to get my board up and running.

Thanks, in advance.

chaos
 
Sure thing, here you go.

Good Luck tomorrow!
 

Attachments

  • 0048patched.zip
    9.6 MB · Views: 174
Thx for those links, Mactester. I will definitely use the custom solutions header as you have shown. My A1181 Bluetooth will find its 3.3v there too.

The I/O plate could've been moved approx 1mm higher for a perfect placement with the Gelid. It was just too risky to cut the hole any higher and destroy the cube. I had no way of knowing that 1mm more would work. I hope these photos will help others using the same setup.

Going to the bank today to wire 25 Euros to Edisen. Looks like a go on the sensor.
 
Sure thing, here you go.

Good Luck tomorrow!
Hi There, Thanks for the BIOS I have the same MB so this is useful. Could you also post the DSDT and SSDT files also ? Thanks. Kiwi
 
Top-Mounted USB 2.0 Ports

I've managed to complete some more work on the Cube in the last couple of days. One of the goals in the project was to mount 2 USB 2.0 ports into the top rear slot of the machine. This would allow easy access for USB devices as opposed to the underside ports of the motherboard.

Of course, the first challenge in accomplishing this was getting the motherboard mounted high enough off the rear of the case to accomodate the required clearance. This topic was covered in previous posts of this thread. Secondly, determining a method to securely mount USB ports to properly align with the top rear slot, yet be firm enough to withstand the forces of plugging/unplugging devices was what turned out to be an equally challenging task.

I found an old Syba 4-port USB PCI card in my junk parts box. It hadn't been used since the days of PCI; many moons ago. If I recall, it never really worked properly anyway, but I'm glad I kept it because I could now remove the 4-port backplate off it and implement it into my Cube build. Lesson: NEVER throw old junk away...

I used the 4-hole PCI backplate and a short piece of 1/4" aluminum flatbar to construct the I/O. JB Weld was used to glue it all to the Cube shell, I used it very liberally (and quite messy :oops: ) to ensure an unbreakable bond under force. I used two 6" Startech USB 2.0 pigtails to supply the needed ports. They have a heavy rubbery casing that allowed a large surface on which to use JB Weld. After it was put together, I didn't like the ugly JB Weld appearance, so I went into my junk parts box again and peeled an attractive stainless steel cover off of an old D-Link PCI Wifi card. It was the perfect size and now wears a genuine Apple sticker from my collection of iPhone boxes. I left 2 tabs on the side of it for purposes of cable management. All in all, I think it turned out good. Its ROCK solid too, which was my main concern.


Two Startech 6" USB pigtails mounted for the top USB Access

IMG_3269.JPG


IMG_3270.JPG


Back Panel View (I added a green LED in case I later want to use it for something)

IMG_3271.JPG


Mounted into the Case

IMG_3274.JPG


Cover Plate with Apple Logo to hide the ugly JB Weld

IMG_3272.JPG


IMG_3273.JPG


Cutting the USB port holes into the exterior can

IMG_3275.JPG


The finished result installed into the Cube; USB devices fit perfectly!

IMG_3278.JPG


IMG_3277.JPG


IMG_3282.JPG


IMG_3276.JPG


IMG_3284.JPG


The Underside of the Cube

IMG_3283.JPG


HDD LED functioning. Its not as bright as it looks in this overexposed iPhone photo, but rather sits under there unobtrusively. I'm happy with its location and function.

IMG_3287.JPG


Only two more tasks; The touch sensor and the A1181 bluetooth module. Both are ordered but still in transit.
 
Well done! Have I ever seen such USB-Ports somewhere? ;)

When will you get the Edisen sensor? Do they ship it?
 
Status
Not open for further replies.
Back
Top