
- Joined
- Jan 12, 2012
- Messages
- 158
- Motherboard
- GA-H77n-Wifi
- CPU
- i3-3225
- Graphics
- HD 4000
- Mac
- Classic Mac
- Mobile Phone
"eHack" [In Progress - Update 09/02/13]
***Completed Mod Write up with Components now at--> 2002 eMac G4 700 -> 2013 eHack i3 Ivy Bridge***
After completing my first Hackintosh over a year ago, I have been following tonymacx86.com on a pretty much daily basis and this has rekindled my desire to do a mod. I was able to nab an eMac on eBay for $2.3 US.
So I have the eMac, and a 17" lcd to retrofit in a similar fashion to Tom Ierna's retrofit.
I have been following many of the modders on Tonymacx86 and have contacted a few for suggestions (thanks Neil!). I had many ideas, so to help clarify, I disassembled the eMac to see what would work.


Test fitting of LCD and components involved some thought as to where to locate things as to cause the least if any disturbance to the outside of the case. The first project was to fit and power the LCD.
LCD Work:
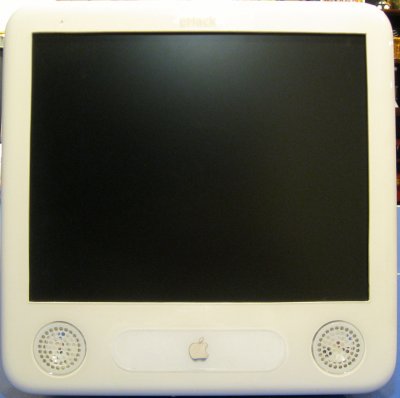
Test fit of bezel (with blue painter's tape on it) and a test of the 12v power hookup to a pc power supply. Bezel was cut with a Rockwell bench mounted jigsaw and a metal blade. LCD used 12V with ground so a simple hookup to yellow and black from a molex connector was all that was needed. Looks good and we have power!


LCD is secured with plastic epoxy guides to keep it centered and corner brackets on the lower back and some home made L brackets on top. The major LCD components are mounted inside of the cowling using an old power supply case as a tray that is riveted to the cowl, and standoffs on the left side. Still plenty of room for a mini-ITX. I could even fit a mATX I bet.


Motherboard and components:
Cleaned the case and keyboard. Totally disassembled the keyboard and it looks awesome. A replacement speaker housing came to replace the broken one I pulled out of my eMac. I also ordered an eMac swivel base. These parts were ordered from DV Warehouse for very decent prices.
Motherboard tray mounted on the rear slanted portion of the frame, above and in front of the fan using tall standoffs from Radio Shack. The power supply is mounted on the side and the SSD sticking out of the cowl via part of the case from an old 3.5 card reader. Instead of the optical drive I mounted the SEDNA - 2 Port USB 3.0 + 2 Port USB 2.0 3.5" Floppy Bay Front Panel. The LCD controls are also mounted behind the Optical Drive door.
An old power cord is soldered to the internal part of the Apple cord so I can still use the white Apple cord with my power supply.


Testing and 10.8.3 Install:
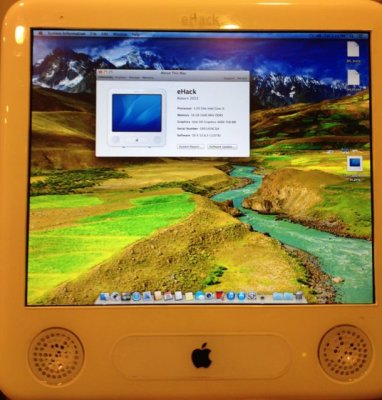
Installed all of the major components. My DVI cable didn't work so I am waiting for 2 new ones, a 3 ft and a 2 ft. ML 10.8.3 installed fine, panic on first boot, no problem with safe boot. Ran Multibeast and then the graphics started going bezerk after the apple logo at boot as is the case with many using HD4000 and DVI. Reinstalled ML from different USB, but same problem. Finally added Graphics mode string to org.chameleon.plist and it works.
<key>Graphics Mode</key>
<string>1280x1024x32</string>
boot before fix bezerk
 safe boot
Audio:
Audio was not working from a hardware sense. It actually was working in OS X, just not through my speaker setup. My attempt to repurpose the audio from the monitor broke somewhere along the line. I removed those components and installed the necessary pieces from a set of Gigaware USB Travel speakers purchased from Radio Shack.
Update: I did not even have to disassemble the Radio Shack speakers one bit. Just needed to solder some female 1/8" mono plugs on to the ends of the eMac speaker wires and they worked. Tested first with alligator clips and sounds good (had to make sure I had the correct wires going to the speaker plugs). A lot easier than the other route I was going to go via a little USB amplifier pcb.


Remaining project (last thing!):
I have to figure out how to mount the panel extensions for USB 2/3, audio, HDMI and Ethernet in the side port area. I found some panel mount cables at FrontX and the others at SGW Electronics. I am thinking of replacing the plastic and epoxying everything in place. The panel mount cables will all attach to the rear ports with the exception of the audio (headphone and mic) which will attach to the motherboard audio header.

A guy at work is also making me a custom "eHack" logo for the bezel.
Update 9/1/2013
During the summer I finished the side panel, and added the eMac swivel stand. Build is complete and write up was added to the "Completed Mods" forum...2002 eMac G4 700 -> 2013 eHack i3 Ivy Bridge
Photos of the Build:


After completing my first Hackintosh over a year ago, I have been following tonymacx86.com on a pretty much daily basis and this has rekindled my desire to do a mod. I was able to nab an eMac on eBay for $2.3 US.
So I have the eMac, and a 17" lcd to retrofit in a similar fashion to Tom Ierna's retrofit.
I have been following many of the modders on Tonymacx86 and have contacted a few for suggestions (thanks Neil!). I had many ideas, so to help clarify, I disassembled the eMac to see what would work.
Test fitting of LCD and components involved some thought as to where to locate things as to cause the least if any disturbance to the outside of the case. The first project was to fit and power the LCD.
LCD Work:
Test fit of bezel (with blue painter's tape on it) and a test of the 12v power hookup to a pc power supply. Bezel was cut with a Rockwell bench mounted jigsaw and a metal blade. LCD used 12V with ground so a simple hookup to yellow and black from a molex connector was all that was needed. Looks good and we have power!
LCD is secured with plastic epoxy guides to keep it centered and corner brackets on the lower back and some home made L brackets on top. The major LCD components are mounted inside of the cowling using an old power supply case as a tray that is riveted to the cowl, and standoffs on the left side. Still plenty of room for a mini-ITX. I could even fit a mATX I bet.
Motherboard and components:
Cleaned the case and keyboard. Totally disassembled the keyboard and it looks awesome. A replacement speaker housing came to replace the broken one I pulled out of my eMac. I also ordered an eMac swivel base. These parts were ordered from DV Warehouse for very decent prices.
Motherboard tray mounted on the rear slanted portion of the frame, above and in front of the fan using tall standoffs from Radio Shack. The power supply is mounted on the side and the SSD sticking out of the cowl via part of the case from an old 3.5 card reader. Instead of the optical drive I mounted the SEDNA - 2 Port USB 3.0 + 2 Port USB 2.0 3.5" Floppy Bay Front Panel. The LCD controls are also mounted behind the Optical Drive door.
An old power cord is soldered to the internal part of the Apple cord so I can still use the white Apple cord with my power supply.
Testing and 10.8.3 Install:
Installed all of the major components. My DVI cable didn't work so I am waiting for 2 new ones, a 3 ft and a 2 ft. ML 10.8.3 installed fine, panic on first boot, no problem with safe boot. Ran Multibeast and then the graphics started going bezerk after the apple logo at boot as is the case with many using HD4000 and DVI. Reinstalled ML from different USB, but same problem. Finally added Graphics mode string to org.chameleon.plist and it works.
<key>Graphics Mode</key>
<string>1280x1024x32</string>
boot before fix
bezerksafe bootAudio:
Audio was not working from a hardware sense. It actually was working in OS X, just not through my speaker setup. My attempt to repurpose the audio from the monitor broke somewhere along the line. I removed those components and installed the necessary pieces from a set of Gigaware USB Travel speakers purchased from Radio Shack.
Update: I did not even have to disassemble the Radio Shack speakers one bit. Just needed to solder some female 1/8" mono plugs on to the ends of the eMac speaker wires and they worked. Tested first with alligator clips and sounds good (had to make sure I had the correct wires going to the speaker plugs). A lot easier than the other route I was going to go via a little USB amplifier pcb.
Remaining project (last thing!):
I have to figure out how to mount the panel extensions for USB 2/3, audio, HDMI and Ethernet in the side port area. I found some panel mount cables at FrontX and the others at SGW Electronics. I am thinking of replacing the plastic and epoxying everything in place. The panel mount cables will all attach to the rear ports with the exception of the audio (headphone and mic) which will attach to the motherboard audio header.
A guy at work is also making me a custom "eHack" logo for the bezel.
Update 9/1/2013
During the summer I finished the side panel, and added the eMac swivel stand. Build is complete and write up was added to the "Completed Mods" forum...2002 eMac G4 700 -> 2013 eHack i3 Ivy Bridge
Photos of the Build:
")