Contribute
Register

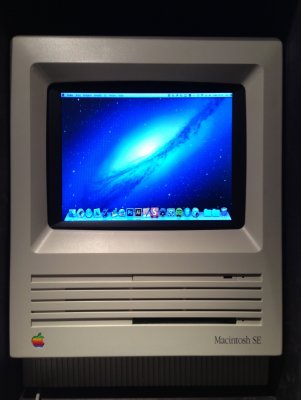
CustoMac Mini 2012 in a Macintosh SE casing

Status
Not open for further replies.
Joined
Dec 26, 2012
Messages
5
Motherboard
GA-H77N-WIFI
CPU
i3-3225
Graphics
HD 4000
Mac
  1. 0
Classic Mac
  1. 0
Mobile Phone
  1. 0
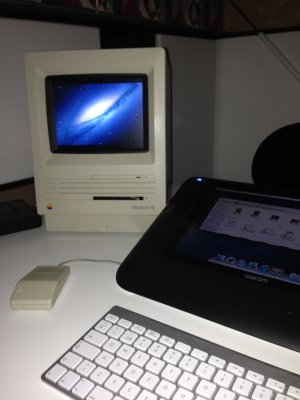
I just want to share some pictures, from my first Hackintosh build, on this awesome forum.

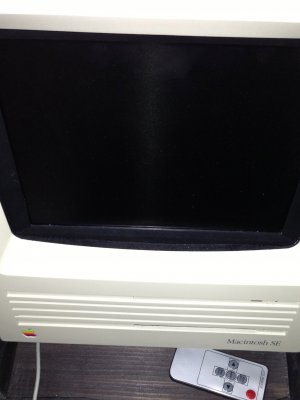
The built-in 8” monitor is just a fun detail that I felt was necessary to get the right feeling. I will probably never use it when the computer is supposed to run with my Wacom board.

I was able to find an iMate on Swedish eBay for $5. That allows me to hook up the old mouse, with ADB connector, to an USB port on the machine. Just another fun detail that I probably never gonna use.

Cheers
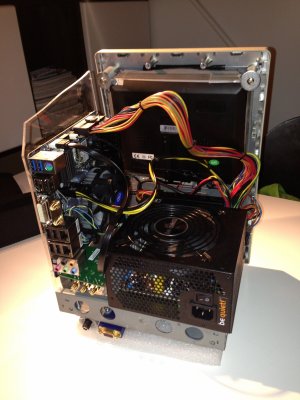
IMG_0719.jpgIMG_0723.jpgIMG_0727.jpg
 
I just want to share some pictures, from my first Hackintosh build, on this awesome forum.

The built-in 8” monitor is just a fun detail that I felt was necessary to get the right feeling. I will probably never use it when the computer is supposed to run with my Wacom board.

I was able to find an iMate on Swedish eBay for $5. That allows me to hook up the old mouse, with ADB connector, to an USB port on the machine. Just another fun detail that I probably never gonna use.

Cheers
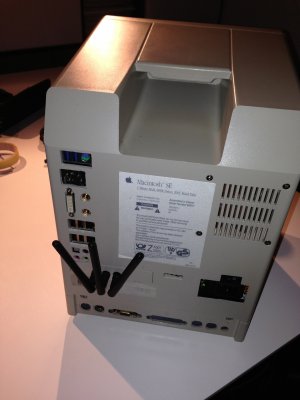
View attachment 45155View attachment 45156View attachment 45157

Very nice, a unique project. More details please. How are you driving the display?

neil
 
BRAVO! What a great job! Would love to see more pics (if you have them) of the case mod "in process"
  • What the inside looked like before you removed all the original components
  • How you mounted the mobo
  • Cutting the housing for all the I/O ports
  • ...etc.... etc...

Regardless - GREAT job!
 
Thank you guys!

This is actually a pretty simple build. But I'm happy with the result as this is my first case mod. Unfortunately, I took no pictures during the build. But have a few more from when the computer was assembled.
IMG_0720.jpg

When I was looking for a SE to disassemble, I found an empty shell online. So I did not have to slaughter a functioning classic :)

I went the easy way when I plugged in the built-in screen. I used extension cables for VGA and DC that I mount to the frame (you can see them at the bottom of the back).
IMG_0719 copy.jpg

Then I use an HDMI-VGA adapter. Unfortunately, I bought a cheap one so I have some problems with the resolution.

To fill the gap between the concave screen seat on the casing and the new flat screen, I used a foam material. Are not entirely happy with how this turned out.
IMG_0729.jpg

I'm thinking to do as spoonie1972 did (see this thread) and use a thin acrylic sheet instead.

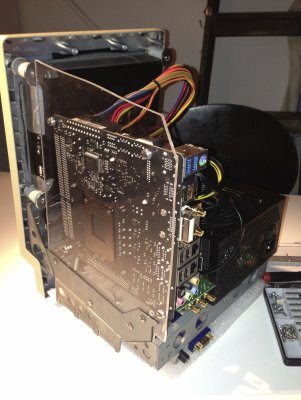
The cut-outs for the I/O ports is made ​​by hand, and hard labor, using a drill, jigsaw and files :) I used the plate that came with the motherboard as a template.
IMG_0734.jpg
When I was happy with the cut-outs I putted the motherboard in place and marked out the holes on the acrylic sheet.

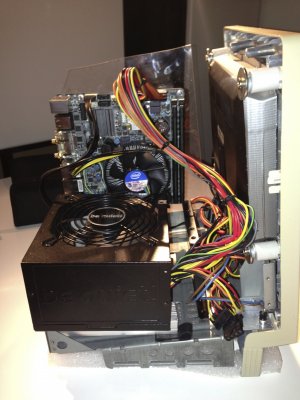
The power supply is attached to aluminum profiles with strong, hardened, double-sided adhesive. I did not want to start drilling holes in it and ruin the warranty. Maybe something I’m going to redo later. But it really sits there!
IMG_0722.jpg


That’s pretty much it. Some lessons are learned, and I've got some new ideas, to the next build. I’m thinking about a Cube as next project…
IMG_0737.jpg
 
Very cool build, I have fond memories of these from when I was pretty young in school. How are your temps? I noticed you don't seen to have any case fans and your PSU vents are blocked by the case. Also I would recommend a DVI to VGA adapter vs an HDMI to VGA to solve your resolution issues.
 
Status
Not open for further replies.
Back
Top