beelzebozo
Super Moderator
- Joined
- Mar 31, 2010
- Messages
- 3,723
- Motherboard
- Gigabyte z690-AERO-G-DDR4
- CPU
- i7-13700K
- Graphics
- RX 6900 XT
- Mac
- Classic Mac
- Mobile Phone
Beelzebozo's Build: Intel Core i7-4770K - GA Z97X-UD5H - 16GB RAM - Intel HD Graphics 4600
Components
mATX/ATX Corsair Carbide 300R Case

GA-Z97X-UD5H Motherboard - Bios version F8

Intel Core i7-4770K Haswell Processor

Thermaltake Water 3.0 Performer (Water) CPU Cooler

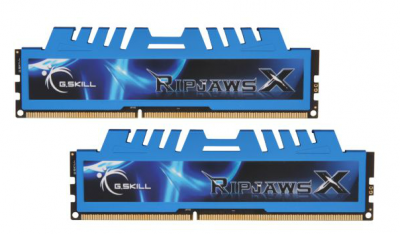
*** Swapped from Crucial Ballistix to G.SKILL Ripjaws which are on the recommended list on the motherboard support web page.
G.SKILL Ripjaws X Series 16GB (2 x 8GB)

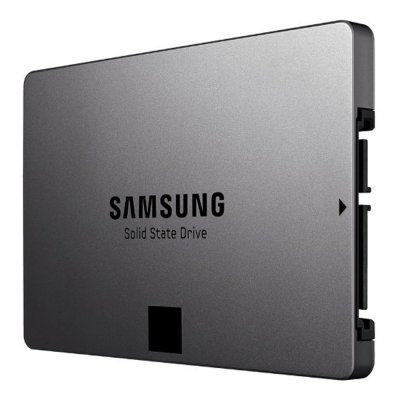
Samsung 840 EVO 256 GBSSD


Already Owned
Dell UltraSharp U2412M 24-Inch Screen LED-lit Monitor

Sony Optiarc DVD Optical Drive

Patriot Xporter XT Boost 8GB USB 2.0 Flash Drive

Apple Airport Mod - Golden Build
This build is not located near my router, so I had to go with WIFI.
Comments
Take a few minutes and read through this if it's your first time installing OS X on a CustoMac-
I'm New to Everything, Where Do I Start?
Before you continue, you'll need to do either one of the following options:
- Purchase an OS X Snow Leopard 10.6 or 10.6.3 install disc from Apple, burn iBoot for Haswell to a CD/DVD, and install OS X Snow Leopard. After that, you'll need to update OS X 10.6.8 and use your Apple ID to download OS X Mavericks for free from the Mac App Store. Then you'll need to create a UniBeast USB installer.
- You'll need access to a real Mac, download OS X Mavericks with your Apple ID, and create a UniBeast USB installer.
It's a good idea to put MultiBeast on your UniBeast USB installer so that you can easily access it after the installation.
- The z97x-UD5H does not require a DSDT.
- I used a DVI cable to connect my Display to the DVI port on the motherboard instead of using HDMI (my display doesn't support HDMI).
Prepare iBoot Haswell
- Download iBoot Haswell from the 'Downloads' index- http://www.tonymacx86.com/downloads.php?do=cat&id=3
- Extract the iBoot-Haswell.zip to your drive. You'll need to burn it to a blank CD. (This can also be done in Windows).
OS X Snow Leopard Installation Guide
- Power on your CustoMac.
- Hit the delete key to enter bios.
- Select a language.
- Insert the iBoot-Haswell disc into the optical drive.
- Hit the F7 key to load Optimized Defaults and click Yes to confirm.
- Move the selection to your optical drive and hit 'return'.
- Once iBoot-Haswell loads Chimera, swap it for your OS X Snow Leopard DVD and hit the 'F5' key (it may select your hard drive instead of the Snow Leopard DVD. If this happens, make sure your target hard drive for the installation is blank and that it doesn't already have an OS installed).
- Once the OS X Snow Leopard DVD is selected, hit 'return' and wait for it to load (I didn't need to use any kernel flags with Intel HD Graphics 4600).
- After you select your language for OS X Snow Leopard, use your mouse and go up to menu bar at the top of the screen and select 'Utilities' (a sub-menu will drop down.) Move selection to and select 'Disk Utility...'.
- You'll see the hard drive(s) as the first option in the left window with the USB drive under it. Select a target hard drive and then go to the 'Partition' button in the center of Disk Utility. Under Partition Layout:, select Current, then select 1 Partition.
- Under Partition Information, enter a name for the partition (I used Macintosh HD which is a name used on Macs). Confirm that the format is set to Mac OS Extended (Journaled).
- Click the 'Options...' button and confirm that the GUID Partition Table radio-button is select. Click the OK button to close the window.
- Click the Apply button to format the partition. Quit Disk Utility once the formatting completes (you'll be taken to the Install OS X set up. Click the Continue button.
- Install OS X Snow Leopard to the target hard drive. Restart once it's complete.
- iBoot should load automatically and you should reach the Chimera menu. Select the OS X Snow Leopard target hard drive by clicking the right-arrow key. Hit 'return' once it's selected.
- OS X Snow Leopard will boot and you'll need to continue with setup.
- Once the desktop loads, open Safari and search for combo update 10.6.8. Download and install it. Restart once it's complete.
- Repeat step 12.
- Once you reach the desktop, you should see the Mac App Store icon in the dockbar below. Click it to launch. You see a link to OS X Mavericks on the main page. Click the link and click download. Sign-in with a valid Apple ID to download the free update.
- Open Safari and to go Preferences > Security and uncheck the plug-ins check box.
- Go to tonymacx86.com and download MultiBeast - Mavericks Edition and UniBeast.
- Once OS X Mavericks is downloaded completely, double-click UniBeast in the downloads folder to launch. Follow the installation prompts.
- Once the UniBeast installation is complete, open the USB drive used for it and drag MultiBeast - Mavericks Edition from the downloads folder into it.
- Eject iBoot-Haswell and restart your CustoMac. Leave your UniBeast USB installer connected.
UniBeast Installation Guide
- Your UniBeast USB installer will load and you will reach the Chimera boot menu. The first first option is the UniBeast install option and the second option will be your target hard drive.
- Hit the 'Enter/return' key to select the OS X Mavericks installer. It will probably take about 2 1/2 minutes to reach the Main Language menu in OS X.
- Use your mouse and go up to menu bar at the top of the screen and select 'Utilities' (a sub-menu will drop down.) Move selection to and select 'Disk Utility...'.
- You'll need to erase the target hard drive this time instead of partitioning it..
- Click the Agree button and select the target hard drive where you want to install OS X. Click the Install Button. The installation process will begin and will take about 10-15 minutes. Once it completes, click the Restart button (it will automatically restart if you don't manually restart). Your CustoMac will reset.
- UniBeast should load automatically and you should see the UniBeast menu.
- You'll need to move the selection to the target hard drive where OS X was installed to. You'll need to use a kernel flag this time- hit the right arrow key twice (you'll notice bar displayed below as 'boot: you may see it as boot:e'. hit the Backspace key (delete key on a Mac keyboard) to erase the e and type -x. Hit the 'Enter/return' key.
- You'll now load OS X in safe mode (you'll see a grey progress bar underneath. It took about 1 min / 20 seconds to reach the set up screen).
- After you've navigated through the set up, you'll need to patch your install with MultiBeast. Because you did the set up in safe mode, you'll need to enter the password you used when creating the account.
MultiBeast Configuration for OS X 10.9 Mavericks

- Once your run MultiBeast, select Quick Start > DSDT Free and then go to Drivers > Network > Atheros > Killer ALXEthernet v.1.0.2 (this is the simplest method for post-installation, however if you are experienced with MultiBeast, you can make single-choice selections).
- Click Install.
- Once the Installation is complete, eject your UniBeast USB installer by right-clicking on it and select "Eject USB" and disconnect it from your CustoMac. Restart your system via the Apple Menu to verify that it will boot from the hard drive (it may take about over a minute to reach the desktop, be patient).
You can always do single choice customizations in MultiBeast such as installing a different Theme or changing your system definition. Take the time to go through all of the options available to best suit your needs.
Benchmarks
Blackmagic Disk Speed Test

Geekbench - Intel (64-bit)

Additional Tweaks
- If you cannot sign into the Mac App Store after you've finished the post-installation setup with MultiBeast, you may need to delete the NetworkInterfaces.plist located in Library > Preferences > SystemConfiguration.

Additional Comments:
- I can sign into iCloud on WIFI.
- I can sign into Facetime on WIFI.
- The display wake is very slow and takes about 1 minute and 30 seconds for a full wake with Intel HD Graphics 4600.
- This build does not have a discrete GPU installed, only Intel HD Graphics 4600 is being used.
Follow the links below to fix Intel HD Graphics 4600 and 9 Series Audio. Once you complete the Intel HD 4600 Graphics fix, you won't need to boot in Safe Boot mode using -x.
Relevant Links:
- http://www.tonymacx86.com/basics/104542-im-new-everything-where-do-i-start.html
- http://www.tonymacx86.com/guidebeast.php
- http://www.tonymacx86.com/374-unibeast-install-os-x-mavericks-any-supported-intel-based-pc.html
- http://www.tonymacx86.com/graphics/...phics-acceleration-9-series-motherboards.html
- http://www.tonymacx86.com/audio/134002-quick-fix-onboard-audio-9-series-motherboards.html
- http://www.tonymacx86.com/network/1056-how-build-your-own-real-airport-card.html
Beelzebozo's OS X Installation Video Guide for 9 Series.
Part 1 - Install OS X Snow Leopard using iBoot-Haswell, update to 10.6.8, download OS X Mavericks, and create a UniBeast USB installer.
[video=youtube_share;_gdl7Whto_k]http://youtu.be/_gdl7Whto_k[/video]
Part 2 - Install OS X Mavericks with UniBeast USB installer.
[video=youtube_share;RKhniL8_e9g]http://youtu.be/RKhniL8_e9g[/video]
Part 3 - Additional Tweaks - 9 Series Audio & Graphics fixes, including Mac App Store fix.
[video=youtube_share;IW6sBXnIOq8]http://youtu.be/IW6sBXnIOq8[/video]
*** OS X Yosemite Installation Video Guide for 9 Series.
[video=youtube_share;sQAUcwwL2w4]http://youtu.be/sQAUcwwL2w4[/video]

