
shilohh
Moderator
- Joined
- Jan 1, 2012
- Messages
- 1,752
- Motherboard
- Asus Prime Z490-A
- CPU
- i9-10850K
- Graphics
- RX 5700 XT
- Mac
- Mobile Phone
Asus X79 DSDT Guide: Create your DSDT in 5 min using MacIASL.
Rampage IV Gene BIOS? Tested by TurbineSeaplane. Just use the R4E patch list.
Rampage IV Black Edition - Work in progress. Need people to post IORegs and report issues.
X79-Deluxe (plan to attempt some edits for the Marvell SATA that only show as ejectable ESATA)
NOTES:
I use the DSDT (Differentiated System Description Table) to rectify IRQ conflicts and patch or add onboard devices to make them functional or more compatible with OS X. You could also choose to add code to inject external devices like PCI cards or USB Bluetooth dongles in the DSDT but I choose to use SSDTs (Secondary System Description Table) for this because they are more modular and you may use many of them in conjunction with each other. They can also easily be removed or modified if the removable hardware they reference is moved or removed. SSDTs add to or override code from the DSDT when the ACPI tables are being loaded by the OS.
Because the DSDT is extracted from the motherboards BIOS (or UEFI), using a DSDT that was extracted on a different machine with different devices installed, may not work on your system. Even if you have an identical motherboard and BIOS version. It is always best extract, patch, and compile a DSDT from your own system. Also, whenever you update your BIOS you need to first delete your patched DSDT and then extract and patch a new one from the new BIOS.
Basic terminology for those of you who are new:
"/Extra" = The folder named "Extra" at the root of your boot drive that was created by Chameleon/Chimera when the bootloader was installed if you use Chameleon/Chimera.
"/System/Library/Extensions" ( /S/L/E or SLE ) = The folder named "Extensions" that is located inside the folder named "Library" that is located inside the folder named "System" that is located at the rood of your boot drive.
"EFI Partition" = A hidden 200MB partition created by OS X on every Mac OS Extended (HFS+) formatted drive. The EFI System partition (ESP) is only used by OS X on real Macs for storing and then booting from and installing EFI firmware updates but the Clover bootloader installs all it's files to and boots from this partition in UEFI mode. It is also possible to install the Chameleon bootloader to the EFI partition.
Motherboard Abbreviations:
R4E = Rampage IV Extreme
R4BE = Rampage IV Black Edition
R4G = Rampage IV Gene
X79D = X79-Deluxe
Guide:
Download MacIASL and the appropriate list of DSDT patches for your motherboard (Links at the bottom of this post).
Make sure you have all your PCI devices functioning correctly and installed in the locations you want them.
1) Delete your old DSDT if you already have one installed. If you don't, your old DSDT will be extracted instead of the unmodified one from the BIOS.
Clover EFI:
Mount your boot drive's EFI partition and Delete DSDT.aml from /Volumes/EFI/EFI/CLOVER/ACPI/patched if present and re-boot.

Chameleon & Chimera:
Delete DSDT.aml from /Extra if present and re-boot.

2) Make sure your BIOS is updated to the version you want. If it is not, update it before you continue.
3) Extract & patch your DSDT.
Clover EFI:
Boot your system into the Clover GUI and press the F4 key at the Clover GUI to extract your motherboard's ACPI files to EFI/CLOVER/ACPI/origin. Boot your system.
3a) Set MaciASL's ACPI version.
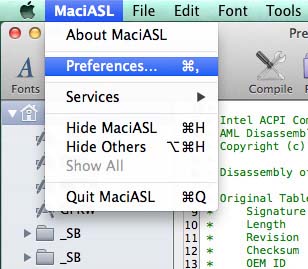
Open MacIASL.app.

Set MacIASL to “ACPI 5.0” in it’s Preferences. EDIT: Set MacIASL to “ACPI 4.0” in it’s Preferences. Apple still compiles their DSDTs with ACPI 4.0. If you use 5.0 you'll be fighting unnecessarily with errors that don't exist in 4.
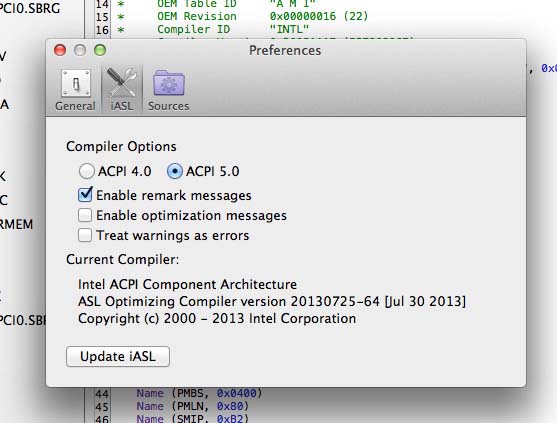
Close the Preferences window.
3b) Open your unmodified DSDT.
Clover EFI:
Close the Pre-Edited DSDT window if one is open. Mount clover's EFI partition. Navigate to /Volumes/EFI/EFI/CLOVER/ACPI/origin and right click DSDT.aml. Choose open with MaciASL.
 Chameleon & Chimera:
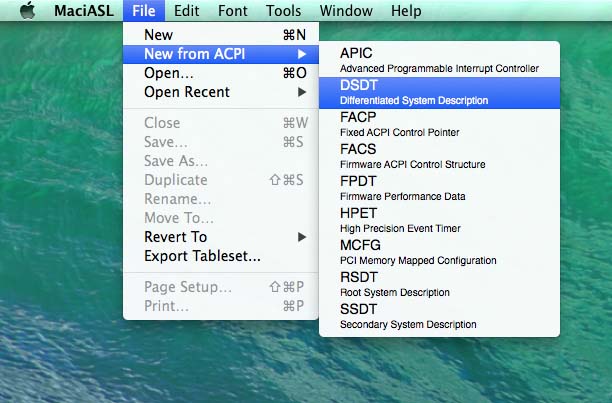
choose File > New From ACPI > DSDT if a Pre-Edited DSDT window isn't already open.
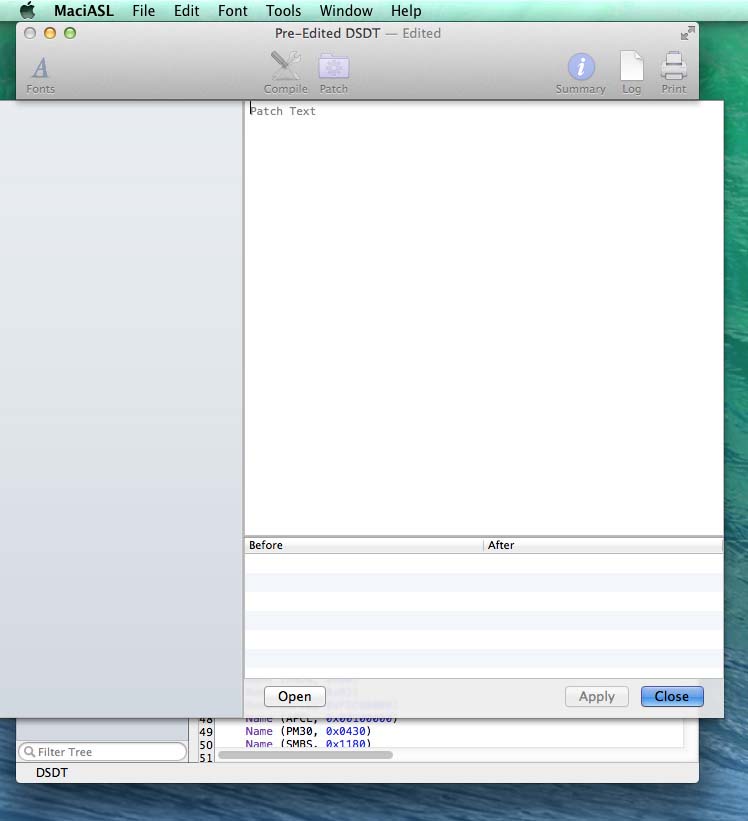
Click Patch.

A "Patch Text" widow will open.
Download and open the "***_DSDT_Patch_***.txt" from the attachments at the bottom of this post that corresponds to your motherboard.

Select all the text from the "***_DSDT_Patch_***.txt" and copy it.
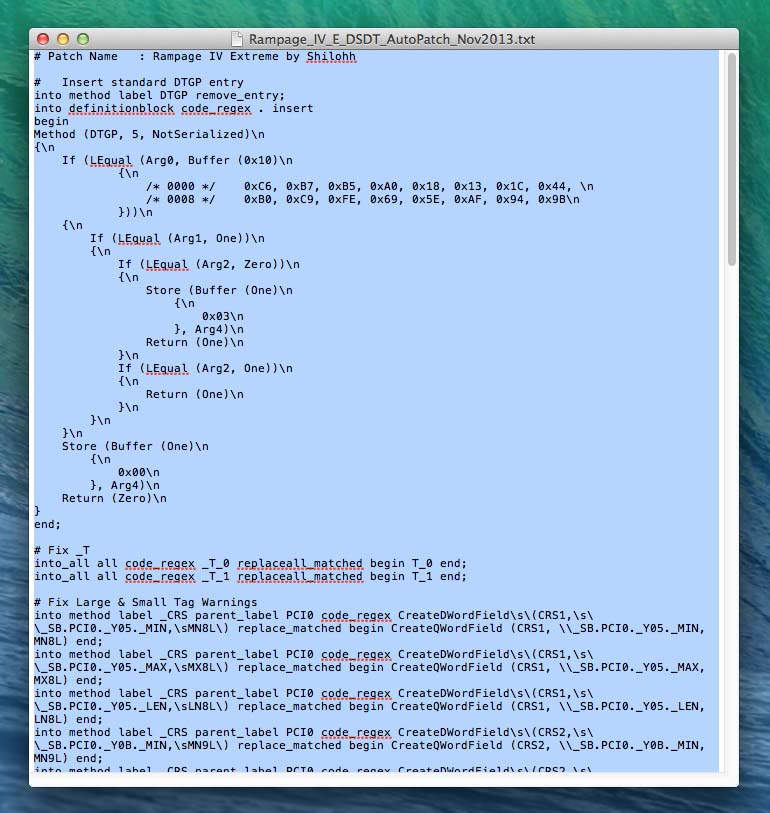
Then paste it into the top half of the “Patch Text” window that opened in the previous step.

Wait a moment until the “Apply” button activates and click it.
When it finishes, close the window.
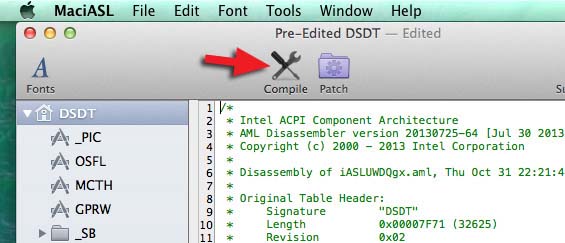
Click the “Compile” button.
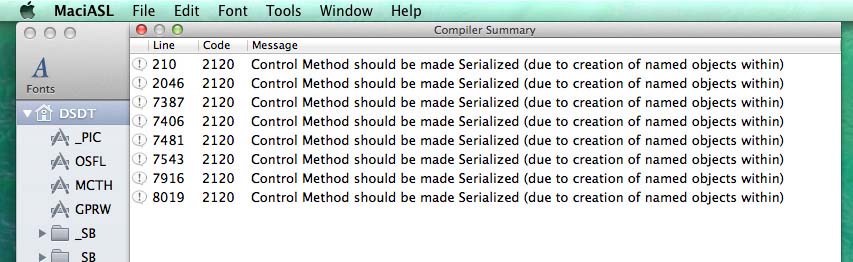
If you set the compiler to ACPI 5.0, you will see some comments left over. These are not a problem and can be ignored. If you really want to fix them, click them in the "Compiler Summary" window. MacIASL will skip to and momentarily highlight the corresponding method. Change the referenced method from “NotSerialized” to “Serialized” and repeat for each one. Again, this is not necessary and the comments are not a problem so I won't go into further detail. This guide is meant to get you your new DSDT in as little time as possible. I didn't fix them in my DSDT.
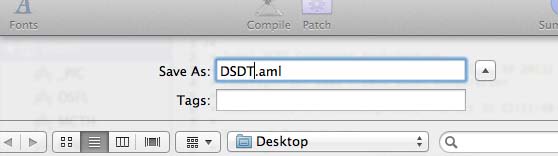
From the "File" menu choose "Save As" to open the save dialog.

Change the File Format to "ACPI Machine Language Binary" from the drop down menu.

Change the "Save As" name to "DSDT.aml". Click "Save" and close MacIASL.
4) Install your new DSDT
Clover EFI:
Mount your boot drive's EFI partition and Place your new DSDT.aml in /Volumes/EFI/EFI/CLOVER/ACPI/patched.
Chameleon & Chimera:
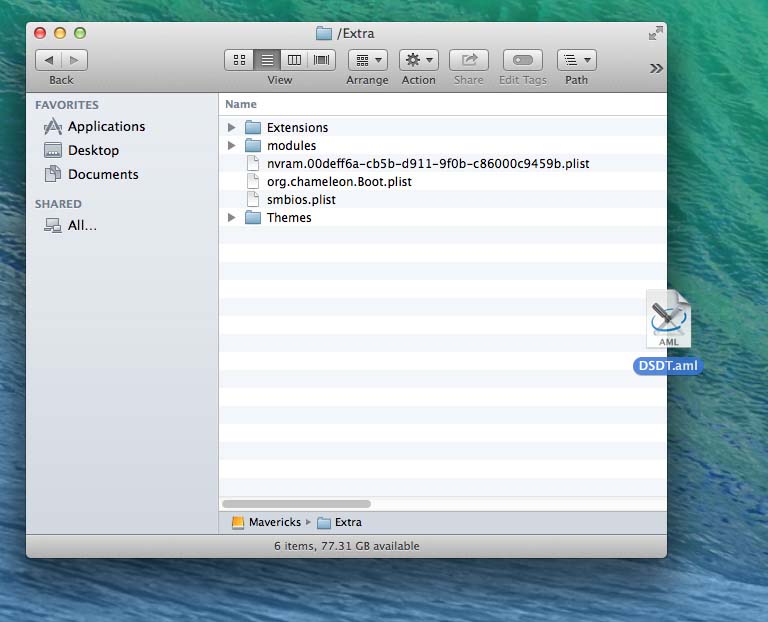
Place your new DSDT.aml in /Extra.
IMPORTANT: If you have previously installed “Without DSDT” audio from MultiBeast, delete “HDAEnabler1.kext” from /System/Library/Extensions before continuing.
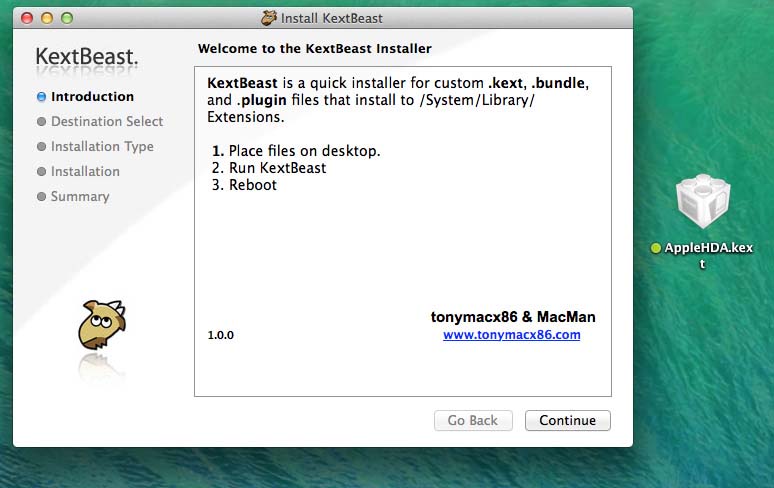
Install your AppleHDA.kext if you haven’t already done so. Either choose “With DSDT” from MultiBeast or place your AppleHDA.kext on the Desktop and run KextBeast. You will need to re-install this kext after OS updates overwrite it so keep a copy handy.
Re-Boot and you're done
EDIT LOG:
07-10-2014 - Changed the name from "Ausus Rampage IV Extreme" to "Asus X79 DSDT Guide".
07-09-2014 - Updated patch list. Removed Interim IvyBridge AppleHDA (Not working in 10.9.4) and info.
04-27-2014 - Updated patch list.
04-24-2014 - Updated patch list.
04-23-2014 - Major update to the patch list.
Tested and working for:
Rampage IV Extreme BIOSs 4206, 4802, 4804 & 4901
Rampage IV Gene BIOS? Tested by TurbineSeaplane. Just use the R4E patch list.
Rampage IV Black Edition - Work in progress. Need people to post IORegs and report issues.
X79-Deluxe (plan to attempt some edits for the Marvell SATA that only show as ejectable ESATA)
NOTES:
I use the DSDT (Differentiated System Description Table) to rectify IRQ conflicts and patch or add onboard devices to make them functional or more compatible with OS X. You could also choose to add code to inject external devices like PCI cards or USB Bluetooth dongles in the DSDT but I choose to use SSDTs (Secondary System Description Table) for this because they are more modular and you may use many of them in conjunction with each other. They can also easily be removed or modified if the removable hardware they reference is moved or removed. SSDTs add to or override code from the DSDT when the ACPI tables are being loaded by the OS.
Because the DSDT is extracted from the motherboards BIOS (or UEFI), using a DSDT that was extracted on a different machine with different devices installed, may not work on your system. Even if you have an identical motherboard and BIOS version. It is always best extract, patch, and compile a DSDT from your own system. Also, whenever you update your BIOS you need to first delete your patched DSDT and then extract and patch a new one from the new BIOS.
Basic terminology for those of you who are new:
"/Extra" = The folder named "Extra" at the root of your boot drive that was created by Chameleon/Chimera when the bootloader was installed if you use Chameleon/Chimera.
"/System/Library/Extensions" ( /S/L/E or SLE ) = The folder named "Extensions" that is located inside the folder named "Library" that is located inside the folder named "System" that is located at the rood of your boot drive.
"EFI Partition" = A hidden 200MB partition created by OS X on every Mac OS Extended (HFS+) formatted drive. The EFI System partition (ESP) is only used by OS X on real Macs for storing and then booting from and installing EFI firmware updates but the Clover bootloader installs all it's files to and boots from this partition in UEFI mode. It is also possible to install the Chameleon bootloader to the EFI partition.
Motherboard Abbreviations:
R4E = Rampage IV Extreme
R4BE = Rampage IV Black Edition
R4G = Rampage IV Gene
X79D = X79-Deluxe
Guide:
Download MacIASL and the appropriate list of DSDT patches for your motherboard (Links at the bottom of this post).
Make sure you have all your PCI devices functioning correctly and installed in the locations you want them.
1) Delete your old DSDT if you already have one installed. If you don't, your old DSDT will be extracted instead of the unmodified one from the BIOS.
Clover EFI:
Mount your boot drive's EFI partition and Delete DSDT.aml from /Volumes/EFI/EFI/CLOVER/ACPI/patched if present and re-boot.
Chameleon & Chimera:
Delete DSDT.aml from /Extra if present and re-boot.
2) Make sure your BIOS is updated to the version you want. If it is not, update it before you continue.
3) Extract & patch your DSDT.
Clover EFI:
Boot your system into the Clover GUI and press the F4 key at the Clover GUI to extract your motherboard's ACPI files to EFI/CLOVER/ACPI/origin. Boot your system.
3a) Set MaciASL's ACPI version.
Open MacIASL.app.
Set MacIASL to “ACPI 5.0” in it’s Preferences. EDIT: Set MacIASL to “ACPI 4.0” in it’s Preferences. Apple still compiles their DSDTs with ACPI 4.0. If you use 5.0 you'll be fighting unnecessarily with errors that don't exist in 4.
Close the Preferences window.
3b) Open your unmodified DSDT.
Clover EFI:
Close the Pre-Edited DSDT window if one is open. Mount clover's EFI partition. Navigate to /Volumes/EFI/EFI/CLOVER/ACPI/origin and right click DSDT.aml. Choose open with MaciASL.
choose File > New From ACPI > DSDT if a Pre-Edited DSDT window isn't already open.
Click Patch.
A "Patch Text" widow will open.
Download and open the "***_DSDT_Patch_***.txt" from the attachments at the bottom of this post that corresponds to your motherboard.
Select all the text from the "***_DSDT_Patch_***.txt" and copy it.
Then paste it into the top half of the “Patch Text” window that opened in the previous step.
Wait a moment until the “Apply” button activates and click it.
When it finishes, close the window.
Click the “Compile” button.
If you set the compiler to ACPI 5.0, you will see some comments left over. These are not a problem and can be ignored. If you really want to fix them, click them in the "Compiler Summary" window. MacIASL will skip to and momentarily highlight the corresponding method. Change the referenced method from “NotSerialized” to “Serialized” and repeat for each one. Again, this is not necessary and the comments are not a problem so I won't go into further detail. This guide is meant to get you your new DSDT in as little time as possible. I didn't fix them in my DSDT.
From the "File" menu choose "Save As" to open the save dialog.
Change the File Format to "ACPI Machine Language Binary" from the drop down menu.
Change the "Save As" name to "DSDT.aml". Click "Save" and close MacIASL.
4) Install your new DSDT
Clover EFI:
Mount your boot drive's EFI partition and Place your new DSDT.aml in /Volumes/EFI/EFI/CLOVER/ACPI/patched.
Chameleon & Chimera:
Place your new DSDT.aml in /Extra.
IMPORTANT: If you have previously installed “Without DSDT” audio from MultiBeast, delete “HDAEnabler1.kext” from /System/Library/Extensions before continuing.
Install your AppleHDA.kext if you haven’t already done so. Either choose “With DSDT” from MultiBeast or place your AppleHDA.kext on the Desktop and run KextBeast. You will need to re-install this kext after OS updates overwrite it so keep a copy handy.
Re-Boot and you're done
EDIT LOG:
07-10-2014 - Changed the name from "Ausus Rampage IV Extreme" to "Asus X79 DSDT Guide".
07-09-2014 - Updated patch list. Removed Interim IvyBridge AppleHDA (Not working in 10.9.4) and info.
04-27-2014 - Updated patch list.
04-24-2014 - Updated patch list.
04-23-2014 - Major update to the patch list.
Attachments

Last edited by a moderator: