Asrock X99 Extreme3 with Xeon E5-1650V3, GTX 980 Ti and
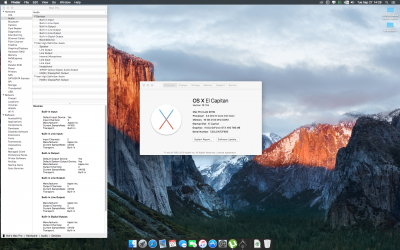
OSX 10.11.1 El Capitan
This has been a tricky build as basicly none of the solutions for other X99 builds I found on this awesome forum (and a couple of other forums) worked for this Asrock board. So for all of those who would like to build something similiar I've put together this guide on how to install El Capitan.
Hardware
Case: Cooler Master Cosmos SE
Motherboard: Asrock X99 Extreme3
CPU: Intel Xeon E5-1650V3 6x3,5GHz (12 Threads)
CPU-Cooler: Corsair Hydro Series H60
RAM: 32GB DDR4 2133 MHz ECC
GPU: Gainward NVidia GTX 980 Ti 6GB
Power Supply: EVGA SuperNova 750 G2-80Plus
Harddrive #1: Samsung SM951 512GB M.2 PCIe
Harddrive #2: Samsung 850 Pro 128GB SATA
Harddrive #3+4: Western Digital WD4000FYYZ 4TB SATA
Bluetooth: IOGear Bluetooth 4.0 IOGGBU521
See build here:
http://www.tonymacx86.com/user-buil...980-ti-32gb-ddr4-ecc-success.html#post1166033
Installation
1) BIOS Settings
The correct BIOS settings are utterly important!
But first update your BIOS to the latest firmware (I used v1.80).
Settings:
OC Tweaker -- CPU:
Intel SpeedStep Technology = Enabled
Intel Turbo Boost Technology = Enabled
Advanced -- CPU Configuration:
Intel Hyper Threading = Enabled
(Intel Virtualization Technology = Enabled/Disabled makes no difference)
CPU C States Support = Enabled
Package C State = C6(non Retention)
CPU C3 State = Enabled
CPU C6 State = Enabled
Advanced -- Chipset Configuration:
VT-d = Disabled
Advanced -- Super IO Configuration:
Serial Port = Disabled
Advanced -- USB Configuration:
Intel USB 3.0 Mode = see below
Legacy USB Support = Enabled
Legacy USB 3.0 Support = Enabled
(USB Compatibility Patch = Enabled/Disabled makes no difference)
Boot:
CSM (Compatibility Support Module) = Disabled
(you might have to enable it for booting from a Linux USB-Stick)
Choose between one of these two options:
USB-OPT-A)
only USB 3.0 ports are available:
Advanced -- USB Configuration -- Intel USB 3.0 Mode=Enabled
USB-OPT-B)
USB 2.0 and 3.0 ports work, but only at USB 2.0 speed:
Advanced -- USB Configuration -- Intel USB 3.0 Mode=Smart Auto
(USB seems to be unstable when using USB 2.0 port for mouse/kb and inserting a USB 3.0 Stick in a USB 3.0 port)
Note: Changing certain settings requires grabbing a new SSDT.aml - e.g. Intel SpeedStep Technology
2) DSDT.aml and SSDT.aml
Without these files nothing will work properly, so make sure you don't skip this step.
- boot Linux, i.e. from a USB-Stick or Live DVD
(you might have to enable CSM (Compatibility Support Module) in BIOS)
- use console to copy DSDT and SSDT to a FAT-Partition on a USB-Stick:
Code:
cp /sys/firmware/acpi/tables/DSDT /media/<USBSTICK>/dsdt.aml
cp /sys/firmware/acpi/tables/SSDT /media/<USBSTICK>/ssdt.aml
(you'll have to mount the USB-Stick first and then replace "<USBSTICK>" with the appropriate path)
3) OSX 10.11 USB-Stick
- use Disk Utility and partition your USB-Stick one "Mac OS Extended (Journaled)" partition and GUID Partition Table, name the partition "OSX11"
- download OS X El Capitan via App Store
- install El Capitan on USB-Stick via Terminal:
Code:
sudo /Applications/Install\ OS\ X\ El\ Capitan.app/Contents/Resources/createinstallmedia --volume /Volumes/OSX11 --applicationpath /Applications/Install\ OS\ X\ El\ Capitan.app --no interaction
- download Clover Installer from http://sourceforge.net/projects/cloverefiboot/
- run Clover Installer
- choose USB-Stick as Install Location
- customize settings:
Install for UEFI booting only
Install Clover in the ESP
Drivers64UEFI
DataHubDxe-64
EmuVariableUefi-64
OsxAptioFixDrv-64
Install RC Scripts on target volume
(you might want to choose some theme as well)
- after Clover installation open EFI partition in Finder
- copy 'DSDT.aml' and 'SSDT.aml' to 'EFI/CLOVER/ACPI/patched/'
- remove 'EFI/CLOVER/drivers64UEFI/VBoxHfs-64.efi' and copy 'HFSPlus-64.efi' to 'EFI/CLOVER/drivers64UEFI/'
(for 'HFSPlus-64.efi' see downloads below)
- copy 'AppleIntelE1000e.kext', 'FakeSMC.kext', 'GenericUSBXHCI.kext' and 'NullCPUPowerManagement.kext' to 'EFI/CLOVER/kexts/10.11/'
(for KEXTs see downloads below)
- if you have a 6-core CPU copy 'VoodooTSCSync-6core.kext' to 'EFI/CLOVER/kexts/10.11/' or
if you have a 8-core CPU copy 'VoodooTSCSync-8core.kext' to 'EFI/CLOVER/kexts/10.11/',
then rename the file in 'EFI/CLOVER/kexts/10.11/' to 'VoodooTSCSync.kext'
(for 'VoodooTSCSync-xxx.kext' see downloads below)
- remove 'EFI/CLOVER/config.plist'
- depending on chosen USB option:
USB-OPT-A)
- no additional drivers required
- copy 'config-setup-usb_option_a.plist' to 'EFI/CLOVER/' and rename it to 'config.plist'
(for 'config-setup-usb_option_a.plist' see downloads below)
USB-OPT-B)
- copy 'FakePCIID_XHCIMux.kext' and 'FakePCIID.kext' to 'EFI/CLOVER/kexts/10.10/' and 'EFI/CLOVER/kexts/10.11/'
(for KEXTs see downloads below)
- copy 'config-setup-usb_option_b.plist' to 'EFI/CLOVER/' and rename it to 'config.plist'
(for 'config-setup-usb_option_b.plist' see downloads below)
- open 'EFI/CLOVER/config.plist' with Clover Configurator
(Clover Configurator: http://mackie100projects.altervista.org/download/)
- under SMBIOS use the "generator" button to generate a MacPro5,1 SMBIOS
View attachment 167265
- save file and close app
- copy all files that are necessary for the post-installation to the USB-Stick
- eject USB-Stick (including EFI partition)
This is how the 'EFI/CLOVER/' directory should look like when your done:
4) OSX 10.11 Installallation
5) OSX 10.11 Post-Installallation
- in OSX System Preferences -- Security -- General: choose "Allow apps download from: Anywhere"
- in OSX System Preferences -- Energy Saver: deselect "Wake for Ethernet network access"
- use Clover Configurator to mount the EFI partition on the HDD (should be disk0s1)
- open the file '/Volumes/EFI/EFI/CLOVER/config.plist' with Clover Configurator
- under "Boot" in the section "Arguments" deselect the kernel flag "nv_disable=1"
- save file and close Clover Configurator
- install NVidia Web Driver for OSX 10.11.1,
necessary for the GTX 980 Ti and other unsupported NVidia cards
(NVidia Web Driver: "http://www.tonymacx86.com/graphics/...raphics-drivers-os-x-10-11-1-346-03-03-a.html")
- reboot from HDD
6) Open issues
- instant wake from sleep when external USB-HUB or some USB drive is connected - at least when using USB-OPT-A.
Not tested when using USB-OPT-B since USB 3.0 speed was more important than having a trillion USB Ports that only run at 2.0 speed
7) Downloads

") .
.