@ P1LGRIM,
Regarding network setup i think you should consider clarifying the following in the guide (if it's known of course).
If a laptop has only wlan or a machine has only ethernet, things are simple and clear. But most non-apple laptops in the market today have both wlan and ethernet (this includes many PC builds lately).
Which of the 2 network interfaces should be set as En0, which of the 2 mac addresses should be used as ROM value, which of the 2 should be used (or preferred) to connect online, or if the one you first connect with, defines the other two (En0 and ROM).
PS.
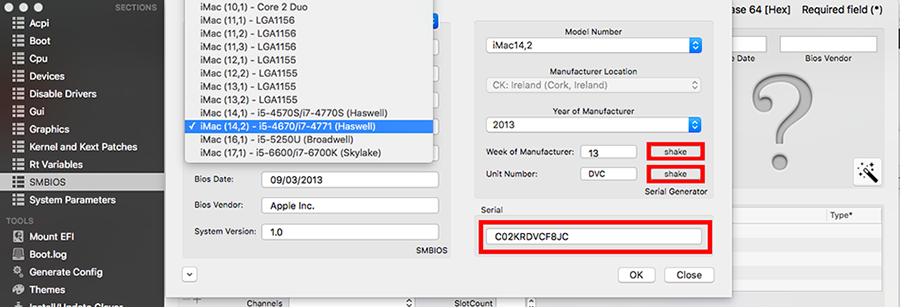
SimpleMLB.sh is quite old. Generating an MLB with a given 12 digit serial, can actually give you a 16 digit instead of a 17 digit MLB (depending on the serial).
Is that even an option?