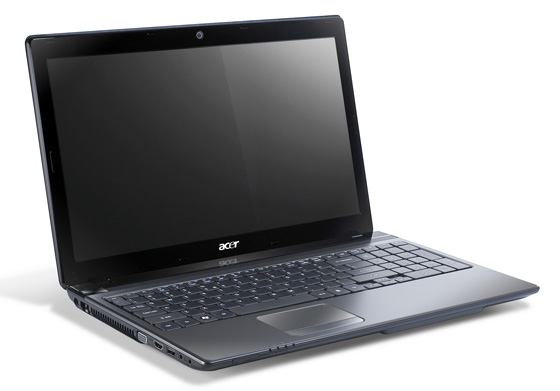
Acer Aspire 5750G OS X 10.9 Clover Install Guide
** This guide is done at your own risk, I am not responsible for any damages made to your PC**
Main features:
Prerequisites
1. First of all you will need to make sure that you have unlocked BIOS V1.20 or V1.21 by Akbar102 (an easy google will and you will find it). Make sure that you have the UEFI option ticked in the BIOS and EFI boot first enabled.
2. It is important to extract and patch your own vanilla DSDT. You can look at this post and then use the patch that I have included in this post. You can get away with not having one as Clover generates one automatically but it makes things easier.
3. Next make sure you have a correct SSDT for your processor. You can use the ProBook installer to generate one automatically for you. (same as above, Clover will generate one for you)
4. Formatting USB sticks for installation. As most of you will have OS X already installed, I would advise to use Disk Utility to restore the Mountain Lion.app or .dmg file to a USB (No Chimera or chameleon is needed which is why you will
not need to install via Unibeast) (you can google if you get stuck on repairing the OS X USB installer). Prepare Windows and Linux USB drive, using
this tool it will allow UEFI booting from each OS, (.iso files will be needed). One will also be used for Clover.
Just to reiterate:
Code:
1. Clover USB (just copy the folders within the folder called Clover to the root of the USB drive). You will need to edit the config.plist slightly for your laptop. [b]You will need to add you own S/N (can generate from Champlist) also only if you have a i7 you can use MBP8,2 if not then you must change the definition type to a MBP8,1.[/b]
2. Windows USB installer made by unetbootin.
3. Linux USB installer made by unetbootin.
4. OS X USB installer made by restoring .app file or .dmg file inside of OS X to a USB drive (VM could be used).
NOTE: You can get away with having just 3 USBs and then formatting them once you have 1 OS installed, but it is up to you.
Disk
1. A pure GPT disk is required but not sure if a GPT/MBR Hybrid will work which is the most commonly used partition table for dual booting Windows and OS X here. To change this I would recommend backing up your all your files and using a Linux USB Drive to format your disk using GParted also create your partitions here, you will need to install hfsprogs in linux to enable the creation of the OS X formatted disks
Code:
sudo apt-get install hfsprogs
I have the following:
Code:
   #:                       TYPE NAME                    SIZE       IDENTIFIER
   0:      GUID_partition_scheme                        *640.1 GB   disk0
   1:                        EFI                         209.7 MB   disk0s1
   2:       Microsoft Basic Data Windows 8               78.6 GB    disk0s2
   3:       Microsoft Basic Data                         59.1 GB    disk0s3
   4:                 Linux Swap                         8.6 GB     disk0s4
   5:       Microsoft Basic Data Data                    338.2 GB   disk0s5
   6:                  Apple_HFS Hackintosh HD           79.9 GB    disk0s6
   7:                 Apple_Boot Recovery HD             650.0 MB   disk0s7
   8:                  Apple_HFS Time Machine            74.9 GB    disk0s8
You can setup something similar to this if you wish, however you will not need to create the Recovery HD partition, that should get created automatically. If you are installing Linux, the SWAP partition is very important.
2. How to Format your HDD:
Code:
Boot Ubuntu USB Stick.
Open gparted (partition editor) to install (sudo apt-get install gparted). Select your hard drive. Use menu Device > Create partition table, select gpt. Create 200mb primary partition fat32 with EFI label at beginning and set as flag as BOOT. Leave empty space for windows or create a fat32 as temporary placeholder, that you will delete and recreate the partition in windows installer (so it has Microsoft System Reserved). Next create a ext2/3/4 partition followed by a linux swap.
Then create your data partition exFAT or whatever you'd like. Then create your OS X and OS X backup as hfs+.
Installation
1. After you are sure you are booting on a pure GPT, it is important to install Windows first then Linux with OS X following behind.
2. Install Windows from the USB stick. Boot > F12 > select the ACPI device with USB > Install Windows to the first partition > complete the installation.
3. Install Linux by booting with the same method as Windows. When installing Ubuntu/Linux make sure that you select "Something Else", make sure the swap is set to the partition you created and make sure your ext/2/3/4 is set as root (/).
4. Next plug in the Clover USB and the OS X USB and boot into Clover
5. Boot the OS X USB and before installation open Disk Utility within the installer, click on the 1 or 2 drives that you formatted with Linux for OS X and click 'Enable Journalling' (Do not reformat). Install OS X after booting via Clover and press space over the USB stick and select boot with 'Injected Kexts' you will only need FakeSMC.kext, VoodooPS2Controller.kext and possibly NullCPUPowerManagement.kext which will be placed within EFI/kexts/10.9/.
6. After making sure that you can boot all systems with Clover on the USB you will need to just copy the files over to the EFI partition that we created earlier in Linux. Here you have to mount the EFI so boot into OS X and fire up terminal. Type the following:
Code:
- cd /
- sudo mkdir HDDEFI
- sudo mount -t msdos /dev/diskXsX /HDDEFI/       (X does stand for your disk and the partition number, most likely to be /dev/disk0s1)
7. More than likely it will not boot into Clover it will boot Windows 8 if using Win8, this is because the firmware forces Windows to the first boot priority. However this can be changed so don't worry. Boot into OS X from Clover USB and mount the EFI partition:
Code:
sudo mount -t msdos /dev/diskXsX /HDDEFI/ (X does stand for your disk and the partition number, most likely to be /dev/disk0s1)
You should have the following folders:
Go into EFI/Microsoft/Boot/ and select the file called 'bootmgfw.efi' rename it to 'bootmgfw-orig.efi'. Then you need to take the CLOVERX64.efi file from EFI/CLOVER/ and place it inside of EFI/Microsoft/boot/ and rename it to 'bootmgfw.efi'.
You can delete the folder /EFI/BOOT. It only contains the file BOOTX64.efi which is exactly the same as CLOVERX64.efi. For our system we don't need that folder.
8. Reboot and you should be fine booting via Clover.
Upgrading Clover
1. You need to select the following options: -
Select custom install:
Code:
[u]Install for UEFI motherboards
Install Clover in the ESP
Bootloader[/u]
- Don’t update MBR and PBR sectors
[u]Themes[/u]
— Black_Green (or your choice)
[u]Drivers64UEFI[/u]
— CsmVideoDxe-64
— EmuVariableUefi-64
— OsxAptioFixDrv-64
— PartitionDxe-64
[u]Install RC scripts on target volume
Install RC scripts on all other bootable OS X volumes [/u]
2. If you want to upgrade Clover this way then you need to make sure you change the Clover file (CLOVERX64.efi) located in /EFI/CLOVER/ to bootmgfw.efi inside of /EFI/Microsoft/Boot/ after installation has completed.
Plain OS X Install
This is my guide with all O/S if you want just OS X installed then I would assume you will not need to change the CLOVERX64.efi file. You would just need to make sure you have a folder with /EFI/BOOT/BOOTX64.efi (Exactly same file as CLOVERX64.efi).
To have just OS X and Clover operating you will need to copy the Clover binary (CLOVERX64.efi) and copy it into a new folder that you will need to create (EFI/Microsoft/boot). Rename CLOVERX64.efi to bootmgfw.efi.
Troubleshooting
If you get Kernel Panic, then try adding NullCPUPowerManagement.kext into /EFI/kexts/10.9/
Disclaimer
This method worked for me so it is not guaranteed to work with your system.
Any questions can be posted here but they may already have been answered within
here.
Also I am not trying to sway this thread away from any of the methods used on this website including Unibeast, it is the users choice in which option they choose to follow
Credits
Credits go to everyone whom helped on ProjectOSX and OSX86, also where due to products of tonymacx86 and their website.
Feedback
With my system I have it fully working with sound along with HDMI audio, this was done with AppleHDA.kext, and AppleIntelSNBGraphicsFB.kext edits, also battery is working with the included kexts.
Ethernet I am not sure if I have it working correctly but you can try with kext included, it shows up but am yet to test.
The only thing I do not have working is the nVidia GT540M but that is not possible due to Optimus.
Update 10.9.1
To update from 10.9 to 10.9.1:
- Download OSXUpd10.9.1.dmg via
http://support.apple.com/kb/DL1707
- Copy AppleHDA.kext in S/L/E to desktop.
- Install OSXUpd10.9.1.dmg.
- Reinstall AppleHDA.kext in Desktop by Kext Wizard.
- Repair permissions again and rebuild caches
- Reboot.
Update 10.9.2
To update from 10.9, 10.9.1 to 10.9.2:
- Download OSXUpd10.9.2.dmg via
http://support.apple.com/kb/DL1726
- Copy AppleHDA.kext in S/L/E to desktop.
- Copy AppleIntelSNBGraphicsFB.kext in S/L/E to desktop.
- Install OSXUpd10.9.2.dmg.
- Reinstall AppleHDA.kext in Desktop by Kext Wizard.
- Repair permissions again and rebuild caches
- Reboot.
Update 10.9.3
To update from 10.9, 10.9.1, 10.9.2 to 10.9.3:
- Download OSXUpd10.9.3.dmg via
http://support.apple.com/kb/DL1746
- Copy AppleHDA.kext in S/L/E to desktop.
- Copy AppleIntelSNBGraphicsFB.kext in S/L/E to desktop.
- Install OSXUpd10.9.3.dmg.
- Reinstall AppleHDA.kext in Desktop by Kext Wizard.
- Repair permissions again and rebuild caches
- Reboot.
Update 10.9.4
To update from 10.9, 10.9.1, 10.9.2, 10.9.3 to 10.9.4:
- Download OSXUpd10.9.4.dmg via
http://support.apple.com/kb/DL1755
- Copy AppleHDA.kext in S/L/E to desktop.
- Copy AppleIntelSNBGraphicsFB.kext in S/L/E to desktop.
- Install OSXUpd10.9.4.dmg.
- Reinstall AppleHDA.kext in Desktop by Kext Wizard.
- Repair permissions again and rebuild caches
- Reboot.
Update 10.9.5
To update from 10.9, 10.9.1, 10.9.2, 10.9.3, 10.9.4 to 10.9.5:
- Download OSXUpd10.9.4.dmg via
http://support.apple.com/kb/DL1760
- Copy AppleHDA.kext in S/L/E to desktop.
- Copy AppleIntelSNBGraphicsFB.kext in S/L/E to desktop.
- Install OSXUpd10.9.5.dmg.
- Reinstall AppleHDA.kext in Desktop by Kext Wizard.
- Repair permissions again and rebuild caches
- Reboot.