Contribute
Register

2013 Mac Pro - My variation

Status
Not open for further replies.
Thank you for your answers JuanLobo

My two questions are:
How did you attach the graphics card on the frame??
After several months of using your mod, have you had problems with overheating ??

For bluetooth, I will use a dong (IOGear Bluetooth 4.0 Adapter)
 
Thank you for your answers JuanLobo

My two questions are:
How did you attach the graphics card on the frame??
After several months of using your mod, have you had problems with overheating ??

For bluetooth, I will use a dong (IOGear Bluetooth 4.0 Adapter)

The graphic card is held in place by the PCIe slot. There is also a piece of plastic on the opposite side of the PCIe slot wedged between the graphics card, and the frame. The PCIe slot is part of the 3M extension cable. It is bolted to the frame.

I have not had any heat problems with it. However, I do not stress it a lot. I play a few hours of games on it a week, and compress some movies with it. It is not under constant load.

One problem I have is due to having lots of pets in the house. Dust collects on the fan blades pretty fast, so I have to clean it with compressed air now and then.
 
Hello Folks,
i recently build my own macpro casemod.
i just assembled my parts* plugged in the prepared usb and now im trying to get to the installermenu.

i dont want to use an external graphics card for now, so i didnt disable the hd 4600 in the bios menu as John proposed.
this is what i get when i boot with: -x -v GraphicsEnabler=YES ( See Attachment )

Any help is very much appreciated,
Best Regards
Niksda

*
Gigabyte Z87n-wifi
intel i3 4360 (with hd4600)
crucial ballistix ram 2x 8gb
be quiet sfx2-400w
samsung ssd evo 120gb
 

Attachments

  • 1.jpg
    1.jpg
    311.3 KB · Views: 143
SDQF-20, here is a video sample. Not sure if it will tell you much. I wouldn't recommend going into a hackintosh project if you are expecting to get a particular noise level... there are so many variables.

https://www.youtube.com/watch?v=FS49t4FPZkM
 
Hello Folks,
i recently build my own macpro casemod.
i just assembled my parts* plugged in the prepared usb and now im trying to get to the installermenu.

i dont want to use an external graphics card for now, so i didnt disable the hd 4600 in the bios menu as John proposed.
this is what i get when i boot with: -x -v GraphicsEnabler=YES ( See Attachment )

Any help is very much appreciated,
Best Regards
Niksda

*
Gigabyte Z87n-wifi
intel i3 4360 (with hd4600)
crucial ballistix ram 2x 8gb
be quiet sfx2-400w
samsung ssd evo 120gb


I can't say for sure what might be going on. I got similar results when I had other OSX bootable volumes plugged in that didn't have the boot loader installed on them. For example, any time I cloned my boot drive to an external drive, it would crash on the next boot if I didn't use Mutibeast to also put the boot loader on the backup drive.

If that isn't it, then I'd try other display connections on the motherboard (a different HDMI port). I never tried a DVI port.

If that doesn't help, you will have to use the other forum topics like post install to see what might be going on.
 
Thank you very much JuanLobo for all your help

Then to make a first installation:
932433total.gif


To be continued...
bit-norty.gif
 
Great rendering! My only question is about the base plate above the power supply. Is there enough open area for air to pass? I was worried that the PSU fan alone would not pass enough cool air to feed the top fan. I would be especially concerned about the GPU not having a source of cool air.
 
Hello again.
I managed to get it up and running with a little settings help from this post:
http://www.tonymacx86.com/user-buil...z87n-wifi-i5-4670k-760gtx-customac-build.html
I figured i mention it for everyone who has come across similar problems when only using onboard graphics.

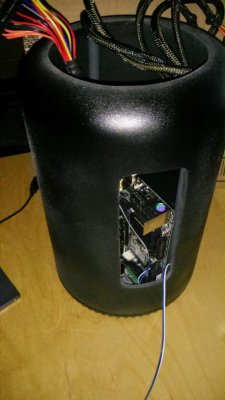
I made my own smaller 3D-Model of the Base and printed it at shapeways. (since i dont have the external graphics card i didnt need all the existing space. I also tried to get it as close as possible to match the original design. (for instance the right number of air ventholes). Additionally i will print my own Input Output plate which i will glue to extension cables and usb hubs which fit perfectly into my case. (also thx to the free space without an extra gfx)

If anyone is interested in my 3d-model feel free to let me know.
Further differences to Johns build are:
(as mentioned)
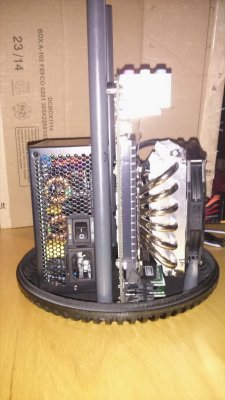
- new Build-Layout with the board positioned vertically (Ports facing upwards, RAM facing downwards.)
- PVC Pipes instead of epoxy/metalrod system
- bequiet 400w psu
- be quiet 140mm casefan (rounded the edges off by hand)
- Corsair 2x 8gb 1600mhz

extension cables:
- 2x hdmi (wanted to add a second hdmi port to my custom i/o shield for dual displays) / 50 cm
- 2x 3.5mm Audio Jack (for mic and headphones) / 50cm
- 2x 1 to 4 usb 2.0 hub
- 2x Gigabit LAN Cuppling /5cm
- 2x LAN Cable /15cm
- Power Switch (with leds)
- 90° angled Power Cable (40cm)

missing:
- 4x USB 3.0 Extension Cables (25cm) / Did anybody try to use the internal USB 3.0 Pins?
- Mini Pcie Wifi-Bluetooth Substitute Card
- printed I/O Shield (Need to adjust the 3d file for the right cables)

Whats not working so far:
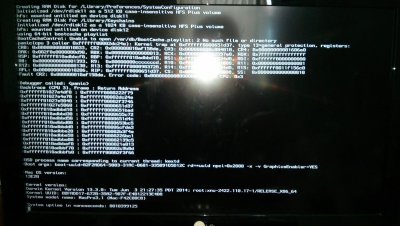
- Grizzled Screen at bootup which looks pretty annoying (doesnt interfere with booting)
- HDMI Audio // Feel free to tell me how to enable it :)
- Wifi (because of the card)

I will soon add some pictures,
Best Regards,
Niksda.
 

Attachments

  • IMG_20140829_173738.jpg
    IMG_20140829_173738.jpg
    81.9 KB · Views: 599
  • IMG_20140829_201614.jpg
    IMG_20140829_201614.jpg
    67.8 KB · Views: 598
Last edited:
Very impressive! Did you 3D print the upper case as well? I ask because I didn't think there was enough room to put the power supply behind the logic board in the trash bin case.
 
Status
Not open for further replies.
Back
Top