- Joined
- Jul 2, 2011
- Messages
- 18
- Motherboard
- EPI-QM77
- CPU
- Intel Core i7 3610M
- Graphics
- Intel HD 4000
- Mac
- Classic Mac
- Mobile Phone
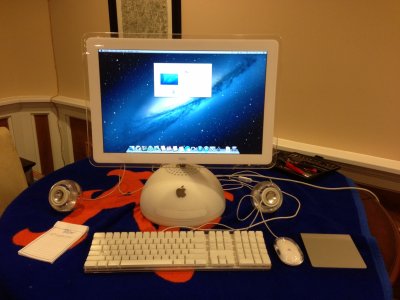
20" iMac G4 Mod - Updated for Ivy Bridge and Mountain Lion - Completed
I had previously posted my 20" iMac G4 Case Mod which used a Core i5 Sandy Bridge small form factor ECX board and ran OS 10.7 Lion. I have decided to do an updated version with an Ivy Bridge Chipset, HD400 graphics, and running 10.8 Mountain Lion, I have made significant headway and am using two different small form factor boards/systems and will incorporate the best one into the final build.
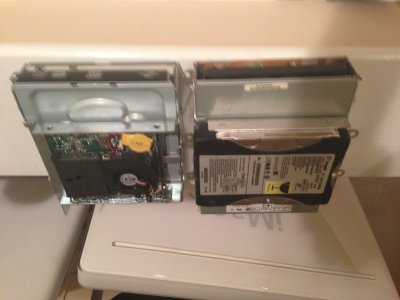
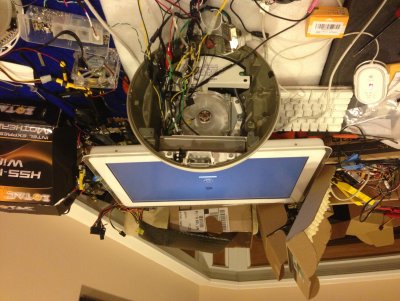
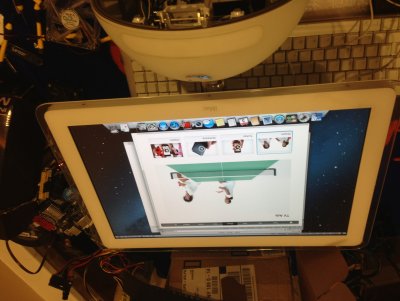
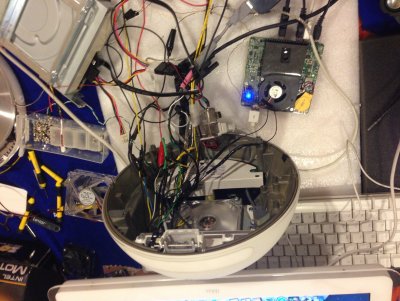
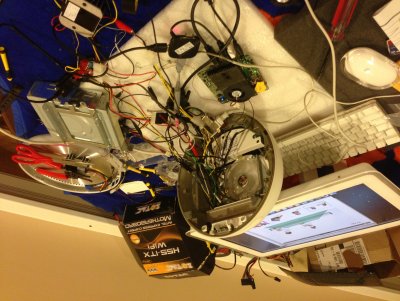
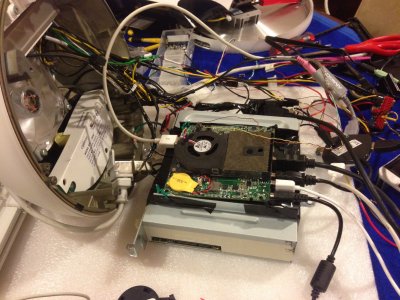
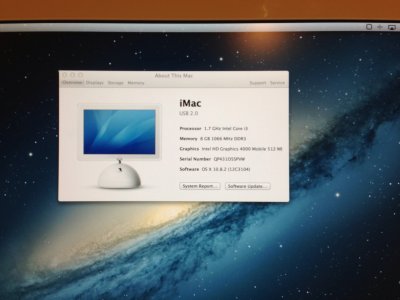
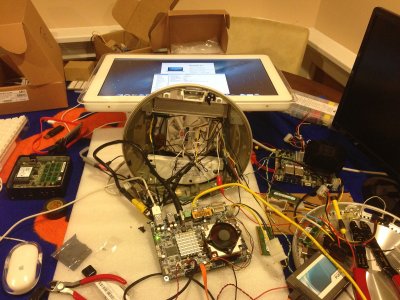
Board #1: Mobile Quad Core i7 Ivy Bridge EPI-QM77 Board running Mountain Lion 10.8This is the EPIC board, at 4.5" x 6.5", it is slightly larger than the ECX board, but much smaller than a mini-itx, and it fits easily within the dome. I used the Unibeast/Multibeast install method (Thank you again tonymac). Changing the SATA from IDE to AHCI was the only change I had to make in the bios, otherwise it installed natively. Interestingly, I had trouble getting the USB to function from a USB 3.0 port, but when I plugged it into the apple keyboard's USB via the USB 3.0 it worked fine.
I am still tweaking the multibeast settings somewhat, but will report them with final recommendations shortly. This build eschews the optical drive which was in my previous mod for the native PSU. Although this is cleaner as there is no power brick, I have mixed feelings about loosing the aesthetics of the drive. Its getting harder to justify what is really a cosmetic feature at this point. I am still trying to devise a use for this and to somehow incorporate a usb powered motor to open and close the door revealing a hot plug or extra ports. I will have to see what might be needed from a cooling perspective, but I may need to upgrade to a larger heatsink, but can not be sure until the computer is fully assembled.
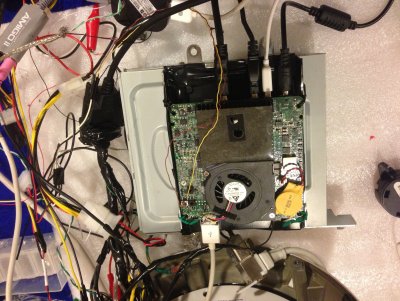
This is likely the build I will keep as this board has everything I need, Core i7 Quad Ivy Bridge with HD4000 graphics, Enough USB 3.0 slots and 2 SATA 6.0 ports. Even a quality 7.1 Realtek Audio Chip is included.
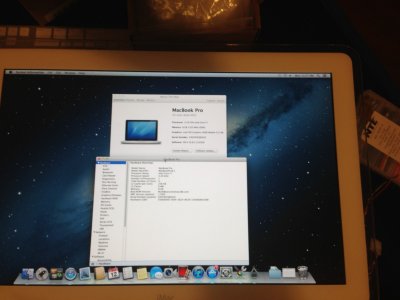
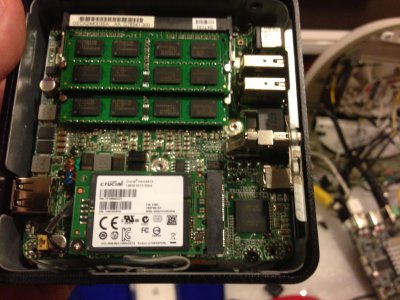
Board #2:THE INTEL DC3217BY
On the forums I have seen successful builds using the sister model which has ethernet and two monitor support. This is the "higher end" model because of the inclusion of a thunderbolt port. With the help of mikeboss' tip (thank you mikeboss for saving me hours of frustration), to set the graphics to 128mb, this board was able to post. I did not go further as a mSATA is required and I did not have one large enough until now. I have installed this Crucial 128GB mSATA, as well as a broadcom half height wifi card. As this board is nearly identical, I suspect I will have similar success. The question will be the thunderbolt, which I am hopeful will work natively.
Thank you for reading, advise and suggestions are appreciated. Happy to answer any questions and will keep updating as I go.
I had previously posted my 20" iMac G4 Case Mod which used a Core i5 Sandy Bridge small form factor ECX board and ran OS 10.7 Lion. I have decided to do an updated version with an Ivy Bridge Chipset, HD400 graphics, and running 10.8 Mountain Lion, I have made significant headway and am using two different small form factor boards/systems and will incorporate the best one into the final build.
Board #1: Mobile Quad Core i7 Ivy Bridge EPI-QM77 Board running Mountain Lion 10.8This is the EPIC board, at 4.5" x 6.5", it is slightly larger than the ECX board, but much smaller than a mini-itx, and it fits easily within the dome. I used the Unibeast/Multibeast install method (Thank you again tonymac). Changing the SATA from IDE to AHCI was the only change I had to make in the bios, otherwise it installed natively. Interestingly, I had trouble getting the USB to function from a USB 3.0 port, but when I plugged it into the apple keyboard's USB via the USB 3.0 it worked fine.
I am still tweaking the multibeast settings somewhat, but will report them with final recommendations shortly. This build eschews the optical drive which was in my previous mod for the native PSU. Although this is cleaner as there is no power brick, I have mixed feelings about loosing the aesthetics of the drive. Its getting harder to justify what is really a cosmetic feature at this point. I am still trying to devise a use for this and to somehow incorporate a usb powered motor to open and close the door revealing a hot plug or extra ports. I will have to see what might be needed from a cooling perspective, but I may need to upgrade to a larger heatsink, but can not be sure until the computer is fully assembled.
This is likely the build I will keep as this board has everything I need, Core i7 Quad Ivy Bridge with HD4000 graphics, Enough USB 3.0 slots and 2 SATA 6.0 ports. Even a quality 7.1 Realtek Audio Chip is included.
Board #2:THE INTEL DC3217BY
On the forums I have seen successful builds using the sister model which has ethernet and two monitor support. This is the "higher end" model because of the inclusion of a thunderbolt port. With the help of mikeboss' tip (thank you mikeboss for saving me hours of frustration), to set the graphics to 128mb, this board was able to post. I did not go further as a mSATA is required and I did not have one large enough until now. I have installed this Crucial 128GB mSATA, as well as a broadcom half height wifi card. As this board is nearly identical, I suspect I will have similar success. The question will be the thunderbolt, which I am hopeful will work natively.
Thank you for reading, advise and suggestions are appreciated. Happy to answer any questions and will keep updating as I go.

")