Contribute
Register

RIP Gobias’s Haswell Build: GA-Z87X-UD5H - i7-4770K - RX 580 - macOS Big Sur & Windows 10

Status
Not open for further replies.
Advice on both would be great!

Do you have experience using Adobe Illustrator? I downloaded a vector logo like this one and modified it in Illustrator.

For the decal, I have an unfair advantage since I have a friend that works in a print shop.

I am attaching two versions of the logo, one for screen and one for print. The print file can be printed and cut by a vinyl cutter at a print shop. Both are vector files, so they can be scaled to any size and saved out to other formats if needed.
View attachment AppleLogoOutline.pdf
View attachment AppleLogoOutlinePrint.pdf
 
Many thanks for that Gobias, I have access to both a vinyl cutter and Illustrator!
 
Hi Stork!

Quite unbelievable how late this reply is (I only just realised you don't get notifications for replies by default!) but i just wanted to say thank you :)
 
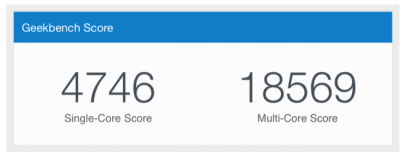
Gobias the past two weeks I have been researching and doing some tweaking in the Bios and now using both Raid 0 using the Highpoint RocketRaid and implemented SSDT. I overclocked my CPU to 4.5ghz, was able to find a controller to enable me to control the fans on my H80i watercooler within OS X from Terminal. Again I have done a lot of tweaking in the Bios and well here are my final results in Geekbench running OS X 10.10.2:

Screen Shot 2015-10-02 at 9.28.35 AM.png

Not a bad score!!!! Its the best score I've gotten on this board and using the i4770k cpu...
 
UPDATE: El Capitan 10.11.1, Windows 10, and Simplified HDMI Audio

My Yosemite installation had gotten very buggy (several apps freezing/crashing on open), so I decided to do a clean install of El Capitan as well as removed extra Clover boot entries described below. I’ve been using it for a couple weeks now, and I haven’t had any issues so far.

Pre-Install: Remove extra Clover BIOS boot entries
I followed this guide to remove extra Clover BIOS boot entries, which might have been causing the app crashes. The guide explains that these extra boot entries are caused by cloned backups that contain Clover bootloaders on internal or always connected external drives. I had cloned backups on partitions of an external drive I always keep connected because I also have my Time Machine backup on it, so I moved those clones to another external drive to hopefully prevent problems in the future.

El Capitan Installation
I followed the El Capitan installation guide to do a clean install of El Capitan and Clover.

Post-Installation
After installing El Capitan, I followed the Alternate Post-Installation step from the El Capitan installation guide because Multibeast hadn’t been updated for El Capitan yet. Initially, after installing Clover and running the Post-Install Tools, OS X would freeze while loading after rebooting. After a little troubleshooting and booting OS X using the Unibeast USB, I discovered that the Post-Install Tools had installed the kexts under EFI/Clover/Kexts/10.10 instead of 10.11 for some reason. Moving the kexts to 10.11 allowed me to boot properly. Multibeast has since been updated for El Capitan, so hopefully this is no longer an issue.

Fixing USB 3.0 Ports
USB 3.0 ports were not working in El Capitan, so I followed this guide to get them working again.

HDMI Audio
I followed this guide to enable HDMI audio through my GTX 660 card, and it was a thousand times easier than trying to follow the standard HDMI guide. Just mount the EFI partition and drop the HDMIAudio.kext file into EFI/Clover/Kexts/10.11.

Windows 10 Installation
I also finally got around to updating to Windows 10. I had read that some people had had issues booting Windows through Clover during the installation, so I made sure to press F12 to select my Windows drive every time my computer restarted during the installation, and it worked fine.
 
Last edited:
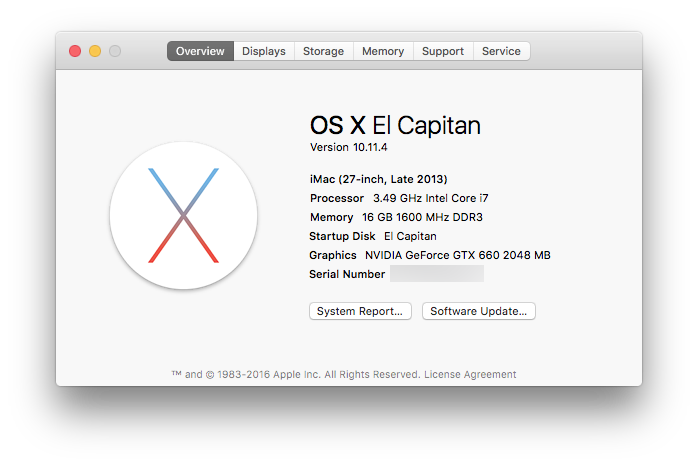
UPDATE: El Capitan 10.11.4

I had been meaning to update OS X for a while, so when 10.11.4 was released, I finally decided to do it.

Installation
I tried to update from 10.11.1 to 10.11.4 using the combo update, but during installation, I got an error saying something like the update could not be verified and that I needed to download the update from app store. The system restarted and gave me a notification about the problem with the update and asked me if I wanted to download the update from app store. I agreed, and it started downloading the 10.11.3 update. I installed that, restarted, and then downloaded and installed the 10.11.4 update.

Post-Installation
After updating, I needed to re-enable TRIM using the new Terminal trimforce command, but otherwise, everything seems to be working fine.
Code:
sudo trimforce enable

 
Last edited:
I have the same MB, since Multibeast was not available when you updated to El Capitan, if it was would you have used Multibeast, or are you happy with Clover. I have an extra SSD and will be testing in the near future.
 
I have the same MB, since Multibeast was not available when you updated to El Capitan, if it was would you have used Multibeast, or are you happy with Clover. I have an extra SSD and will be testing in the near future.

Well, now Multibeast actually installs Clover instead of Chimera, and it automates a lot of the post-install stuff I had to do somewhat manually, so yeah, I'd use Multibeast.
 
Thanks for the reply, now I just have to find some time to test. At the same time, I'm very happy with Yosemite, for a while I was getting a USB lockup/freeze thing happening, then I ran Kext Utility and it fixed the problem.
 
UPDATE: High Sierra 10.13.6

Installation
Back in August, I attempted to update from El Capitan to High Sierra via the App Store. However, my SSD got corrupted during the installation, so I had to create a bootable USB with UniBeast and do a clean install of High Sierra.

Post-Installation
After installing High Sierra, I completed post-installation with MultiBeast as I’ve done in the past…or so I thought. After restarting my computer, I started getting kernel panics every time I tried to load macOS. It took a lot of troubleshooting, but I eventually figured out that the cause of the KPs was that I had mistakenly installed v3.3.6 instead of v3.2.4.2 of the AppleIntelE1000e.kext ethernet driver. Deleting v3.3.6 got rid of the KPs.

Once I was able to boot into macOS again, I discovered that my USB 3.0 ports weren’t working, so I installed FakePCIID.kext and FakePCIID_XHCIMux.kext to restore USB 3.0 support by checking the 7/8/9 Series USB Support option in MultiBeast.

Here is the complete list of working options I selected in MultiBeast:

  • Quick Start > Clover UEFI Boot Mode
  • Drivers > Misc > FakeSMC
  • Drivers > Network > Intel > AppleIntelE1000e v3.2.4.2
  • Drivers > USB > 7/8/9 Series USB Support
  • Bootloaders > Clover UEFI Boot Mode
  • Customize > System Definitions > iMac > iMac 14,2
389208

GTX 660 Glitch
The only other problem I had after installing High Sierra was a graphics glitch caused by using a GTX 660 graphics card with High Sierra (or Mojave). Changing my display resolution, rotation, or color profile temporarily removes the glitch, but it always comes back later. I plan to eventually replace my GTX 660 with a Radeon RX 560, 570, or 580, all of which are now natively supported in macOS.
 
Last edited:
Status
Not open for further replies.
Back
Top