Contribute
Register

Booting Problems

Status
Not open for further replies.
The XHCI-300-series-injector.kext was created for H370, B360 and H310 motherboards as they have a different chipset then the Z370 motherboards.

Another quote

BreBo,

I stand corrected.

m(_ _)m
Thank you for the explanation and the link.
 
  • Because of your unusually prolonged and problem prone installation attempts, I hope you have Physically removed your Nvidia PCIE Add-on card from its PCIE socket and also your system has only one hard disk connected to the SATA port and that is for the macOS High Sierra installation
  • In the webpage that opens,
    • Click Clone or Download down arrow> Download Zip> open OS-X-USB-Inject-All-master and copy XHCI-300-series-injector.kext and paste it to your CLOVER/kexts/Other
  • Since you might have done so many forced shut downs due to hanging boot screens, it is possible, your CMOS could have corruption.
    • I suggest you do a Clear CMOS to Reset it and then Load Optimized Default BIOS and edit the BIOS settings (make sure Year|Month|Date|and Time are Reset to the current for your Time zone) afresh to boot USB installer using Intel HD 630 Graphics to Digital Port before trying a Reinstall.
Ok, I physically removed NVidia Graphics Card. I only have 1 SSD connected (Crucial 275Gb) and the Bootable USB High Sierra connected to USB 2.0.
I've placed XHCI-200-series-injector.kext into Clover - kexts - Other.
I've Loaded Optimized Default BIOS and re-configure all the settings like in my 1st post. Same result.

I would never thought install High sierra could be so difficult. I've done a couple more before and never was so difficult. I followed the "Buyers Guide" to choose the hardware...

The most strange is that always have the same verbose output, it doesn't matter what change, I always get same message...

Thanks again for your help.
 
Last edited:
Ok, I physically removed NVidia Graphics Card. I only have 1 SSD connected (Crucial 275Gb) and the Bootable USB High Sierra connected to USB 2.0.
I've placed XHCI-200-series-injector.kext into Clover - kexts - Other.
I've Loaded Optimized Default BIOS and re-configure all the settings like in my 1st post. Same result.

I would never thought install High sierra could be so difficult. I've done a couple more before and never was so difficult. I followed the "Buyers Guide" to choose the hardware...

The most strange is that always have the same verbose output, it doesn't matter what change, I always get same message...

Thanks again for your help.

First of all I want to apologize for suggesting to include the XHCI 300 series-injector.kext to the kexts/Other folder on the belief that this MoBo was a true Intel 300 Series as I thought from reading as listed in your profile and and hence believed it needed the corresponding kext until BreBo corrected me with a quote from RehabMan.

On further research I did find Intel had sold it as if it has a 300 Series Chipset like the H -series for example when in fact it had only a 200 Series Chipset! You can read the details: :https://www.******.com/r/intel/comments/8exbpp/intel_z370_listed_as_200series_chipset_in/


Now , at this stage , what else can you try?

  • With the listed BIOS options, you reboot the USB Installer disk and reach the CBM screen
  • On CBM screen navigate to Options make sure Boot Args has dart=0 -v
    • Navigate to Graphics Injector -> and make sure, you have
      • [√] Inject Intel,
      • FakeID : 0x59128086
      • ig-platform-id =0x59120003
  • Return to CBM screen and reboot THE USB Installer Disk
  • and upload any verbose boot screen that shows a failure.
 
Hi, I've followed all the steps you indicate, the only thing I had to change is:
  • ig-platform-id =0x59120003
I had 0x59120000, changed it to 0x59120003 and same result. I did a video and upload it to youtube to show my bios config and the verbose output. Here is the link:

Thanks again for your help.
  • ig-platform-id=0x5912000 is quite Ok for Intel HD 630 and in many of my systems I use that. In some 0x59120003 is better especially for Video Editing Software.
  • Sorry I could not read the verbose output just about the time KP occurred. It is too illegible. I tried several reruns of the video but at the most critical place it is fuzzy.
  • At this point I don't know what hardware or kext is responsible for the Kernel Panic. If you have not already checked the downloaded McOS High Sierra Installer file you have used to create the USB Installer for its file Integrity with Sha-1 Checksum, I would do that to rule out if the KP has anything to do with the Installer file itself.
    • The command for checksum :
shasum /Applications/Install*OS*.app/Contents/SharedSupport/InstallESD.dmg

  • If you Right click the long Alphanumeric String output and Google Search you can see if that is matching the published Shasum from Apple for your macOS High Sierra Version.
 
Sorry I could not read the verbose output just about the time KP occurred. It is too illegible. I tried several reruns of the video but at the most critical place it is fuzzy.

Hi, If you tell me in what moment is giving the kernel panic I can try to get a better snapshot in order to know what is the problem.

I run the command shasum /Applications/Install*OS*.app/Contents/SharedSupport/InstallESD.dmg in a terminal and also Google search it and I got the same code: 69159caf25666ea1c5d466e158e075d947f6a9ee

This code is for MacOS High Sierra 10.13.6, so I suppose the integrity of the file is ok.

Thanks.
Have you run Windows or Linux on this computer without any issues?

I am coming back to questioning the hardware once again because you had a working USB Installer and you seem to have followed all the usual steps to install macOS HS 10.13.6.

If other Operating Systems like Windows 10 or Linux worked OK, then we can conclude hardware is OK and then come back and review your HS install all over again more meticulously from BIOS setup and CLOVER contents all the way to verbose boot screen analysis.
 
No, I haven't installed any operating system before, I bought everything some weeks ago. All HW is brand new. I'm going to try to install W10 and let you know if I have any problem.

Thanks again.

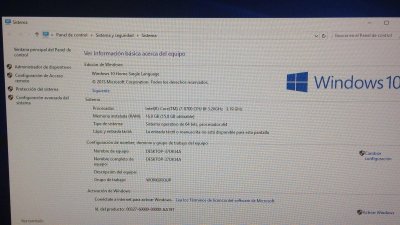
Edit: I've installed W10 without problems, I attach a picture of info page where you can see the RAM is recognized correctly, the processor is correct... After that, I tried again to install High Sierra and same response.

Thanks
 

Attachments

  • W10.jpeg
    W10.jpeg
    305 KB · Views: 88
Last edited:
No, I haven't installed any operating system before, I bought everything some weeks ago. All HW is brand new. I'm going to try to install W10 and let you know if I have any problem.

Thanks again.

Edit: I've installed W10 without problems, I attach a picture of info page where you can see the RAM is recognized correctly, the processor is correct... After that, I tried again to install High Sierra and same response.

Thanks
Since I know your hardware has no defect and your downloaded High Sierra Installer file has the right checksum, please try the following:

  • Upload the BIOS settings you are going to use for Mac OS His Sierra installation preferably as images.
  • You may know the steps, but for the benefit of other readers who may not know about Gigabyte Board BIOS screen capture
    • Have a FAT 32 formatted USB Installer or use your macOS High Sierra USB Installer that has enough free space in its EFI Folder (FAT) to save screen shots from BIOS
    • Insert the above USB flash disk when you have opened the BIOS
    • Open the screen to be captured for you to view properly
    • Press F-12 key to capture and load it on to FAT formatted space
    • Press ENTER key when screen prompts you.
    • Wait until screen capture occurs (May take up to 10-15 seconds in some cases for Flash disk to be made ready)
    • You can open and view BMT images in any Graphic Viewer later .
    • To upload images to this Forum, convert images to .png or .JPG
  • Upload the CLOVER or Entire EFI from your USB Intaller as a zipped file
  • Disconnect your Windows hard drive (all hard drives and unnecessary Storage devices ( External Drives USB Drives, Printers) from the computer to have a pristine environment for macOS installation to avoid any failure from other conflicting hardware from SATA or USB ports.
  • Boot in Verbose mode with your macOS High Sierra 10.13.6 UEFI USB installer and be prepared to take as many still images as possible starting from CBM screen , Options and submenu screens, verbose boot screens .
  • Later upload your CBM screen with Device icons image, Options screen shots, and any problem Verbose boot screen shots.
Hopefully , we may catch the cause for failure this time.
 
Ok, I think I've done all steps you indicate. I attach 3 zipped files, one includes BIOS settings, other the entire EFI folder and the last one includes clover + verbose output. I hope it can be helpful.

Edit: When I take the screenshots of BIOS, I had my Crucial HD connected, but I disconnected it before launch clover. Now I don't have any Hard Disk connected to the motherboard, nothing connected through USB except Bootable USB and keyboard (both connected through USB 2.0)

Thanks.
 

Attachments

  • BIOS.zip
    2.4 MB · Views: 59
  • EFI.zip
    4.2 MB · Views: 75
  • Clover.zip
    2.6 MB · Views: 67
Last edited:
Status
Not open for further replies.
Back
Top