- Joined
- Jan 4, 2013
- Messages
- 48
- Motherboard
- MSI Z170A SLI Plus
- CPU
- i7 6700k
- Graphics
- gtx 980
- Mac
- Mobile Phone
Intel Core i5-2500K Quad-Core Processor 3.3 GHz 6 MB Cache LGA 1155
http://www.amazon.com/dp/B004EBUXHQ/
MSI Z77A-G45 Motherboard
http://www.amazon.com/dp/B007QWI9TY/
Gigabyte GV-N670OC-2GD GeForce GTX 670 Windforce OC 2048MB GDDR5
http://www.amazon.com/dp/B0080I06WQ/
2x G.Skill Value Series GB (2 x 4GB) 240-Pin SDRAM DDR3 1333 (PC3 10600)
http://www.amazon.com/dp/B004G8KCGO/
Samsung SSD 840 Pro Series 2.5-Inch 128GB SATA 6Gbps Solid State Drive
http://www.amazon.com/gp/product/B009NB8WR0/
Crucial M500 240GB SATA 6.0 Gbs 2.5-Inch Solid State Drive
http://www.amazon.com/dp/B00BQ8RM1A/
Western Digital Caviar Blue 500GB SATA III 7200 RPM 16 MB Cache Bulk OEM HDD
http://www.amazon.com/dp/B00461G3MS/
Corsair Enthusiast Series TX650M 650W ATX12V v2.31 / EPS12V 80 PLUS BRONZE Certified
http://www.amazon.com/gp/product/B005E98I0G/
LG Electronics GH22NS70B 16X SATA Super Multi DVD+/-RW Internal Drive (Black)
http://www.amazon.com/gp/product/B004U65QQ8/
Corsair Obsidian Series 750D Performance Full Tower Case CC-9011035-WW
http://www.amazon.com/dp/B00EB6O4N8/
Corsair Hydro Series H100 Extreme Performance Liquid CPU Cooler
http://www.amazon.com/gp/product/B0051U7HMS/
Apple Mac OS X 10.9.2 Mavericks
https://itunes.apple.com/us/app/os-x-mavericks/id675248567?mt=12
Already Owned:
2x Acer S231HL BBID 23.5" LED-Lit Monitor (Black)
http://www.amazon.com/dp/B00CRZCJKK/
Microsoft Sidewinder X6 Gaming Keyboard with USB Port (Black)
http://www.amazon.com/dp/B001DWI4FM/
Razer DeathAdder Ergonomic PC Gaming Mouse (Black)
http://www.amazon.com/dp/B00AAS888S/
Comments
Over the past two years, I've been frequently updating my HackPro's with the latest and greatest to get the most out of my machines. Eventually, this ended up leaving older, but still perfectly good parts laying around my house. I finally decided to re-purpose an older machine and turn it into a somewhat powerful HackPro workstation for programming/content creation, rendering, light gaming, and browsing purposes.
Some of these parts in the machine are fairly old (a few generations), but nothing outrageous and all still work perfect for the simple type of setup that I was looking for. The basis behind these parts were simply picked for the best possible OOB (out-of-box) OS X solution. These parts were not at all difficult to get working well with OS X, and are very stable when paired together. I've had the machine running 24/7 for about 6 days now with no errors or instabilities, even after stress testing it to the max.
The motherboard works absolutely flawless after you apply a simple patched BIOS provided by samisnake, which will allow for native power management (speedstep, sleep, etc.). In my particular case, my board allows for flawless sleep, waking, hibernating, scheduling and shutdown/reset. It's perfect! The aforementioned BIOS patch will be included in a link below for you to download.
I have not tried overclocking this machine as of yet, as it's not really necessary for it's purposes. However, I will try soon and update back here with my findings. Now, on with the build process!
Patching your BIOS
Remember when I talked about that patched BIOS earlier? Well, now's the time to get that portion of this install out of the way. The BIOS was created and patched by samisnake, and can be obtained via: http://bios.zmac.net/msi/MSI-Z77A-G45-280_modified.zip
Once you have it downloaded, you need to format a 4GB or greater sized USB in FAT32. Then simply put that downloaded BIOS on the root portion of the formatted drive. This MSI board has a built in utility called M-Flash that will allow you to flash a custom BIOS. After completing this step, plug the USB into any empty USB slot (USB2 port is preferred).
BIOS Settings
The first thing I did after completing my build and firing it up was head to the BIOS. On this particular board, you can press the Delete key to enter the BIOS screen. After appearing at the BIOS screen, you need to navigate to the Utilities tab, and find the M-Flash option. This section has four options that you can choose from, but you only need to worry about one. Click the one that says Select UEFI file to flash. Navigate to the downloaded BIOS on your USB drive that you formatted earlier, and click the flash button. Let the motherboard do its thing. It shouldn't take long, just don't panic, because the motherboard will restart anywhere from 1-3 times on its own for the new BIOS version to take effect.
After a successful flash, reload into the BIOS, press F7 or click on Load Optimized Defaults. Then change the following settings in order to get the install process rolling:
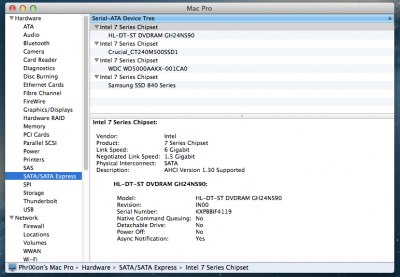
- SATA controller is set to AHCI.
- If you are using hd3000, set the graphics mode to IGP with 64MB of RAM & DVMT to MAX.
- If you are using a dedicated graphics card, simply leave it at PEG (it will auto default).
- Enable Resume from S3
Installation
The installation on this board is as good as it gets when it comes to Hackintoshing, or at least in my personal experience. With that said, there are a few tasks that have been assumed completed by you before attempting this. The first is obviously the purchase of OS X Mavericks from the AppStore on a functioning MAC. The second is the creation of a Mavericks Unibeast USB drive. If you have not done so, tony's guide can be found here: http://www.tonymacx86.com/374-unibeast-install-os-x-mavericks-any-supported-intel-based-pc.html
After the aforementioned steps have been completed, go ahead and plug your Mavericks USB drive into one of the black USB2 ports on the back of this motherboard. Restart your computer and at the BIOS splash screen, press the F12 key to select which USB drive to boot from. Select your USB thumb drive and let it load into Chimera. My next few steps are based directly on the hardware that I am using. The next few tips are outlined as follows:
- Once in Chimera, hover over your Unibeast USB drive and type -v GraphicsEnabler=No
- Press the Enter key and let it load into the installer
- Once in the installer, install OS X as usual.
- For those that haven't installed OS X before, the official install guide is located above.
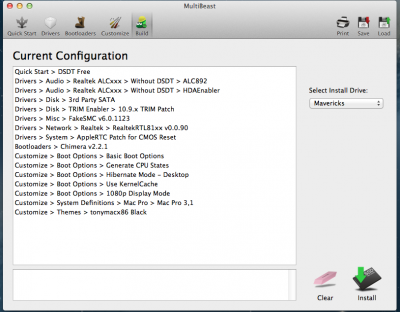
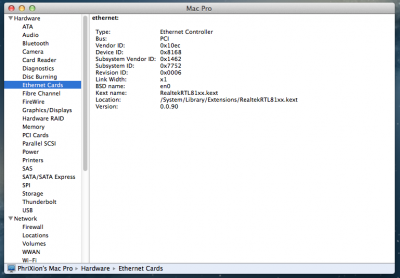
After completing the initial Mac setup, you should have working Ethernet out of the box. However, we will end up installing a newer and much better kext in MultiBeast. For now, open Safari and navigate to the tonymacx86 downloads section and grab the latest Mavericks MultiBeast. If you do not have OOB Ethernet, simply download MultiBeast on another computer and put it on a flash drive and transfer it over. That's all you need for now. Once downloaded, open it up and select the following options for your build:
I have also included the DSDT.aml and MultiBeast settings profile down below in the attachments if you wish to use them for this. The DSDT was created and edited by Darfweder for his Z77A-G45 build. I opted not to use the DSDT for my build, as it works perfect without it. Note: if you decide to use the DSDT, make sure to place it on your desktop PRIOR to using MultiBeast.
Once the installation has completed, DO NOT RESTART. You are going to want to make sure a few things are right in order for you to have a fully functional HackPro. First, you are going to want to navigate to your org.chameleon.Boot.plist file in your /Extra folder. Once in there, Make sure that MultiBeast used the string GraphicsEnabler=No which it should have by default as of 10.8.5. Once confirmed, you may now un-mount your Unibeast USB drive and restart the computer. You should now have a fully functional HackPro!

What is Working
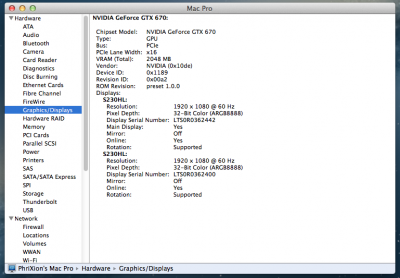
- Native OpenCL/CE via GTX 670
- Native Powermanagement (speedstep, sleep, scheduling, hibernation, shutdown/restart)
- Multi-monitor display OOB! Two 1080p screens on DVI/DVI-D & 1080p TV via HDMI
- Video out HDMI to 1080p TV (audio not tested - probably won't work without edited DSDT)
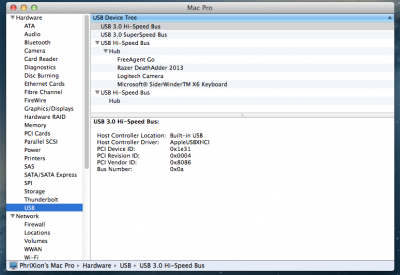
- USB 3.0 via back plate (front USB header is on a different controller and is not supported)
- Trim Support for SSD's
- Audio via ALC892 codec
- Bluetooth (Tested a wireless Logitech KB/Mouse combo)
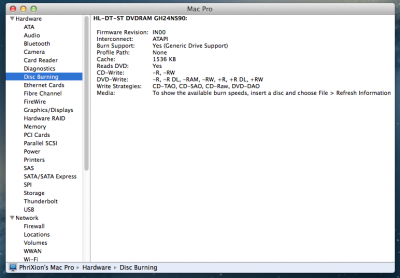
- Disk burning/playing via CD-ROM
- Logitech Web Cam
I've attached the MultiBeast profile as well as the pre-edited DSDT.aml file below in the attachments to use at your own discretion. This build was a lot of fun and it always a fun experience for me. I'd like to thank samisnake and Darfweder for their work in making sure this board is able to run OS X very smoothly without any problems. I'd also like to thank the community for providing some amazing resources, for which all of this wouldn't be possible. That's all I've got for you guys for now. I'll edit this once I overclock it and let you guys know how well it handles it. If you use this guide, and succeed, enjoy your new hack!


