
- Joined
- Jun 11, 2012
- Messages
- 355
- Motherboard
- GA-Z87X-UD3H
- CPU
- i7-4770K
- Graphics
- GTX 960
- Mac
- Classic Mac
- Mobile Phone
I wanted to explore the idea of a simple G5 case mod. The spectrum of difficulty for a G5 case mod is very broad ranging from water-cooled, powder-coated, and tricked-out to something simple. This mod explores the simple end of the spectrum. This case mod was completed in one day, once I had obtained all the parts. Also, I had a bunch of "spare parts" lying around that I wanted to put to good use.
Parts
- Intel Core i3-2120 Dual Core LGA1155 3.3Ghz Sandy Bridge (had lying around)
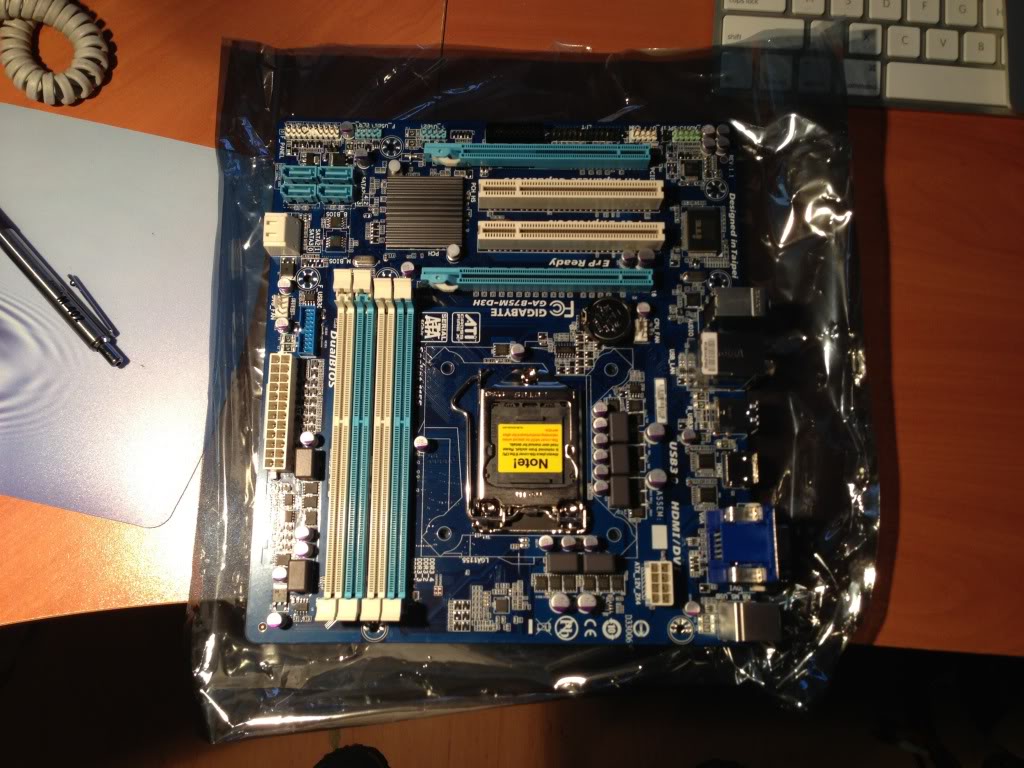
- GigaByte GA-B75M-D3H motherboard (bought new for this build)
- 2x4GB Kingston HyperX DDR3-1600 XMP Dual Channel RAM (bought new for this build)
- Gigabyte Radeon GTX 520 (stole from Eerie Blue Glow...Eerie now runs Mountain Lion and HD 4000 graphics)
- 500GB Hard Drive (was in the G5, originally)
- LG 24X SATA DVD Writer (bought on sale a while ago for $9)
- Corsair VX550W (bought on sale a while ago)
- Corsair Front Panel Kit (had laying around for projects just like this)
People love pictures, so I will spare the dialog. Feel free to ask questions, leave comments, etc.
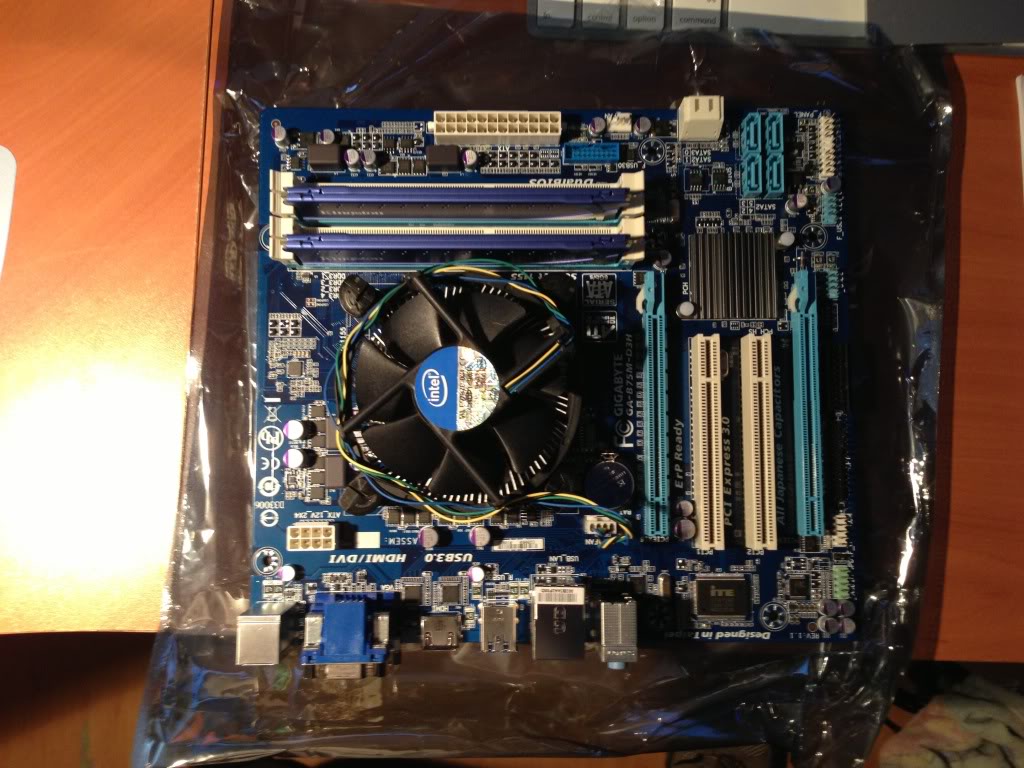
All the parts.

An empty canvas, er.. I mean case.

Test fitting the motherboard.
Using the shorter standoffs, sets the graphic card height perfectly.

The edge of the board is tight up against the top shelf.

Attaching the shorter standoffs to an old mATX board for glueing.

Another view of the standoffs, along with the bottom tip of the graphics card.

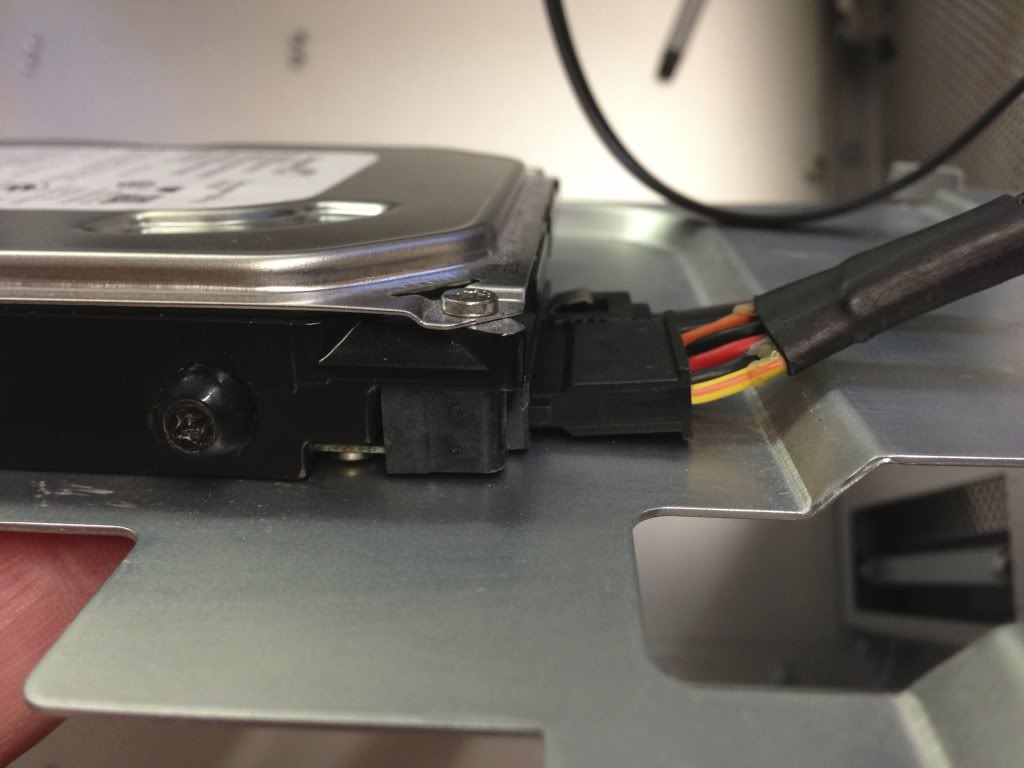
Mounting the hard drive on the top shelf.

I drilled 3 holes in the top shelf to secure the hard drive (one was already there.)

And the cables fit nice.

Another view.
The cut-out on the rear panel.
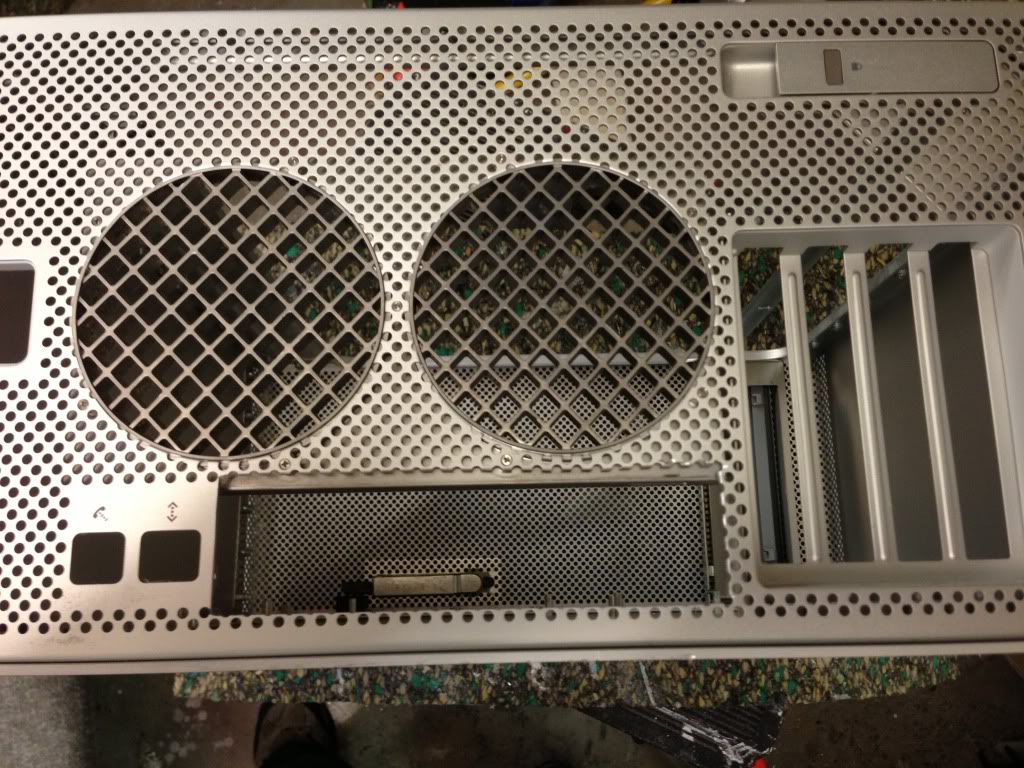
Close up.

From inside.

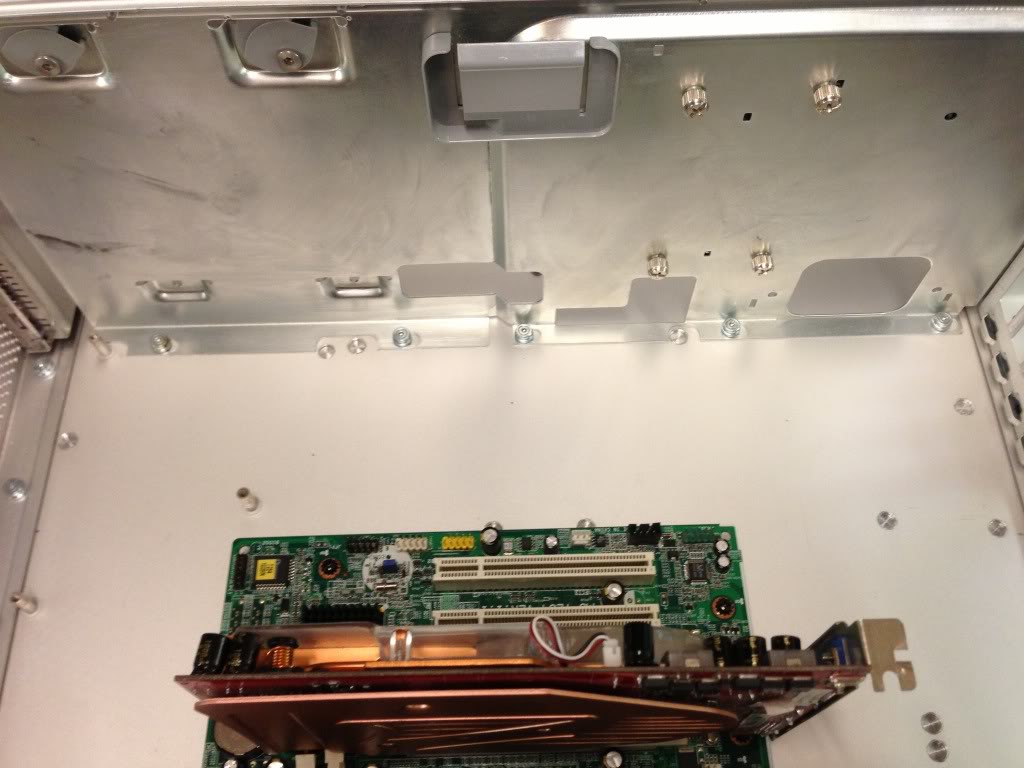
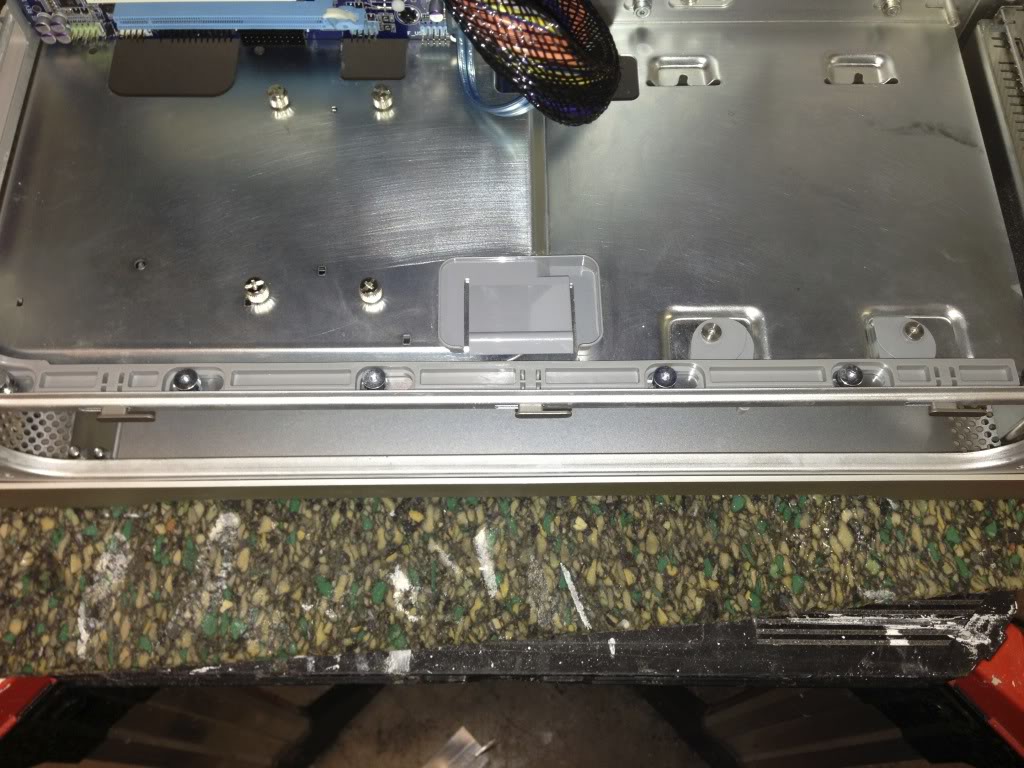
Installing the top shelf.
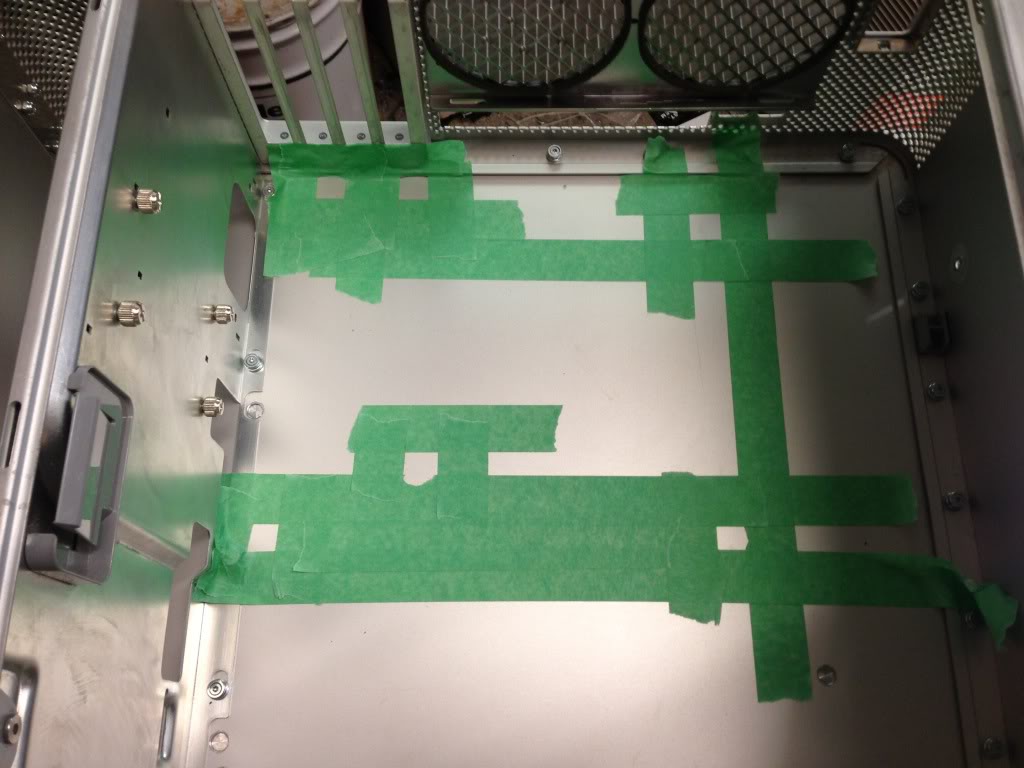
Lined up where the standoffs will connect to the G5. I used masking tape to limit the glue.
Roughened up the bonding surface.

Gluing the standoffs.
While the glue dries...
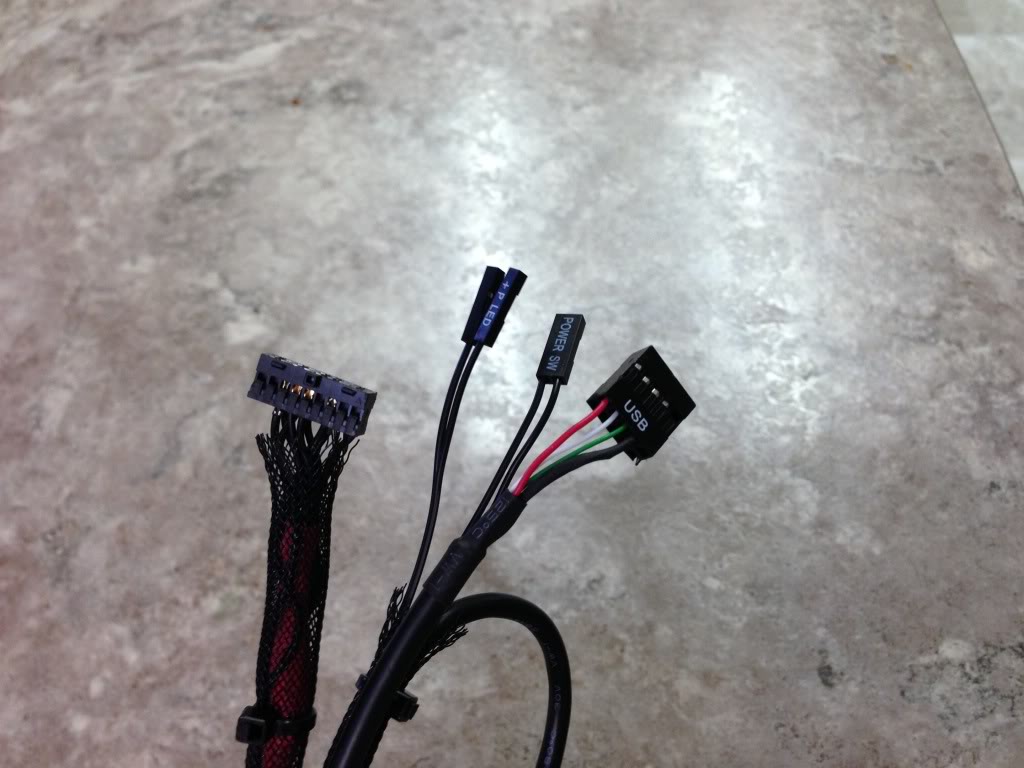
Made the front panel cable. USB, Power switch, and Power LED only.
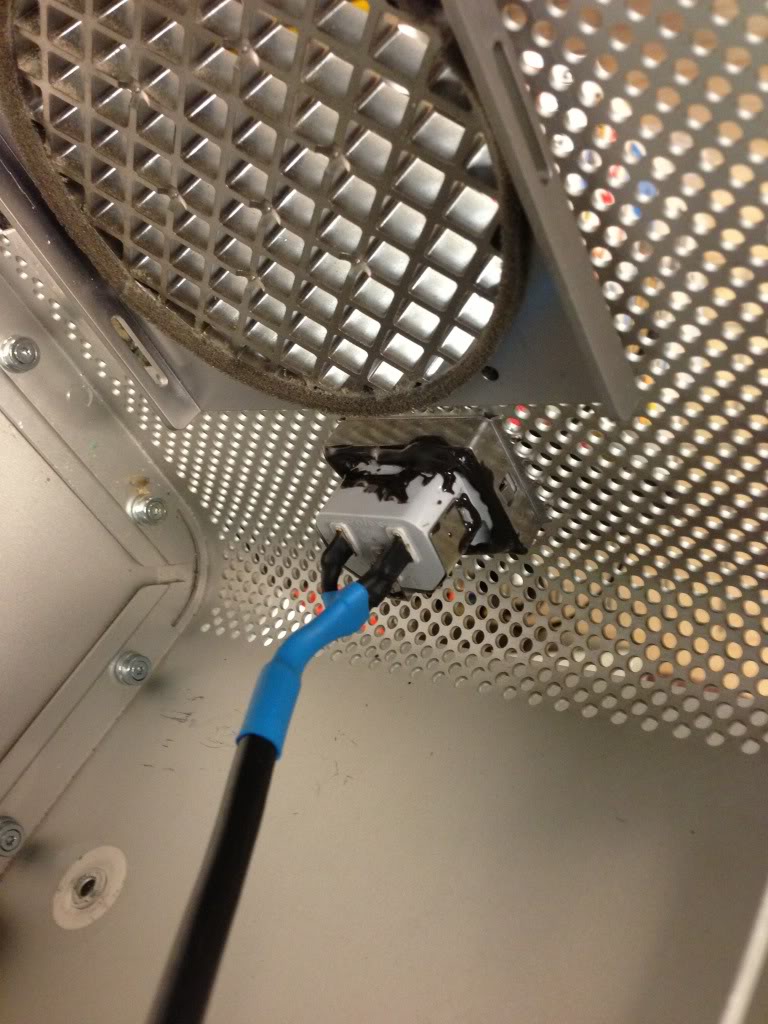
Made a power cord pigtail using the original G5 power socket.

Prepared the motherboard.
Installed RAM, CPU and stock heatsink.
...And the glue is dry!
Standoffs are complete.

Glued the power pigtail.
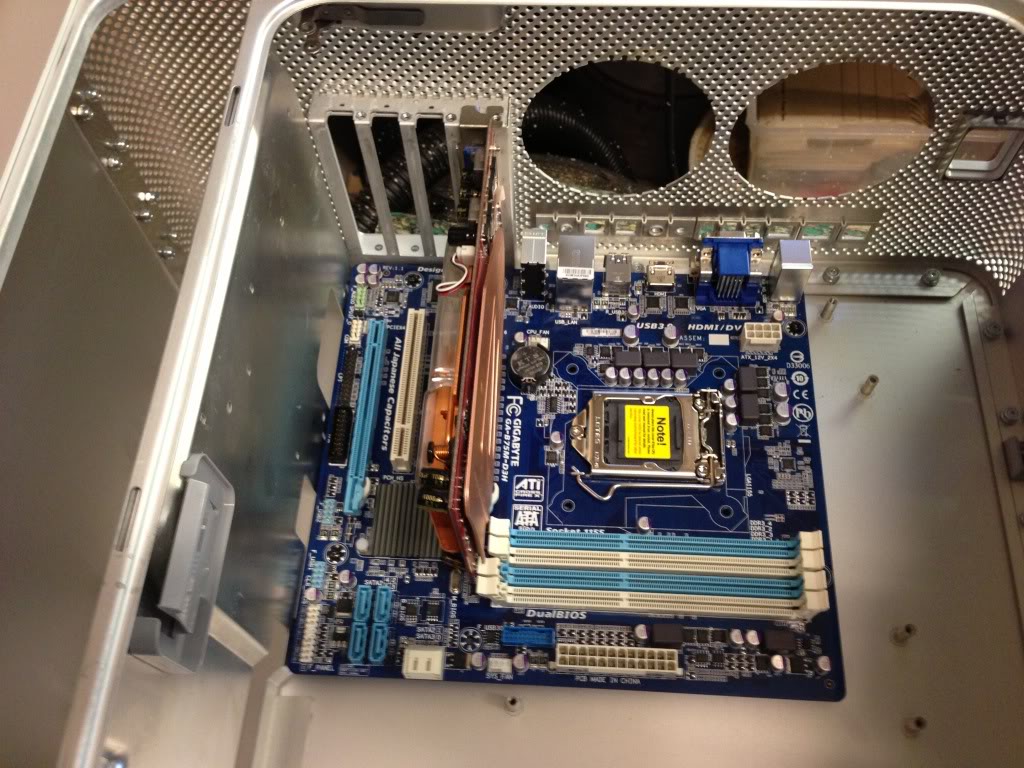
Installed motherboard.

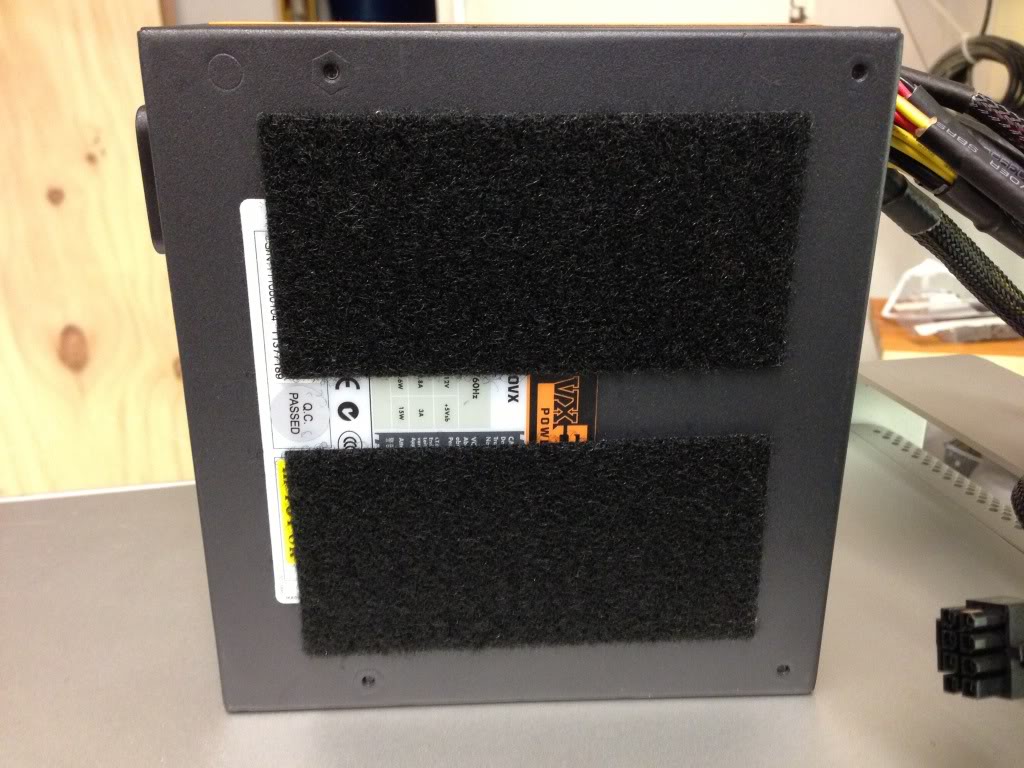
I used industrial strength velcro to mount the power supply.

Velcro on the PSU.
I flipped the G5 case upside down and completed installing the top shelf.
Installed the PSU.
Installed the "special" screws onto the bottom of the optical drive.

Installed the optical drive.

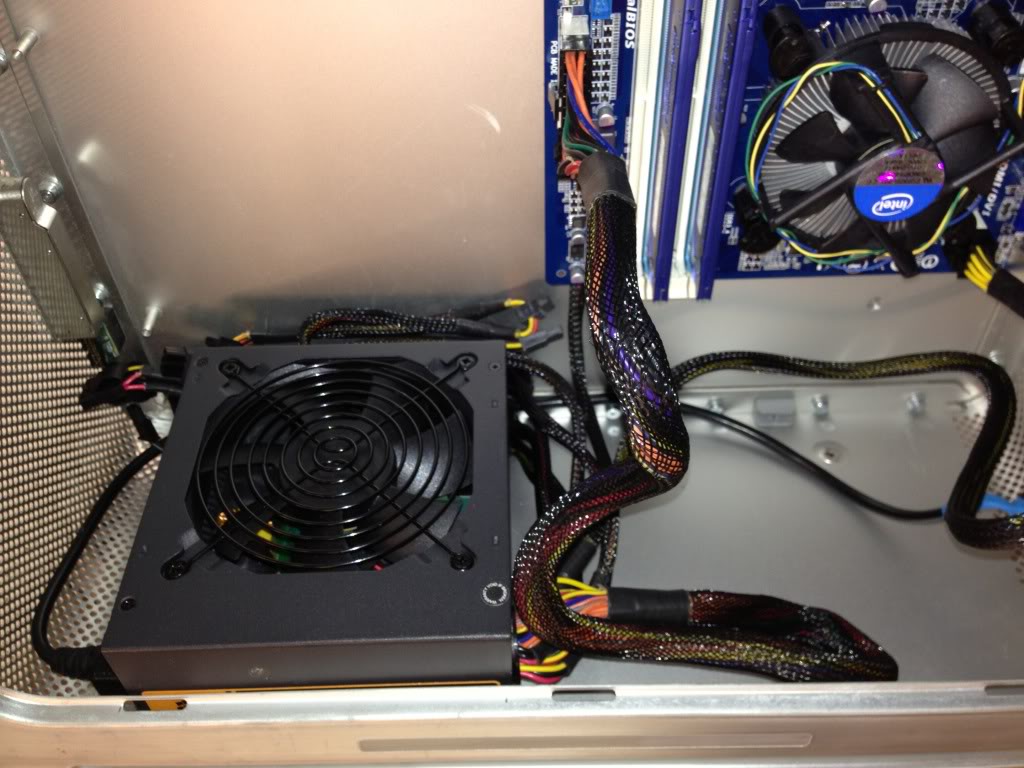
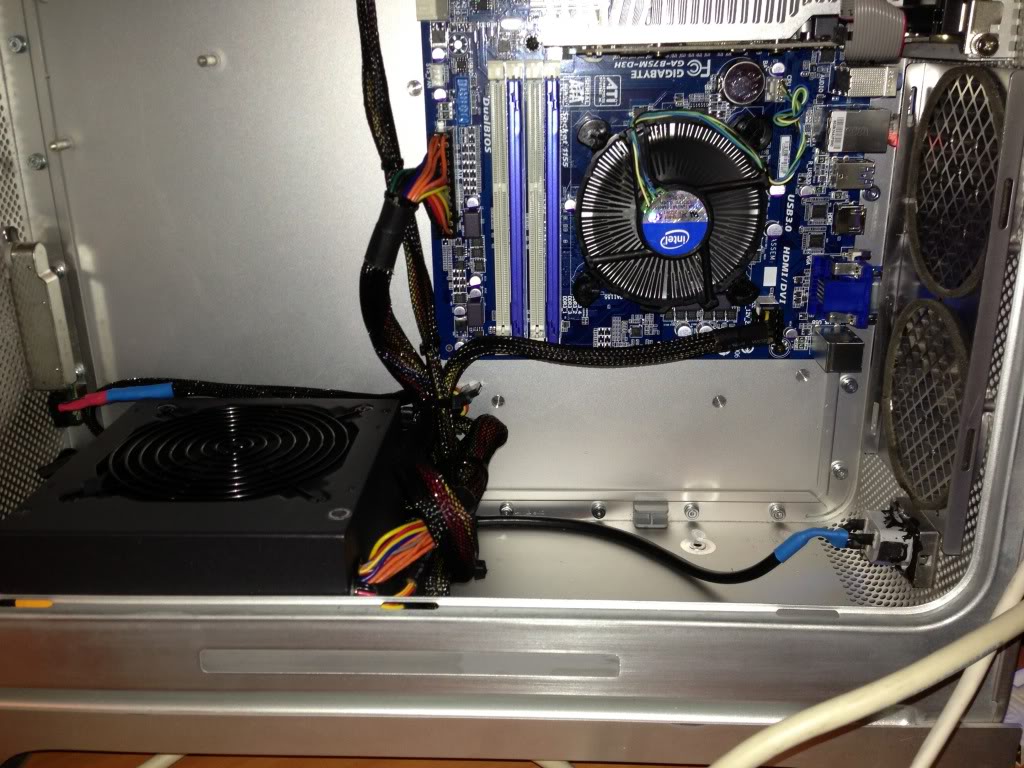
After some (minor) cable management.

Tidied up the PSU cables.
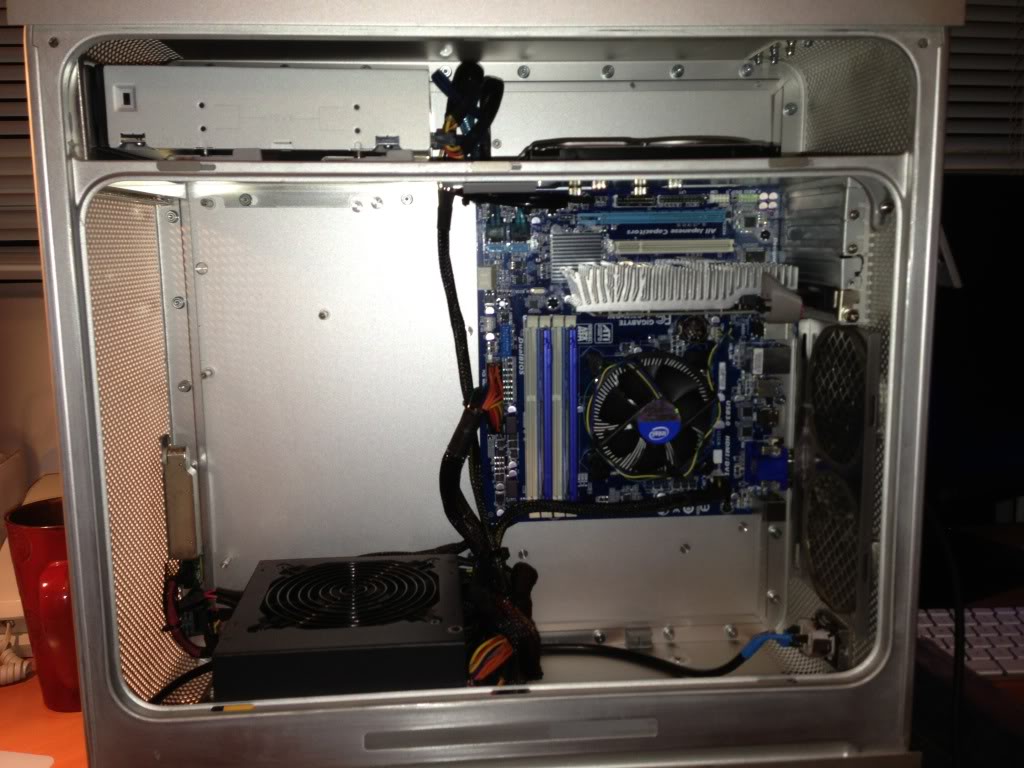
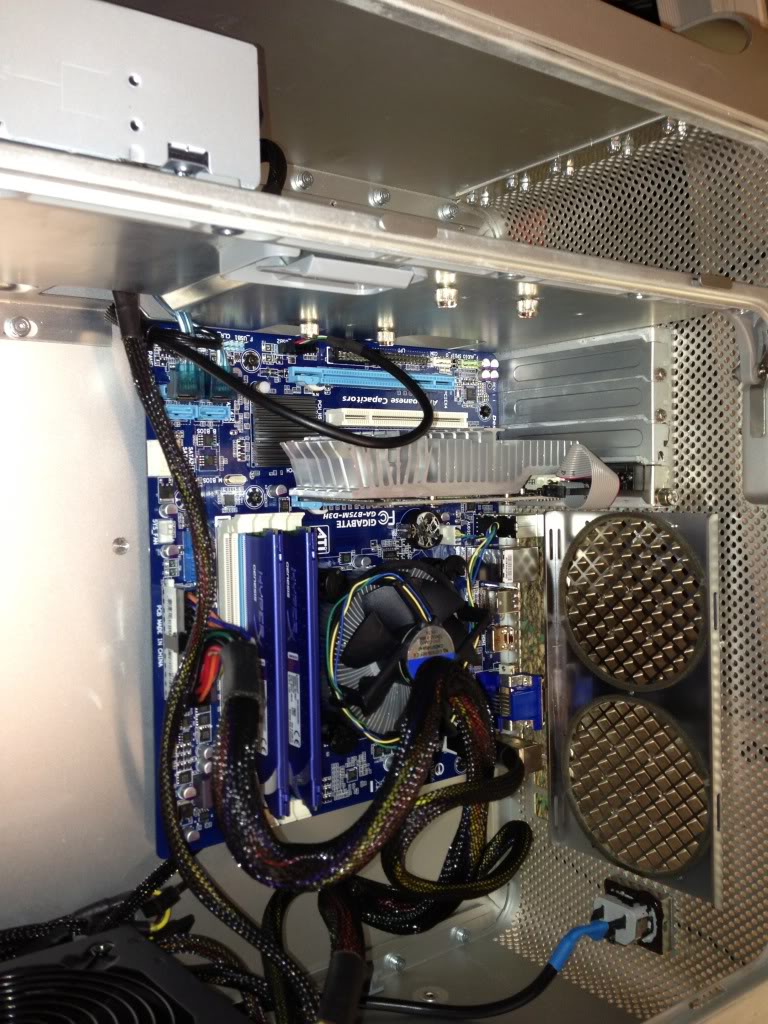
Some shots of the completed build.
Front panel cable neatly hidden behind the motherboard. I can't say much for the other ones.
Rear panel.

Close up.

Installing Mac OSX Lion
1) Used "Install Max OS X Lion.app" v 10.7.4 and built a UniBeast USB Installer on a 16GB USB Flash Drive
Building the UniBeast installer took 12 minutes.
2) Download BridgeHelper5 and Install onto USB Flash Drive. This provides support in Lion 10.7.4 for Ivy Bridge Processors
using the Native mach_kernel vers 11.4.2
3) Enter PC Bios and Load Defaults and ensure SATA mode is set to AHCI
Ensure High Precision Event Timer (HPET) is enabled. (This was the default)
Save bios settings
4) Insert the USB stick into PC and Boot and Install onto PC (this is detailed in step 1 instructions)
5) Do a Software Update to latest version (10.7.5) ** for some reason, the Ethernet jack is working! **
6) Reboot the USB stick, and choose to boot into the Lion Installation.
7) Use MultiBeast 4.6.1 to install the following
- UserDSDT Install
- Kexts & Enablers/Network/Realtek Gigabit Ethernet 2.0.6 for 10.7
- Kexts & Enablers/Audio/Realtek ALC8xx/Non_DSDT HDA Enabler/ALC887-888b
- Patched AppleHDA/ALC88b-887/v100302 Current
- Kexts & Enablers/FakeSMC
- Kexts & Enablers/FakeSMC/Motherboard Plugins
- Kexts & Enablers/FakeSMC/HW Monitor Application
8) Reboot, Set Boot order in BIOS
9) Install Software: GeekBench, Temperature Monitor, TextWrangler, Carbon Copy Cloner
What Works
- Sound
- Networking
- Sleep-Wake
- Speed Step
- Monitor Resolution Changes
- VGA, DVI
- USB 3 ports (not tested at USB 3 speeds)
Happy Modding!
chaos
Parts
- Intel Core i3-2120 Dual Core LGA1155 3.3Ghz Sandy Bridge (had lying around)
- GigaByte GA-B75M-D3H motherboard (bought new for this build)
- 2x4GB Kingston HyperX DDR3-1600 XMP Dual Channel RAM (bought new for this build)
- Gigabyte Radeon GTX 520 (stole from Eerie Blue Glow...Eerie now runs Mountain Lion and HD 4000 graphics)
- 500GB Hard Drive (was in the G5, originally)
- LG 24X SATA DVD Writer (bought on sale a while ago for $9)
- Corsair VX550W (bought on sale a while ago)
- Corsair Front Panel Kit (had laying around for projects just like this)
People love pictures, so I will spare the dialog. Feel free to ask questions, leave comments, etc.
All the parts.
An empty canvas, er.. I mean case.
Test fitting the motherboard.
Using the shorter standoffs, sets the graphic card height perfectly.
The edge of the board is tight up against the top shelf.
Attaching the shorter standoffs to an old mATX board for glueing.
Another view of the standoffs, along with the bottom tip of the graphics card.
Mounting the hard drive on the top shelf.
I drilled 3 holes in the top shelf to secure the hard drive (one was already there.)
And the cables fit nice.
Another view.
The cut-out on the rear panel.
Close up.
From inside.
Installing the top shelf.
Lined up where the standoffs will connect to the G5. I used masking tape to limit the glue.
Roughened up the bonding surface.
Gluing the standoffs.
While the glue dries...
Made the front panel cable. USB, Power switch, and Power LED only.
Made a power cord pigtail using the original G5 power socket.
Prepared the motherboard.
Installed RAM, CPU and stock heatsink.
...And the glue is dry!
Standoffs are complete.
Glued the power pigtail.
Installed motherboard.
I used industrial strength velcro to mount the power supply.
Velcro on the PSU.
I flipped the G5 case upside down and completed installing the top shelf.
Installed the PSU.
Installed the "special" screws onto the bottom of the optical drive.
Installed the optical drive.
After some (minor) cable management.
Tidied up the PSU cables.
Some shots of the completed build.
Front panel cable neatly hidden behind the motherboard. I can't say much for the other ones.
Rear panel.
Close up.
Installing Mac OSX Lion
1) Used "Install Max OS X Lion.app" v 10.7.4 and built a UniBeast USB Installer on a 16GB USB Flash Drive
Building the UniBeast installer took 12 minutes.
2) Download BridgeHelper5 and Install onto USB Flash Drive. This provides support in Lion 10.7.4 for Ivy Bridge Processors
using the Native mach_kernel vers 11.4.2
3) Enter PC Bios and Load Defaults and ensure SATA mode is set to AHCI
Ensure High Precision Event Timer (HPET) is enabled. (This was the default)
Save bios settings
4) Insert the USB stick into PC and Boot and Install onto PC (this is detailed in step 1 instructions)
5) Do a Software Update to latest version (10.7.5) ** for some reason, the Ethernet jack is working! **
6) Reboot the USB stick, and choose to boot into the Lion Installation.
7) Use MultiBeast 4.6.1 to install the following
- UserDSDT Install
- Kexts & Enablers/Network/Realtek Gigabit Ethernet 2.0.6 for 10.7
- Kexts & Enablers/Audio/Realtek ALC8xx/Non_DSDT HDA Enabler/ALC887-888b
- Patched AppleHDA/ALC88b-887/v100302 Current
- Kexts & Enablers/FakeSMC
- Kexts & Enablers/FakeSMC/Motherboard Plugins
- Kexts & Enablers/FakeSMC/HW Monitor Application
8) Reboot, Set Boot order in BIOS
9) Install Software: GeekBench, Temperature Monitor, TextWrangler, Carbon Copy Cloner
What Works
- Sound
- Networking
- Sleep-Wake
- Speed Step
- Monitor Resolution Changes
- VGA, DVI
- USB 3 ports (not tested at USB 3 speeds)
Happy Modding!
chaos
Last edited:
")

