Contribute
Register

15 years I've been waiting to mod a G5

Status
Not open for further replies.
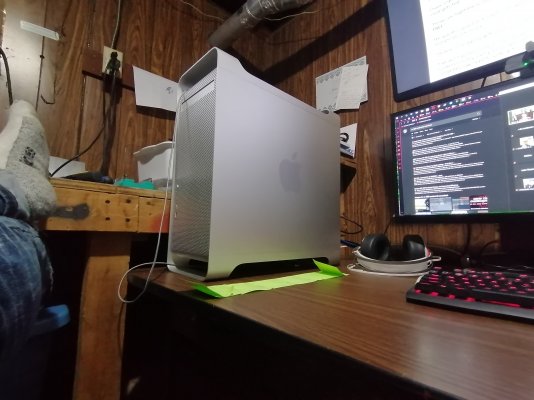
Just a small update. For those of us that live in Canada, the silver hi-temp Powerfist spray paint from Princess Auto is an almost EXACT match to the interior steel parts, and the PCI slot covers.

I painted a few parts on a halfway warm day, and reinstalled the back-plane, and MoBo Tray. I sanded down all the backs of the really short standoffs so I could use them as nuts on the inside with the screws that I removed the spacers from. Looks really nice to me.

That paint is such a close match that I am tempted to just trim down the steel plate that came with the front IO that I plan on using and surface mounting it in the front. I'm still debating that or getting USB 3 ports and attaching them in place on the original front IO, and then soldering an internal cable to the port to connect that way. Decisions, decisions...
 

Attachments

  • IMG_20210114_173615.jpg
    3.4 MB · Views: 167
  • IMG_20210114_190957.jpg
    3.8 MB · Views: 145
  • IMG_20210114_191204.jpg
    3.9 MB · Views: 142
  • IMG_20210119_115750.jpg
    3.5 MB · Views: 131
  • IMG_20210119_115807.jpg
    3.9 MB · Views: 141
Time for another Update!!

we had a couple more warm days so I was able to heat up the garage to be able to paint more parts. I am rally liking the finish of this high temp paint.

Then I finally broke down and just bought a set of M.2 screws since ASUS has decided that screws aren't important enough for the same service that the MoBo got initially.

I am really happy with how this has come together. The last couple months of waiting and testing, and planning, and testing again.. this is probably the absolutely cleanest custom build I have ever put together.

This is the final main assembly for now, I may still tear it down this coming summer and give the whole thing a spray down. but for now its mostly done. eventually I will even remove the EVGA signature red wire sleeve and replace it. but for now its functions and keeps things tidy.
 

Attachments

  • IMG_20210120_140032.jpg
    IMG_20210120_140032.jpg
    3.8 MB · Views: 174
  • IMG_20210120_140420.jpg
    3.2 MB · Views: 116
  • IMG_20210120_144229.jpg
    3.8 MB · Views: 110
  • IMG_20210127_165215.jpg
    4.4 MB · Views: 114
  • IMG_20210127_204932.jpg
    IMG_20210127_204932.jpg
    3.4 MB · Views: 172
  • IMG_20210127_214744.jpg
    4.7 MB · Views: 101
  • IMG_20210127_224143.jpg
    4.1 MB · Views: 121
  • IMG_20210130_124405.jpg
    IMG_20210130_124405.jpg
    1.5 MB · Views: 175
That paint is such a close match
I like how that paint looks on your MP too. How much does a can of it cost up in CA ?
Is it available anywhere in the USA ?
 
Well I meant to publish that last post a few days ago.... Look a squirrel...

Last night and today I decided to snag the USB 3.0 ports from a spare CoolerMaster case I've got here that I'm turning into a test-bed or maybe a mining rig.. either way, having front USB ports on that is less important than this guy and what it had was perfect for what I really wanted to do here.

as you can see the USB ports were surface mounted cable heads, not part of the PCB circuit, so with very little persuasion they were no longer attached and ready to be filed down to fit.

In another post here I saw someone do basically exactly what I did, after removing the USB 2 and Firewire port I modified the little bracket/shield, filed down and sanded the PCB, and then it was ready for the next step.

For this I headed out to the scrap pile in the garage to snag the port trim from the back of the case that was cut out earlier. Then with the vacuum going, and some paper taped inside (while the system was on and mining) I filed the Firewire opening to fit the USB trim and port.

Then it was time to break out the JB Weld. The picture speak for them selves. This was one of the smoothest operations I've ever done. I used a couple spare dongles to hold the port on the outside while I finagled the JB Weld into place. Once the first had partially set I used a twist tie to hold it at the back while I prepped the other end. I did have to shut down the system to rout the cable and get it plugged in. I like how it turned out, I do wish I had some jewelers files. I think the filing job could have been a bit cleaner. But I'm probably the only one that will ever care. LOL
 

Attachments

  • IMG_20210130_210730.jpg
    3.5 MB · Views: 146
  • IMG_20210130_210736.jpg
    3.4 MB · Views: 123
  • IMG_20210130_213102.jpg
    3.5 MB · Views: 135
  • IMG_20210130_224705.jpg
    4 MB · Views: 124
  • IMG_20210131_172032.jpg
    4 MB · Views: 126
  • IMG_20210131_180102.jpg
    3.2 MB · Views: 124
  • IMG_20210131_183320.jpg
    4.6 MB · Views: 133
  • IMG_20210131_183351.jpg
    4.3 MB · Views: 137
I like how that paint looks on your MP too. How much does a can of it cost up in CA ?
Is it available anywhere in the USA ?
Its really affordable I think its about $4-7CAD per can. I used "maybe" 1\4 of the can. I had already used it for 4 brake calipers last year and it still feels about half full.

Not sure where you could find it. Maybe Harbor Freight?

Here are some pics. Obviously it will be labeled differently since "Power Fist" is a Princess Auto branding.
 

Attachments

  • IMG_20210131_194351.jpg
    4.2 MB · Views: 123
  • IMG_20210131_194400.jpg
    4.5 MB · Views: 111
  • IMG_20210131_194415.jpg
    4.1 MB · Views: 111
Some more pics, cus it looks great on my desk... oh yeah, I had to make a scoop out of the original CPU cooler funnel to direct air from the GPU section intake fan to the bottom of the GPU. Now when I'm mining my 2080 PEAKS at 68 deg C.... usually hovering around 65-66.
 

Attachments

  • IMG_20210131_193628.jpg
    4.5 MB · Views: 132
  • IMG_20210131_193649.jpg
    4.3 MB · Views: 120
  • IMG_20210131_193812.jpg
    5 MB · Views: 129
Its really affordable I think its about $4-7CAD per can. I used "maybe" 1\4 of the can. I had already used it for 4 brake calipers last year and it still feels about half full.

Not sure where you could find it. Maybe Harbor Freight?

Here are some pics. Obviously it will be labeled differently since "Power Fist" is a Princess Auto branding.
Correct, there's nothing for the US market with the Powerfist brand name. This is probably the closest match I could find.

https://www.amazon.com/dp/B003CT4AKM/?tag=tonymacx86com-20
 
Correct, there's nothing for the US market with the Powerfist brand name. This is probably the closest match I could find.

https://www.amazon.com/dp/B003CT4AKM/?tag=tonymacx86com-20
HOLY S***!!!! $30 for a single can of Off-The-Shelf spray paint?!?!

I would be willing to bet that since the PF stuff is manufactured in the US there are probably local companies that brand it under their name for distribution. just would take some hunting around for it.
 
HOLY S***!!!! $30 for a single can of Off-The-Shelf spray paint?!?!

I would be willing to bet that since the PF stuff is manufactured in the US there are probably local companies that brand it under their name for distribution. just would take some hunting around for it.
Amazon.com says it's $6.44 USD.

Screen Shot 5.jpg
 
Great job! I really like how you reused the fan plastics and divider.
 
Status
Not open for further replies.
Back
Top