- Joined
- Nov 24, 2020
- Messages
- 9
- Motherboard
- Gigabyte Z390 Aorus Pro Wifi
- CPU
- i7-9700k
- Graphics
- RX 5700 XT
- Mac
- Mobile Phone
Hi everyone! I've been lurking here for quite awhile and I have wanted to do my own G5 mod for the longest time, and since I've had a lot of free time this autumn I decided to start one. English isn't my native language, but hopefully I'm comprehensible.
Also disclaimer - This is my first ever self build computer and my first ever mod of any sort.
But let's start!


I bought my G5 from Ebay, it wasn't necessarily the best deal but seemed to be pretty standard pricing for what these were going for. It was sold as parts only and it didn't include all of the components which I was happy about so I would have less components to take out. It seemed to be overall in a okay condition, but it was VERY dirty and had a lot of stickers and sticker residue all over it.


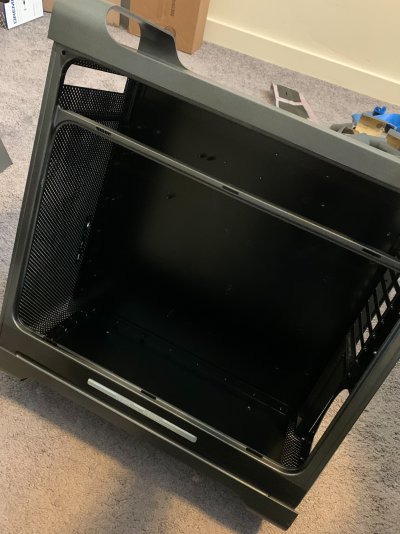
Removing everything ended up being more difficult than I was expecting, but few cuts in my hands later I managed to empty the case out. After removing all the stickers and cleaning the case, there was some nasty scratches that I tried and filled, I've never done that before so it was definitely a learning experience. After filling the scratches I did A LOT of sanding and I had decided to paint the case myself which I would learn to regret afterwards. Sadly I didn't take any pictures of the sanding part, but I ended up doing it many times because I had to remove bad paint jobs that I did.


The backplate cutting part was one of the things that I was most nervous about, but it ended up being easier than I expected. I decided to go with the Laser Hive ATX conversion kit, cause I thought it would be the easiest approach for amateurs like me. I had to spend quite a lot of money to get the tools that I needed for this project as I didn't own anything beforehand.


As I wrote earlier I ended up painting this case many times again and again. It was my first time using any sort of spray paint so I was still kinda trying the best ways to do everything. Originally I was wanting to go with more of an space gray color like my MacBook Pro, but I end up with this dark metal color cause I couldn't get the lighter color to be even looking enough. I don't think it looks too bad, the finish is definitely not perfect but it's something I can live with. I used Krylons - Metallic Dark Metal (I think).


Big thanks to this website for helping me to choose the parts for this computer. I also made a mistake by not doing a test build outside the case first but instead of started putting everything in right away. Because of this I had to unscrew and take everything apart couple of times. The inside I painted black to get more of a uniform look.


The paint job suffered a little bit during this building process but I try to think those as battle scars haha.
I sadly didn't get the power button to work so I had to get a separate power button so I can at least turn on the computer for now. I don't currently have the time to try to figure it out but I'll try to get it working eventually.
The front USB does work but I haven't tried the audio yet nor the firewire. I'm quite satisfied how the backside of the computer looks like.


It's definitely not the most cable-managed build and I might try make it look nicer later. I also want to install a DVD drive which I already bought but I want to figure out the power button situation before putting it in. I also have vinyl apple stickers that I'm gonna put on the sides at some point.
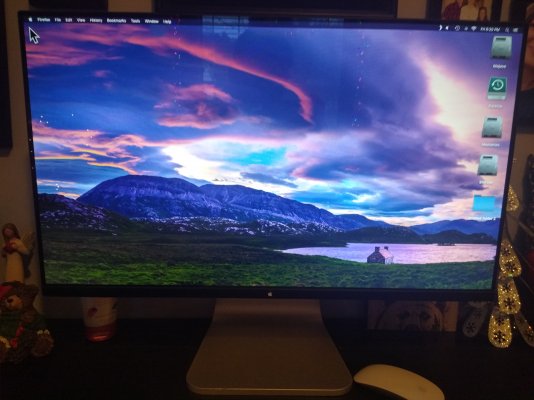
And that's it for now! Overall I'm pretty satisfied with myself for actually doing this. It wasn't always easy, and it was quite frustrating for a lot of the time but it's something I can be proud of even if it doesn't match 100% with what I envisioned. Currently I only have windows installed, but I'm planning on trying to get Catalina running. I'm sure that's gonna be its own journey.
What would I do differently:

Next I want to see how could I get this working in 2020 with this computer build.
Thank you for reading!
Also disclaimer - This is my first ever self build computer and my first ever mod of any sort.
But let's start!
I bought my G5 from Ebay, it wasn't necessarily the best deal but seemed to be pretty standard pricing for what these were going for. It was sold as parts only and it didn't include all of the components which I was happy about so I would have less components to take out. It seemed to be overall in a okay condition, but it was VERY dirty and had a lot of stickers and sticker residue all over it.
Removing everything ended up being more difficult than I was expecting, but few cuts in my hands later I managed to empty the case out. After removing all the stickers and cleaning the case, there was some nasty scratches that I tried and filled, I've never done that before so it was definitely a learning experience. After filling the scratches I did A LOT of sanding and I had decided to paint the case myself which I would learn to regret afterwards. Sadly I didn't take any pictures of the sanding part, but I ended up doing it many times because I had to remove bad paint jobs that I did.
The backplate cutting part was one of the things that I was most nervous about, but it ended up being easier than I expected. I decided to go with the Laser Hive ATX conversion kit, cause I thought it would be the easiest approach for amateurs like me. I had to spend quite a lot of money to get the tools that I needed for this project as I didn't own anything beforehand.
As I wrote earlier I ended up painting this case many times again and again. It was my first time using any sort of spray paint so I was still kinda trying the best ways to do everything. Originally I was wanting to go with more of an space gray color like my MacBook Pro, but I end up with this dark metal color cause I couldn't get the lighter color to be even looking enough. I don't think it looks too bad, the finish is definitely not perfect but it's something I can live with. I used Krylons - Metallic Dark Metal (I think).
Big thanks to this website for helping me to choose the parts for this computer. I also made a mistake by not doing a test build outside the case first but instead of started putting everything in right away. Because of this I had to unscrew and take everything apart couple of times. The inside I painted black to get more of a uniform look.
The paint job suffered a little bit during this building process but I try to think those as battle scars haha.
I sadly didn't get the power button to work so I had to get a separate power button so I can at least turn on the computer for now. I don't currently have the time to try to figure it out but I'll try to get it working eventually.
The front USB does work but I haven't tried the audio yet nor the firewire. I'm quite satisfied how the backside of the computer looks like.
It's definitely not the most cable-managed build and I might try make it look nicer later. I also want to install a DVD drive which I already bought but I want to figure out the power button situation before putting it in. I also have vinyl apple stickers that I'm gonna put on the sides at some point.
And that's it for now! Overall I'm pretty satisfied with myself for actually doing this. It wasn't always easy, and it was quite frustrating for a lot of the time but it's something I can be proud of even if it doesn't match 100% with what I envisioned. Currently I only have windows installed, but I'm planning on trying to get Catalina running. I'm sure that's gonna be its own journey.
What would I do differently:
- I would have done a test build before putting everything into the case.
- I would have gotten the case professionally powder coated or anodized.
- Or just lived with the existing scratches and kept the original aluminum look.
Next I want to see how could I get this working in 2020 with this computer build.
Thank you for reading!