- Joined
- Mar 24, 2014
- Messages
- 131
- Motherboard
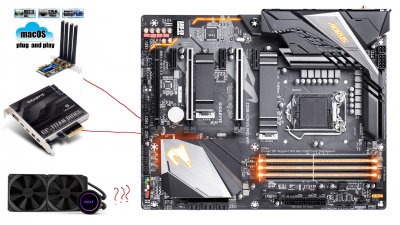
- Aorus Xtreme Z390
- CPU
- i9-9900K
- Graphics
- Vega VII
- Mobile Phone
Before @iRamon came along again (didn't know he shot a "before" photo as well), I waited just for YOU, cause the picture I found was definitely not good enough for a 100% assessmentYes indeed there are some "thingies" missing on the board in question. Here's a not so great photo of my board showing the "thingies" evident.
Lucky meAfter checking, I can tell you, there's absolutely nothing wrong with your eyes!!
")
That also seals the deal for me to order a new Designare motherboard ... there's no way I'm going to solder this, or spend money on a professional to do it for me.
You should definitely go with resoldering (if you ask me). Simple reason(s):
1. you consider buying a new mainboard anyway, so why not fix it?
2. More experimenting
3. Price for components such as these are mere cents.
And you would need a good pair of tweezers and an even better magnifier
This is extraordinary detective work, keen enough to impress Sherlock Holmes!! Detail in those photos can be unreliable, and often depends on angle and concentration of incident light. That's why I recommended using a multimeter to check for electrical continuity.
Kind words, really, buuut...Amen, couldn't agree more!
...have whacked some components myself, back in the day. That tiny stuff really isn't robust, at all. You could take those down with your fingernail. I think these are the reasons, why I noticedNow to @iRamon: How the bloody hell did you dislodge those thingies???
Last edited: