
You are using an out of date browser. It may not display this or other websites correctly.
You should upgrade or use an alternative browser.
You should upgrade or use an alternative browser.
[SUCCESS] Gigabyte Designare Z390 (Thunderbolt 3) + i7-9700K + AMD RX 580
- Thread starter CaseySJ
- Start date
-
- Tags
- gigabyte thunderbolt 3
- Joined
- Aug 25, 2013
- Messages
- 110
- Motherboard
- Asus ProArt Z790-Creator Wifi
- CPU
- i9-14900K
- Graphics
- RX 6950 XT
- Mac
- Mobile Phone
@CaseySJ @jb007
many thnaks for your help here. As suggested by Casey I have typed the command directly and actually with the comma (Jb0007: I saw your message only after). But it looks like it was a copy / paste problem as this time I managed to have the winbond chip read very esaily 3 times in a raw, with no error reporting afterward at the checksum")
I am joining the .bin file from the first read (backup1.bin)
I suppose the next step would be to try flashing the modified firware in the repository for the GC-titan-ridge and testing along with the provided SSDT?
Thank you very much
many thnaks for your help here. As suggested by Casey I have typed the command directly and actually with the comma (Jb0007: I saw your message only after). But it looks like it was a copy / paste problem as this time I managed to have the winbond chip read very esaily 3 times in a raw, with no error reporting afterward at the checksum
Code:
pi@raspberrypi:~/Documents $ sudo flashrom -p linux_spi:dev=/dev/spidev0.0,spispeed=1024 -r backup1.bin
flashrom  on Linux 4.19.97-v7l+ (armv7l)
flashrom is free software, get the source code at https://flashrom.org

Using clock_gettime for delay loops (clk_id: 1, resolution: 1ns).
Found Winbond flash chip "W25Q80.V" (1024 kB, SPI) on linux_spi.
Reading flash... done.
pi@raspberrypi:~/Documents $ sudo flashrom -p linux_spi:dev=/dev/spidev0.0,spispeed=1024 -r backup2.bin
flashrom  on Linux 4.19.97-v7l+ (armv7l)
flashrom is free software, get the source code at https://flashrom.org

Using clock_gettime for delay loops (clk_id: 1, resolution: 1ns).
Found Winbond flash chip "W25Q80.V" (1024 kB, SPI) on linux_spi.
Reading flash... done.
pi@raspberrypi:~/Documents $ sudo flashrom -p linux_spi:dev=/dev/spidev0.0,spispeed=1024 -r backup3.bin
flashrom  on Linux 4.19.97-v7l+ (armv7l)
flashrom is free software, get the source code at https://flashrom.org

Using clock_gettime for delay loops (clk_id: 1, resolution: 1ns).
Found Winbond flash chip "W25Q80.V" (1024 kB, SPI) on linux_spi.
Reading flash... done.
pi@raspberrypi:~/Documents $ shasum backup1.bin backup2.bin backup3.bin
bb384564231ed51abb5d4c7bab59ae80a716dd13  backup1.bin
bb384564231ed51abb5d4c7bab59ae80a716dd13  backup2.bin
bb384564231ed51abb5d4c7bab59ae80a716dd13  backup3.bin
I am joining the .bin file from the first read (backup1.bin)
I suppose the next step would be to try flashing the modified firware in the repository for the GC-titan-ridge and testing along with the provided SSDT?
Thank you very much
Attachments
- Joined
- Apr 16, 2012
- Messages
- 235
- Motherboard
- Asus X299 Prime Deluxe
- CPU
- i9-7960x
- Graphics
- Vega 56
I have a TB3>2 adapter going into a Corning optical TB2 cable (33’) into another TB3>2 adapter that connects to my Apollo. So the adapter is def not an issue.Thanks for making that video. Is it because I have a unit with TB2 and I have to use the Apple TB3<TB2 dongles? (I'm a believa', just not an achieva'!) My Z390 TB is also unflashed.
Would you be willing to look at my EFI and fix my TB patch? I've always wondered if I needed to populate the Thunderbolt patch with the UUID of the Apollo, or if the original KGP UUID is enough. I really have no idea. Regarding the EFI: I've removed the serials, but the rest is small and intact. The screen shot is how the Apollo looks on my 2018 Mini with the latest firmware and Mojave. Please and thank you.
Have you considered trying the Titan Ridge card?
I’ll take a look at your EFI this weekend but I am no SSDT expert - I just matched the port from ioregexplorer into the SSDT and that’s it. Please post your ioregexplorer results when you search ‘thunder’ WITHOUT any TB SSDT and a screenshot or photo of you TB bios settings and I will do my best!
edit: I forgot to mention (since I seldom do this): 1 out of every 5 times if I shut down my Apollo while the machine is running, everything freezes completely and I have to hard reset. Most of the time, it’s just like in the video I posted
Last edited:
- Joined
- Nov 18, 2015
- Messages
- 170
- Motherboard
- Gigabyte Z390 Designare
- CPU
- i9-9900K
- Graphics
- RX 580
Therefore, after backing up the system, I should:You have correctly identified all the Hackintosh kexts in those blue boxes. But you should delete them and then run Kext Utility to rebuild kernel cache. You won't be able to reboot into Mojave until Catalina installation is done, because we'll use Catalina's kexts to boot both Mojave and Catalina.
- Install macOS Catalina in the second APFS Volume
- Reboot into macOS Mojave
- Mount the EFI partition and replace the EFI folder with the one provided in your macOS Catalina installation guide
- Copy ALL Hackintosh kexts from /Library/Extensions to EFI/CLOVER/kexts/Other
- Delete all hackintosh kexts in /Library/Extensions and run Kext Utility to rebuild Mojave's kernel cache.
- Reboot
Sorry but I would like to be sure I understood correctly: I should copy ALL the hackintosh kexts in /Library/Extensions, (including AHCI_3rdParty_eSATA.kext, AHCI_3rdParty_SATA.kext, FakePCIID_Intel_GbX.kext, FakePCIID.kext and all the FakeSMC _ *** Sensors.kext)?
- Joined
- Mar 26, 2020
- Messages
- 37
- Motherboard
- Gigabyte Z390 Designare
- CPU
- Intel i9 9900K
- Graphics
- Sapphire Nitro+ RX 580 8GB
- Mac
- Mobile Phone
Hi guys! My name is Chris, I followed this guide for my build and I successfully installed Mojave 10.14.6 on my machine. Everything works fine (except bluetooth and wifi but I only need BT so I just plugged a USB dongle and works fine).
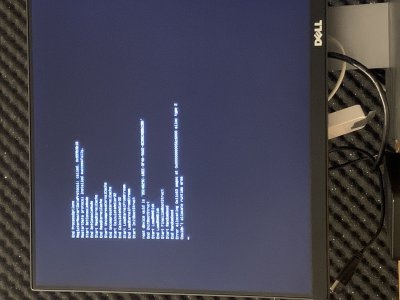
Sometimes when I boot the machine I have the "Couldn't allocate runtime area". This fixes with a reboot but there is a permanent fix available? I leave here my EFI and a picture attached with the error.
I have the following HW:
Z390 Designare with the latest bios (F9b)
i9 9900K 3.6ghz
XFX Radeon RX580 8GB
16GB RAM 3200mhz (Adata Spectrix D41)
HP EX900 500GB Nvme SSD
Thank you in advance!
Attachments
CaseySJ
Moderator
- Joined
- Nov 11, 2018
- Messages
- 22,187
- Motherboard
- Asus ProArt Z690-Creator
- CPU
- i7-12700K
- Graphics
- RX 6800 XT
- Mac
- Classic Mac
- Mobile Phone
All of the steps are correct except this:Therefore, after backing up the system, I should:
- Install macOS Catalina in the second APFS Volume
- Reboot into macOS Mojave
- Mount the EFI partition and replace the EFI folder with the one provided in your macOS Catalina installation guide
- Copy ALL Hackintosh kexts from /Library/Extensions to EFI/CLOVER/kexts/Other
- Delete all hackintosh kexts in /Library/Extensions and run Kext Utility to rebuild Mojave's kernel cache.
- Reboot
Sorry but I would like to be sure I understood correctly: I should copy ALL the hackintosh kexts in /Library/Extensions, (including AHCI_3rdParty_eSATA.kext, AHCI_3rdParty_SATA.kext, FakePCIID_Intel_GbX.kext, FakePCIID.kext and all the FakeSMC _ *** Sensors.kext)?
At the end, do not copy the Mojave kexts from /L/E to C/K/O. Just delete them from /L/E. Poof. Gone. Then run Kext Utility.
After copying-and-pasting RtVariables and SMBIOS from Mojave config.plist to Catalina config.plist (which is in the EFI folder of Catalina USB install disk), and also copying your USB SSDT into the Catalina EFI folder on Catalina USB install disk, you can then delete the ENTIRE Mojave EFI folder. (You should back it up first.)
Do you see what we’re trying to ?
We are trying to update the Catalina EFI folder (on Catalina USB flash disk) so that it can fully replace the old Mojave EFI folder.
When the Catalina EFI folder (on Catalina USB install disk) has been updated, it can be copied to the EFI partition of the MacOS internal SSD.
Now the internal SSD can boot both Mojave and Catalina.
CaseySJ
Moderator
- Joined
- Nov 11, 2018
- Messages
- 22,187
- Motherboard
- Asus ProArt Z690-Creator
- CPU
- i7-12700K
- Graphics
- RX 6800 XT
- Mac
- Classic Mac
- Mobile Phone
Hello Chris,Hi guys! My name is Chris, I followed this guide for my build and I successfully installed Mojave 10.14.6 on my machine. Everything works fine (except bluetooth and wifi but I only need BT so I just plugged a USB dongle and works fine).
Sometimes when I boot the machine I have the "Couldn't allocate runtime area". This fixes with a reboot but there is a permanent fix available? I leave here my EFI and a picture attached with the error.
I have the following HW:
Z390 Designare with the latest bios (F9b)
i9 9900K 3.6ghz
XFX Radeon RX580 8GB
16GB RAM 3200mhz (Adata Spectrix D41)
HP EX900 500GB Nvme SSD
Thank you in advance!
In Post #1 please find the section “Replacing OsxAptioFix2Drv-free2000 with FwRuntimeServices”.
If the problem persists, perform a CMOS Reset as described in the Designare user manual. Then configure all BIOS parameters again according to Post 1.
CaseySJ
Moderator
- Joined
- Nov 11, 2018
- Messages
- 22,187
- Motherboard
- Asus ProArt Z690-Creator
- CPU
- i7-12700K
- Graphics
- RX 6800 XT
- Mac
- Classic Mac
- Mobile Phone
Yes, please try the NVM23 first. It’s much more reliable than NVM43, but not perfect.@CaseySJ @jb007
many thnaks for your help here. As suggested by Casey I have typed the command directly and actually with the comma (Jb0007: I saw your message only after). But it looks like it was a copy / paste problem as this time I managed to have the winbond chip read very esaily 3 times in a raw, with no error reporting afterward at the checksum
Code:pi@raspberrypi:~/Documents $ sudo flashrom -p linux_spi:dev=/dev/spidev0.0,spispeed=1024 -r backup1.bin flashrom on Linux 4.19.97-v7l+ (armv7l) flashrom is free software, get the source code at https://flashrom.org Using clock_gettime for delay loops (clk_id: 1, resolution: 1ns). Found Winbond flash chip "W25Q80.V" (1024 kB, SPI) on linux_spi. Reading flash... done. pi@raspberrypi:~/Documents $ sudo flashrom -p linux_spi:dev=/dev/spidev0.0,spispeed=1024 -r backup2.bin flashrom on Linux 4.19.97-v7l+ (armv7l) flashrom is free software, get the source code at https://flashrom.org Using clock_gettime for delay loops (clk_id: 1, resolution: 1ns). Found Winbond flash chip "W25Q80.V" (1024 kB, SPI) on linux_spi. Reading flash... done. pi@raspberrypi:~/Documents $ sudo flashrom -p linux_spi:dev=/dev/spidev0.0,spispeed=1024 -r backup3.bin flashrom on Linux 4.19.97-v7l+ (armv7l) flashrom is free software, get the source code at https://flashrom.org Using clock_gettime for delay loops (clk_id: 1, resolution: 1ns). Found Winbond flash chip "W25Q80.V" (1024 kB, SPI) on linux_spi. Reading flash... done. pi@raspberrypi:~/Documents $ shasum backup1.bin backup2.bin backup3.bin bb384564231ed51abb5d4c7bab59ae80a716dd13 backup1.bin bb384564231ed51abb5d4c7bab59ae80a716dd13 backup2.bin bb384564231ed51abb5d4c7bab59ae80a716dd13 backup3.bin
I am joining the .bin file from the first read (backup1.bin)
I suppose the next step would be to try flashing the modified firware in the repository for the GC-titan-ridge and testing along with the provided SSDT?
Thank you very much
- Joined
- Mar 26, 2020
- Messages
- 37
- Motherboard
- Gigabyte Z390 Designare
- CPU
- Intel i9 9900K
- Graphics
- Sapphire Nitro+ RX 580 8GB
- Mac
- Mobile Phone
Thank you for your reply! I will try replacing OsxAptioFix2Drv-free2000 with FwRuntimeService and will keep you updated!Hello Chris,
In Post #1 please find the section “Replacing OsxAptioFix2Drv-free2000 with FwRuntimeServices”.
If the problem persists, perform a CMOS Reset as described in the Designare user manual. Then configure all BIOS parameters again according to Post 1.
- Joined
- Nov 7, 2013
- Messages
- 112
- Motherboard
- Gigabyte Z390 Designare
- CPU
- i9-9900K
- Graphics
- RX 5700 XT
Copyright © 2010 - 2024 tonymacx86 LLC