Contribute
Register

[Guide] Lenovo Thinkpad T440S using Clover UEFI hotpatch

Status
Not open for further replies.
Yes, but if you remember back in time when #37 you actually felt some difference into that compared to Tluck kext that we used previously.
About gestures, don't worry it just a matter of time and that kext will be ready and support ThinkPads.

I would like to if you don't mind as i can't test that on my L440 for now. If you confirm the changes to be better i will upload the changes to all thinkpad repos and update them.

That can be a test worth trying.
The keyboard changes are much worse (in my opinion). It seems much choppier and not as smooth. I think the settings before (at least with the Rehabman kext) are much better so I will be keeping the old settings. I'm hoping that VoodooPS2 will be ready soon!

I disabled the Touchscreen just by disabling the "HP15" port (instead of disabling EH01 all together). This didn't change anything. Do you think removing EH01 all together would help?

Also, I posted some problem reporting files a few pages back related to this issue. Not sure if they would help you at all.

@Sniki I also tried to remove the patch in the config.plist titled "Rename EHC1 to EH01" or something along those lines. That also disabled the touchscreen. However, the EHCI kext is still being loaded (and I still see a USB 2.0 bus) which I suppose is correct for USB 2.0 devices? Unfortunately these changes did not improve my situation with the iPhone XS :/
 
Last edited:
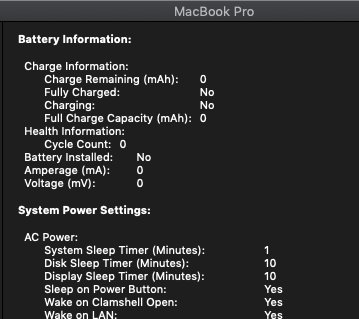
Hi @Sniki. I read this guide and used the files in your Thinkpad T440p project on your Github to install Mac OS Mojave on my Thinkpad T440p. Everything seems to work well now. However, the battery usage/charging icon does not show up. It looks like Mac OS can not see the battery in the system. Can you please help me? Thank you

screen-shot-2019-07-25-at-10-01-56-pm-png.418546


P/S: I tried another hotpatch file from another Thinkpad T440P Mojave Hackintosh guide on Github. Now everything works very well
 

Attachments

  • Screen Shot 2019-07-25 at 10.01.56 PM.png
    Screen Shot 2019-07-25 at 10.01.56 PM.png
    34.1 KB · Views: 591
Last edited:
Can definitely confirm the dell bcm94352z works like a charm out of the box. No kext patching necessary for wifi and bt.
However... on the Windows side, not so much. Not sure if it had been mentioned or not but windows update installs a driver for it that does not properly interface with the card it self so no wifi unfortunately.

Is there a special driver that will work properly with the card? will I need to install the driver from dell? Thanks again. Everything else is fine though. Hackintosh works flawlessly including wifi+bt. Even touchpad has full functionality so there is no need for me to order one.

Thanks again OP
 
Hello and thanks for the wonderful guide. I followed it to install it on my T440s and everything works almost perfectly. However, I have an issue connecting an external monitor - Dell U2718Q. The monitor has a native resolution of 3840x2160. I connected it through the mini DP port on the laptop, to the DP port on the monitor. For some reason, the maximum resolution detected by the OS is 2560x1440 but the image is not clear , even with font smoothing turned on and/or HiDPI enabled. Setting to any of the available resolutions does not produce a clean image because the OS "thinks" this monitor has a native resolution of 2560x1440. If I force a resolution of 3840x2160 (using RDP, SwitchResX), the image becomes fuzzy.

I know this should work, because 3840x2160 is works with Windows and Ubuntu out of the box on the same machine, connected the same way. Also, if I connect a MBP the same way (mini DP on the MBP to DP on the Dell), it again works correctly. So, this is not a hardware issue.

Any ideas?

[Edit]: I also followed this guide to enable custom resolutions on the T440s. This is how I managed to make it switch to 3840x2160. But as mentioned - it produces fuzzy image
 
Last edited:
I upgraded the LCD in my T440s this morning. I ordered a B140HAN01.0 panel from AliExpress for $51 shipped. From order to delivery was only 10 days despite the 4 week estimate, but I'm in South Korea :)

The replacement was pretty straightforward and only requires a small Philips screwdriver. Lots of resources online on how to do it.

The display is a nice upgrade, and worked on the first boot through clover and the flievault preboot unlock. Unfortunately, the desktop came up like this:
IMG_9482.jpg


Only mild panic though, as it worked at full res before that stage and the artifacts looked like a software problem not a hardware one.

Windows 10 didn't experience the same issue, so I spent some time searching around.

it turns out that it was the CSM setting in the BIOS which I had set to NO. I had it disabled because I thought going non-legacy was a good idea if I didn't need it (and I didn't before). Setting CSM to YES and everything is sorted :)

IMG_9491.jpg
 
Last edited:
Hello and thanks for the wonderful guide. I followed it to install it on my T440s and everything works almost perfectly. However, I have an issue connecting an external monitor - Dell U2718Q. The monitor has a native resolution of 3840x2160. I connected it through the mini DP port on the laptop, to the DP port on the monitor. For some reason, the maximum resolution detected by the OS is 2560x1440 but the image is not clear , even with font smoothing turned on and/or HiDPI enabled. Setting to any of the available resolutions does not produce a clean image because the OS "thinks" this monitor has a native resolution of 2560x1440. If I force a resolution of 3840x2160 (using RDP, SwitchResX), the image becomes fuzzy.

I know this should work, because 3840x2160 is works with Windows and Ubuntu out of the box on the same machine, connected the same way. Also, if I connect a MBP the same way (mini DP on the MBP to DP on the Dell), it again works correctly. So, this is not a hardware issue.

Any ideas?

[Edit]: I also followed this guide to enable custom resolutions on the T440s. This is how I managed to make it switch to 3840x2160. But as mentioned - it produces fuzzy image
Try reading here about related properties you can inject:
enable-hdmi20 property / -cdfon boot flag would be one thing to try
LSPCON-related properties would be another.
Verify Windows support in this case - connect your laptop to that display when running Windows, see if you get full resolution.
Check video memory setting in BIOS.
 
I upgraded the LCD in my T440s this morning. I ordered a B140HAN01.0 panel from AliExpress for $51 shipped. From order to delivery was only 10 days despite the 4 week estimate, but I'm in South Korea :)

The replacement was pretty straightforward and only requires a small Philips screwdriver. Lots of resources online on how to do it.

The display is a nice upgrade, and worked on the first boot through clover and the flievault preboot unlock. Unfortunately, the desktop came up like this:
View attachment 418867

Only mild panic though, as it worked at full res before that stage and the artifacts looked like a software problem not a hardware one.

Windows 10 didn't experience the same issue, so I spent some time searching around.

it turns out that it was the CSM setting in the BIOS which I had set to NO. I had it disabled because I thought going non-legacy was a good idea if I didn't need it (and I didn't before). Setting CSM to YES and everything is sorted :)

View attachment 418868

Also had the same problem after installing my replacement screen. And the enable CSM solve the problem.
However, previously when using HS with original 1366x768 display with CSM disabled, the display works fine.
I actually prefer using CSM disabled, as it shows a slick lenovo logo on boot, rather than the Thinkpad lowres logo when enabling CSM.
Wondering if there is anything that can be done to disable the CSM and still make the display work in Mojave? Just like when it is working when using HS?
 
Last edited:
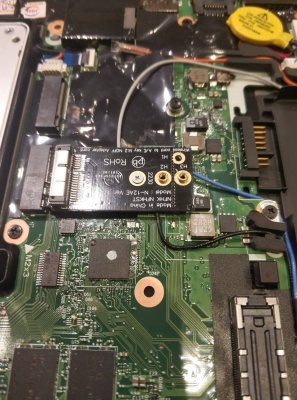
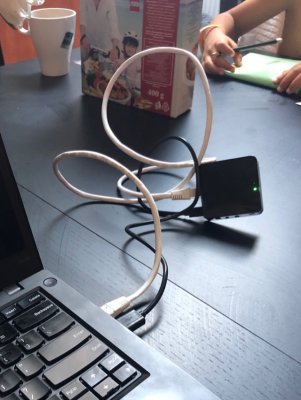
I spotted a USB wifi adapter in Daiso this morning for 5,000 KRW ($4.22 USD). It listed OSX and Linux support, so there was a hope that it'd Just Work. I'm waiting for the BCM94360CS2 and adapter to arrive from AliExpress, and had wifi via a very dongly solution with a USB powered wifi AP (that I had) in bridge mode:
IMG_9253 (2).jpg

The USB wifi adapter was labeled TS-WIFI24 and included a driver CD. I can't read is because I don't have an optical drive. I searched around and found a pages in Korean that detailing a windows install that reveals that it's an RTL8188EU. With that bit of knowledge, I was able to find https://github.com/chris1111/Wireless-USB-Adapter-Clover which works :)

Much better:
IMG_9520.jpg
 
Status
Not open for further replies.
Back
Top