RuleBreaker01
Banned
- Joined
- May 31, 2018
- Messages
- 1,274
Thank you for the detailed response. I can confirm your description matches mine.Do you know why I keep harping about creating bootable backups on cheap 256GB or 512GB SSDs mounted in even cheaper USB 3.0 external SSD enclosures? I issue this warning every time there is an O/S update. But you're in enough stress already, so I should watch what I say!
But let this be a lesson to everyone who has still not decided that they should spend a few dollars and a few minutes of their time to create and periodically update their bootable backup.
Okay, let's try to recover your system in a methodical way. I believe I actually encountered the same problem when I installed 10.14.5 onto a spare SSD and tried to see what would happen by deleting WhateverGreen. The computer would go through the startup sequence, but then the RX580 would terminate its video output, leading to a black screen. Unfortunately, this might have caused some unexpected collateral damage because restoring WhateverGreen did not fix the problem. In fact, I tried various alternatives including a new USB boot loader, but I could simply not overcome the RX580 black screen. The OS itself or a key preferences file might have been corrupted.
Fortunately, this was on a spare SSD so I simply reinstalled macOS 10.14.5 with WhateverGreen (i.e. followed my own guide strictly) and the system booted up perfectly fine.
Did you remove WhateverGreen at any time?
Does your problem sound similar to what I described?
If so, I don't think it makes sense to spend any time trying to identify the root cause. Instead, it would be better to follow a full system recovery procedure instead.
Option 1: Restore from Time Machine
Option 2: Install fresh copy of 10.14.5
- You should be able to boot into Recovery. Don't use the USB for this. Boot directly with the Mojave SSD and choose the Recovery option at Clover Boot Menu. You should not get a black screen.
- When the Recovery system starts, you will have an option to restore from Time Machine.
- Try that option.
- Install 10.14.5 onto a new or spare SSD. You can easily use a low-cost USB 3.0 external SSD enclosure and a 256GB SSD.
- Follow all steps of the build guide, but DO NOT LOG INTO iCLOUD at ANY time.
- When macOS asks you to create a login ID and password, use a different password than the old Mojave SSD.
- Boot from the new spare SSD and login to your fresh copy of Mojave.
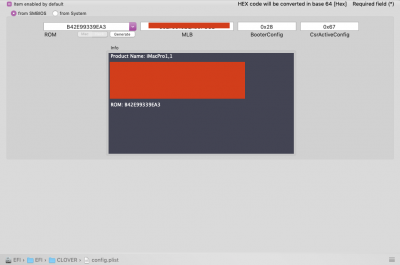
- Now mount the EFI partition of the old Mojave SSD and copy your config.plist to the EFI partition of the new USB SSD. This will transfer your serial numbers to the new USB SSD.
- Reboot from the USB SSD.
- You can log in to iCloud now.
- Use Migration Assistant to transfer your files and apps to the new USB SSD.
- Reboot and use the USB SSD for a few days to make sure everything is okay and all your apps are working fine.
- Yes, for a few days.
- Fully back up the old Mojave SSD.
- Once you're convinced that everything from the old Mojave SSD has been transferred, then you can use Carbon Copy Cloner to clone the USB SSD to the old Mojave SSD.
- Then remove the USB SSD and boot directly from the Mojave SSD.
")
In this install, I took the approach of only installing the kexts that were necessary for the system. I never installed whatevergreen. So, that gives an additional option to recover. I’ll try that out in addition.
Also I see a post right before your where another user had seemingly the same issue. I’ll try his fix in the event the steps you gave me don’t get me recovered.
I do have a bootable local backup, which is on an external NVMe array. It’s theoretically bootable. I say theoretically because I’ve not been able to troubleshoot thunderbolt boot yet. Which, is definitely an option.
I maintain the time machine backup on an external server. On a separate external server, I have a daily bootable backup created with CCC, with the intention of using it as bootable over iSER. When it rains it pours, permissions problem on the time machine. ISCSI/iSER boot is untested, probably take more time to figure out how to boot from iSER.
Now after writing that all out, I could boot the local thunderbolt backup on my real Mac, and clone it to a separate SSD. But, the snag remains the usb bootloader is only in the time machine and ccc snapshots.
At least, as you said, at the very least this brought to light a glaring hole in my backup and recovery process. While all my data is safely stored, replication is only as good as its weakest link. I put this system together with extra redundancy and replication, to avoid a long recovery process. Should be instantaneous recovery and it’s not because of small oversight.
-Curious if anyone has successfully booted macOS over iSER/iSCSI or PXE. I can with my VM’s. That would be pretty awesome. I’ve got 32TG of NVMe block storage, I just don’t know to use it yet.
-CaseySJ -> how do you approach having the local bootable backup directly attached via SATA/NVMe? I wanted to implement this as a tertiary protocol for replication, but every time macOS saw the clone, it would cause issues; freezing, stuttering, etc.
I think it has something to do with detecting a duplicate UUID. My assumption either macOS isncinfused by it, or its an anti-piracy mechanism.
I still keep coming back to being very anti bare metal and more in favor of vm or NvME block storage with iSER boot. My VM’s on the flash array are absurdly fast. R/W speeds to VM’s on the array is over 20GB/s -> Gigabytes per second, not gigabits per second. Not that the read/write speed is needed, but the flexibility and ease, is incredible.