Contribute
Register

Killer Mac Pro 2019

Status
Not open for further replies.
Follow because it will mount a similar configuration.
Intel - Core i9-9900K 3.6 GHz 8-Core Processor
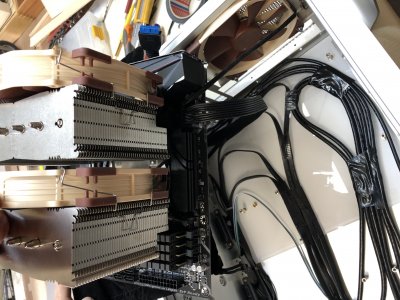
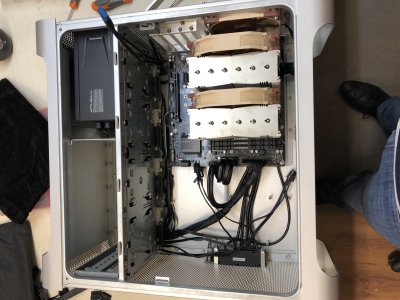
Noctua - NH-D15 82.5 CFM CPU Cooler
Gigabyte - Z390 M GAMING Micro ATX LGA1151 Motherboard
Corsair - Vengeance RGB Pro 32 GB (2 x 16 GB) DDR4-3466 Memory
Samsung - 970 Evo 500 GB M.2-2280 Solid State Drive
4x Seagate - IronWolf Pro 4 TB 3.5" 7200RPM Internal Hard Drive
4x 2TB HDD 2.5"
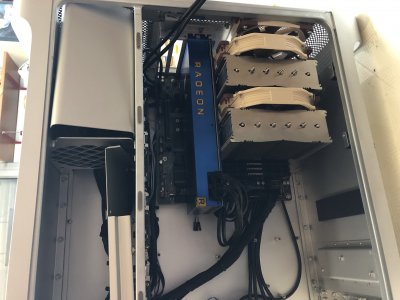
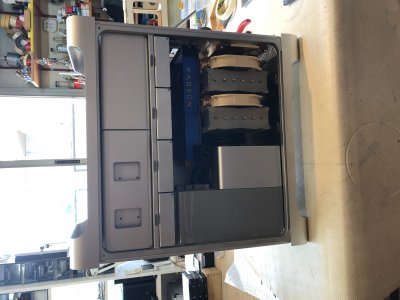
Sapphire - Radeon RX VEGA 56 8 GB PULSE Video Card
Corsair - RMx 850 W 80+ Gold Certified Fully Modular ATX Power
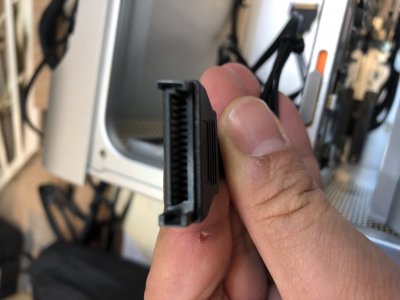
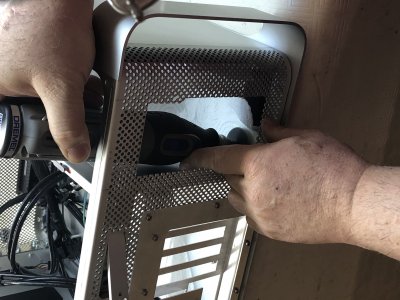
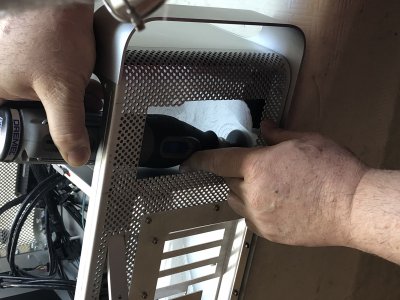
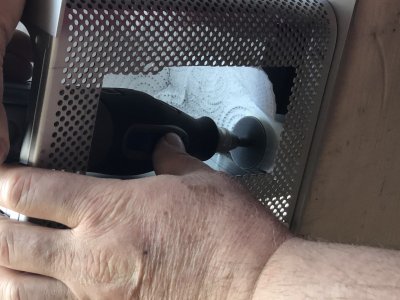
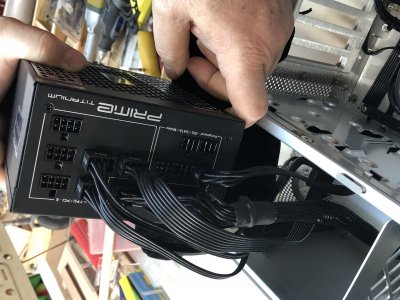
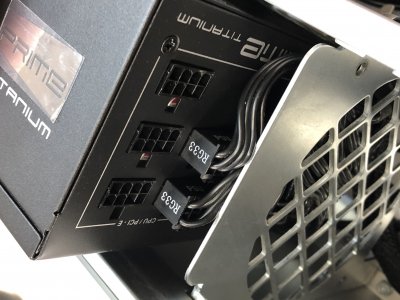
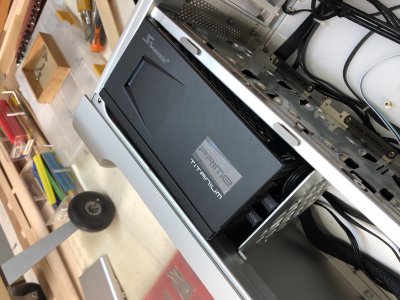
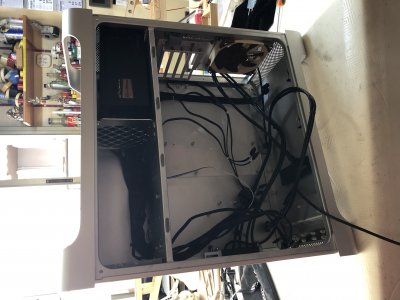
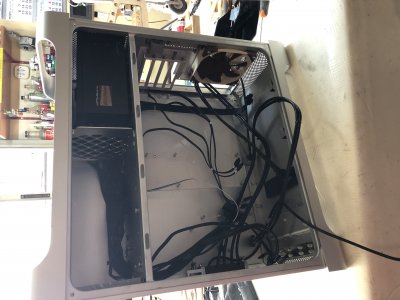
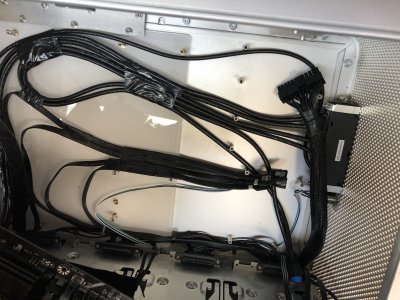
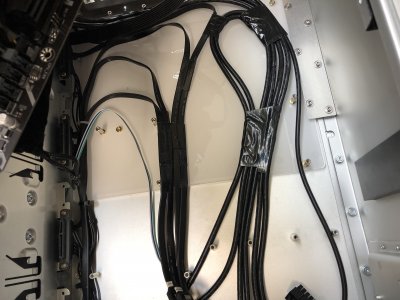
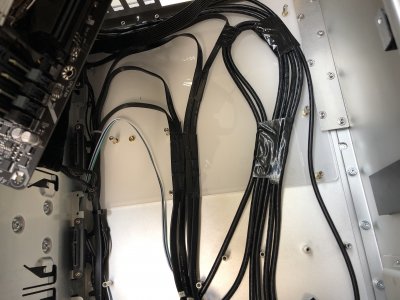
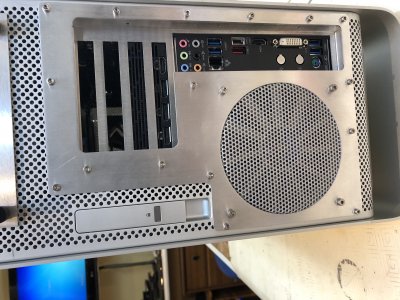
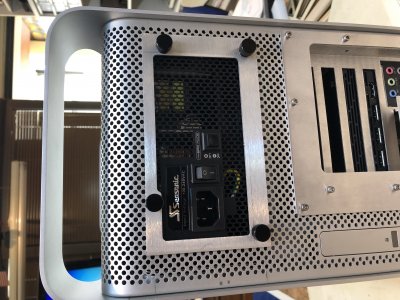
 
As I said I already passed modding the case at this stage, but I run into a problem with the 8 pin CPU 12 Volt cable falling short, apart from that I used all the cables, routed from the original slot which is located at the front right corner, there are two places where the cables route, there is a large opening at the right hand side of the original PSU Fan cover which all the cables passed except the 8 pin 12 Volt CPU Cable I checked some shops here in Turkey with no luck, the ones that I find was not good quality so I came back at home start thinking where to pass the damn cable :) luckily there is a part at the back of the hot swap sata connector, which is quite hard to reach but managed somehow and made a new opening, the other option was to take out the shelf which I did not want to bother :)
 

Attachments

  • aotv+PhNRZywSEATe0s7+A.jpg
    aotv+PhNRZywSEATe0s7+A.jpg
    1.4 MB · Views: 171
  • d1ycyTLdRsOx0BK0fA8PEw.jpg
    d1ycyTLdRsOx0BK0fA8PEw.jpg
    1.5 MB · Views: 174
  • Eo1abdJZSN6FIycGFwqMyw.jpg
    Eo1abdJZSN6FIycGFwqMyw.jpg
    1.5 MB · Views: 188
  • lqnd%sRySbeIk+E+hwGMMg.jpg
    lqnd%sRySbeIk+E+hwGMMg.jpg
    1.6 MB · Views: 179
  • RQbiH%XeT5Wy0sFhmCTRGw.jpg
    RQbiH%XeT5Wy0sFhmCTRGw.jpg
    1.4 MB · Views: 173
  • ciaG56sCR5COhB4L1dBoBQ.jpg
    ciaG56sCR5COhB4L1dBoBQ.jpg
    1.4 MB · Views: 177
After opening the new hole I was able to easily pass the cable, then I started to manage my cables, taking the motherboard in front of me I routed all the cables accordingly and checked their heights, they were all below the standoffs, so I decided to organize them well and leave them under the motherboard for proper cable management. I bring the cables side by side used a tape to fix them flat and leave them accordingly, I also finally installed my new seasonic 750W PSU. first you have to decide which cables to use with the psu install them outside route them to their final destinations and slot in very slowly the PSU to its final resting place :)
 

Attachments

  • zXjfTCsqSmajZ0LMDSV+BQ.jpg
    zXjfTCsqSmajZ0LMDSV+BQ.jpg
    1.8 MB · Views: 190
  • mMwdKoIfRfyyP9TDdWfB%Q.jpg
    mMwdKoIfRfyyP9TDdWfB%Q.jpg
    1.5 MB · Views: 209
  • MeR6Oq0nRn6Isbq4CpWbng.jpg
    MeR6Oq0nRn6Isbq4CpWbng.jpg
    2 MB · Views: 209
  • UAv8xyIMRdyyQVyG5qCPmQ.jpg
    UAv8xyIMRdyyQVyG5qCPmQ.jpg
    1.5 MB · Views: 201
  • gfkYcQcIQham3yxV8H1PFA.jpg
    gfkYcQcIQham3yxV8H1PFA.jpg
    1.6 MB · Views: 200
  • 5H83IzApRseemnkk8sdFOQ.jpg
    5H83IzApRseemnkk8sdFOQ.jpg
    2.4 MB · Views: 219
  • p8Ti8qbCRk6ApzgChj4w5A.jpg
    p8Ti8qbCRk6ApzgChj4w5A.jpg
    1.9 MB · Views: 198
  • 8DJ4DbT2S2SiUNzg6SeBNg.jpg
    8DJ4DbT2S2SiUNzg6SeBNg.jpg
    1.9 MB · Views: 186
Then I started to install all the components one by one.
 

Attachments

  • kiqGlf7YR12SG6E0uSTrXA.jpg
    kiqGlf7YR12SG6E0uSTrXA.jpg
    2.1 MB · Views: 208
  • gGRRVWOrQeSfBJ0KALB4wQ.jpg
    gGRRVWOrQeSfBJ0KALB4wQ.jpg
    2.4 MB · Views: 241
  • HCZibLAYRNyObp4s89C57Q.jpg
    HCZibLAYRNyObp4s89C57Q.jpg
    2.4 MB · Views: 230
  • d4%hfOuXQomrSk6TU1Igxw.jpg
    d4%hfOuXQomrSk6TU1Igxw.jpg
    1.7 MB · Views: 248
  • aCZQpWEzQtmtbUVlXIiibQ.jpg
    aCZQpWEzQtmtbUVlXIiibQ.jpg
    1.7 MB · Views: 253
  • A57K8vqASo6cn25NuT+Vbw.jpg
    A57K8vqASo6cn25NuT+Vbw.jpg
    2 MB · Views: 271
And Voila ! "The Killer Mac Pro 2019" is finished :)
 

Attachments

  • PnQgNJmLScK6eeS7+pW8lg.jpg
    PnQgNJmLScK6eeS7+pW8lg.jpg
    1.6 MB · Views: 288
  • qyB8rlfPQvewVhQ+418mcw.jpg
    qyB8rlfPQvewVhQ+418mcw.jpg
    2.2 MB · Views: 288
  • N4LGz%gFRkmF6aXJZl2%Ug.jpg
    N4LGz%gFRkmF6aXJZl2%Ug.jpg
    2.3 MB · Views: 291
  • N5Mk7HH%Qd+jCy9iTftREw.jpg
    N5Mk7HH%Qd+jCy9iTftREw.jpg
    2.3 MB · Views: 270
Installed Mac OSX and it works flawlessly :) Its been my 3rd day still polishing up my Clover Configurator. My only problem is I have a 30" Cinema Display and I connected it via DVI-D to Displayport adapter, which later I find out that because the adapter that I used is a Single DVI-D Adapter I could only get 1280x800 Resolution, just find out that these displays need dual link active adapters which I found and ordered, I still like my 30" Cinema Display the Max res is 2560X1440 which is still acceptable today, hope to reach that resolution with this adapter, at the moment everything is so big in my screen :)
 

Attachments

  • DyGKOzeiRSyF6Pxm1UT18Q.jpg
    DyGKOzeiRSyF6Pxm1UT18Q.jpg
    2.2 MB · Views: 163
Hi, my setup is similar to yours, I have some doubts:
- With this Noctua H-D15S it is not possible to put the cover that goes on the memories (MacPro)?
- With this cooler did you have to sanding a part to be able to fit on the board?
- You bought the Corsair connector instead of using the original, which in the case we have an "adapter" SAS-> SATA.
- You put an acrylic plate to be able to fix the motherboard in the case, what would be the thickness?

Hi,
- With this Noctua H-D15S it is not possible to put the cover that goes on the memories (MacPro)?

Believe me I also wanted to install the Ram cover back, but because the cooler is so big, it is not possible, and it would do more harm than looking aesthetically good, because you need to cut out many parts and you will be locking the cooler in another container, which will increase the heat there, so If I were you I would just leave it as is, believe me it still looks very good this way.

- With this cooler did you have to sanding a part to be able to fit on the board?

No I did not have to sand anything to fit it to the board, there was enough clearance for the Rams and also for the GPU,
so no worries there, as I explained in the thread, the only issue is with the case cover not clearing the front cpu fan, which I have to shave it down to have a 5mm clearance.

- You bought the Corsair connector instead of using the original, which in the case we have an "adapter" SAS-> SATA.

It is the same thing, and also they independently route to any place you want, the original I had to do more soldering, which I did not want to do, so it is still the same thing.

- You put an acrylic plate to be able to fix the motherboard in the case, what would be the thickness?

This kit belongs to laserhive the thickness of the plate is 5mm.

Hope this helps.
 
Status
Not open for further replies.
Back
Top