- Joined
- Oct 30, 2012
- Messages
- 83
- Motherboard
- DELL G3 3779
- CPU
- i5-8300H / HM470
- Graphics
- HD630
- Mac
- Mobile Phone
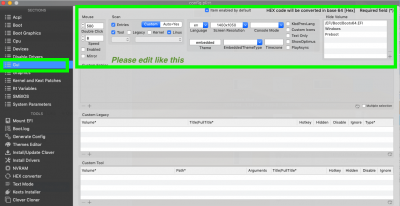
Hello,
prepare my second Hackintosh build with the following parameters:
- MSI Z170 GAMING M5 motherboard
-CPU i3 6100
-RAM 8GB
-SSD 120GB
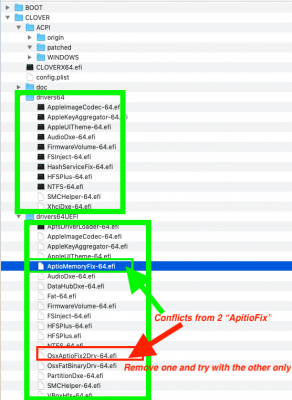
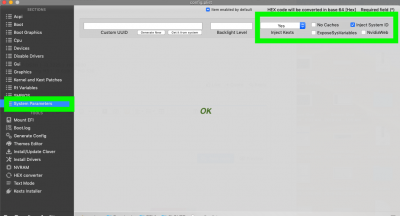
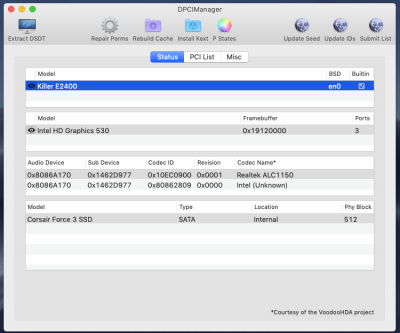
I installed Mojave successfully. I did not see if everything is working normally because I have a boot screen problem. I fail to automatically get to the screen where Clover shows the partitions of the hard drives. Attach a file for clarity. The installation boots to the screen I've put as a picture and stops there. I can reach the SSD partition screen only after pressing any keys on the keyboard.
Has anyone had a similar problem? I ask for your cooperation.
I apologize for my bad English.
prepare my second Hackintosh build with the following parameters:
- MSI Z170 GAMING M5 motherboard
-CPU i3 6100
-RAM 8GB
-SSD 120GB
I installed Mojave successfully. I did not see if everything is working normally because I have a boot screen problem. I fail to automatically get to the screen where Clover shows the partitions of the hard drives. Attach a file for clarity. The installation boots to the screen I've put as a picture and stops there. I can reach the SSD partition screen only after pressing any keys on the keyboard.
Has anyone had a similar problem? I ask for your cooperation.
I apologize for my bad English.
Attachments

Last edited: