Contribute
Register

[SUCCESS] Gigabyte Designare Z390 (Thunderbolt 3) + i7-9700K + AMD RX 580

Happy to help. Let’s get some background info first:
  • Are you starting with 10.14 or 10.14.2?
  • Is your USB disk plugged into a USB 2.0 port with the black insert? USB 3.x ports have blue or red inserts.
  • Can you upload your config.plist? Don’t worry about serial numbers in the file because there aren’t any!

  • It's 10.14.2. That's what I saw in Clover Boot Options.
  • My USB is Sandisk Ultra 3.0 32GB is plugged in USB 2.0 in the back.
  • config.plist is attached :thumbup:
 

Attachments

  • config.plist
    5.6 KB · Views: 320
  • It's 10.14.2. That's what I saw in Clover Boot Options.
  • My USB is Sandisk Ultra 3.0 32GB is plugged in USB 2.0 in the back.
  • config.plist is attached :thumbup:
Attached is a modified config.plist. Please copy this to the EFI/CLOVER folder on the EFI partition of the USB flash disk and try stage 2 installation again. You'll have to boot from the USB disk, of course, by pressing F12 at the BIOS screen.
 

Attachments

  • config.plist
    6 KB · Views: 437
Attached is a modified config.plist. Please copy this to the EFI/CLOVER folder on the EFI partition of the USB flash disk and try stage 2 installation again. You'll have to boot from the USB disk, of course, by pressing F12 at the BIOS screen.

I'll try and let you know sir.. Thank you so much for spending your time:clap:. I'll check right away and let you know
 
Attached is a modified config.plist. Please copy this to the EFI/CLOVER folder on the EFI partition of the USB flash disk and try stage 2 installation again. You'll have to boot from the USB disk, of course, by pressing F12 at the BIOS screen.

I’ve copied the file to EFI/Clover and tried installing stage 2 but sadly the output is same sir. Am attaching a screenshot of the error sir.
 

Attachments

  • 0ADF4C69-402E-4FF7-BD09-9B850B09F999.jpeg
    0ADF4C69-402E-4FF7-BD09-9B850B09F999.jpeg
    1.1 MB · Views: 349
Some more questions:
  1. Do you get the same error with the RTX2080 removed (or its PCI power cable unplugged), and your monitor connected to HDMI port on the motherboard IO panel?
  2. Are you installing to an NVMe drive or to a SATA SSD or regular hard drive?
  3. One more thing to try would be to replace "AptioMemoryFix-drv.efi" in your CLOVER/driversUEFI64 folder with OsxAptioFix2Drv-free2000.efi that can be downloaded from bullet #3 here.
 
Do you get the same error with the RTX2080 removed (or its PCI power cable unplugged), and your monitor connected to HDMI port on the motherboard IO panel?

I’ve removed RTX2080 along with its PCI powercable sir. HDMI is connected to IO panel and BIOS setting for display output is set as iGFX sir.
 
I’ve removed RTX2080 along with its PCI powercable sir. HDMI is connected to IO panel and BIOS setting for display output is set as iGFX sir.
I added 2 more questions to my previous post!
 
Some more questions:
  1. Do you get the same error with the RTX2080 removed (or its PCI power cable unplugged), and your monitor connected to HDMI port on the motherboard IO panel?
  2. Are you installing to an NVMe drive or to a SATA SSD or regular hard drive?
  3. One more thing to try would be to replace "AptioMemoryFix-drv.efi" in your CLOVER/driversUEFI64 folder with OsxAptioFix2Drv-free2000.efi that can be downloaded from bullet #3 here.

  1. HDMI connected to IO panel
  2. It’s a normal HDD. Seagate Barracuda 1TB
  3. I’ll try this step and will let u know sir
 
Some more questions:
  1. Do you get the same error with the RTX2080 removed (or its PCI power cable unplugged), and your monitor connected to HDMI port on the motherboard IO panel?
  2. Are you installing to an NVMe drive or to a SATA SSD or regular hard drive?
  3. One more thing to try would be to replace "AptioMemoryFix-drv.efi" in your CLOVER/driversUEFI64 folder with OsxAptioFix2Drv-free2000.efi that can be downloaded from bullet #3 here.

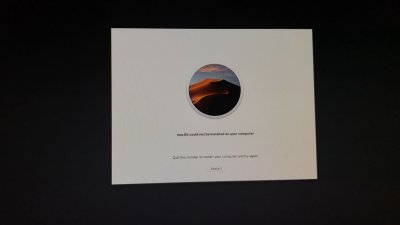
I’ve replaced “AptioMemoryFix-drv.efi” with OsxAptioFix2Drv-free2000.efi and tried starting stage 2 installation.
This time it’s a new error sir. Saying that macOS couldn’t be installed on your computer. Am attaching the screenshot.
But after the reboot I can see Mac recovery HD icon sir
 

Attachments

  • F7E89BE1-37F4-4EB0-A9CE-4E2EC70FA73F.jpeg
    F7E89BE1-37F4-4EB0-A9CE-4E2EC70FA73F.jpeg
    808 KB · Views: 328
During Stage 1 install when you ran Disk Utilities to format the hard drive, do you remember choosing “Show All Devices” and then selecting the parent name of your hard drive? And formatting it as MacOS Extended (Journaled)?

I wonder if adding the SAT0 to SATA patch in ACPI might help as well. This is available from the Clover Configurator ACPI screen, from the pop-up menu. I just stepped away from the house for a few hours but please try this as well.

Also, what happens if you ignore the error, power down the system completely, pull the power cable from the power supply for 10 seconds, then boot up again and try stage 2?
 
Back
Top