- Joined
- Sep 22, 2016
- Messages
- 464
- Motherboard
- Gigabyte Z170X-UD5 TH-Clover
- CPU
- i7-6700K
- Graphics
- Vega 56
- Mac
- Mobile Phone
Gigabyte Z170X-UD5 TH motherboard
I decided to create a thread for Gigabyte Z170X-UD5 TH motherboard users. This motherboard comes with Thunderbolt support, which is great for building custom macOS computer. Gigabyte claims that Z170X-UD5 TH is World's First Intel® Thunderbolt™ 3 Certified Motherboard. Board supports Supports 7th / 6th Generation Intel® Core™ Processors and up to 64 GB of system memory. It's great board for video and photo production. There is no many thunderbolt built in alternatives available.
There are multiple threads how to install hackintosh on Z170X-UD5 TH. I'm not going to repeat any of these. The most complicated part is to build a comp that runs smoothly without issues.
My hack is based on Z170X-UD5 TH (Intel® Z170 Chipset) motherboard, i7-6700K (4,01 GHz) Intel Core i7 processor and NVIDIA GeForce GTX 970 4GB graphics card.
I'm going to update this post to share my configuration, problems etc. You are welcome to post to share your thoughts and and success.
macOS Mojave 10.14.* and NVIDIA graphics
I'm unable to upgrade my hack from macOS High Sierra to Mojave because of NVIDIA graphics card. Maybe I'm going to replace my card with an AMD card, but not sure yet. If NVIDIA will not provide drivers within next 4 months, I'm probably switching to AMD card (AMD Radeon RX Vega 64). Apple states that only specific cards will work on Mojave:
As I'm stuck on High Sierra, this thread is mainly about High Sierra. Of course your post about success/failure with Mojave are welcome.
Firmware (BIOS)
I'm using the latest firmware of Z170X-UD5 TH, version F22g, released on 2018/03/09. Suggestions about the best BIOS settings are welcome!
CFG Lock setting
On Z170X-UD5 TH BIOS the CFG Lock setting is hidden and by default it's disabled, which causes kernel panic. To overcome this we use KernelPM patch in Clover settings. There a way how to patch BIOS so default value for CFG Lock setting will be enabled.
KernelPm patch on Glover is needed for any system that uses XCPM and has MSR_PKG_CST_CONFIG_CONTROL locked.
Starting with Haswell Macs, CPU power management functionality was moved into the kernel (known as XNU CPU Power Management). KernelPm patches the kernel to prevent writes to MSR_PKG_CST_CONFIG_CONTROL (MSR 0xE2), which is frequently locked on many systems (can usually be disabled by disabling the firmware option "CFG Lock"). Without this patch, you will encounter a kernel panic if MSR 0xE2 is locked (which appears to be the case for your system).
Using patched BIOS eliminates need for KernelPm patch. With this patch is possible to get fully native HWP (Intel SpeedShift Technology) CPU Power Management for all Skylake-X processors on all X299 mainboards with unlocked MSR 0xE2 BIOS Register, resulting in absolutely brilliant and top-end CPU performance.
Please read detailed instructions here:
On Z170X-UD5 TH BIOS version f22g the CFG Lock offset is 0x4EF and 0x1 is default setting.
Command to use with modified GRUB Shell for motherboard Z170X-UD5 TH BIOS version f22g:
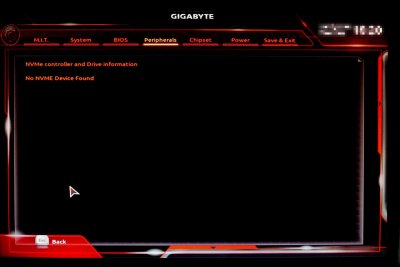
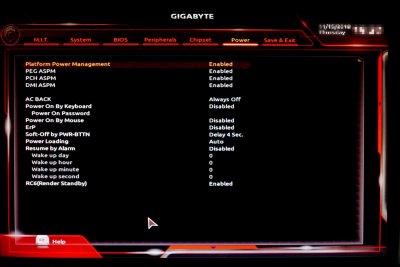
Screenshots of BIOS settings
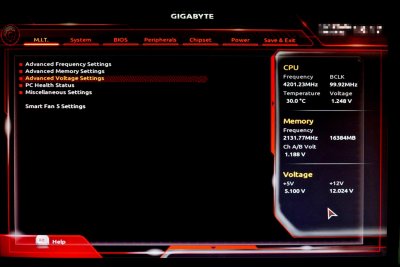
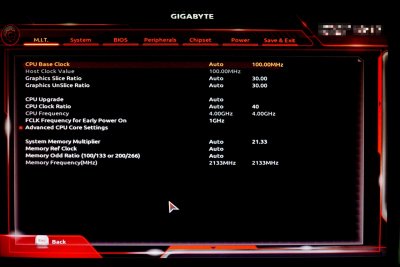


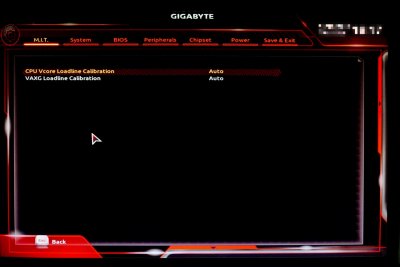
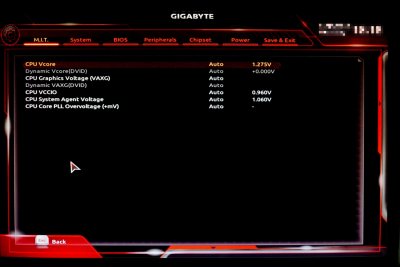
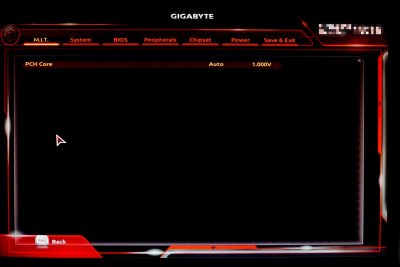
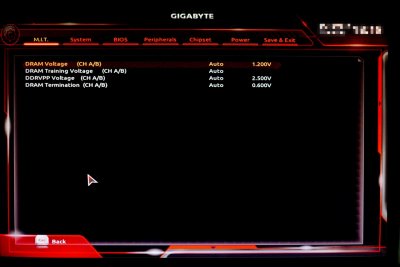
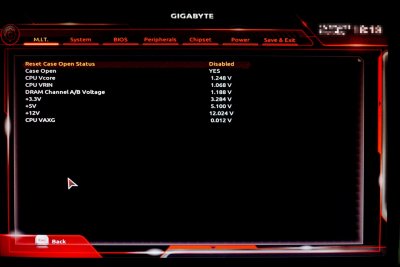
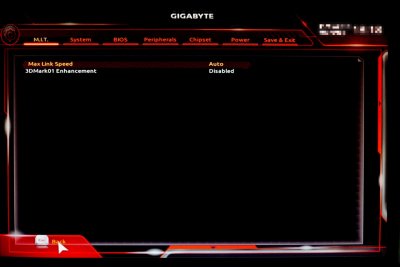
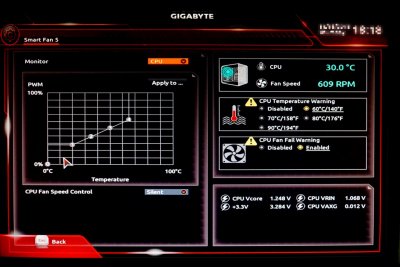

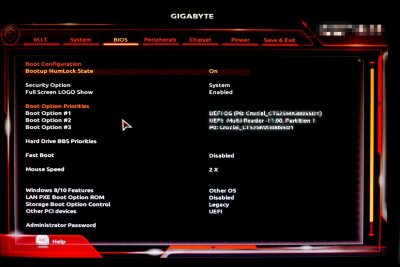
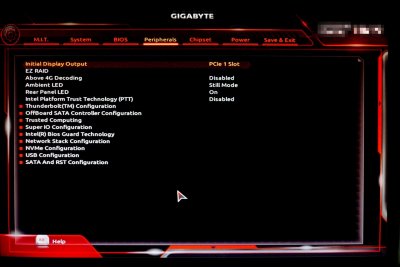
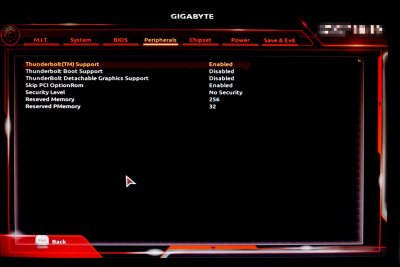
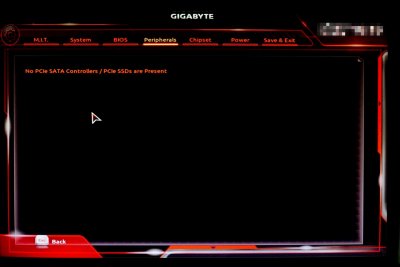
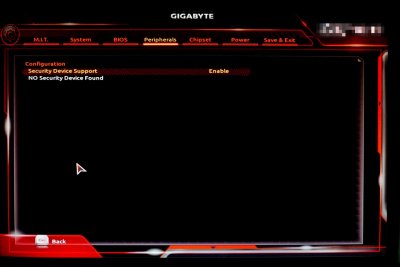

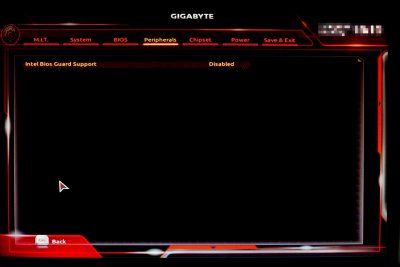
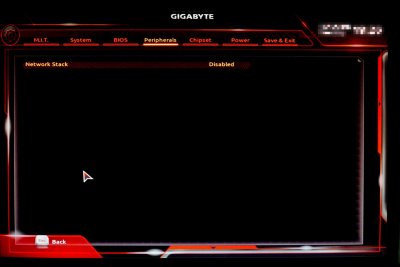


Clover configuration
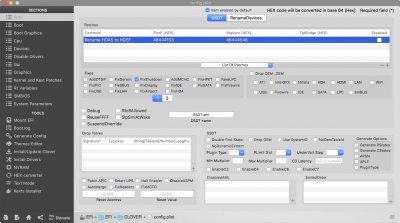
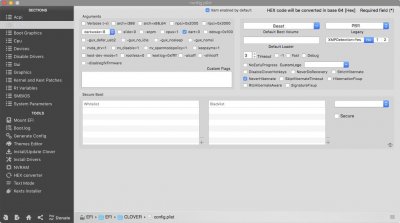
Crucial part of hackintosh are clover drivers, it's configuration and additional kexts. I'm sharing screenshots of my clover configuration with you, so you can make better suggestions or use these to try.


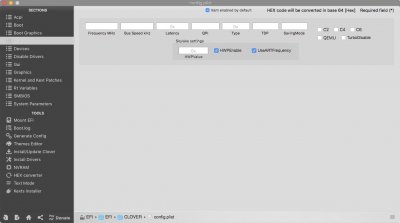
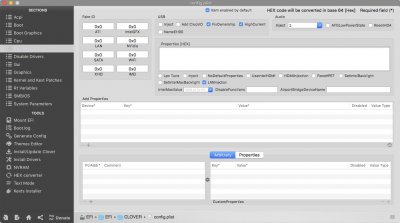
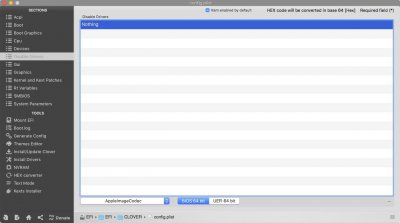
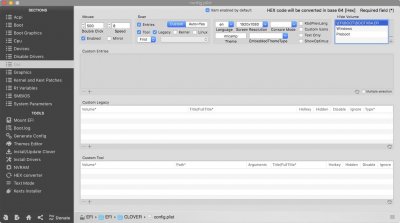
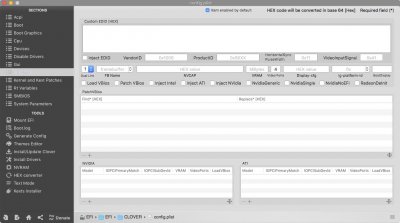
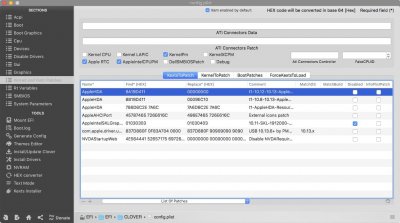
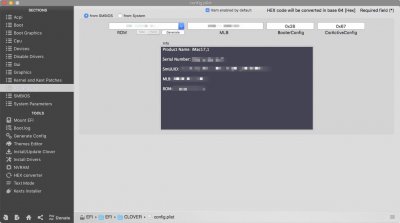
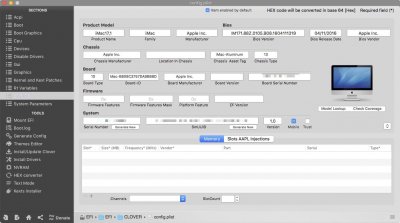
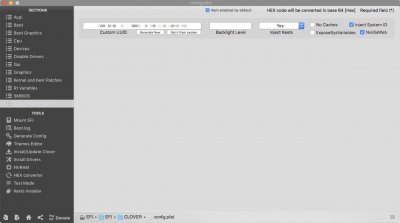
List of kexts on /EFI/EFI/CLover/kexts/Other
VirtualSMC
VirtualSMC supersedes FakeSMC.kext. It's quite new and there is no much information available yet. To use it, you shall remove FakeSMC.kext and all its plugins like FakeSMC_ACPISensors.kext etc. You can download it here VirtualSMC releases. Haven't tested it yet. FAQ of VirtualSMC states about benefits:
About requirements FAQ states:
If you keen to test new things, it's for you. If you aren't quite familiar building hack, FakeSMC.kext might be better option as there is lot of info world-wide available.
Audio
Use AppleALC.kext and CodecCommander.kext.
Modify CodecCommander.kext/Contents/Info.plist IOKitPersonalities/CodecCommander/Codec Profile/Realtek ALC1150
Fix USB after 10.13.6 update:
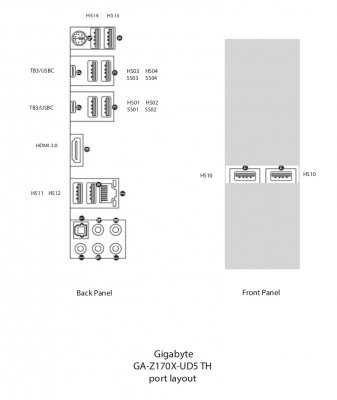
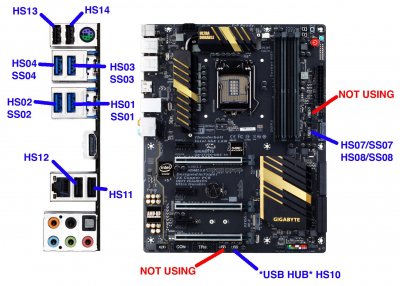
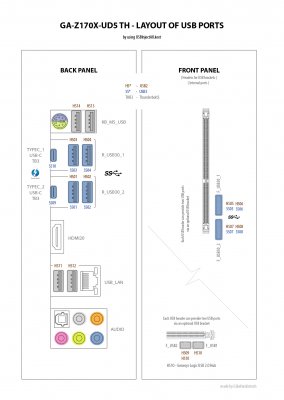
Thanks to USBInjectAll.kext and OSX-USB-SSDT is possible to create "native" USB for Z170X-UD5 TH. No need after that to use USBInjectAll.kext. Also it helps easily to disable desired ports. I created separate extremely detailed post about that on this thread:
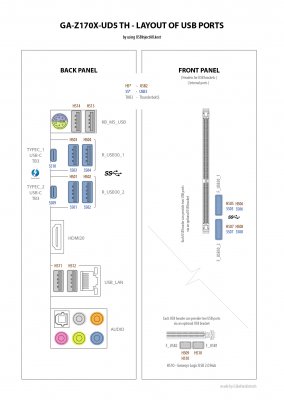
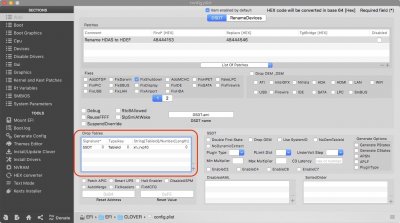
You have to map all ports with USBInjectAll.kext, figure out which to exclude and then to run OSX-USB-SSDT script, which helps to generate proper SSDT-USB.aml file. After coping SSDT-USB.aml into /Volumes/EFI/EFI/CLOVER/ACPI/patched
folder, USBInjectAll.kext can be removed. Additional setting is required too in clover configuration too.
It's reccomended to decrease amount of USB ports to 15 or less ports, so you don't need port limit patch anymore. For example you can disable USB2 ports, which are shared with USB3 ports and internal ports, which doesn't have front panel brackets connected.
Useful Instructions
[will update soon]
I decided to create a thread for Gigabyte Z170X-UD5 TH motherboard users. This motherboard comes with Thunderbolt support, which is great for building custom macOS computer. Gigabyte claims that Z170X-UD5 TH is World's First Intel® Thunderbolt™ 3 Certified Motherboard. Board supports Supports 7th / 6th Generation Intel® Core™ Processors and up to 64 GB of system memory. It's great board for video and photo production. There is no many thunderbolt built in alternatives available.
There are multiple threads how to install hackintosh on Z170X-UD5 TH. I'm not going to repeat any of these. The most complicated part is to build a comp that runs smoothly without issues.
My hack is based on Z170X-UD5 TH (Intel® Z170 Chipset) motherboard, i7-6700K (4,01 GHz) Intel Core i7 processor and NVIDIA GeForce GTX 970 4GB graphics card.
I'm going to update this post to share my configuration, problems etc. You are welcome to post to share your thoughts and and success.
macOS Mojave 10.14.* and NVIDIA graphics
I'm unable to upgrade my hack from macOS High Sierra to Mojave because of NVIDIA graphics card. Maybe I'm going to replace my card with an AMD card, but not sure yet. If NVIDIA will not provide drivers within next 4 months, I'm probably switching to AMD card (AMD Radeon RX Vega 64). Apple states that only specific cards will work on Mojave:
These specific third-party graphics cards are Metal-capable and compatible with macOS Mojave on Mac Pro (Mid 2010) and Mac Pro (Mid 2012):
Some other third-party graphics cards* based on the following AMD GPU families might also be compatible with macOS Mojave on Mac Pro (Mid 2010) and Mac Pro (Mid 2012):
- MSI Gaming Radeon RX 560 128-bit 4GB GDRR5
- SAPPHIRE Radeon PULSE RX 580 8GB GDDR5
- SAPPHIRE Radeon HD 7950 Mac Edition
- NVIDIA Quadro K5000 for Mac
- NVIDIA GeForce GTX 680 Mac Edition
- AMD Radeon RX 560
- AMD Radeon RX 570
- AMD Radeon RX 580
- AMD Radeon Pro WX 7100
- AMD Radeon RX Vega 56
- AMD Radeon RX Vega 64
- AMD Radeon Pro WX 9100
- AMD Radeon Frontier Edition
As I'm stuck on High Sierra, this thread is mainly about High Sierra. Of course your post about success/failure with Mojave are welcome.
Firmware (BIOS)
I'm using the latest firmware of Z170X-UD5 TH, version F22g, released on 2018/03/09. Suggestions about the best BIOS settings are welcome!
CFG Lock setting
On Z170X-UD5 TH BIOS the CFG Lock setting is hidden and by default it's disabled, which causes kernel panic. To overcome this we use KernelPM patch in Clover settings. There a way how to patch BIOS so default value for CFG Lock setting will be enabled.
KernelPm patch on Glover is needed for any system that uses XCPM and has MSR_PKG_CST_CONFIG_CONTROL locked.
Starting with Haswell Macs, CPU power management functionality was moved into the kernel (known as XNU CPU Power Management). KernelPm patches the kernel to prevent writes to MSR_PKG_CST_CONFIG_CONTROL (MSR 0xE2), which is frequently locked on many systems (can usually be disabled by disabling the firmware option "CFG Lock"). Without this patch, you will encounter a kernel panic if MSR 0xE2 is locked (which appears to be the case for your system).
Using patched BIOS eliminates need for KernelPm patch. With this patch is possible to get fully native HWP (Intel SpeedShift Technology) CPU Power Management for all Skylake-X processors on all X299 mainboards with unlocked MSR 0xE2 BIOS Register, resulting in absolutely brilliant and top-end CPU performance.
Please read detailed instructions here:
On Z170X-UD5 TH BIOS version f22g the CFG Lock offset is 0x4EF and 0x1 is default setting.
Command to use with modified GRUB Shell for motherboard Z170X-UD5 TH BIOS version f22g:
Code:
setup_var 0x4EF 0x00Screenshots of BIOS settings


Clover configuration
Crucial part of hackintosh are clover drivers, it's configuration and additional kexts. I'm sharing screenshots of my clover configuration with you, so you can make better suggestions or use these to try.


List of kexts on /EFI/EFI/CLover/kexts/Other
- AppleALC.kext
- CodecCommander.kext
- FakeSMC.kext
- FakeSMC_ACPISensors.kext
- FakeSMC_CPUSensors.kext
- FakeSMC_GPUSensors.kext
- FakeSMC_LPCSensors.kext
- FakeSMC_SMMSensors.kext
- IntelMausiEthernet.kext
- Lilu.kext
- USBInjectAll.kext (If you create custom SSDT, then you can remove it!!)
- WhateverGreen.kext (If you use NVIDIA graphics, also for some AMD cards)
- SSDT-HDMI-HD530.aml
- SSDT-HDMI-NVIDIA-PEG0.aml
- SSDT.aml
VirtualSMC
VirtualSMC supersedes FakeSMC.kext. It's quite new and there is no much information available yet. To use it, you shall remove FakeSMC.kext and all its plugins like FakeSMC_ACPISensors.kext etc. You can download it here VirtualSMC releases. Haven't tested it yet. FAQ of VirtualSMC states about benefits:
Depending on the circumstances VirtualSMC can bring better compatibility with present and future macOS releases providing broader SMC feature support and allowing more flexible SMC key emulation like MMIO, events (like in SMCLightSensor), permission support, etc. On older Macs it can be used to upgrade SMC generation with more features.
About requirements FAQ states:
Compatible Lilu is required for full functionality, basic functionality will be available even on beta macOS versions or with -liluoff boot-arg. VirtualSMC.efi module is recommended for boot.efi compatibility when FileVault 2 is enabled. SMCHelper-64.efi is not compatible with VirtualSMC.efi and must be removed.
If you keen to test new things, it's for you. If you aren't quite familiar building hack, FakeSMC.kext might be better option as there is lot of info world-wide available.
Audio
Use AppleALC.kext and CodecCommander.kext.
Modify CodecCommander.kext/Contents/Info.plist IOKitPersonalities/CodecCommander/Codec Profile/Realtek ALC1150
- Send Delay = 300
- Sleep Nodes = false
- Update Nodes = true
Fix USB after 10.13.6 update:
- Click Kernel and Kext Patches on Clover Configurator
- remove/disable previous com.apple.driver.usb.AppleUSBXHCI patches.
- Click the “+” button near the bottom to add this patch:
- Name*: com.apple.driver.usb.AppleUSBXHCI
- Find* [HEX]: 837D880F 0F83A704 0000
- Replace* [HEX]: 837D880F 90909090 9090
- Comment: USB 10.13.6+ by PMHeart
- MatchOS: 10.13.x
- Save config.plist
Thanks to USBInjectAll.kext and OSX-USB-SSDT is possible to create "native" USB for Z170X-UD5 TH. No need after that to use USBInjectAll.kext. Also it helps easily to disable desired ports. I created separate extremely detailed post about that on this thread:

You have to map all ports with USBInjectAll.kext, figure out which to exclude and then to run OSX-USB-SSDT script, which helps to generate proper SSDT-USB.aml file. After coping SSDT-USB.aml into /Volumes/EFI/EFI/CLOVER/ACPI/patched
folder, USBInjectAll.kext can be removed. Additional setting is required too in clover configuration too.
It's reccomended to decrease amount of USB ports to 15 or less ports, so you don't need port limit patch anymore. For example you can disable USB2 ports, which are shared with USB3 ports and internal ports, which doesn't have front panel brackets connected.
Useful Instructions
- AppleHDA Realtek Audio [Guide]
- Quick Guide to Generate a SSDT for CPU Power Management
- Fix no sound after sleep on 1150 (and possibly other realtek's)
- Fix for failure NVIDIA Web Driver on High Sierra, black screen, panics.
- Install any version of NVIDIA Web Drivers
- [SUCCESS] Z170X-UD5 TH, i7-6700K, AMD Radeon Pro WX 7100, 64GB DDR4
- tonymacx86's Skylake Thunderbolt 3 Test Build: GA-Z170X-UD5-TH - i5-6600K
- Bash script for managing NVIDIA's web drivers on macOS High Sierra and later
- Z170X-UD5 TH CFG Lock
[will update soon]
Attachments
Last edited:


