Components
The only specifically required components for this build are an ASRock Rack EP2C602 motherboard and Ivy Bridge-EP processors. Your case, ram, PSU, etc should have no bearing on your success. As noted below, the LGA 2011 socket supports both Sandy Bridge-EP (E5 v1) and Ivy Bridge-EP (E5 v2) processors. You could use this guide to build a similar setup with Sandy Bridge-EP xeon processors, but since I don't have those chips, I don't know what difference will arise.
Pre-Installation Notes
- This is not a beginners hackintosh. You will encounter pitfalls where it will be handy to have prior experience. If you are contemplating a dual CPU motherboard with the purpose of running macOS, but have never built a hack before, I would encourage you to consider an X99 or X299 single CPU build.
- This guide will heavily draw on or reference other sources. I don't intend to reinvent the wheel. Please let me know if there are any dead links which require correction.
- This guide is for the Asrock Rack EP2C602 using Ivy Bridge (E5 v2) processors. Although ASRock makes several boards, such as the 4L/D16, that are similar to the EP2C602, I don't own them and therefore can't test on them. Sandy Bridge processors will work (likely just as well as Ivy Bridge), but there are some distinctions that will effect the build. Since I don't own an E5 v1 chip, I can't test what those differences are. If you own an Sandy Bridge-EP, please provide feedback so that I can incorporate the information into this guide.
- My personal advice is to read the entire guide through, from start to finish, at least once before starting anything. Familiarize yourself with the whole process before diving in. If any problems arise it will help to know what the big picture looks like.
- This guide is for macOS 10.12 Sierra and 10.13 High Sierra.
- If this helps you, awesome! More importantly, if it doesn't or you encounter any problems at all, please provide feedback. I will continue to expand or revise this guide based on any comments received.
What Works / What Doesn't
Using the files provided, you should have normal usage for all seven USB 2 ports, the two gigabit LAN NICs, the two SATA III, four SATA II, and the four SATA III ports attached to the Marvell SE9230 controller. The SE9230 provides true hardware RAID which can be seen by macOS and is bootable. RAID levels 0, 1, and 10 are available but the SE9230 does not support RAID 5. There is no known way to make the C602's SCU (SAS) controller work in macOS and is disabled in the recommended BIOS configuration. While SAS is a nice enterprise feature, I suspect most people will elect to use NVMe over magnetic hard disk drives for their primary storage. The onboard video does work out of the box, but who builds a multi-processor workstation without a discrete graphics card? Keep in mind that while a i7-7700K supports only 16 PCIe lanes, each E5-2680v2 supports 40. That is why this motherboard has five PCIe 3.0 x16 slots. You might as well use them...
Installation
Step One - Reprogram your NIC Device ID's:
The purpose of this step is to permanently reprogram each gigabit ethernet controller with a different device-id. We are changing the device-id information to match that contained inside Intel82574L.kext so that the network interface controllers will use vanilla, unpatched macOS kexts. Using Rufus or unetbootin, create a live linux USB. I personally prefer Ubuntu, but it isn't required. Boot into the live linux USB and launch terminal.
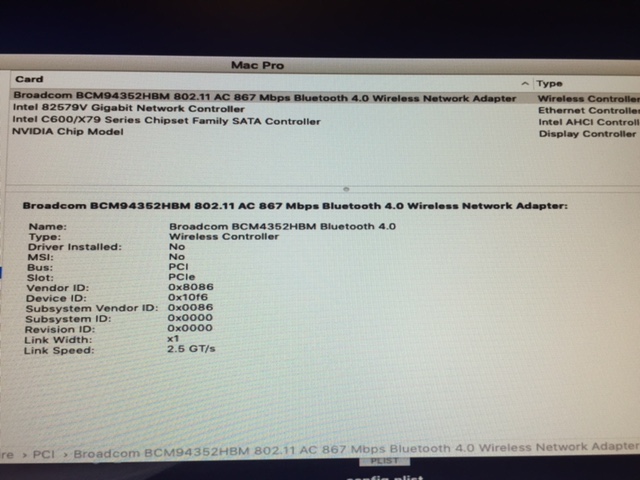
It is possible, although unlikely, to screw this up so badly that your ethernet controllers are rendered inoperable and irrecoverable. However, the ethtool is generally forgiving. If you do make a mistake, you can typically correct it with a subsequent flash command. Be patient, go slow, and be careful! To make things easier, I strongly recommend removing all other NIC's attached to the system before attempting this step. If you have any add-on USB or PCI / PCIe ethernet, WiFi, or Bluetooth adapters you will make this step much safer and easier by disconnecting them first.
Your first set of commands are:
Code:
sudo -s
apt-get install ethtool net-tools
ifconfig
Identify how many LAN NIC's you have and their names. You will then run the following commands for each NIC, replacing "?????" with your NIC name.
Code:
ethtool -E ????? magic 0x10D38086 offset 0x16 value 0x00
ethtool -E ????? magic 0x10D38086 offset 0x17 value 0x00
ethtool -E ????? magic 0x10D38086 offset 0x1A value 0xF6
ethtool -E ????? magic 0x10D38086 offset 0x16 value 0x00
ethtool -E ????? magic 0x10D38086 offset 0x17 value 0x00
ethtool -E ????? magic 0x10D38086 offset 0x18 value 0x86
ethtool -E ????? magic 0x10D38086 offset 0x19 value 0x80
You can now shutdown and reuse the same USB to create your macOS installer. You should not need the live linux USB again.
Step Two - Prepare your USB installer:
Using the
installation guide, create a USB drive with macOS. Choose "UEFI Boot Mode". If installing Sierra, you will need this
link to download Sierra now that 10.12 has been superseded by High Sierra. You can download
High Sierra here. After everything is complete, you need to
mount the ESP for your USB drive and place the unzipped contents of the attached BIOS.zip file in the root. Next, completely replace the /EFI/CLOVER/ directory with the attached CLOVER directory.
Step Three - Configure config.plist:
Using
Clover Configurator (or manually, if thats your thing) you need to make a few changes to the config.plist. If you aren't familiar with a basic Clover installation, I recommend
reading up first. Regenerate the SMBIOS MacPro6,1 information in order to create your own serial number etc. Also, create a custom UUID under System Parameters. Copy that UUID to the SmUUID field under SMBIOS and again generate a new UUID under System Parameters.
This thread provides far more depth on properly configuring your SMBIOS. If you have a discrete nVidia GPU, check "NvidiaWeb" under System Parameters in Clover Configurator. No other changes to config.plist necessary unless otherwise specifically needed for your GPU.
Step Four - Update BIOS and Marvell SE9230 Firmware:
Update the EP2C602 BIOS using the file contained in the ESP of your USB drive. The instructions on how to do so are contained in the manufacturer's manual as well as
here online.
Flashing BIOS, especially modded or unofficial builds, has an inherent degree of risk. Neither I, nor anyone else on the planet, is responsible if you damage your computer, self, or relationship as a result. The provided BIOS has been modified to add NVMe boot support and to unlock the MSR.
Next, update the Marvell SE9230 storage controller firmware.
Here is the link to the files and instructions.
Step Five - Configure BIOS:
Using the attached PDF guide, make all necessary changes to your BIOS configuration. Can you deviate from this guide? Maybe, depends on what you want to change. Some settings will not change the ability to install macOS but will effect performance. Some changes will complete break your ability to install macOS. My recommendation is to follow my BIOS settings exactly until you have a stable system. Feel free to tweak and play iteratively later. If you are curious about a specific setting, ask in this thread. After everything is correctly configured, save and reboot.
Step Six - Booting into Clover:
We are now ready to boot into Clover but not quite ready to install macOS. If you continued on at this stage, you would encounter a kernel panic. While in the Clover main boot screen,
press F4 to dump the ACPI. You will need it later. Next, we need to calculate the slide value for AptioMemoryFix.
Using this guide, calculate your slide value. Although the guide is referencing OSXAptioFix2, the process is the same. Once you have your slide value (mine is "slide=10" but yours may vary based on PCIe cards, amount of RAM installed, etc), you will once again edit your config.plist to add the necessary slide value boot argument.
Step Seven - Install macOS:
Now that we have our configured Clover boot loader, macOS should boot into the installer without issue. OS installation should be relatively straight forward to anyone who has installed any version of OS X / macOS previously. If you need help, use
this guide.
Post-Installation
Step Eight - Install Clover in the boot drive ESP:
Using the installation guide referenced in Step Two, install Clover on to the drive with your macOS installation so that you can boot without the USB drive. Copy all the files you used on the USB to the EFI partition for the boot drive. Remove the USB drive and reboot.
Step Eight (A) - NVIDIA GPU Web Drivers:
If you have an AMD GPU, you don't need any special drivers. However, if you have an nVidia graphics card, you will need to install the Web Drivers. A list of drivers organized by dot point release for
Sierra is here and
here for High Sierra.
Step Nine - Fix CPU Power Management:
Using
Piker-Alpha's instructions, generate a SSDT to fix CPUPM. However, I recommend using the "custom" flag method so that you can provide the script your original, unpatched ACPI. In order for the custom flag to function, you must copy the contents of /EFI/CLOVER/ACPI/origin to your desktop. If the origin folder is empty, you didn't dump the ACPI using F4 at the Clover boot menu as described in Step Six. Run the script with the "-h" help flag to see all available flags. I suggest using the relevant flags for model and board-id (copy from your config.plist), cpu's, mode, and processor model. After the script generates your SSDT, you may delete the ACPI files from your desktop and delete NullCPUPowerManagement from /EFI/CLOVER/kexts/Other/. Rename the newly generated SSDT to SSDT-CPUPM.aml and move it to /EFI/CLOVER/ACPI/patched/. Reboot.
Step Ten - Fix UEFI Boot:
ASRock motherboards have trouble correctly recognizing your Clover installation in the ESP as a UEFI bootable operating system. Without a fix, you will be stuck booting Clover from your USB drive. To fix the problem, you will need to use bcfg commands from within the UEFI shell available in Clover. A basic guide is
here. See also the comments in this thread.
References / Credit / Attribution
I can't take any credit for this guide. All I did was piece the information together. Other people far smarter than me developed the necessary tools. Here are some of the most important people in making this a successful build.
Change Log
02/09/18 - Working to complete initial post.
02/10/18 - Moved subforums from The Build to Sierra Desktop Guides.
02/12/18 - Updated guide and attached files to provide support for macOS 10.13 High Sierra.
02/12/18 - Made changes based on
@Coool advice. Eliminated need for SSDT.aml and for AppleIntelE1000e.kext. Updated attached files.
02/13/18 - Revised BIOS instructions and replaced attached files.
02/19/18 - Made corrections and revisions to config.plist.
02/21/18 - Added new "Step Ten - Fix UEFI Boot"
04/01/18 - Updated attachments with newest available kexts.
04/02/18 - Confirmed success on 10.13.4.
04/05/18 - Added BIOS Guide. Updated CLOVER.zip to update to Clover r4427.
07/04/18 - Update guide for Clover r4586,
BIOS 1.90, and updated kexts.
07/23/2018 - Update graphics kext information due to the merger of WhateverGreen and nvidiagraphicsfixup. Condensed and shortened for length. General reorganization in preparations for 10.14.


