Contribute
Register

[Success] GIGABYTE Z370 Gaming 7 + Intel Core i7-8700K + RX 580 + (2x) Dell P2715Q 4k @ 60Hz

HackaShaq, can I ask you bud, what made you choose Corsair Vengeance ram? Being new to Hackintoshing I see the only recommended ram in the Buyers Guide on this site for a Mac Pro build is the Crucial Ballistix Sport. Will any DDR4 ram work so long as its compatible with the MoBo? How did you know that that particular ram would pose no issues or even work at all? I'm still trying to reverse engineer how one chooses parts beyond the very limited Buyers Guide list of parts so I can make more informed choices. If its all the same I'd rather buy a ram that presents the best value vs performance here in the UK but the last thing I want is unexpected issues with it.
Hey @Glynster that's an excellent question. Honestly, I didn't look at the Buyer's Guide here (and I probably should have) but what I did was to start with the processor I wanted to use for the build, then I finally decided on the motherboard. Once I had those two main items to focus on, I started researching other successful builds.

I would jot down info online from people who had successful builds using the Gigabyte Z370 Gaming 7 from various sources, (here, ******, etc.) and in my notes jotted down a note to myself that read "Use 2666mhz DDR4 memory!". Can't remember if that was more performance-related or compatibility-related (or whether that's actually true or not!) :) But it was a note to myself I must have read somewhere. I would google things like "Hackintosh Gigabyte Z370 Gaming 7 RAM" and take notes and do research. I then saw a couple of different builds using that Corsair Vengeance LPX 32GB (2x16GB) DDR4 DRAM 2666MHz (PC4-21300) and it matched with my other note of "Use 2666mhz DDR4 memory " so I went with it.

There really wasn't anything other than references from other successful builds I found online with that MoBo that lead me to choose the Corsair Vengeance RAM.

So in your case, once you have solidified the exact motherboard you want, pick a brand/model of RAM that you are leaning towards for costs, ensure it's compatible with your MoBo, and then just google the word "hackintosh + (your motherboard) + brand of ram" and see if others have successful builds around it.

Hope this info helped.
 
Hi both.

A good question which, as you point out @HackaShaq , merits more discussion than is usual because of the current high prices of RAM, if for no other reason. Mistakes can be expensive.

I also use Corsair Vengence LPX and have done for several builds now, with zero problems. Gigabyte's motherboard "Recommended RAM" lists never seem to include it, so I understand the concern.

Personally I bought 3000ghz speed because the price was much the same as 2400 and 2666. However I only actually run it at standard 2133 speed in the BIOS. You probably know that any speed over 2133 is classed as "overclocking" and needs to be changed in BIOS to match the bought RAM anyway. The reason I do this is simply because there's not much difference in performance for what I do, and running it slower means it stays cooler and is less 'stressed' (although someone here once told me that was wrong as it was designed to run at higher speeds. Yes true, but running a Ferrari at full speed all the time still builds up heat and wear even if it is designed to go fast etc).

Whichever brand you get, check the spec is right AND that it will fit under your cooler, as @HackaShaq points out in the build. Buy from a company with an easy returns policy, just in case of incompatibilities.

:)
 
Great build and guide. Thank you.
I'm actually planning on building 2-3 pieces of hackintosh with this motherboard and cpu.
One question tho.

Why are you not using iMac18,3 definition as this build has Coffee Lake i7 and a dedicated GPU ?

Best regards,
Svavar
 
Great build and guide. Thank you.
I'm actually planning on building 2-3 pieces of hackintosh with this motherboard and cpu.
One question tho.

Why are you not using iMac18,3 definition as this build has Coffee Lake i7 and a dedicated GPU ?

Best regards,
Svavar
Hey svavaroe, that's a valid question, that I don't really have an answer for. Looking back, I do see that for Coffeelake i7's that the recommended system definition is iMac18,2 or iMac18,3 but when I was running Multibeast, I just went with the default setting it pre-selected which was iMac14,2.

I have seen no adverse effects at all from using the system definition, and in theory, I could change it, but my system is running literally 100% perfectly smooth, so there's no reason for me to update this.

I'm not really an expert on whether the iMac18,3 would somehow yield better performance in any way, or a change in anything really (aside from not showing up on an "unsupported list" for future macOS versions) and I'd welcome any input from anyone on this.
iMac 18,3 is still Kaby Lake and not Coffee Lake so it is even not a perfect fit for a Z370 8700K system. I would keep using 14,2 at least until there is a sysdef specifically for an i7-8700K iMac. When that is available to use, see what results other 8700K owners are getting with it. Changing it requires a new serial #, basically looks to Apple like a whole new machine. Why mess with perfection, is probably the best approach to this.
 
iMac 18,3 is still Kaby Lake and not Coffee Lake so it is even not a perfect fit for a Z370 8700K system. I would keep using 14,2 at least until there is a sysdef specifically for an i7-8700K iMac. When that is available to use, see what results other 8700K owners are getting with it. Changing it requires a new serial #, basically looks to Apple like a whole new machine. Why mess with perfection, is probably the best approach to this.
I just posted this exact question in the "Post Install" forum and got the same reply from Stork.
Since I'm a huge proponent of "If it ain't broke..." I'm definitely going to leave everything as-is. I have also seen people with similar builds to mine having USB issues, so perhaps by sticking with the default iMac14,2 system definition, I avoided USB sleep/wake/mounting/ejecting issues.

The funny thing is that if I properly did my research on this exact topic, I probably would have selected the iMac 18,3 most likely from the get-go, and it could have been fine...or not. Instead I was lazy and just went with the default System Definition in Multibeast, and my machine is running absolutely positively 100% perfect. I'm actually kind of shocked there are no issues. Who knew being lazy and sticking with the default system defs would actually have a benefit? :)

Thanks for your reply, trs96.
 
Whichever brand you get, check the spec is right AND that it will fit under your cooler, as @HackaShaq points out in the build. Buy from a company with an easy returns policy, just in case of incompatibilities.
I've always found Corsair to provide great customer service. Whether it's a case, CPU cooler, PSU or ram they go out of their way to make things right if you have any problems. That's just one of the reasons we have their products in the Buyer's Guide. It's most always a very good choice to go with Corsair for PC components. I've never bought a Corsair branded SSD but have used most everything else they make/sell.
 
Last edited:
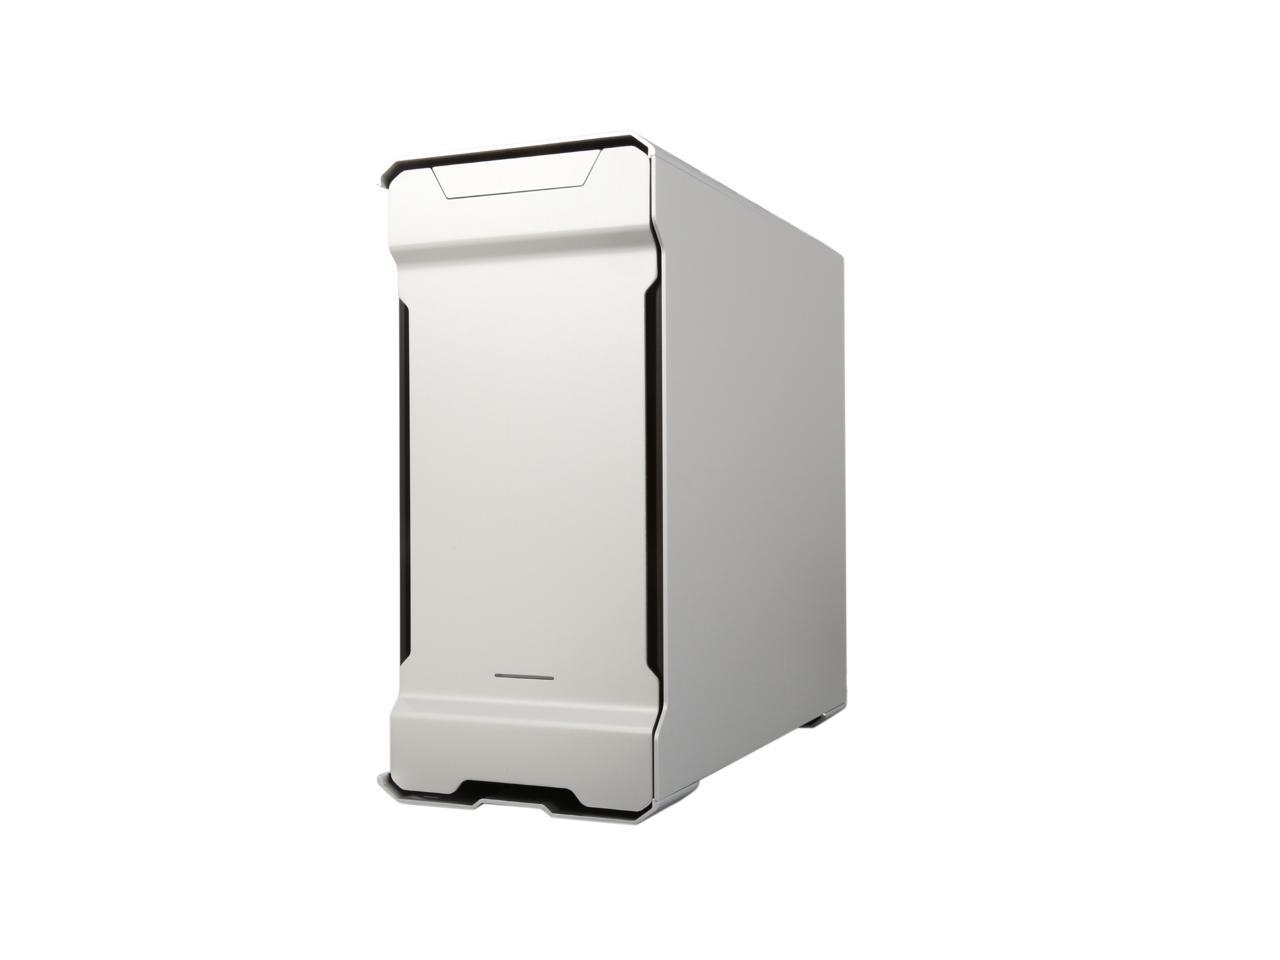
I usually post these deals in "deals of the day" but this is specific to those that are trying to replicate this build. The exact case that HackaShaq uses in this build is deeply discounted on Newegg.com right now. If you live in the USA you can get one shipped to you for $107.98 and then send in a 15 USD rebate to put your total at about only half of the retail price of $180. So if you are going to try this build it's the best price you're ever going to see on this case. If I could justify another build I'd buy this in a minute. I just bought a smaller Phanteks ATX case (steel instead of AL) a few months ago so I'm not in the market for another. Shipping and taxes will vary based on the State that you reside in.

Screen Shot 2.jpg

https://www.newegg.com/Product/Product.aspx?Item=N82E16811854025&ignorebbr=1

These are being closed out and there are just 14 left on Newegg. A really good opportunity for a Mac Pro like build. This one has the solid AL right side panel. All the newer versions have tempered glass on the right side of the case. The black and gray versions are also being closed out but cost 50-60 dollars more, before rebate. The Amazon Listing has the best pictures of the case if you want to see the interior details.

11-854-025_R01.jpg


Looks like Amazon has now matched the $99.99 price on the Galaxy Silver case. 4 of these are left as of today.
Screen Shot.jpg

https://www.amazon.com/dp/B01803RRLI/?tag=tonymacx86com-20
 
Last edited:
iMac 18,3 is still Kaby Lake and not Coffee Lake so it is even not a perfect fit for a Z370 8700K system. I would keep using 14,2 at least until there is a sysdef specifically for an i7-8700K iMac. When that is available to use, see what results other 8700K owners are getting with it. Changing it requires a new serial #, basically looks to Apple like a whole new machine. Why mess with perfection, is probably the best approach to this.

Ahh, my bad. I meant Kaby lake. Just saw so many tutorials and configs where people are using Z370 mobo's, Coffee Lake on the 18,3 with a dedicated GPU and iMac18,1 when using the internal Intel GPU. But it's also a valid point. Why fix what is not broken. :)

Cheers.
 
Last edited:
I usually post these deals in "deals of the day" but this is specific to those that are trying to replicate this build. The exact case that HackaShaq uses in this build is deeply discounted on Newegg.com right now. If you live in the USA you can get one shipped to you for $107.98 and then send in a 15 USD rebate to put your total at about only half of the retail price of $180. So if you are going to try this build it's the best price you're ever going to see on this case. If I could justify another build I'd buy this in a minute. I just bought a smaller Phanteks ATX case (steel instead of AL) a few months ago so I'm not in the market for another. Shipping and taxes will vary based on the State that you reside in.

https://www.newegg.com/Product/Product.aspx?Item=N82E16811854025&ignorebbr=1

These are being closed out and there are just 14 left on Newegg. A really good opportunity for a Mac Pro like build. This one has the solid AL right side panel. All the newer versions have tempered glass on the right side of the case. The black and gray versions are also being closed out but cost 50-60 dollars more, before rebate. The Amazon Listing has the best pictures of the case if you want to see the interior details.

11-854-025_R01.jpg


Looks like Amazon has now matched the $99.99 price on the Galaxy Silver case. 4 of these are left as of today.
View attachment 334659
https://www.amazon.com/dp/B01803RRLI/?tag=tonymacx86com-20
Fantastic price!
I honestly can't say enough positive things about this case. It's a fantastic case in a beautiful design.

I should also point out that I did a bunch of research when I was putting together the parts for my build, and I spent a lot of time on which case to get. I couldn't be happier, and I found an absolutely fantastic video on YouTube that showed exactly how to install components for this case. I would have loved to include all YouTube videos in my build thread, but the forum only allows one video per build.

However, if anyone is on the fence about this case, this video is a perfect step-by-step showing the ins and outs of this case, and how to install each component:


There's even a part 2 to this video for those who want to install a liquid cooled options.

This video helped me absolutely confirm that this was the case for me, and since this was my first ever ground-up Hackintosh build, I really needed the guidance to see the inside of the case and get as many tips as possible. Hopefully video can also help others who select this case for their build.

Lastly, I swear I don't work for Phanteks! Even though I sound like a shill, my comments are completely genuine. I just love this case. :D
 
Back
Top