Contribute
Register

First G5 Build and Vinyl Wrap

Status
Not open for further replies.
Joined
Jan 13, 2017
Messages
17
Motherboard
Z370 Extreme 4
CPU
i7-8700K
Graphics
GTX 1080
Mac
  1. iMac
  2. Mac Pro
Classic Mac
  1. 128K
Mobile Phone
  1. iOS
This is my very first build. I have been dreaming/planning this for over a year now. Of course when I finally get the funds, and I am ready to build, prices have gone crazy. Go figure.

Why:

I am starting with my very own, pre-ordered in 2003, dual 2.0 powermac G5. This thing was a beast and got years and years of service. I used it daily for graphic design work/ school/ games and general mayhem. This all changed when the power supply finally gave up the ghost in 2012. This era of machine was left behind by Apple by then so I had no choice but to abandon my trusty steed and jump on the iMac bandwagon.
The iMac has been great, but its no powermac so the Hackintosh plan was set into motion.

Whats:

i7-8700K
AsRock Z370 Extreme 4
8x2 XPG DDR4 2666 RAM
2 TB Toshiba 7200 hard drive for storage
2x M500’s from Crucial, one each for macOS and Windows 10
Corsair CX750M PSU
Cooler Master Hyper 212 LED CPU cooler with various CoolMaster and Arctic case fans
Bluetooth Adapter
Gigabyte GTX1080
Mountain Mods Tray
Laser Hive front Panel/ fan bracket and ATX PSU Trim
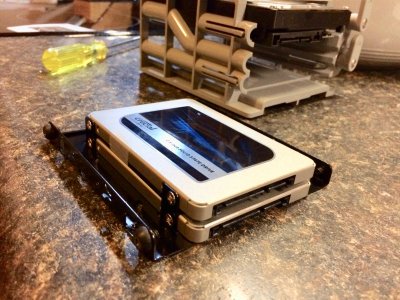
3.5 to 2.5 adapter
Fan extension


The Build:
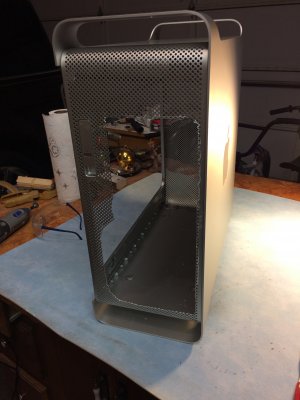
Started with the basic, disassembly and dump all the precious bits in a tub for later scrapping. This was sadder than it probably should have been.
This thing was sitting for several years out in the garage so it had a good layer of grime, mouse turds and bug carcasses. A good bath was in order before we got too far along.
Now I am just waiting for the motherboard tray and other parts to arive so I can start cutting.

Empty


Garbage


that did not come off very easy! LOL


Bath Time


Last edited:
My “plan” is to mount the psu up top along with the original dvd burner. Then 2 120mm fans mounted in front and my original hard drive cage either hanging off the shelf or mounted on the floor. Then the guts and massive cpu cooler (I hope it fits?) and 2 80mm fans blowing out the back. I have the mountain mods motherboard tray and back panel coming along with Laser Hive’s front USB/power assembly. I might of had a few too many fingers of Jim Bean and ordered the front fan mount and rear psu trim piece from Laser Hive as well. Those where not really in the budget.

I’m still waiting on the mother board tray so I can’t do a whole lot yet. I did get the SSD mount so I can fit both my SSD’s in the original mount along with a 2TB HD.

1 (1).jpg
Oh, and I lost my bid for a new monitor on eBay :(
 
Last edited:
I should probably clarify my purchase decision with Mountain mods and Laser Hive. After reading this post I sound a bit schizophrenic.
The dream of course was to buy all the goods from Laser Hive (mother board mount, back plate with CPU cutout, front fan mount and front USB/power switches). But in the spirit of saving coin I opted to ONLY order the mother board mount/back plate from Mountain Mods. That was it. I was going to make my own fan mounts and solder up my own connector for the front assembly…
…But I seem to have gotten into a buying frenzy few days later, and with the help from a bottle, I ordered the other stuff from Laser Hive. So that’s that.
 
I had time after work to get started today but had to take the wife and kids out to eat first. Boy can they ever eat slow, and wife, just had to talk and talk :)

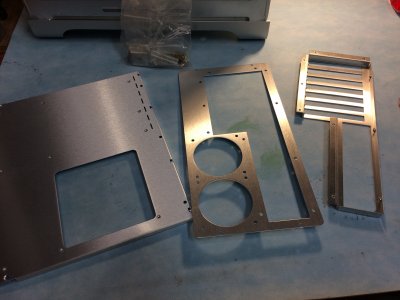
The Mountain Mods kit came in the other day. This is a really nice kit. The tray will hold either an mATX or full ATX board. If you order one be sure to get the 2x80mm fan back panel. They say the 120mm is too wide for the G5 case.
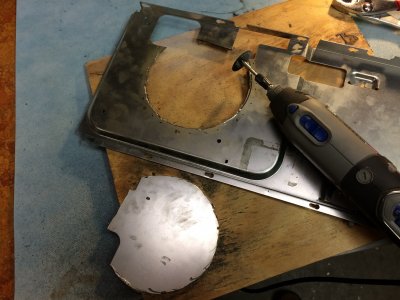
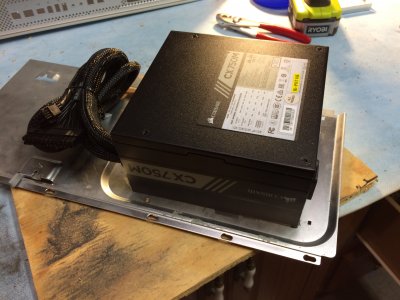
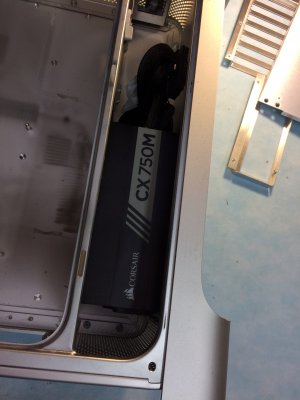
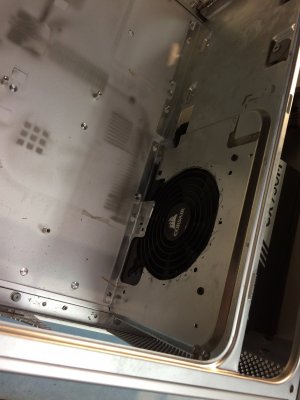
The first step was setting the PSU in place and figuring that whole mess out. I decided on the exact perfect spot and started cutting the fan opening out. Then I mounted the PSU to the tray and set the whole piece in place to get measurements for the tray/backplate.
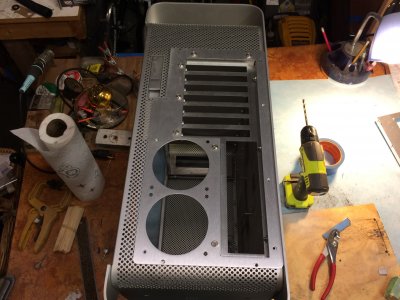
Once I had everything in place and lined up, I marked out the cut lines with a sharpie. Cut on the lines, and only 2.5 cutting wheels later I had a good cut. It still needs a little cleaning up with a file but its almost ready to be assembled.
I broke all the original standoffs, off and used 5 of the short ones to be the base for the tray. I strategically (randomly) marked off where they would go and drilled out the holes and mounted them. Next step is to go to Walmart for some JB weld and get that mounted in the morning.

The kit
1 (3).jpg

Cutting out the fan opening
3 (2).jpg

Mounted to tray
4 (2).jpg

5 (2).jpg 9.jpg

Back cut out
10 (1).jpg 7 (1).jpg
8 (1).jpg

You will need to cut a notch out of the back panel for the door latch. The metal is soft compared to the G5 case. It cuts so easy. I marked the spot and drilled the corners out with a drill bit to get nice round corners. then Cut 2 straight lines and done.
 
Last edited:
We got a little more done. My 14 year old son jumped in and offered up some much needed help/support.
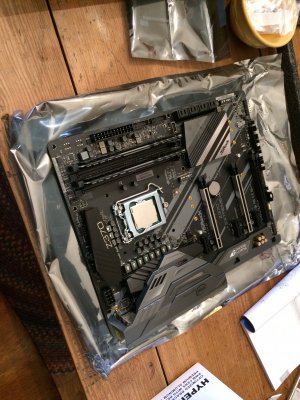
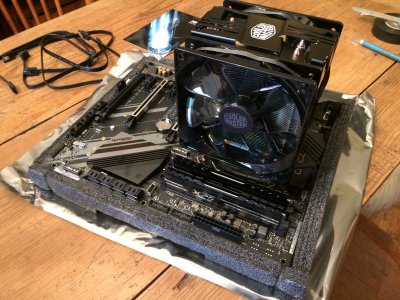
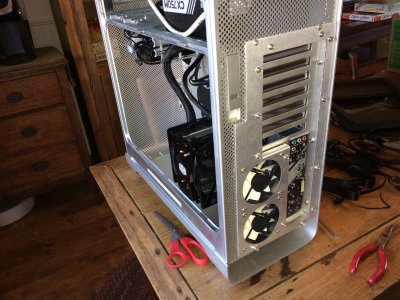
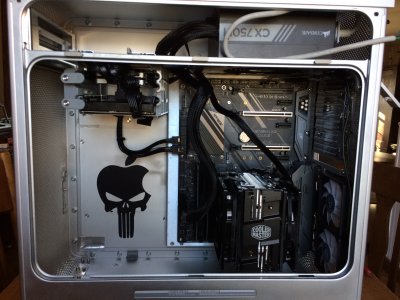
Motherboard tray and back plate got installed Saturday. We had a small hiccup with the JB weld not hardening. I must not of mixed it properly? Made a new batch and now the mother board standoff’s are mounted for good. Every thing else went as planned. Went ahead and mounted the motherboard in and wired it all up as a test run. It all fits, just. There is not 1mm of clearance from the CPU cooler and the door, but it shuts :)

Still need the front panel/ fan mount and a fused receptacle for the power cord. That all involves more cutting so I will be taking it all apart again before that happens.

Still looking for a graphics card. This is crazy.


Motherboard tray with 6 standoff's


Motherboard
5 (3).jpg

CPU, RAM and Cooler mounted up
7 (2).jpg
Rear
14 (1).jpg
Under the hood
12 (1).jpg
 

Attachments

  • 9 (1).jpg
    9 (1).jpg
    1.3 MB · Views: 331
Last edited:
Looking good! Keep up the good work.

I’m taking another look at my ol’ build later this month. Time for some tweaks, edits, cable cleanup, and a good old dust out!

GPU prices are stupid right now, so there’s not point in a hardware upgrade just yet, so might as well take care of the outside :)
 
GPU prices are stupid right now, so there’s not point in a hardware upgrade just yet, so might as well take care of the outside :)


I am afraid I’m going to be running this on the internal gpu if things don’t get any better soon. You can’t find a used one either. Everyone is out making money off these things. Can’t say that I blame them.

Dust
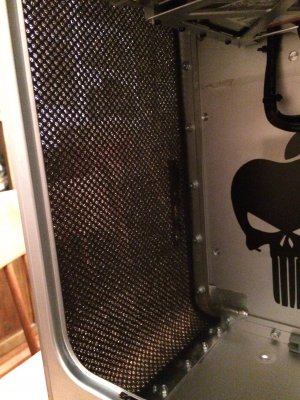
I have been trying to think of a simple way to keep the dust and gunk out of this G5. I remember back when I was running this full time it was always disgusting inside. And when I tore it down and opened up the PSU, wow! That's all I’ll say about that.:sick:

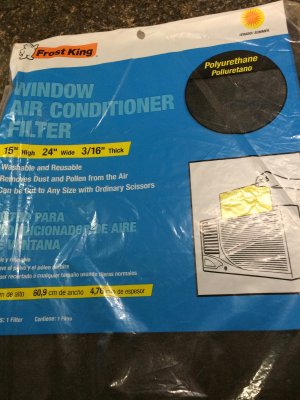
I found this stuff at newegg but its way too expensive, especially with shipping. So I have been digging around and came up with this stuff.

Picked up a batch today and started cutting it up. I have enough to cover every hole in the case and a lot left over. I think its going to do the trick just fine.

Because I have her...
3 (4).jpg


...I need this
1 (5).jpg


Just right.
2 (4).jpg
 
Picked up a batch today and started cutting it up. I have enough to cover every hole in the case and a lot left over. I think its going to do the trick just fine.

That stuff should do nicely. I have something very similar in two of my HP Microservers and those have almost no dust in them after nearly two years. I have three dogs and live in Arizona so I have serious dust!

Was eyeing some 800 micron steel micro mesh at a biodiesel supply company recently for my G5 mod. It’s almost exactly like the mesh filter I have in a Lian Li HDD cage, but at 25 bucks per sq ft (incl shipping), I might reconsider until I can come up with a more elegant way to mount and unmount it properly without having to remove half the guts of the rig every darn time I want to clean it.
 
Last edited:
Status
Not open for further replies.
Back
Top