
- Joined
- Dec 28, 2017
- Messages
- 112
- Motherboard
- Gigabyte Z370 HD3P
- CPU
- i5-8600K
- Graphics
- GTX 1080
- Mac
- Mobile Phone
monsterz Build:
Gigabyte Z370 HD3P - i5 8600K - MSI GTX 1080 DUKE
Gigabyte Z370 HD3P - i5 8600K - MSI GTX 1080 DUKE
***This build is currently running Mojave BUT the graphics are through web drivers, NOT true Nvidia drivers. The system does run Mojave no problem. I will be testing Intel graphics in near future. No perfect solution for the drivers right now.***
Components
Intel Core i5 8600K Processor(Overclocked to 4.8 GHz)
https://www.amazon.com/dp/B0759FKH8K/?tag=tonymacx86com-20
Gigabyte Z370 HD3P Motherboard
https://www.amazon.com/dp/B0762RN791/?tag=tonymacx86com-20
Crucial 16GB RAM
https://www.amazon.com/gp/product/B019FRD5O6/?tag=tonymacx86com-20
Corsair H100i v2 Processor Cooler
https://www.amazon.com/dp/B019EXSSBG/?tag=tonymacx86com-20
SanDisk SSD 960GB(for Windows 10)
https://www.amazon.com/gp/product/B01LY5ZZ4P/?tag=tonymacx86com-20
Silicon Power 512GB SSD
https://www.amazon.com/gp/product/B07997QV4Z/?tag=tonymacx86com-20
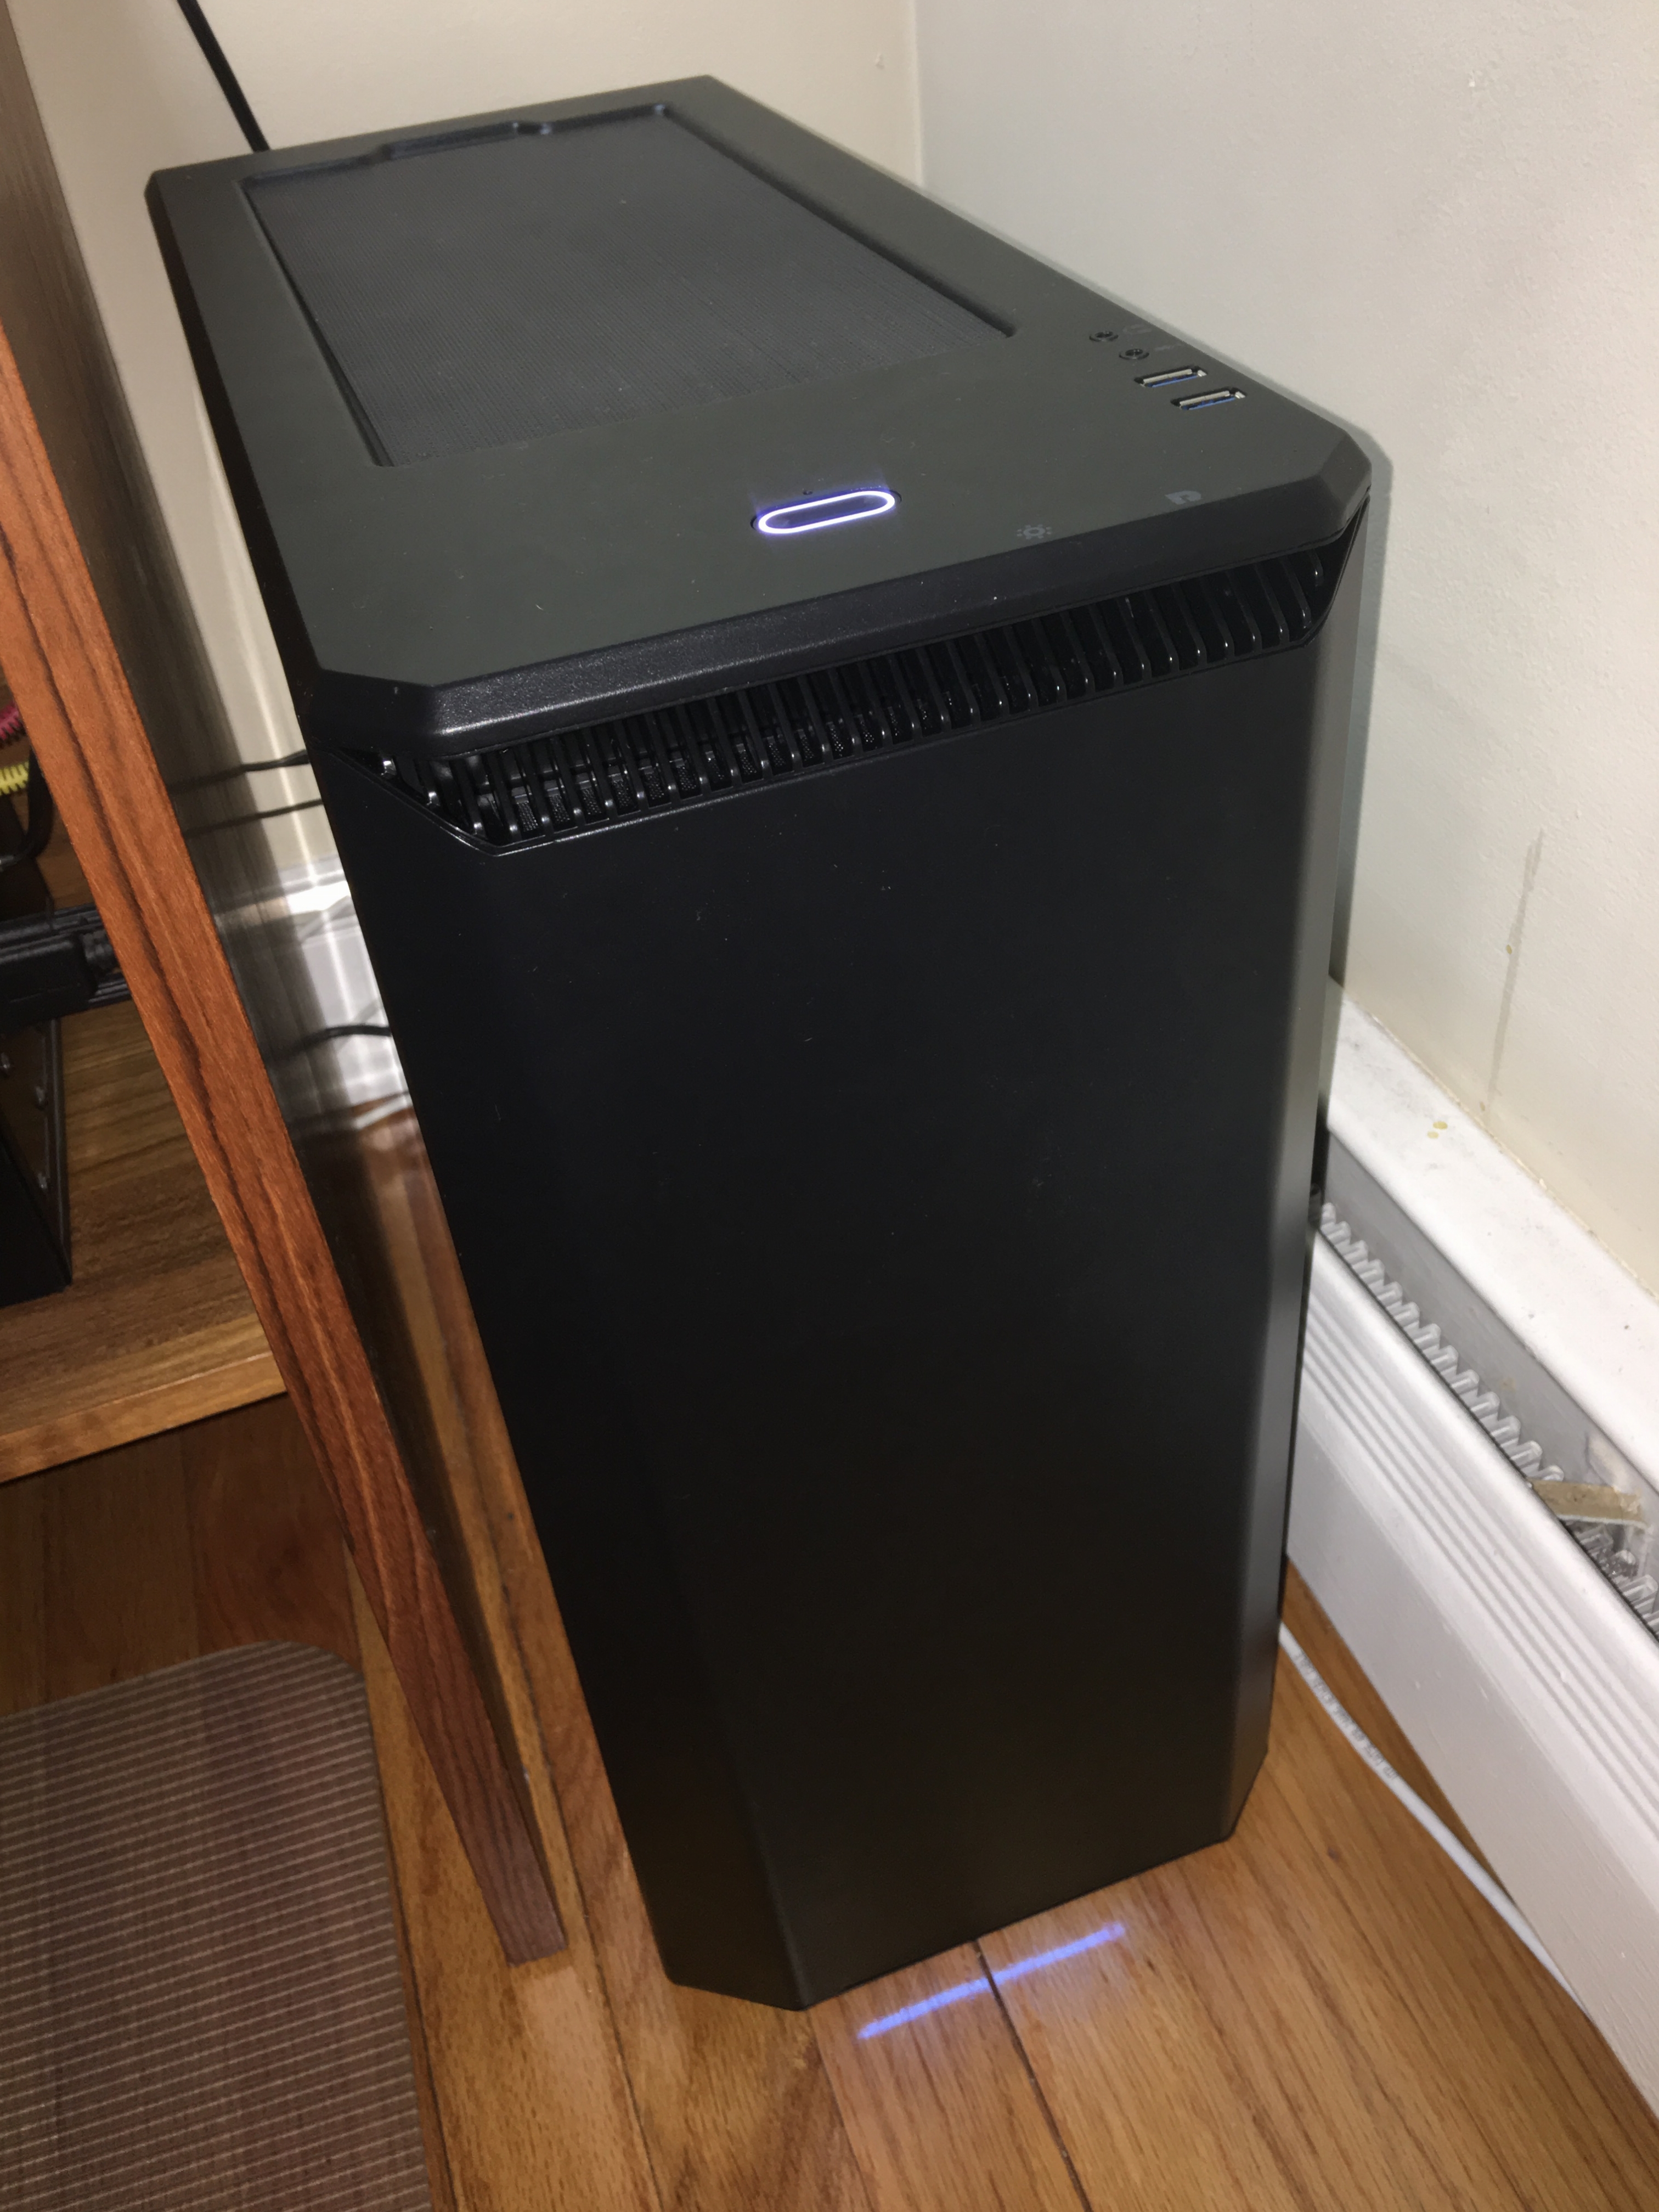
Phanteks Eclipse Case
https://www.amazon.com/dp/B01BLHP4RO/?tag=tonymacx86com-20
EVGA 600 Power Supply
https://www.amazon.com/dp/B01MTJTO2O/?tag=tonymacx86com-20
MSI Gaming GeForce GTX 1080 DUKE
https://www.amazon.com/dp/B06XGMJJ2K/?tag=tonymacx86com-20
Comments
Hello all! This was my very first hackintosh build, and definitely not my last. I've owned Mac's for years but really wanted to have the freedom to create my own build. I used my 2011 MacBook Pro to download High Sierra from the Apple Mac Store for this build. All the problems I ran into and what I did to fix them are listed below.
*If you get stuck during any installation steps just go browsing through the forums, this post, or the interweb regarding installation of drivers, kexts, troubleshooting, etc. Also, any generic questions about setting hackintoshes up or for even more in depth ones, follow the same procedure. A lot of repetitive questions have been asked, so make sure to read through the thread thoroughly, and more than likely the answer your looking for will have been addressed. Cheers!
BIOS
- Save & Exit → Load Optimized Defaults
- BIOS → Fast Boot : Disabled
- BIOS → LAN PXE Boot Option ROM : Disabled
- BIOS → Storage Boot Option Control : UEFI
- Peripherals → Super IO Configuration → Serial Port : Disabled
- Peripherals → USB Configuration → XHCI Hand-off : Enabled
- Chipset → Vt-d : Disabled
*I noticed that even though some builds used the same motherboard as me, not all BIOS settings were available for me to select(my BIOS doesn't show XMP profile options due to my RAM not supporting it). But these basic settings should be more than enough get your build up and running smoothly. Just tweak accordingly if need be.
MultiBeast Settings
- Quick Start > Clover UEFI Boot Mode
- Drivers > Audio > Realtek ALCxxx > ALC1220 *
- Drivers > Misc > FakeSMC Drivers > Network > Intel > IntelMausiEthernet v2.3.0
- Drivers > USB > Increase Max Port Limit 200 Series
- Bootloaders > Clover UEFI Boot Mode + Emulated NVRAM
- Customize > System Definitions > iMac > iMac 18,2
- Drivers > Graphics > NVIDIA Web Drivers Boot Flag
-Sound through IntSpeaker
-HDMI
-All USB ports
-Audio after sleep
-Ethernet
-iGPU(setup up computer without graphics card first,
which is why I set this up. Later changed to my Nvidia card.)
-iMessage(Used the "Idiot's Guide to iMessage" thread)
-Sleep/Wake(Please read the " *NOTE " post below)
-Nvidia Graphics
*I also used my second SSD for Windows 10. I used Rufus to convert the USB to a bootable UEFI. Clover recognized this after the install and I've had no problems with this whatsoever.
*I just updated to the latest Sierra supplemental update(10.13.12) through the app store and it went through without a hunch. Just prompted me to update my Nvidia drivers and reboot. After that, back to normal!
What doesn't work
So far I really haven't had anything not work that I couldn't find a solution for. I had a bunch of tweaks I needed to fix like audio, no audio after sleep wake, and iGPU. But after some digging around on the internet I was able to find all the correct Kexts, etc. to fix all of these problems. Below are the problems I encountered and what I did to fix them, or their current status. I will update as time goes on.
- [SOLVED] Once I put the hack into Sleep it sleeps for about 2 seconds then comes back on, with the fans running at full speed. Display stays asleep though. I unplugged my H100i v2 USB 2.0 connector which routed to the USB connected to the motherboard and it went to sleep/wake with no problems whatsoever. Come to find out that the Corsair Link software isn't available for OSX, therefore the CPU link cable is useless unless I decide to use the software with windows. I will just be leaving it unplugged for now.
- [*SOLVED*] Lastly my CPU fan, as well as my case fans, stay at a very high speed once waking from sleep. The computer goes to sleep perfectly, but once I wake the system up all the fans start running at relatively high speeds, as if the initial boot up fan speeds are being overrode. When I check the i stat monitor it shows all fans are at 0 and in HWmonitor no fans are present.
- There was a glitch in the Gigabyte BIOS that has been eliminated in the latest BIOS updated(F12). Everything has been working normally.
Build UPDATE as of 1/26/18
I was having a few issues with my sleep settings and grew tired of dealing with them. I created a Custom USB Injection following this guide here, Pastrychef's tips on this build here, as well as taking tips from RehabMan's guide here. There are multiple ways to inject your custom USB. I took bits and pieces from each of those guides and got everything to work accordingly. I ended up leaving my H100i v2 plugged in, but disabling the port that the H100i was plugged into in my config.plist. I use it for when I boot into Windows 10 and it works perfect.
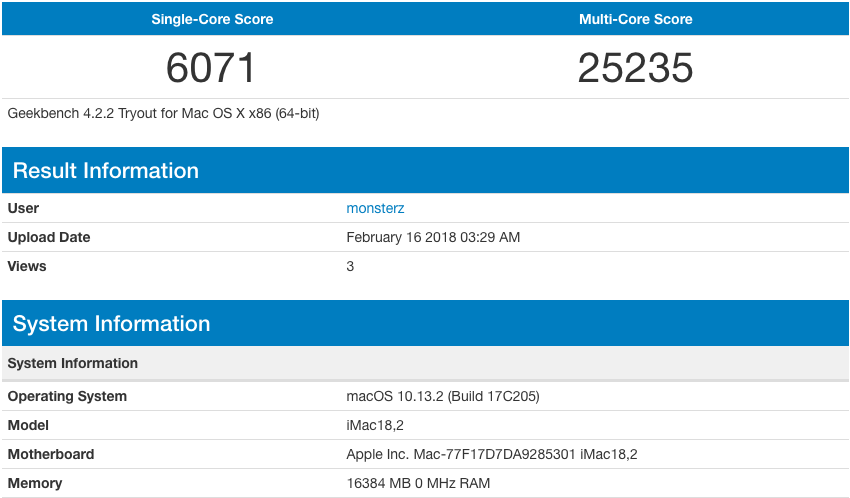
GeekBench Results
These were with all stock settings. Will eventually do some overclocking but I'm pretty happy with my results for now. More tweaking in future.

*Build Update as of 10/10/18*
Updated to Mojave but currently waiting on Nvidia drivers. Was able to fix the resolution but no driver acceleration yet.
*Over Clocking Results as of 2/15/18*
I'm currently at 4.8 GHz on my CPU and moderately OCed my RAM to 2800 MHz with the proper voltage/timing settings. I ran numerous stress/benchmark tests to evaluate temps, voltage, etc. I also went to higher OC numbers just to see what my system was capable of, but opted for stableness and longevity out of my system. I OCed mainly for the gaming aspect of my hackintosh. Overall I'm very pleased with these results. More updates in the future!
Final Impressions
Overall I'm very pleased with the way this build panned out. It was my very first computer build, as well as hackintosh build. It had it's up and down but it provided me with a great learning experience. I will update with scores and such as time goes on! Feel free to post here with any of your questions.
Attachments
Last edited: