- Joined
- Feb 20, 2012
- Messages
- 19
- Motherboard
- ASUS Maximus VIII Formula
- CPU
- i7-6700
- Graphics
- NVIDIA GeForce GTX 970
- Mac
- Mobile Phone
This build wouldn’t have been possible for me if it wasn’t for theracermaster’s Gigabyte GA-Z77X DSDT Patch.
Background:
- My build already had Windows and Yosemite, but I decided it was time for an upgrade. The first step for me was to do some research and watch tutorials. Of these, the most helpful were this YouTube video and the tonymacx86 tutorial. I followed the tutorials almost exactly and had poor results. I couldn't get the audio wouldn’t work and I tried almost every VoodooHDA and AppleHDA kext. Also, none of the ethernet kexts in Multibeast El Capitan would work. Then, I tried using Multibeast Yosemite which crashed on install. So I kept on researching and researching anything that could help with these issues. I could not find a single post with success using the GA-Z77X-D3H motherboard to install El Capitan. Finally, I came accross theracermaster’s Gigabyte GA-Z77X DSDT Patch script on GitHub. The Z77X-D3H was listed under supported motherboards and the Version 1.5 (2015-08-17) changelog bulletin listed El Capitan support! I was very excited but sceptical as well. So, I reinstalled El Capitan and used this script instead of multibeast and it worked. But, then I realized that the USB 3.0 ports didn’t work. The only way to install them through MultiBeast was to first check UEFI Boot Mode, which gives me boot problems. (I don't know if that's a bug, but It gives me a failed to install kexts error.) To fix this issue I installed the kext and boot mode through multibeast, deleted the EFI folder in the EFI partition, then installed the GitHub patch. I also had to modify the config.plist with the Clover Configurator (Mac Pro 3,1 under SMBIOS and kext-dev-mode=1 under Boot). After a whole week of trial and error, I was finally successful!
My Hackintosh Specs:
- Z77X-D3H Motherboard
- Samsung Pro SSD
- Thermaltake Chaser MK-1
- NVIDIA GeForce 970
- Two Dell Monitors with DVI/Display Port (Does Not Work with VGA)
- Core i7 Processor
Requirements:
- Another Mac & Windows Machine
- At least one flash drive
- Official Copy of Windows
Required Downloads:
- El Capitan from the Mac App Store
- MultiBeast - El Capitan
- Unibeast 6
- Rufus
- Clover Configurator
- theracermaster’s Gigabyte GA-Z77X DSDT Patch using the Git Clone command listed in the tutorial
Recommended:
- F18K Beta BIOS
- 2 to 3 Flash Drives
Known Issues:
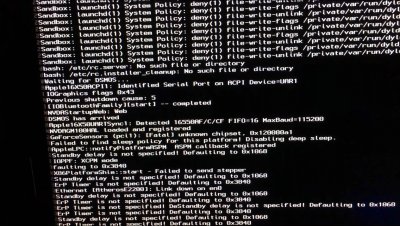
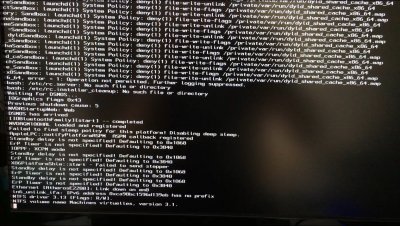
- Hang on boot progress bar, then works on forced reboot.
- Create an El Capitan UniBeast Flash Drive using Unibeast 6.
- Make sure the UniBeast Flash Drive is set to GUID Partition Table and Mac OS Extended (Journaled) before creating.
Step 2:
- On a Windows machine download Rufus to create a Windows installer.
- Make sure the File System is set to NTFS then set the Partition Scheme to "MBR Partition Scheme for BIOS or UEFI-CSM".
Step 3:
- Load Optimized Defaults in the BIOS.
- Then set xHCI Mode to Enabled under Peripherals.
- Save changes and reboot.
Step 4:
- Load the Unibeast Flash Drive by using F12 during boot.
Step 5:
- Boot into the UniBeast Flash Drive installer. (I did not have to use any boot flags.)
Step 6:
- Go into Utilities, then Disk Utility.
- Click on the HDD or SSD you will be installing OS X and Windows on.
- Go into the partition tab.
- Choose GUID Partition Table.
- Make two partitions; the OS X partition on the left and the Windows partition on the right. Set the OS X Partition to Mac OS Extended (Journaled) and the Windows Partition to MS-DOS.
- Apply then exit Disk Utility.
Step 7:
- Install El Capitan onto the OS X partition.
Step 8:
- When the install finishes, restart and boot into El Capitan with the Unibeast Flash Drive using F12.
Step 9:
- When the setup is finished, open Multibeast El Capitan.
- Select UEFI Boot mode and 3rd Party USB 3.0 then install.
- Go to your mounted EFI partition and delete the EFI folder, then empty the trash.
Step 10:
- Download the Gigabyte GA-Z77X DSDT Patch with this command on another Mac:
- Then copy the Installer folder from the other Mac’s desktop to your hackintosh desktop.
- Downloading the file from github as a zip file does not work!
- Install onto your hackintosh with the following commands then reboot your computer:
You will get errors because the ethernet kext will not work until you reboot. You’ll need internet access to install the rest of the kexts.
- Install again, now that the ethernet is working, then reboot.
- You shouldn’t get any errors this time.
Now would be a good time to install any graphics drivers if needed.
Step 11:
- Open the config.plist from the EFI Partition EFI/CLOVER folder by dragging and dropping the config.plist file on top of the Clover Configurator application.
- In the Clover Configurator, go to the Boot tab and enable kext-dev-mode=1. (This is to ensure all unsigned kexts load properly during boot.)
You should also enable nvda_drv=1 if you installed NVIDIA graphics drivers.
- Then go the SMBIOS tab and click the magic wand tool on the right. Then, select the Mac Pro on the right and change “Mac Pro (2,1)” to “Mac Pro (3,1) - LGA775” on the top left of the drop down.
- Click ok, use Command+S on the keyboard, close, then quit Clover Configurator.
Step 12:
- Reboot directly into your Windows flash drive with F12.
Step 13:
- Install Windows onto the MS-DOS partition you made earlier. Only format the Windows partition.
- If there are any reboots during the installation, use the clover bootloader to boot into Windows with Legacy HD1. You’ll see what I mean at the clover bootloader.
Step 14:
- When the Windows install has completed, do a final reboot and enjoy your new Hackintosh!
Background:
- My build already had Windows and Yosemite, but I decided it was time for an upgrade. The first step for me was to do some research and watch tutorials. Of these, the most helpful were this YouTube video and the tonymacx86 tutorial. I followed the tutorials almost exactly and had poor results. I couldn't get the audio wouldn’t work and I tried almost every VoodooHDA and AppleHDA kext. Also, none of the ethernet kexts in Multibeast El Capitan would work. Then, I tried using Multibeast Yosemite which crashed on install. So I kept on researching and researching anything that could help with these issues. I could not find a single post with success using the GA-Z77X-D3H motherboard to install El Capitan. Finally, I came accross theracermaster’s Gigabyte GA-Z77X DSDT Patch script on GitHub. The Z77X-D3H was listed under supported motherboards and the Version 1.5 (2015-08-17) changelog bulletin listed El Capitan support! I was very excited but sceptical as well. So, I reinstalled El Capitan and used this script instead of multibeast and it worked. But, then I realized that the USB 3.0 ports didn’t work. The only way to install them through MultiBeast was to first check UEFI Boot Mode, which gives me boot problems. (I don't know if that's a bug, but It gives me a failed to install kexts error.) To fix this issue I installed the kext and boot mode through multibeast, deleted the EFI folder in the EFI partition, then installed the GitHub patch. I also had to modify the config.plist with the Clover Configurator (Mac Pro 3,1 under SMBIOS and kext-dev-mode=1 under Boot). After a whole week of trial and error, I was finally successful!
My Hackintosh Specs:
- Z77X-D3H Motherboard
- Samsung Pro SSD
- Thermaltake Chaser MK-1
- NVIDIA GeForce 970
- Two Dell Monitors with DVI/Display Port (Does Not Work with VGA)
- Core i7 Processor
Requirements:
- Another Mac & Windows Machine
- At least one flash drive
- Official Copy of Windows
Required Downloads:
- El Capitan from the Mac App Store
- MultiBeast - El Capitan
- Unibeast 6
- Rufus
- Clover Configurator
- theracermaster’s Gigabyte GA-Z77X DSDT Patch using the Git Clone command listed in the tutorial
Recommended:
- F18K Beta BIOS
- 2 to 3 Flash Drives
Known Issues:
- Hang on boot progress bar, then works on forced reboot.
Step By Step Tutorial
Step 1:- Create an El Capitan UniBeast Flash Drive using Unibeast 6.
- Make sure the UniBeast Flash Drive is set to GUID Partition Table and Mac OS Extended (Journaled) before creating.
Step 2:
- On a Windows machine download Rufus to create a Windows installer.
- Make sure the File System is set to NTFS then set the Partition Scheme to "MBR Partition Scheme for BIOS or UEFI-CSM".
Step 3:
- Load Optimized Defaults in the BIOS.
- Then set xHCI Mode to Enabled under Peripherals.
- Save changes and reboot.
Step 4:
- Load the Unibeast Flash Drive by using F12 during boot.
Step 5:
- Boot into the UniBeast Flash Drive installer. (I did not have to use any boot flags.)
Step 6:
- Go into Utilities, then Disk Utility.
- Click on the HDD or SSD you will be installing OS X and Windows on.
- Go into the partition tab.
- Choose GUID Partition Table.
- Make two partitions; the OS X partition on the left and the Windows partition on the right. Set the OS X Partition to Mac OS Extended (Journaled) and the Windows Partition to MS-DOS.
- Apply then exit Disk Utility.
Step 7:
- Install El Capitan onto the OS X partition.
Step 8:
- When the install finishes, restart and boot into El Capitan with the Unibeast Flash Drive using F12.
Step 9:
- When the setup is finished, open Multibeast El Capitan.
- Select UEFI Boot mode and 3rd Party USB 3.0 then install.
- Go to your mounted EFI partition and delete the EFI folder, then empty the trash.
Step 10:
- Download the Gigabyte GA-Z77X DSDT Patch with this command on another Mac:
Code:
git clone --recursive https://github.com/theracermaster/Gigabyte-GA-Z77X-DSDT-Patch Desktop/Installer- Downloading the file from github as a zip file does not work!
- Install onto your hackintosh with the following commands then reboot your computer:
You will get errors because the ethernet kext will not work until you reboot. You’ll need internet access to install the rest of the kexts.
Code:
cd Desktop/Installer
./GA-Z77X.sh --compile-ssdt
./GA-Z77X.sh --inject-hda
./GA-Z77X.sh --install-clover
- You shouldn’t get any errors this time.
Now would be a good time to install any graphics drivers if needed.
Step 11:
- Open the config.plist from the EFI Partition EFI/CLOVER folder by dragging and dropping the config.plist file on top of the Clover Configurator application.
- In the Clover Configurator, go to the Boot tab and enable kext-dev-mode=1. (This is to ensure all unsigned kexts load properly during boot.)
You should also enable nvda_drv=1 if you installed NVIDIA graphics drivers.
- Then go the SMBIOS tab and click the magic wand tool on the right. Then, select the Mac Pro on the right and change “Mac Pro (2,1)” to “Mac Pro (3,1) - LGA775” on the top left of the drop down.
- Click ok, use Command+S on the keyboard, close, then quit Clover Configurator.
Step 12:
- Reboot directly into your Windows flash drive with F12.
Step 13:
- Install Windows onto the MS-DOS partition you made earlier. Only format the Windows partition.
- If there are any reboots during the installation, use the clover bootloader to boot into Windows with Legacy HD1. You’ll see what I mean at the clover bootloader.
Step 14:
- When the Windows install has completed, do a final reboot and enjoy your new Hackintosh!
Last edited:


